实现后,大多数组件的内容不是静态的——它会根据提供给组件的数据而变化。为了在您的设计中反映这一点,您可以使用内容参数。内容参数允许您指定设计中哪个部分包含数据,而无需硬编码实际数据。
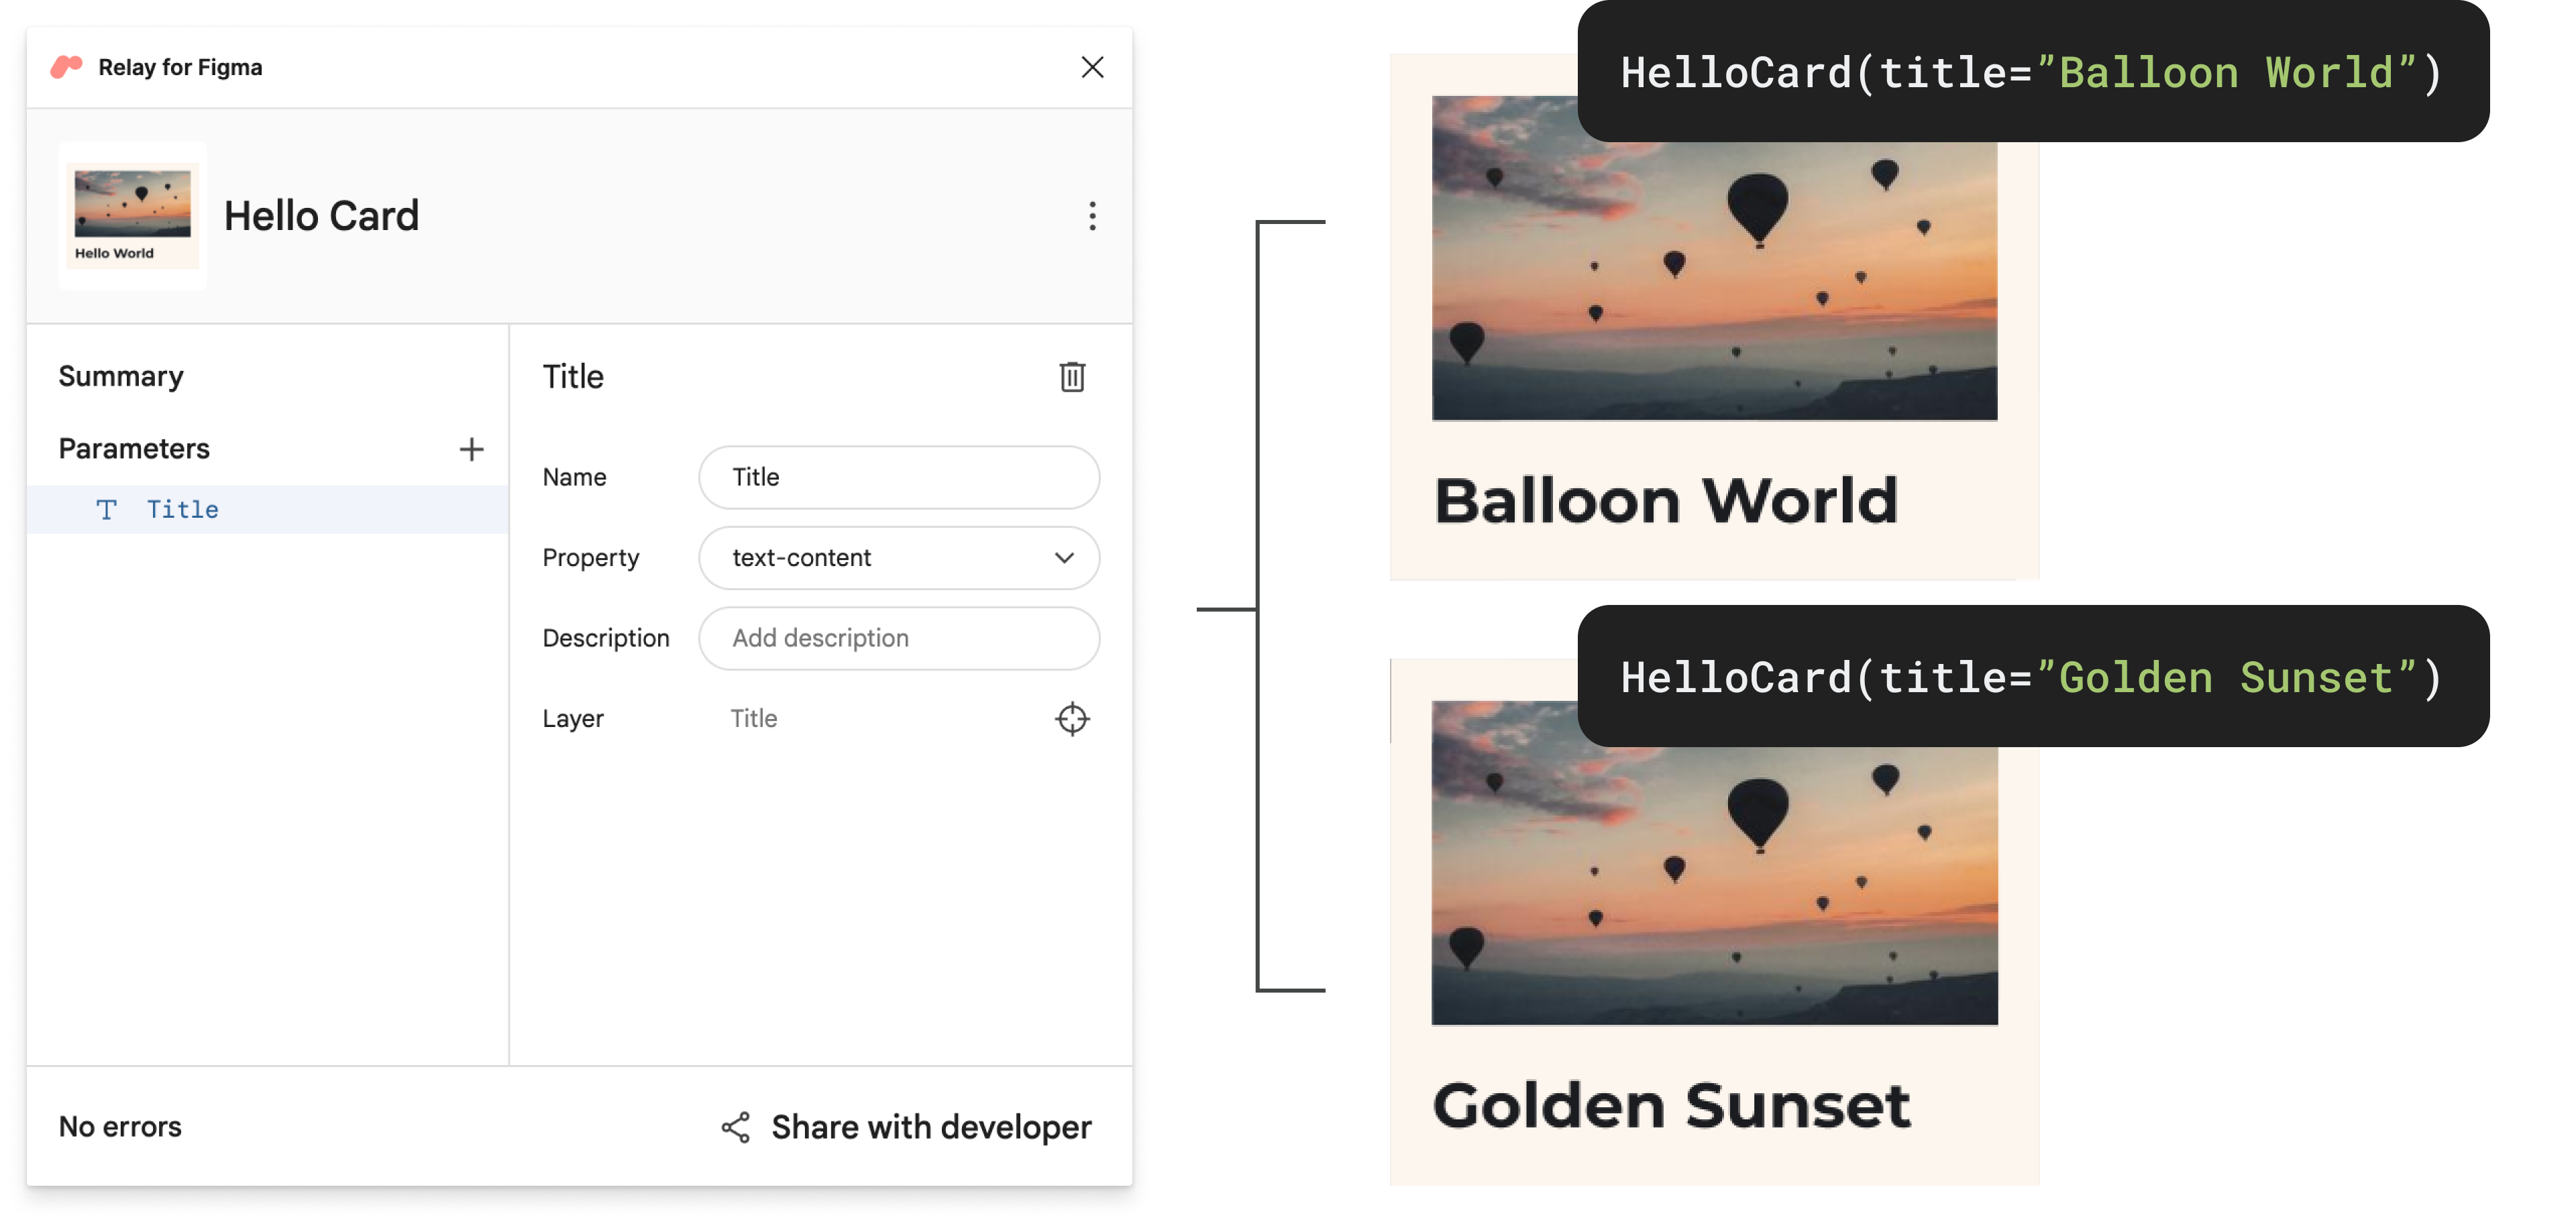
添加内容参数
在您的 Figma 文件中,选择组件并打开 Relay for Figma 插件(**插件 > Relay for Figma**)。
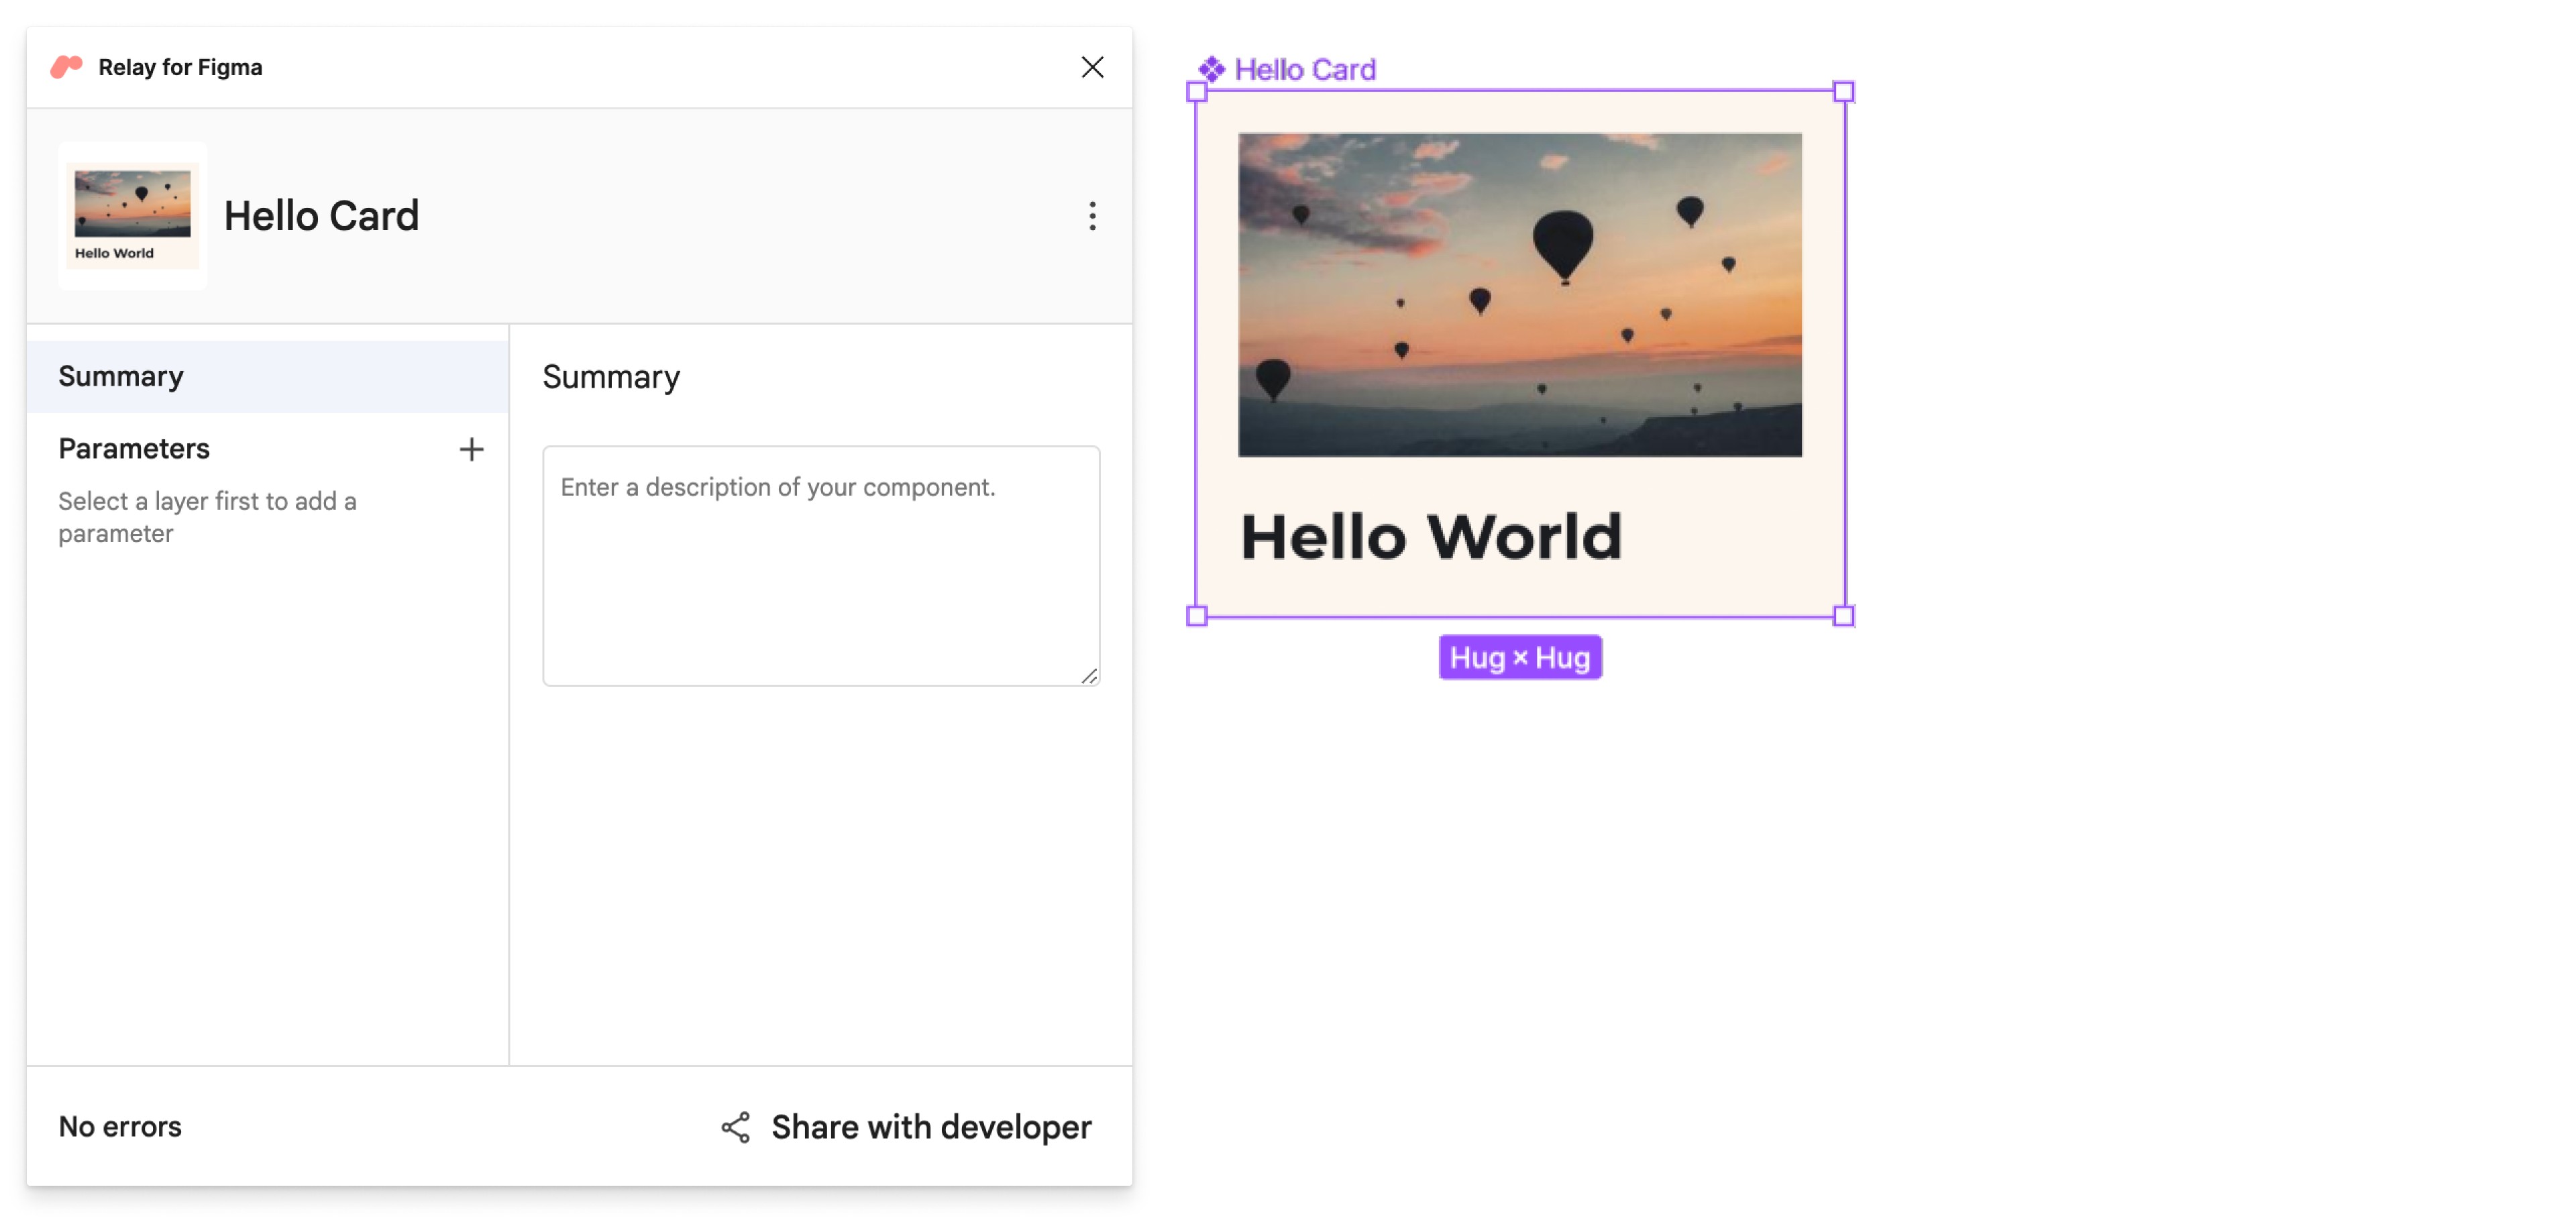
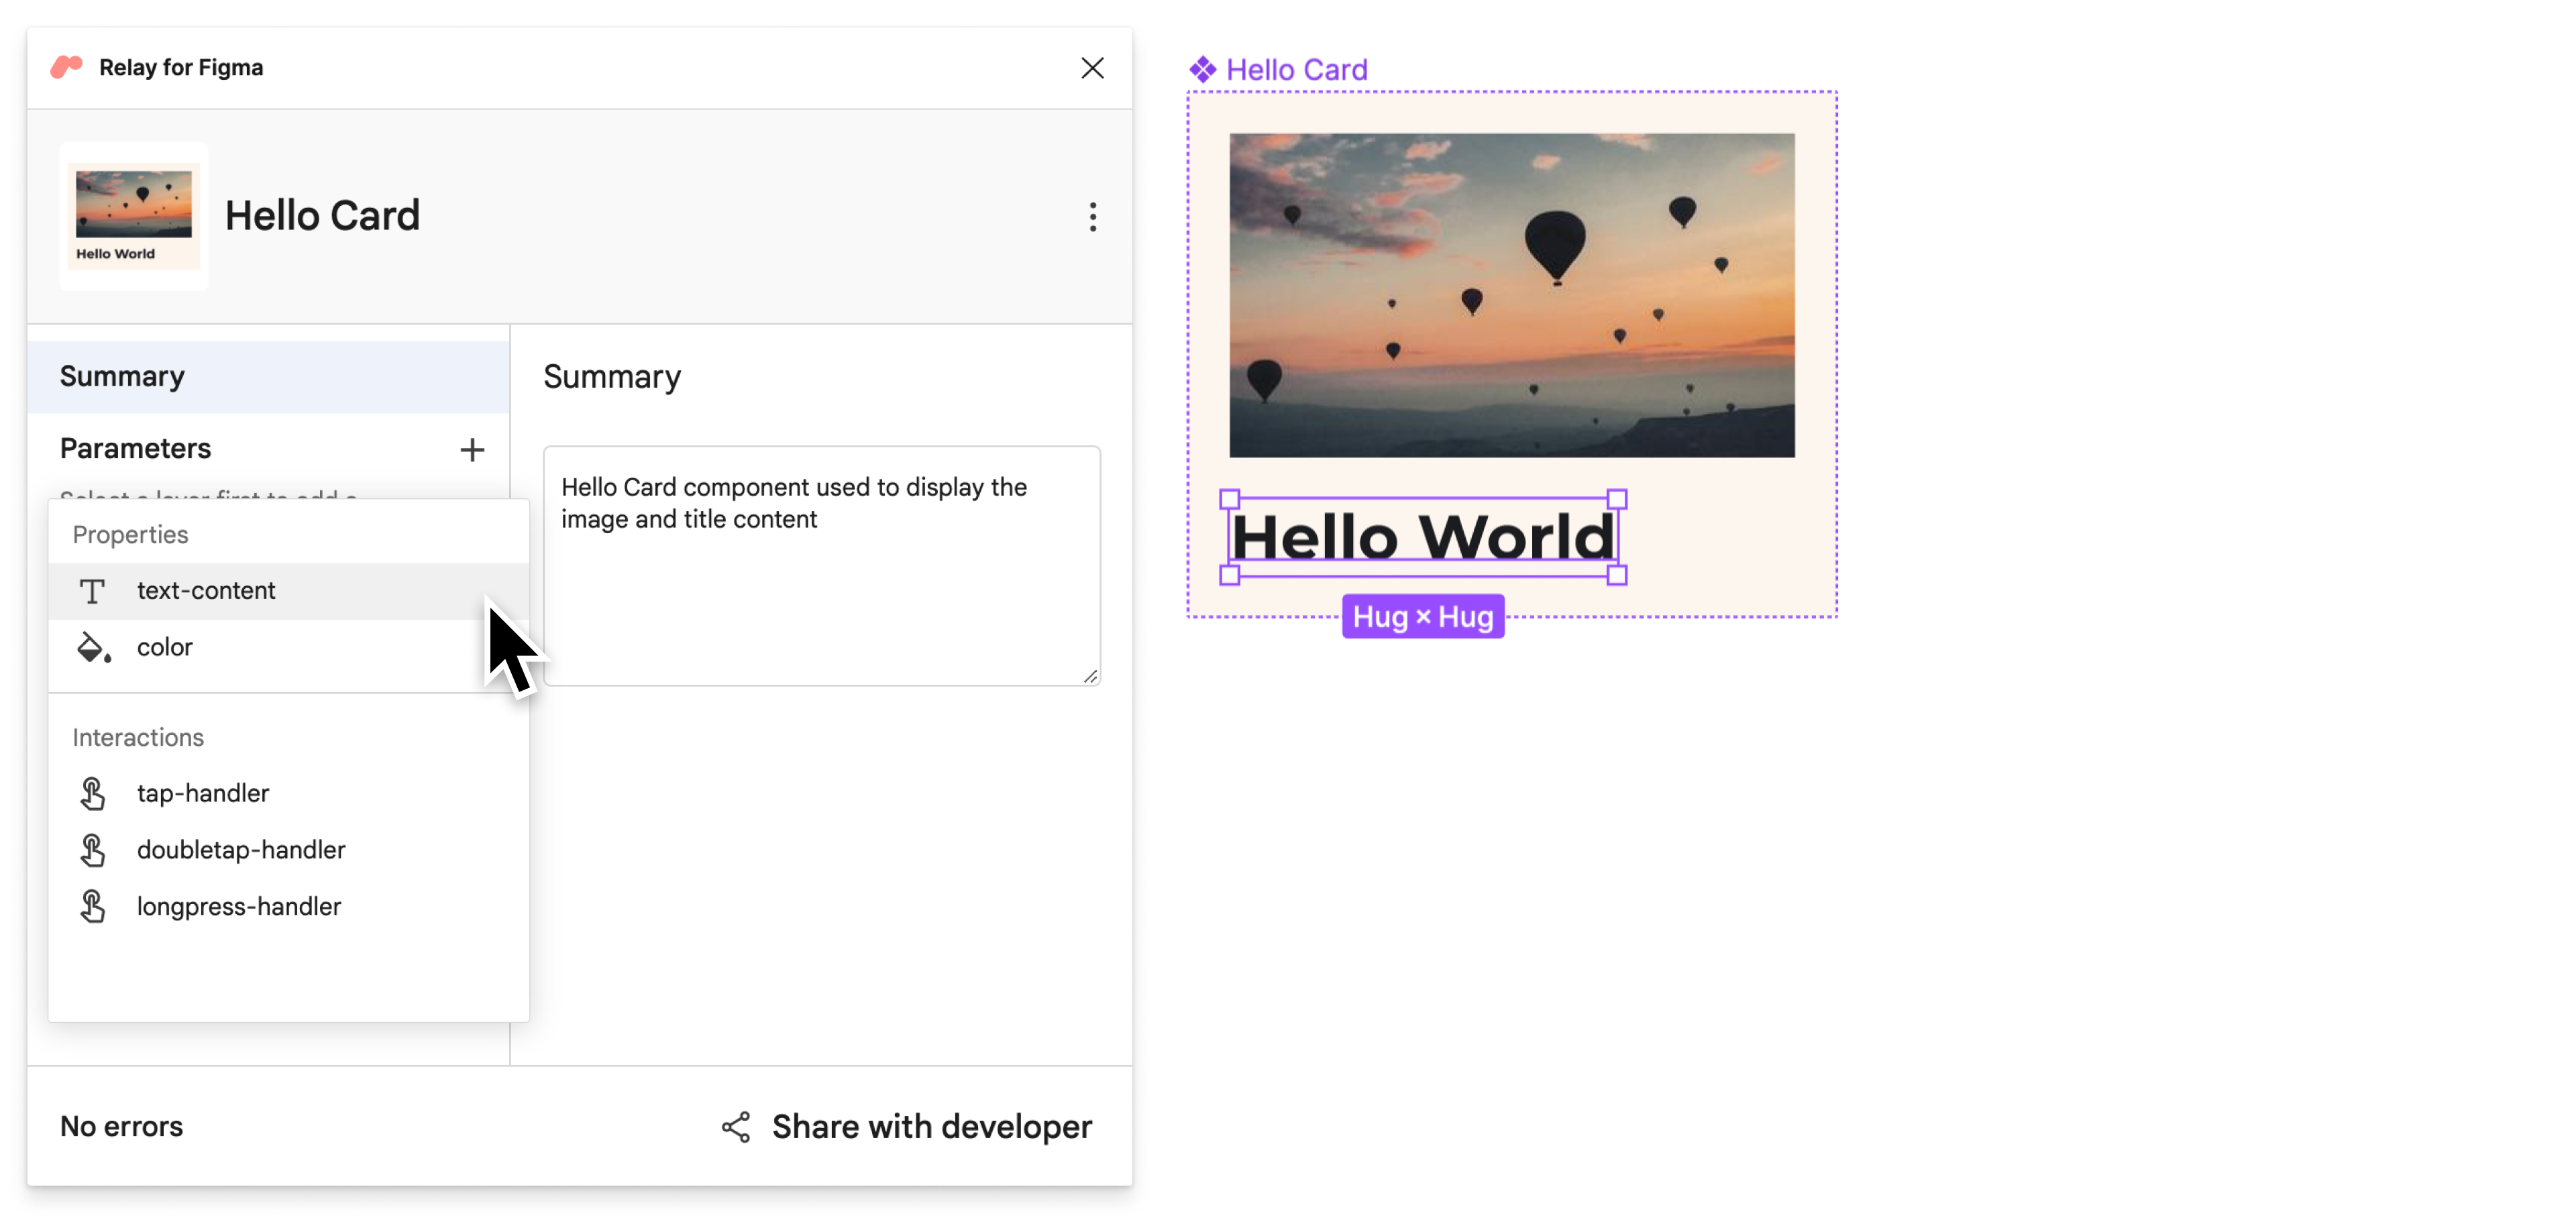
在主 Figma 窗口中,使用 Mac 上的 **⌘** + **单击** 或 Windows 和 Linux 上的 **Ctrl + 单击** 选择 **标题** 图层。然后,在插件中,单击“参数”旁边的 **+** 并选择 **text-content** 为图层添加参数。
要更改标题文本内容参数的名称,请在 **名称** 中输入。在本教程中,输入 **标题**。
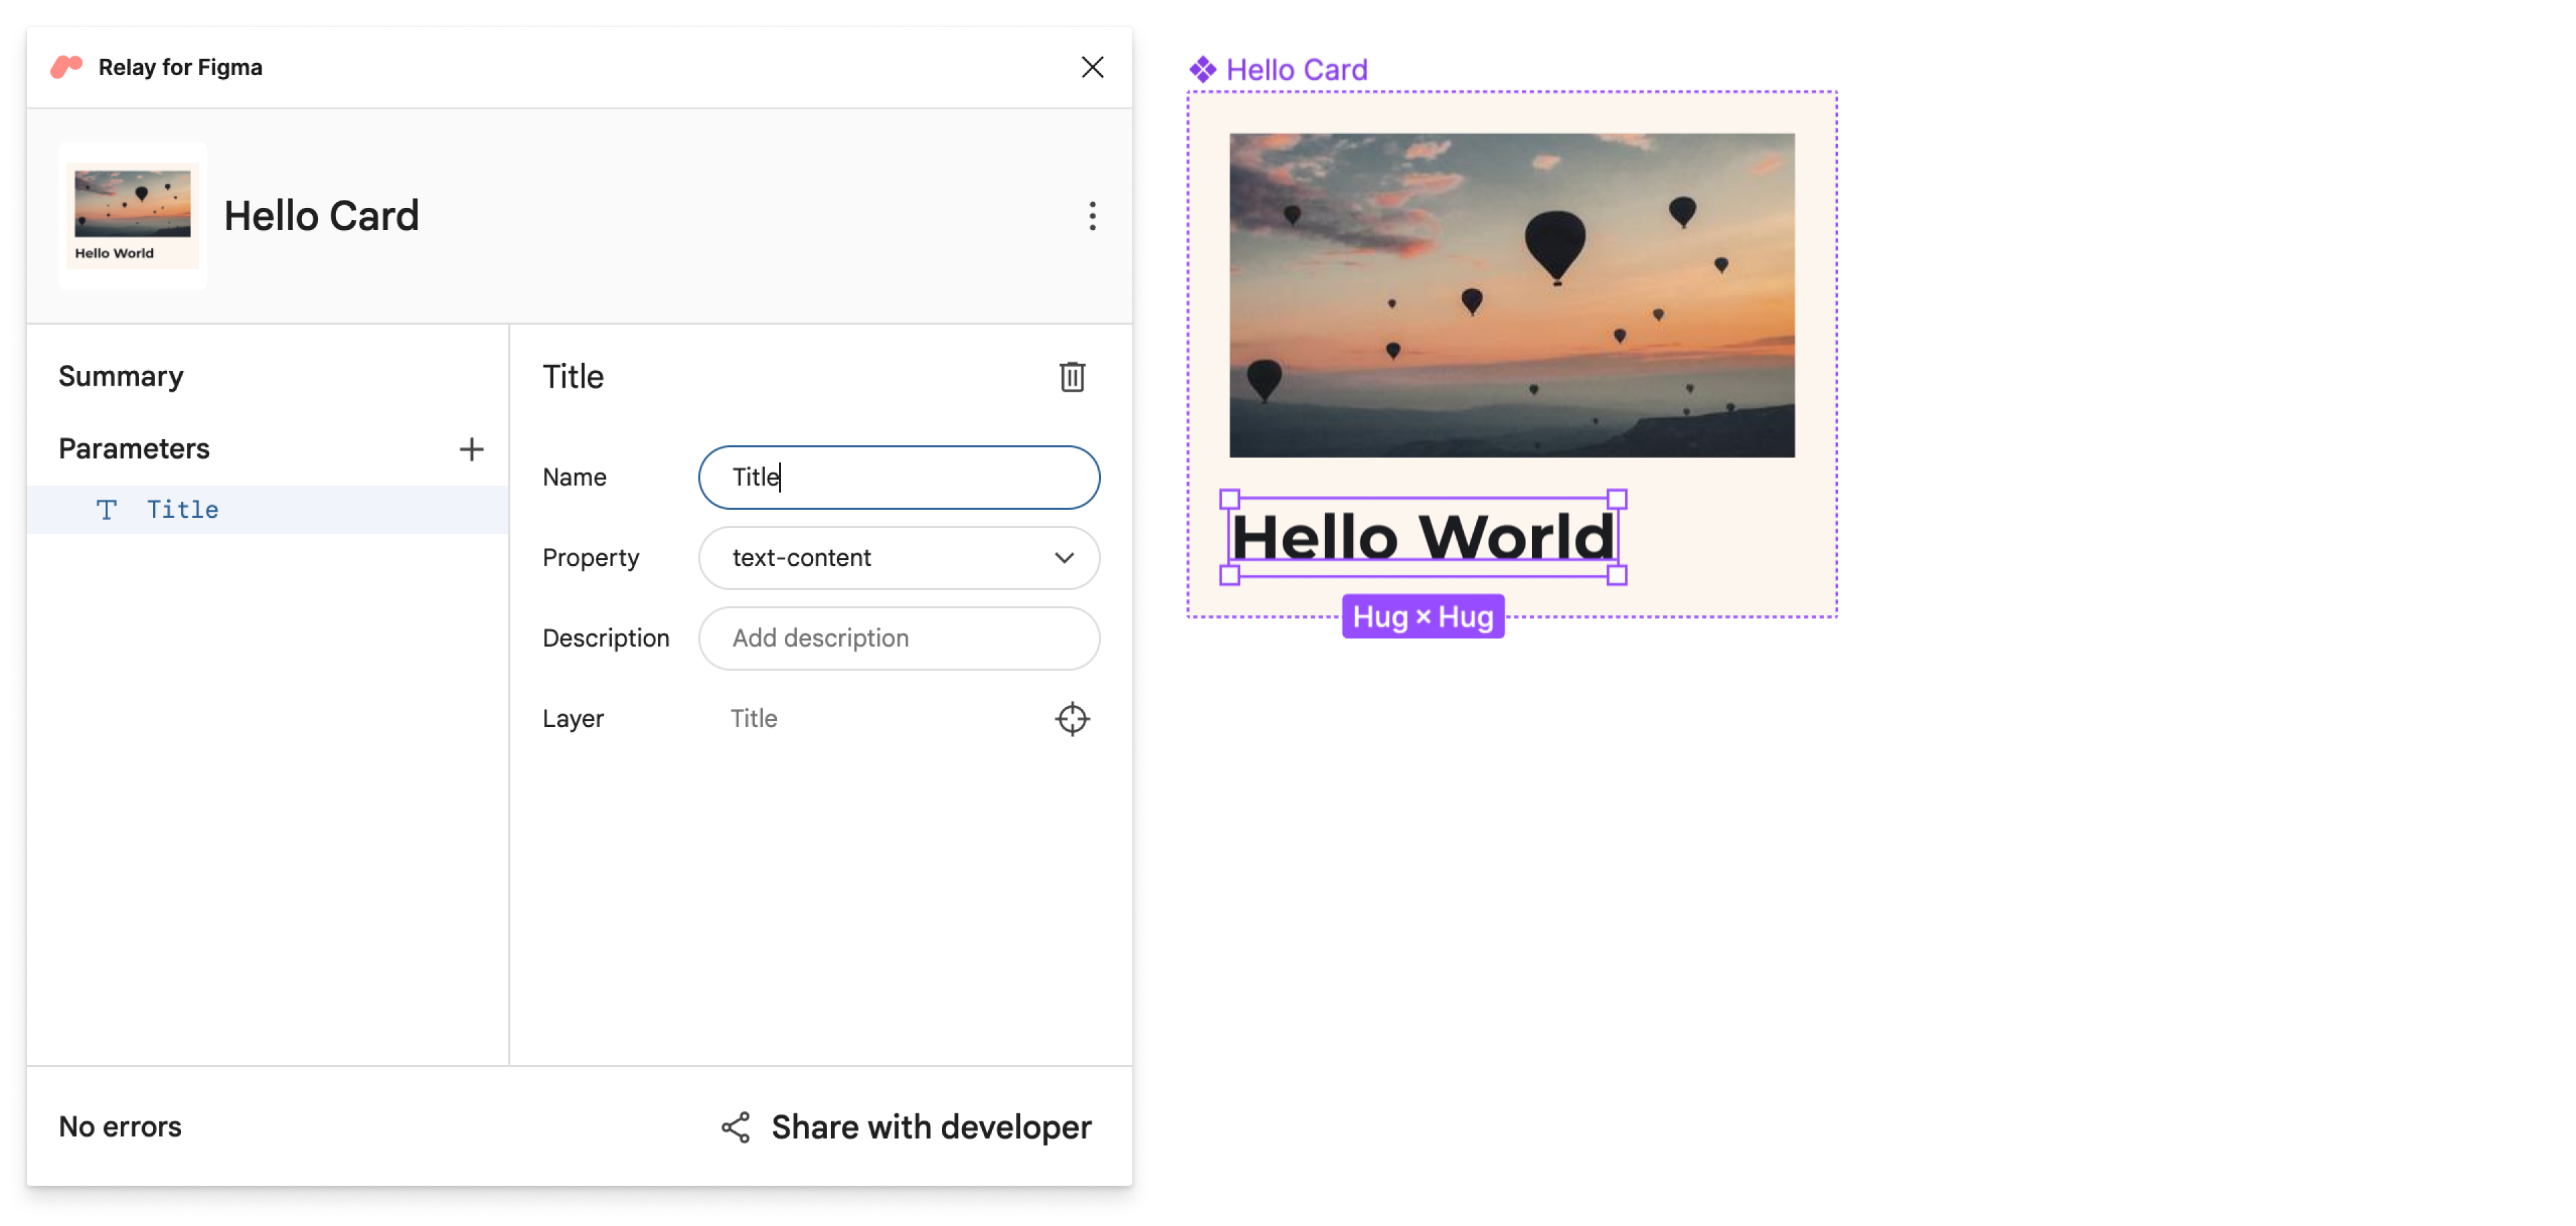
除了编辑名称之外,您还可以选择不同的属性类型,或添加描述以在代码中生成注释。与您的开发者合作,找到最合适的命名方案。内容参数的名称会转换为生成的组合式组件中参数的名称。
保存命名版本
现在,我们将此版本标记为准备好导入到代码中。
- 如果尚未打开,请打开 Figma Relay 插件。
- 单击 **与开发者共享**。
在 **与开发者共享** 屏幕上,输入版本的名称和描述。
**示例标题**: Hello World 卡片 V3
**示例描述**: 添加了参数
在 Android Studio 中更新组件
让我们在 Android Studio 中更新组件。
在 Android Studio 中,确保项目工具窗口处于 **Android 视图**。然后,右键单击
app/ui-packages/hello_card/,然后单击 **更新 UI 包**。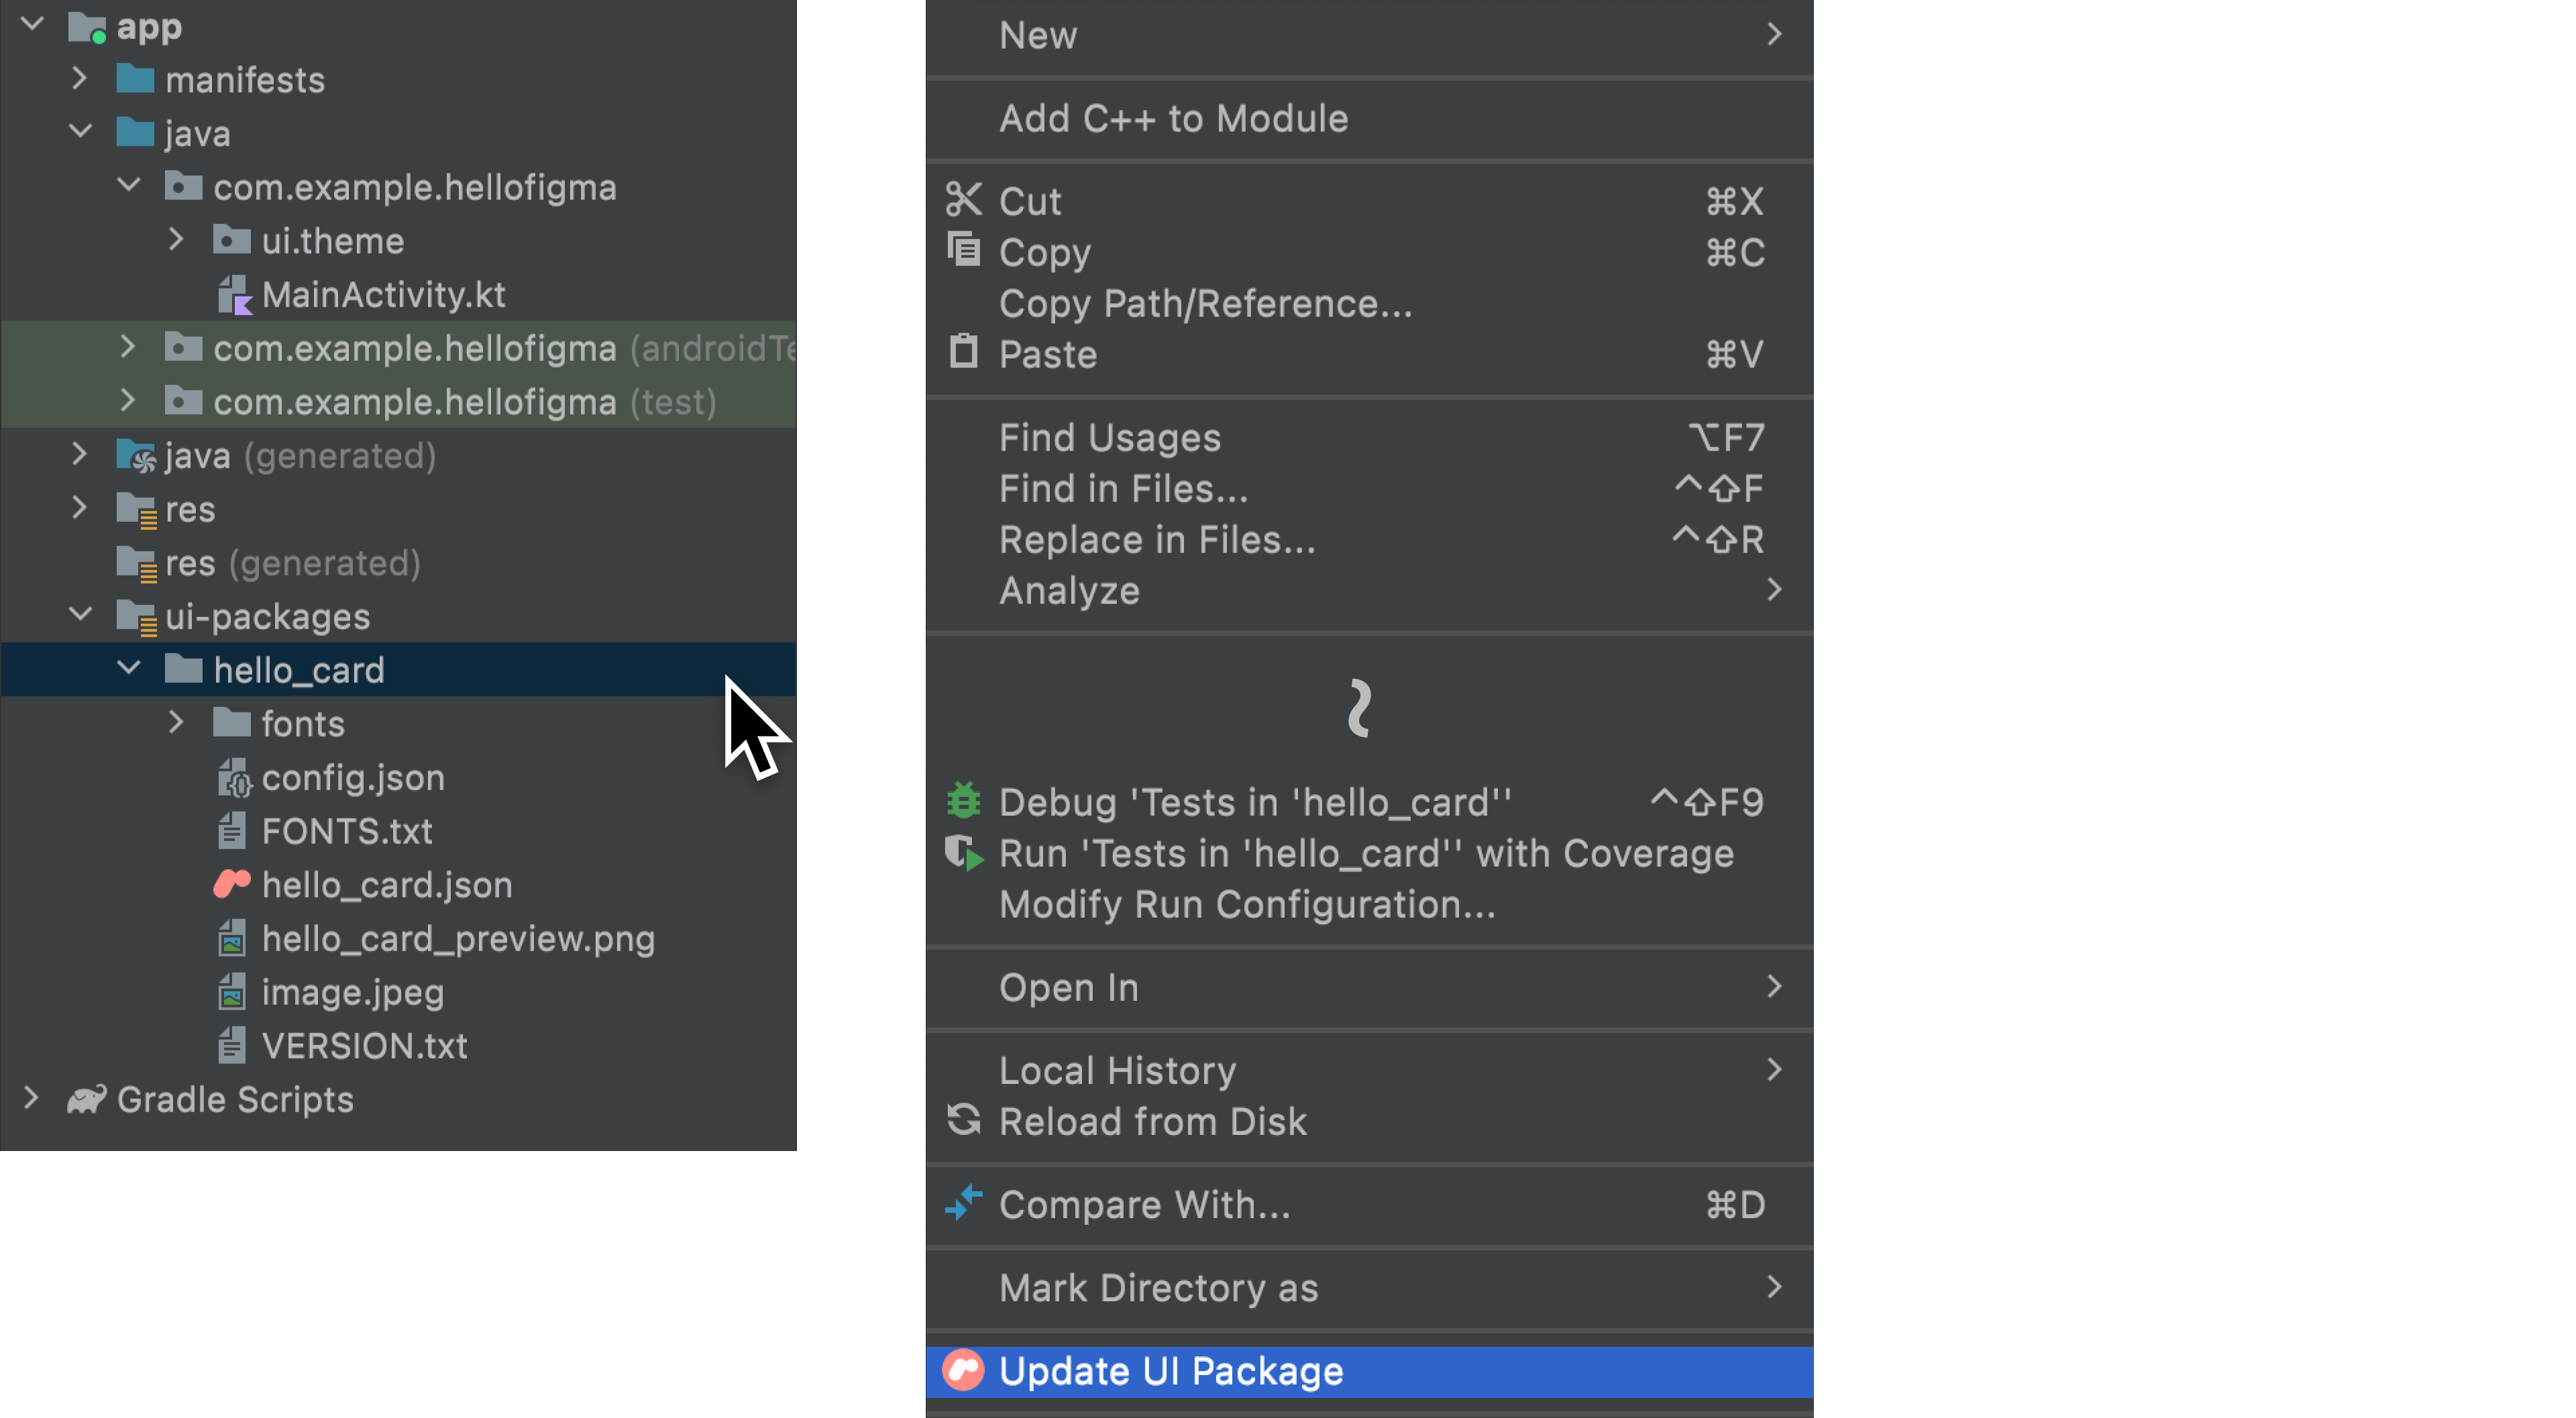
单击
 再次构建您的项目。
如果您打开
app/java/com/example/hellofigma/hellocard/HelloCard.kt,您会注意到添加了一个参数:title。参数的名称是我们之前在 Figma 中指定的内容参数的名称。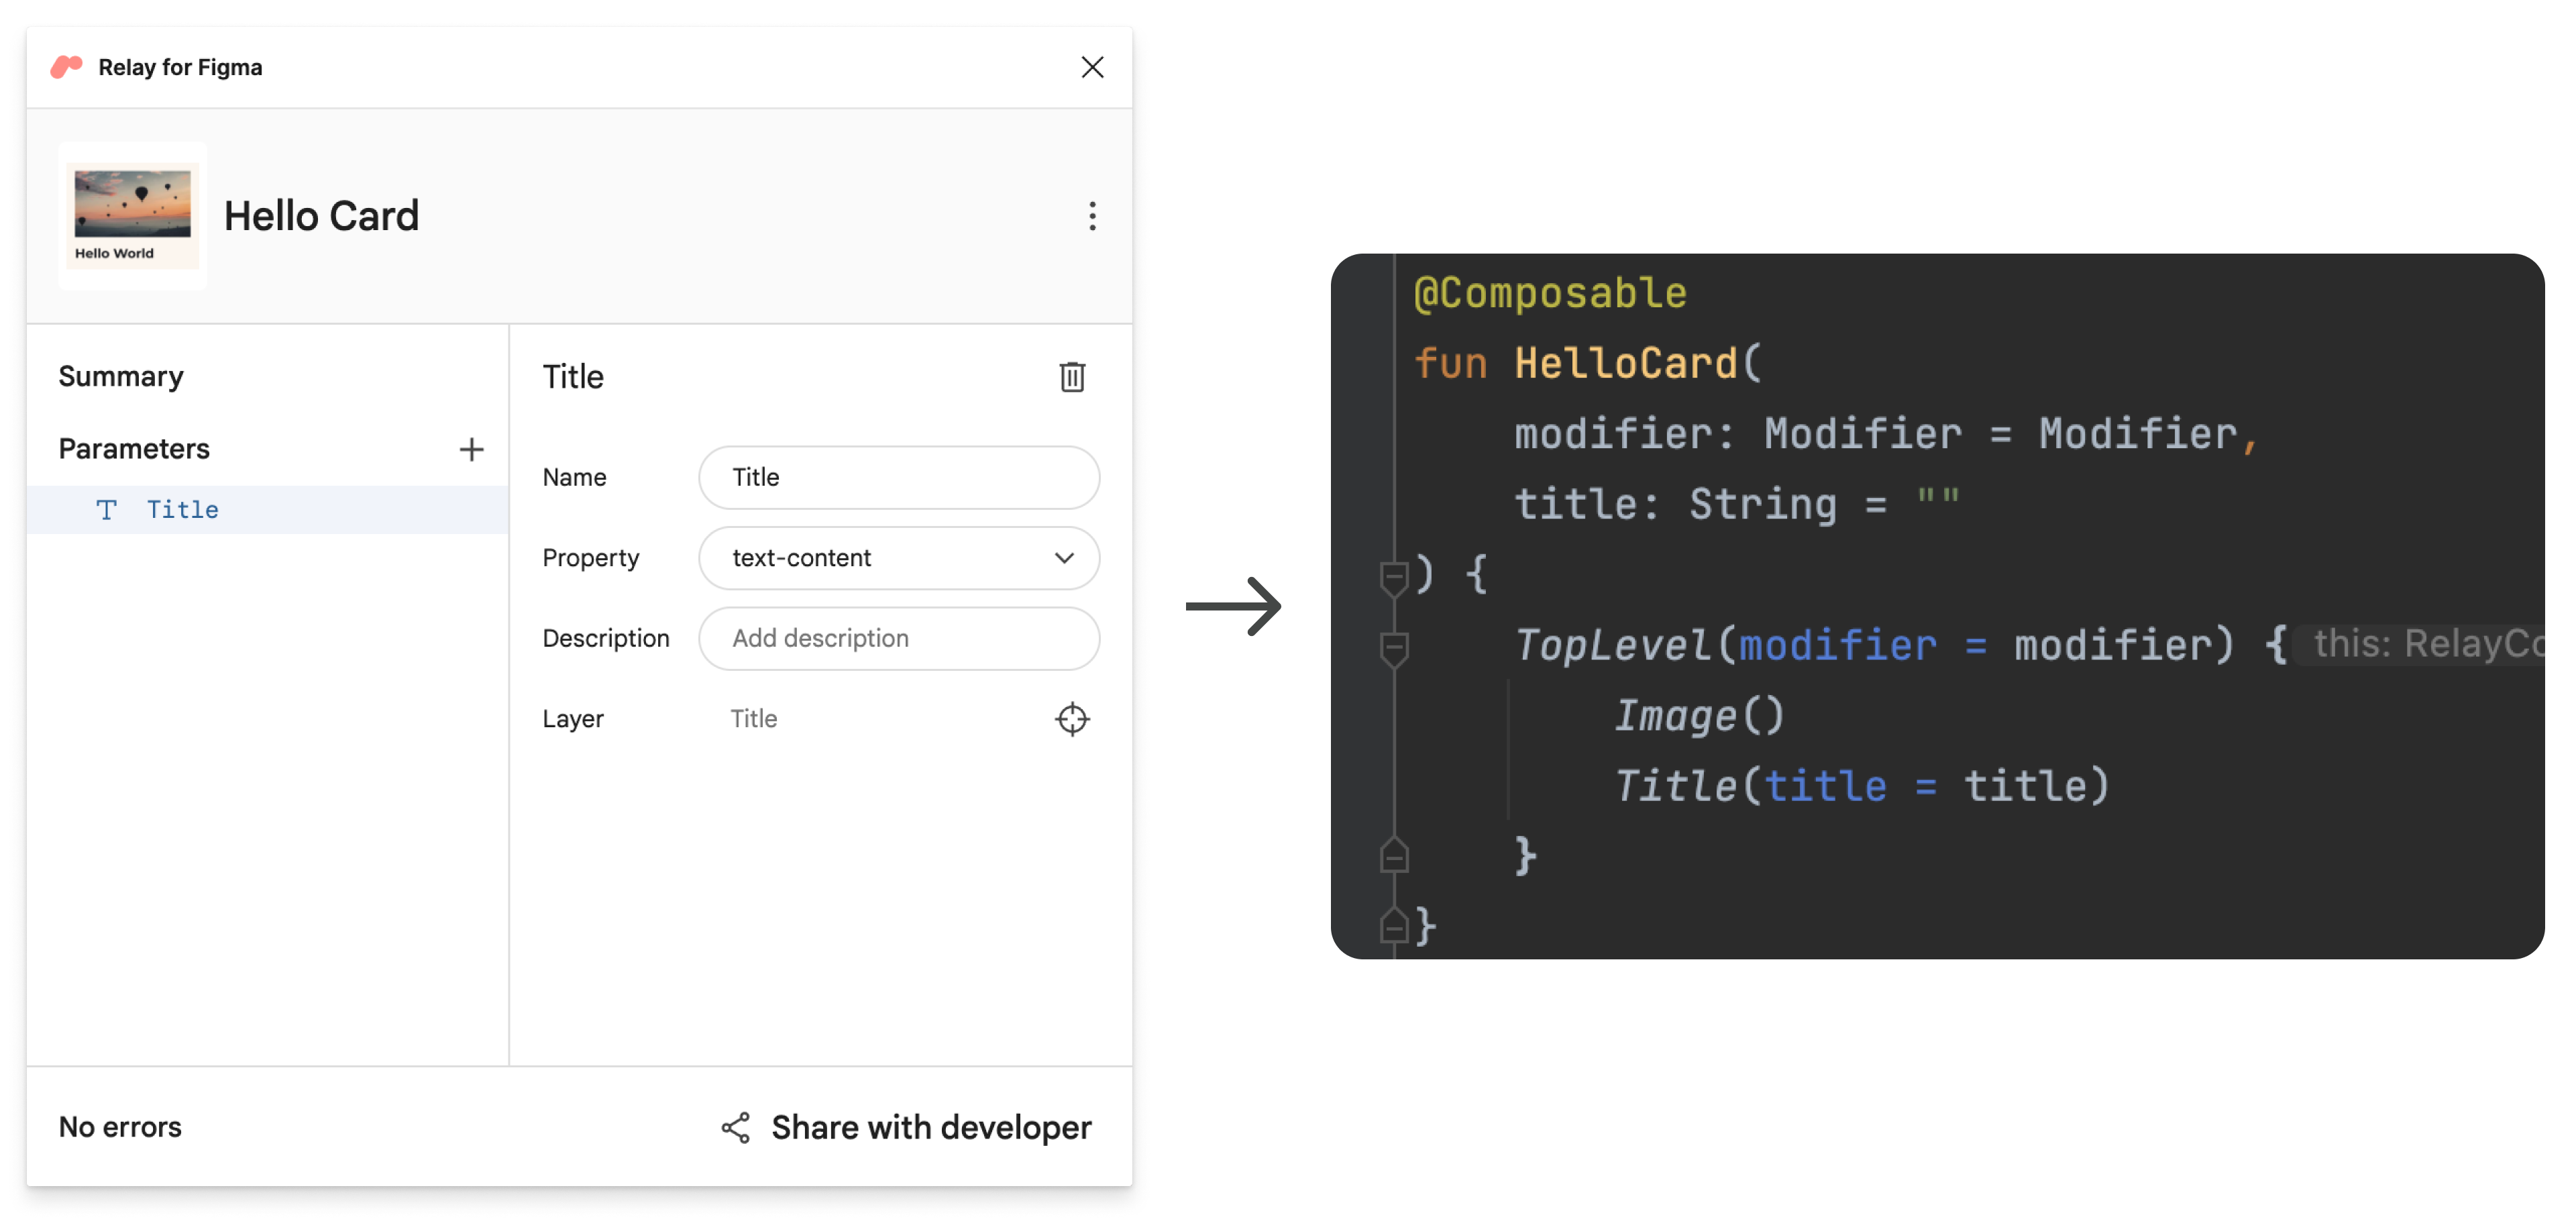
打开
app/java/com/example/hellofigma/MainActivity.kt。更改
MainActivity类中的一行,为title参数添加一个值。class MainActivity : ComponentActivity() { override fun onCreate(savedInstanceState: Bundle?) { super.onCreate(savedInstanceState) setContent { HelloFigmaTheme { // A surface container using the 'background' color from the theme Surface(color = MaterialTheme.colors.background) { HelloCard(title="Balloon World!") // Change this line } } } } }在同一文件的更下方,在组合式组件的预览中,更改一行。
@Preview(showBackground = true)
@Composable
fun DefaultPreview() {
    HelloFigmaTheme {
        HelloCard(title="Balloon World!") // Change this line
    }
}
再次构建您的项目,并在预览中查看更新后的组件!请注意,现在可以查看新的参数值。
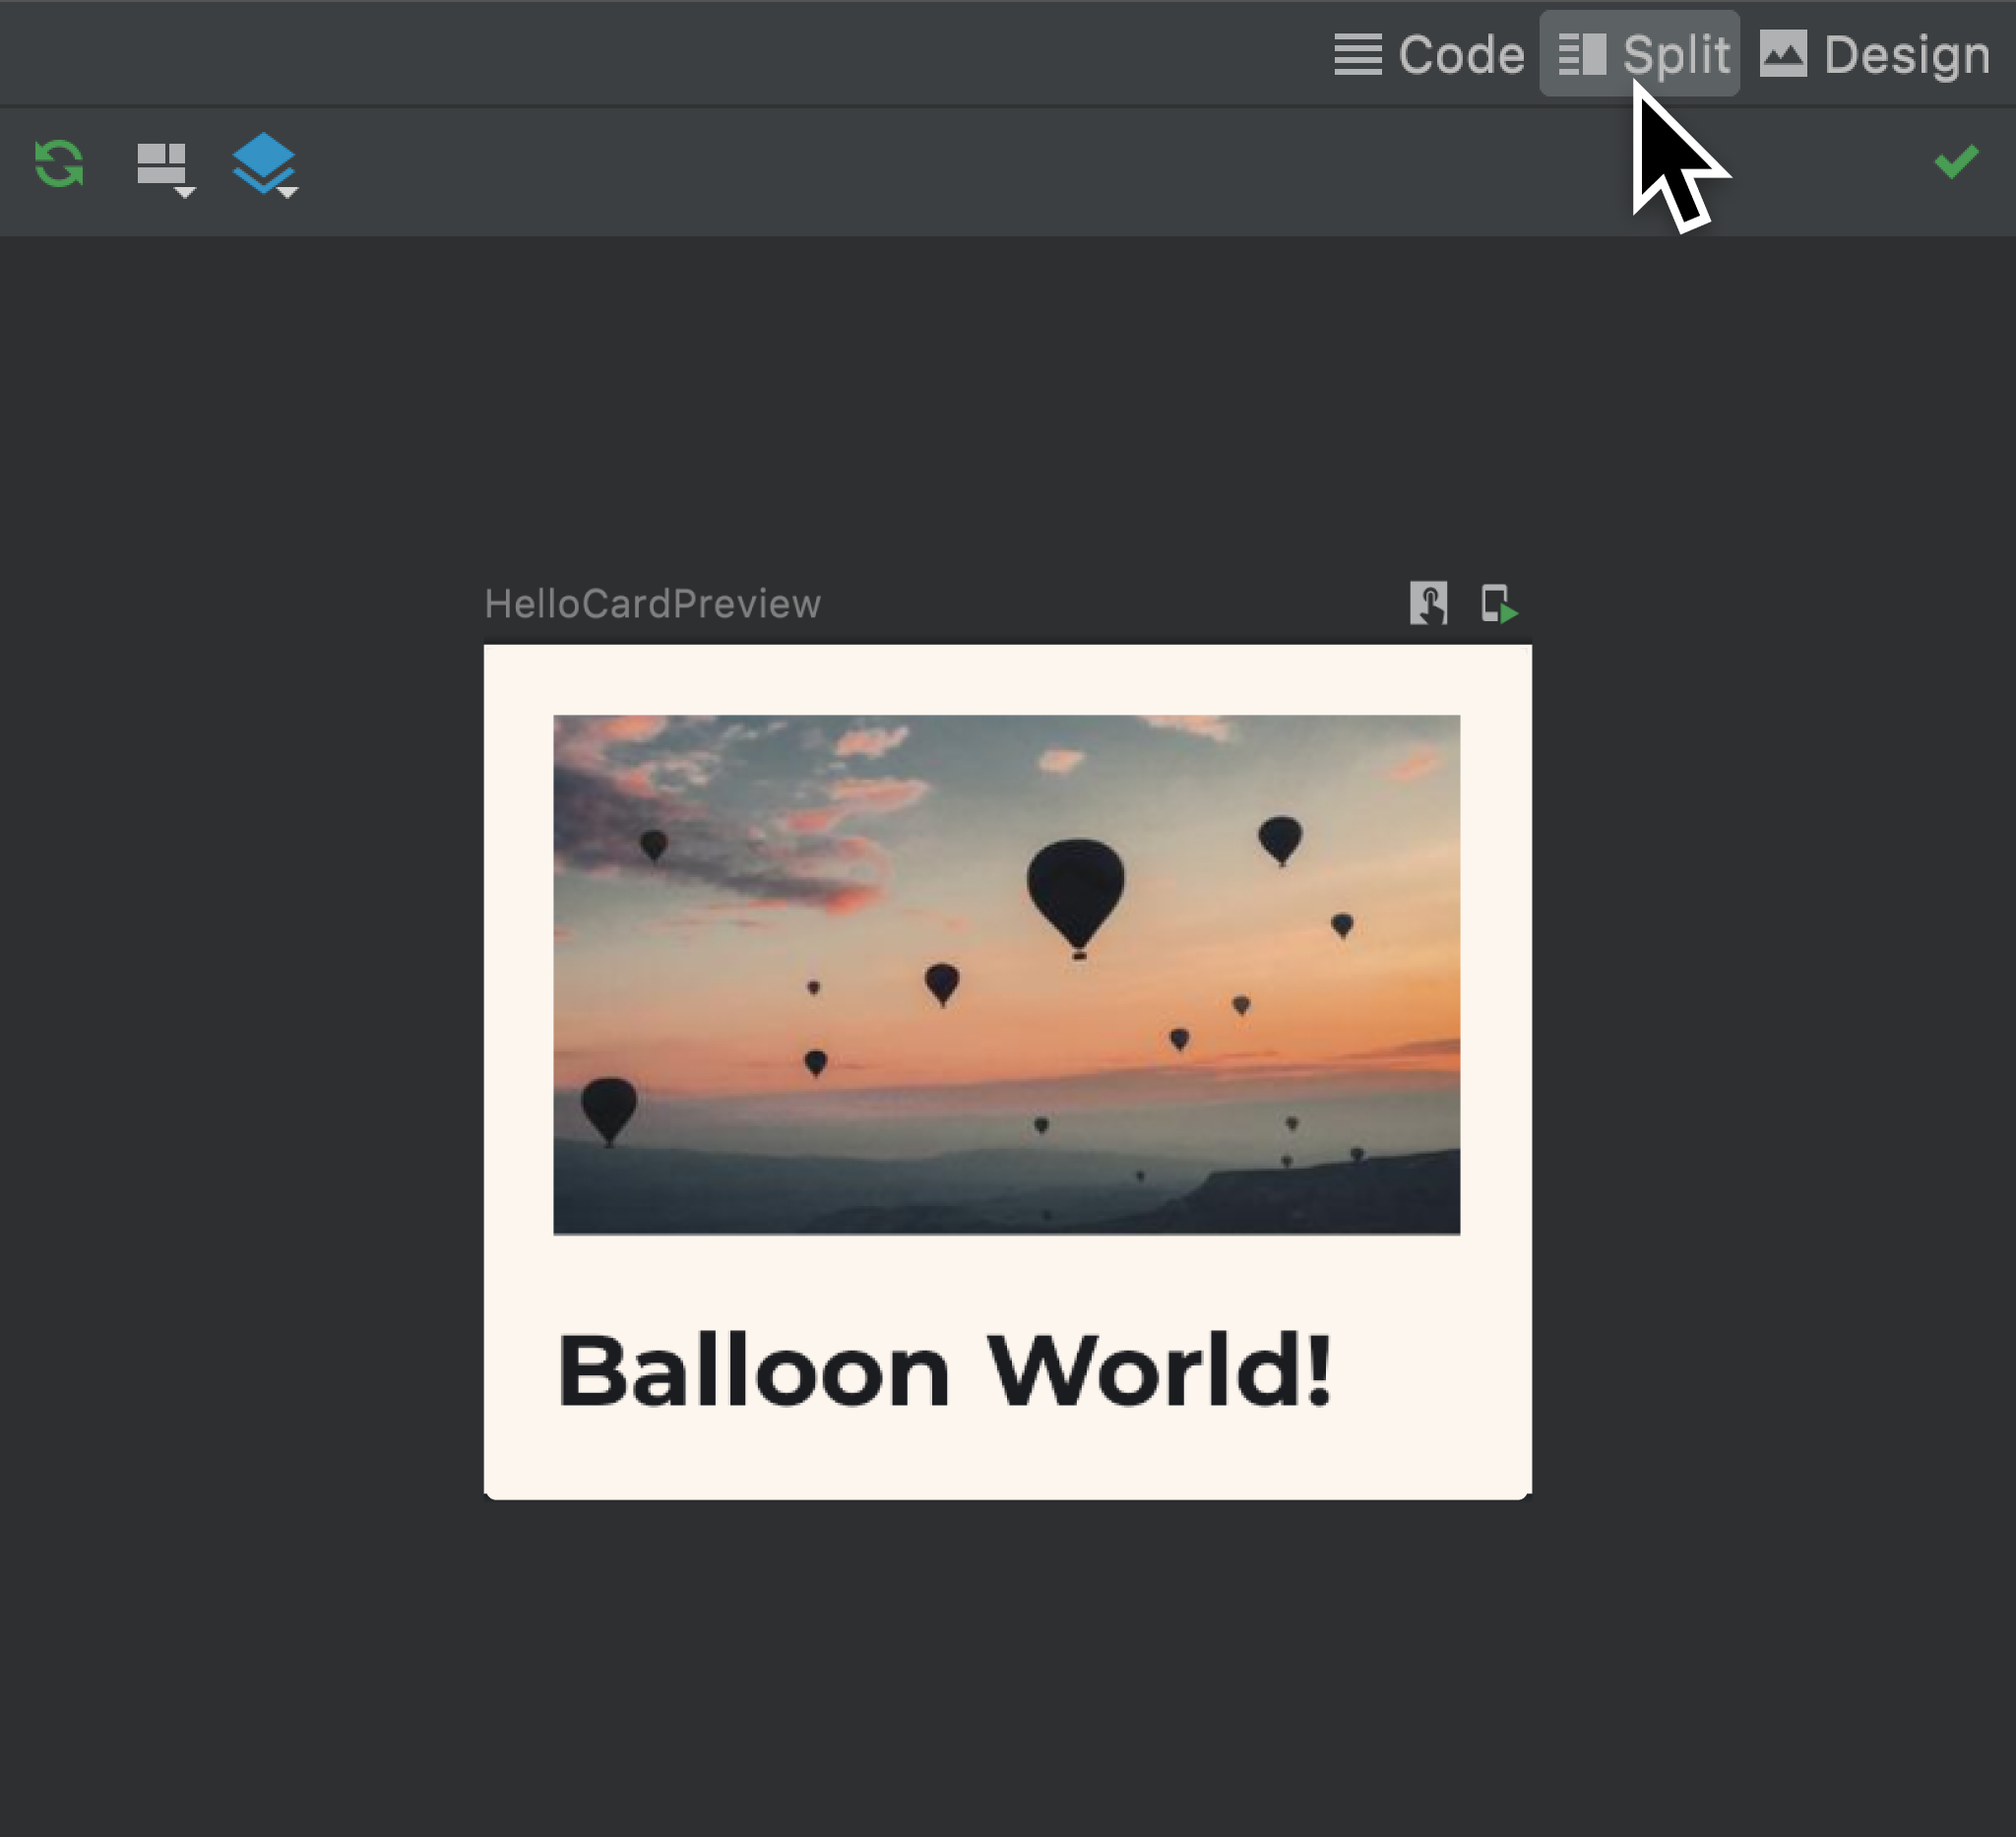
运行应用程序以在模拟器中查看相同的更新。
太棒了!您已经学习了 Relay 工作流程的基础知识。
下一步
本基本教程到此结束。虽然您已经看到了 Relay 工作流程的许多功能,但还有其他几个功能可用。如果您有兴趣了解如何使用交互处理程序等功能,以及如何处理具有多个 Figma 变体的组件等等,请跳转到 高级教程!
推荐内容
- 注意:当 JavaScript 关闭时显示链接文本
- 将设计转换为 Android Studio 中的代码
- 进行并传播设计更新
- Compose 布局基础知识
