第 1 课:可组合函数
Jetpack Compose 是围绕可组合函数构建的。这些函数允许您通过描述其外观和提供数据依赖项来以编程方式定义应用的 UI,而不是关注 UI 的构建过程(初始化元素、将其附加到父级等)。要创建可组合函数,只需将 @Composable 注解添加到函数名称。

添加文本元素
首先,下载最新版本的 Android Studio,然后通过选择 New Project,并在 Phone and Tablet 类别下选择 Empty Activity 来创建应用。将您的应用命名为 ComposeTutorial,然后点击 Finish。默认模板已包含一些 Compose 元素,但在本教程中,您将逐步构建它。
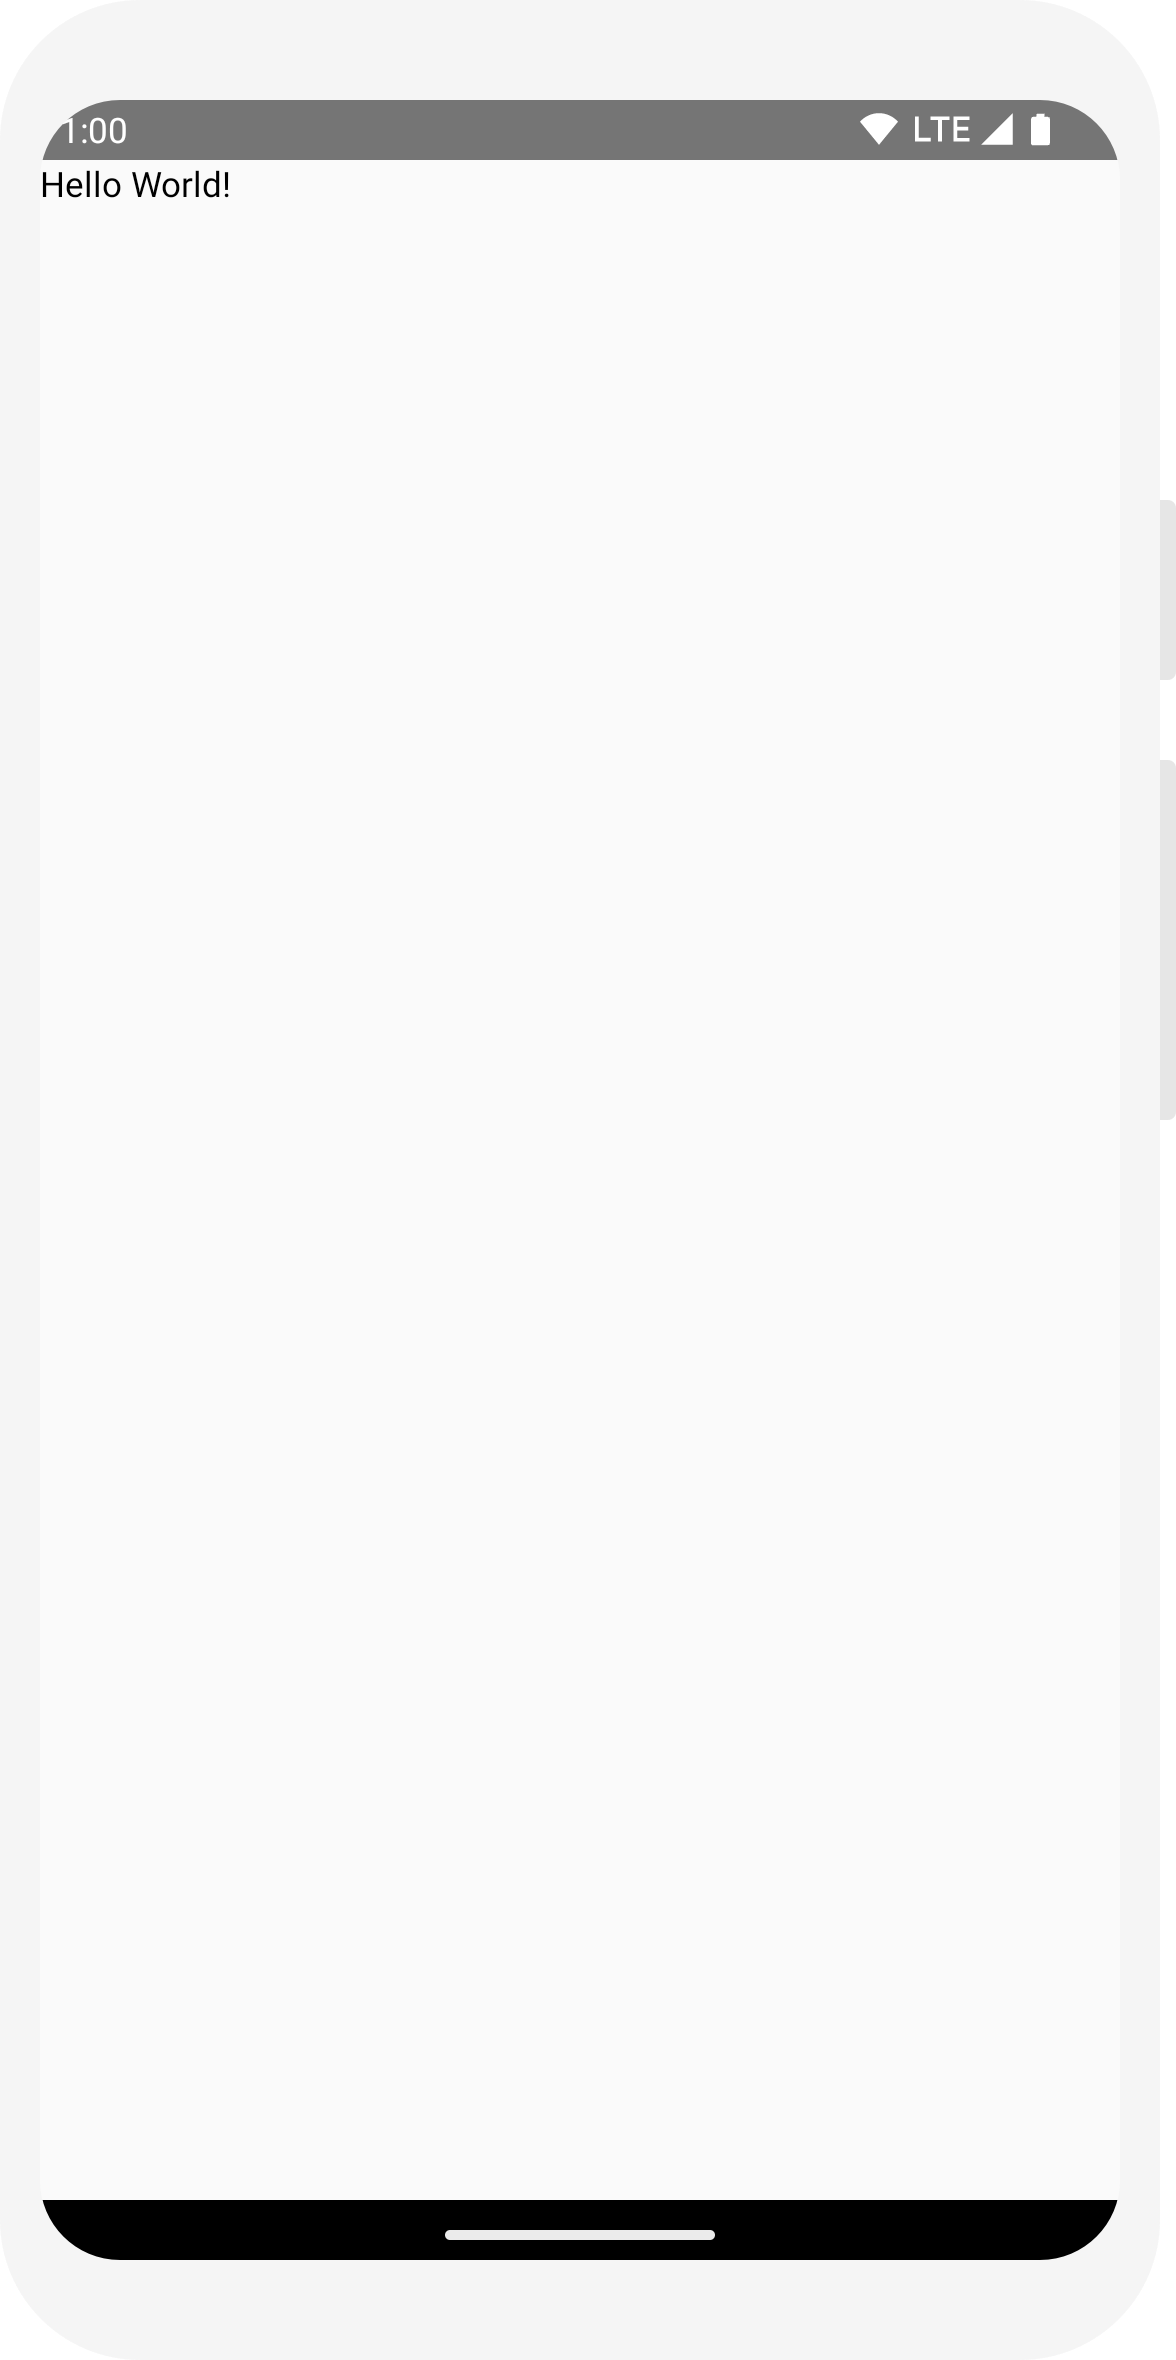
首先,通过在 onCreate 方法中添加一个文本元素来显示“Hello world!”文本。您可以通过定义内容块并调用 Text 可组合函数来实现。 setContent 块定义了调用可组合函数的 Activity 布局。可组合函数只能从其他可组合函数中调用。
Jetpack Compose 使用 Kotlin 编译器插件将这些可组合函数转换为应用的 UI 元素。例如,Compose UI 库定义的 Text 可组合函数在屏幕上显示一个文本标签。
import android.os.Bundle
import androidx.activity.ComponentActivity
import androidx.activity.compose.setContent
import androidx.compose.material3.Text

class MainActivity : ComponentActivity() {
    override fun onCreate(savedInstanceState: Bundle?) {
        super.onCreate(savedInstanceState)
        setContent {
            Text("Hello world!")
        }
    }
}
定义可组合函数
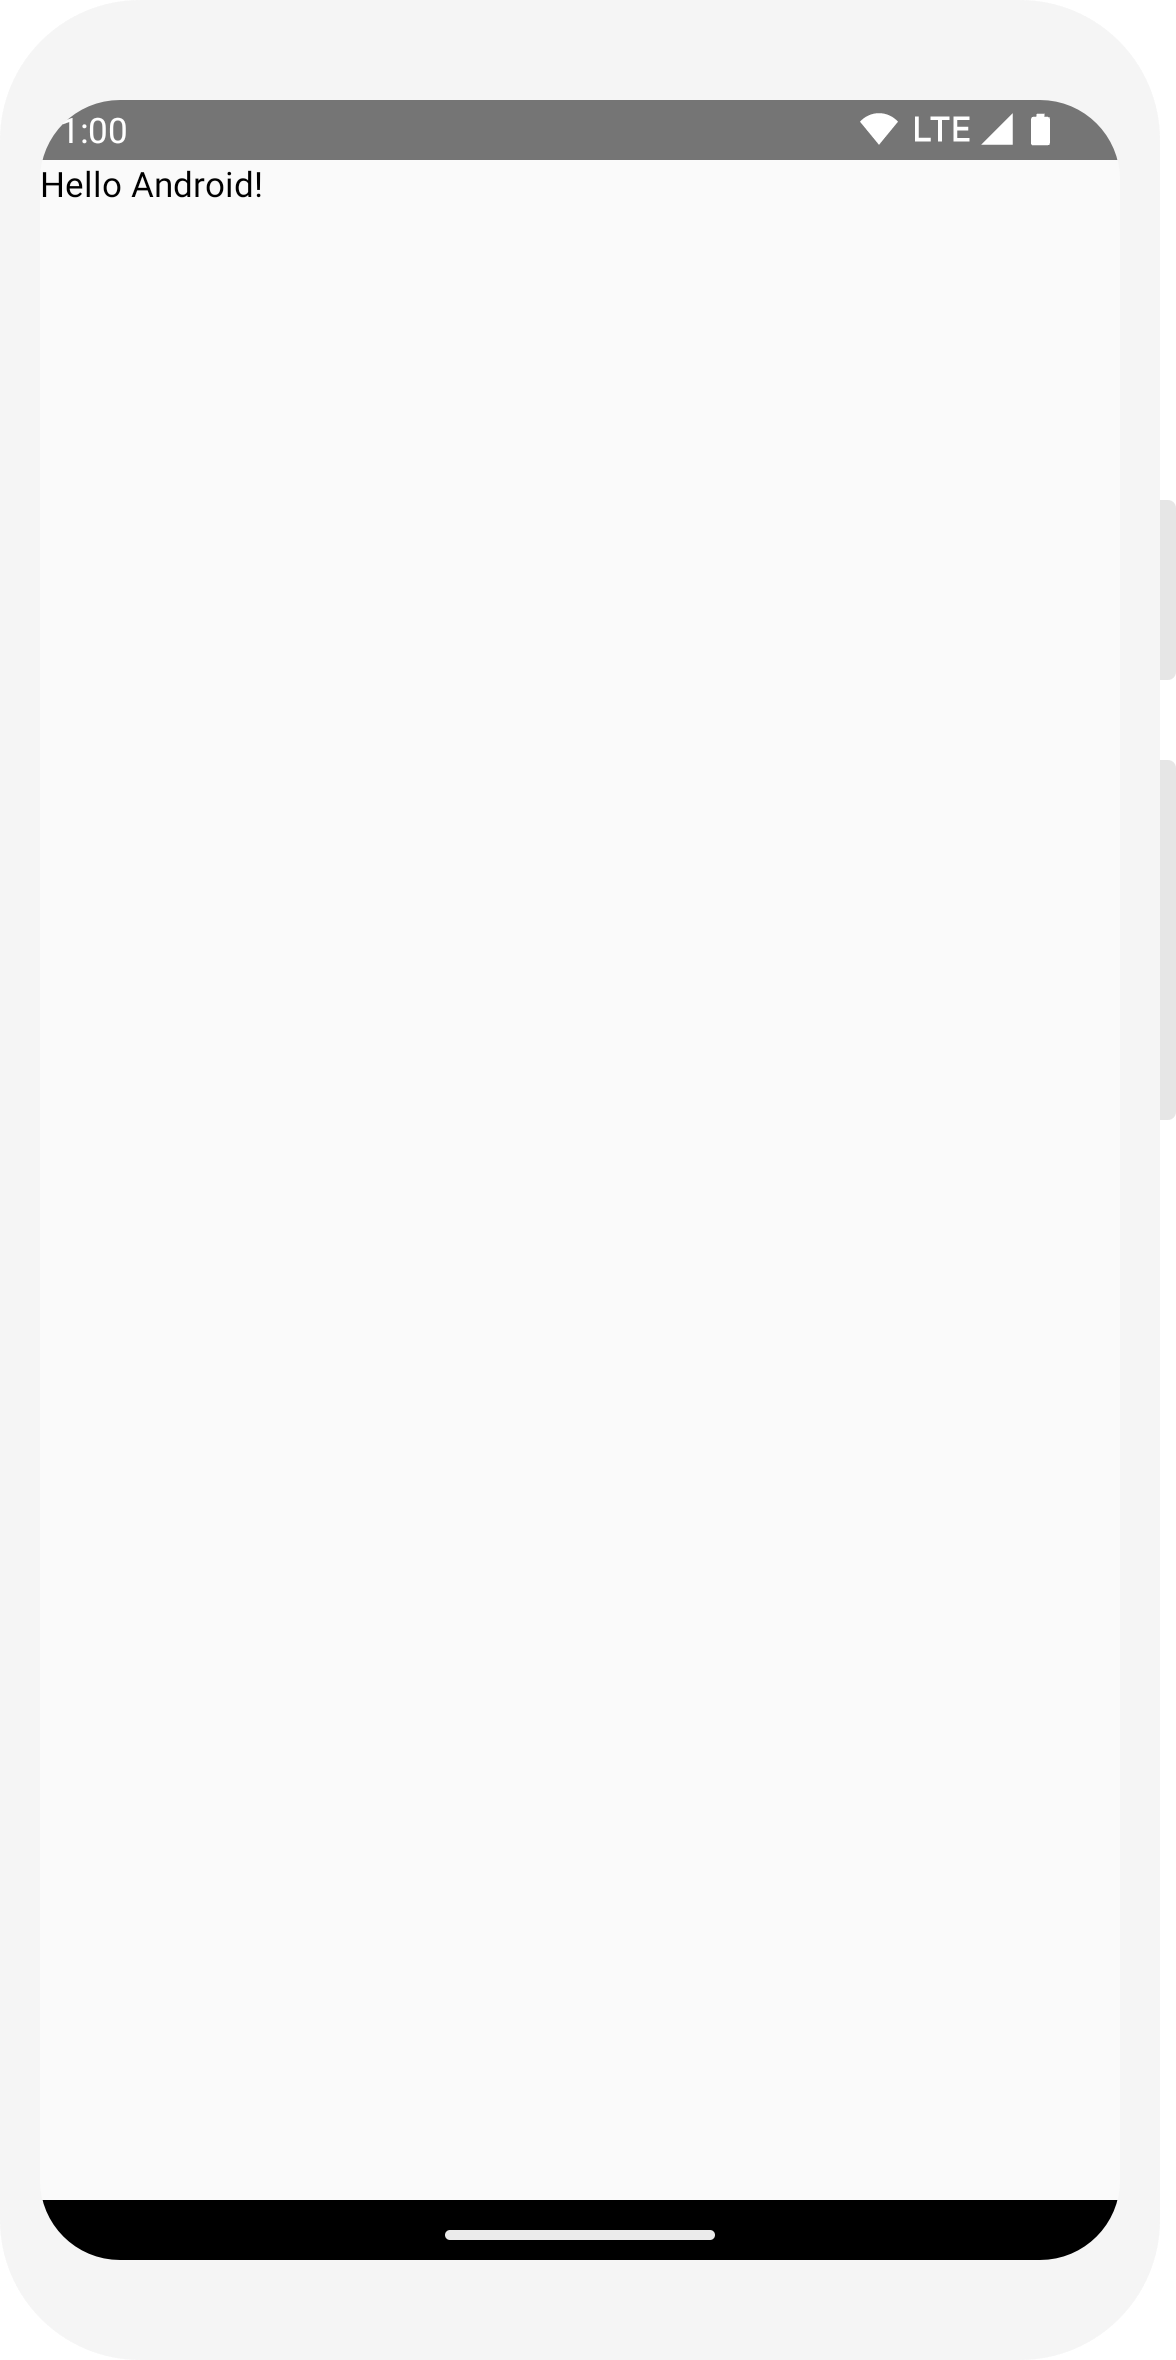
要使函数可组合,请添加 @Composable 注解。要尝试此功能,请定义一个接收名称并使用该名称配置文本元素的 MessageCard 函数。
// ...
import androidx.compose.runtime.Composable

class MainActivity : ComponentActivity() {
    override fun onCreate(savedInstanceState: Bundle?) {
        super.onCreate(savedInstanceState)
        setContent {
            MessageCard("Android")
        }
    }
}

@Composable
fun MessageCard(name: String) {
    Text(text = "Hello $name!")
}
在 Android Studio 中预览您的函数
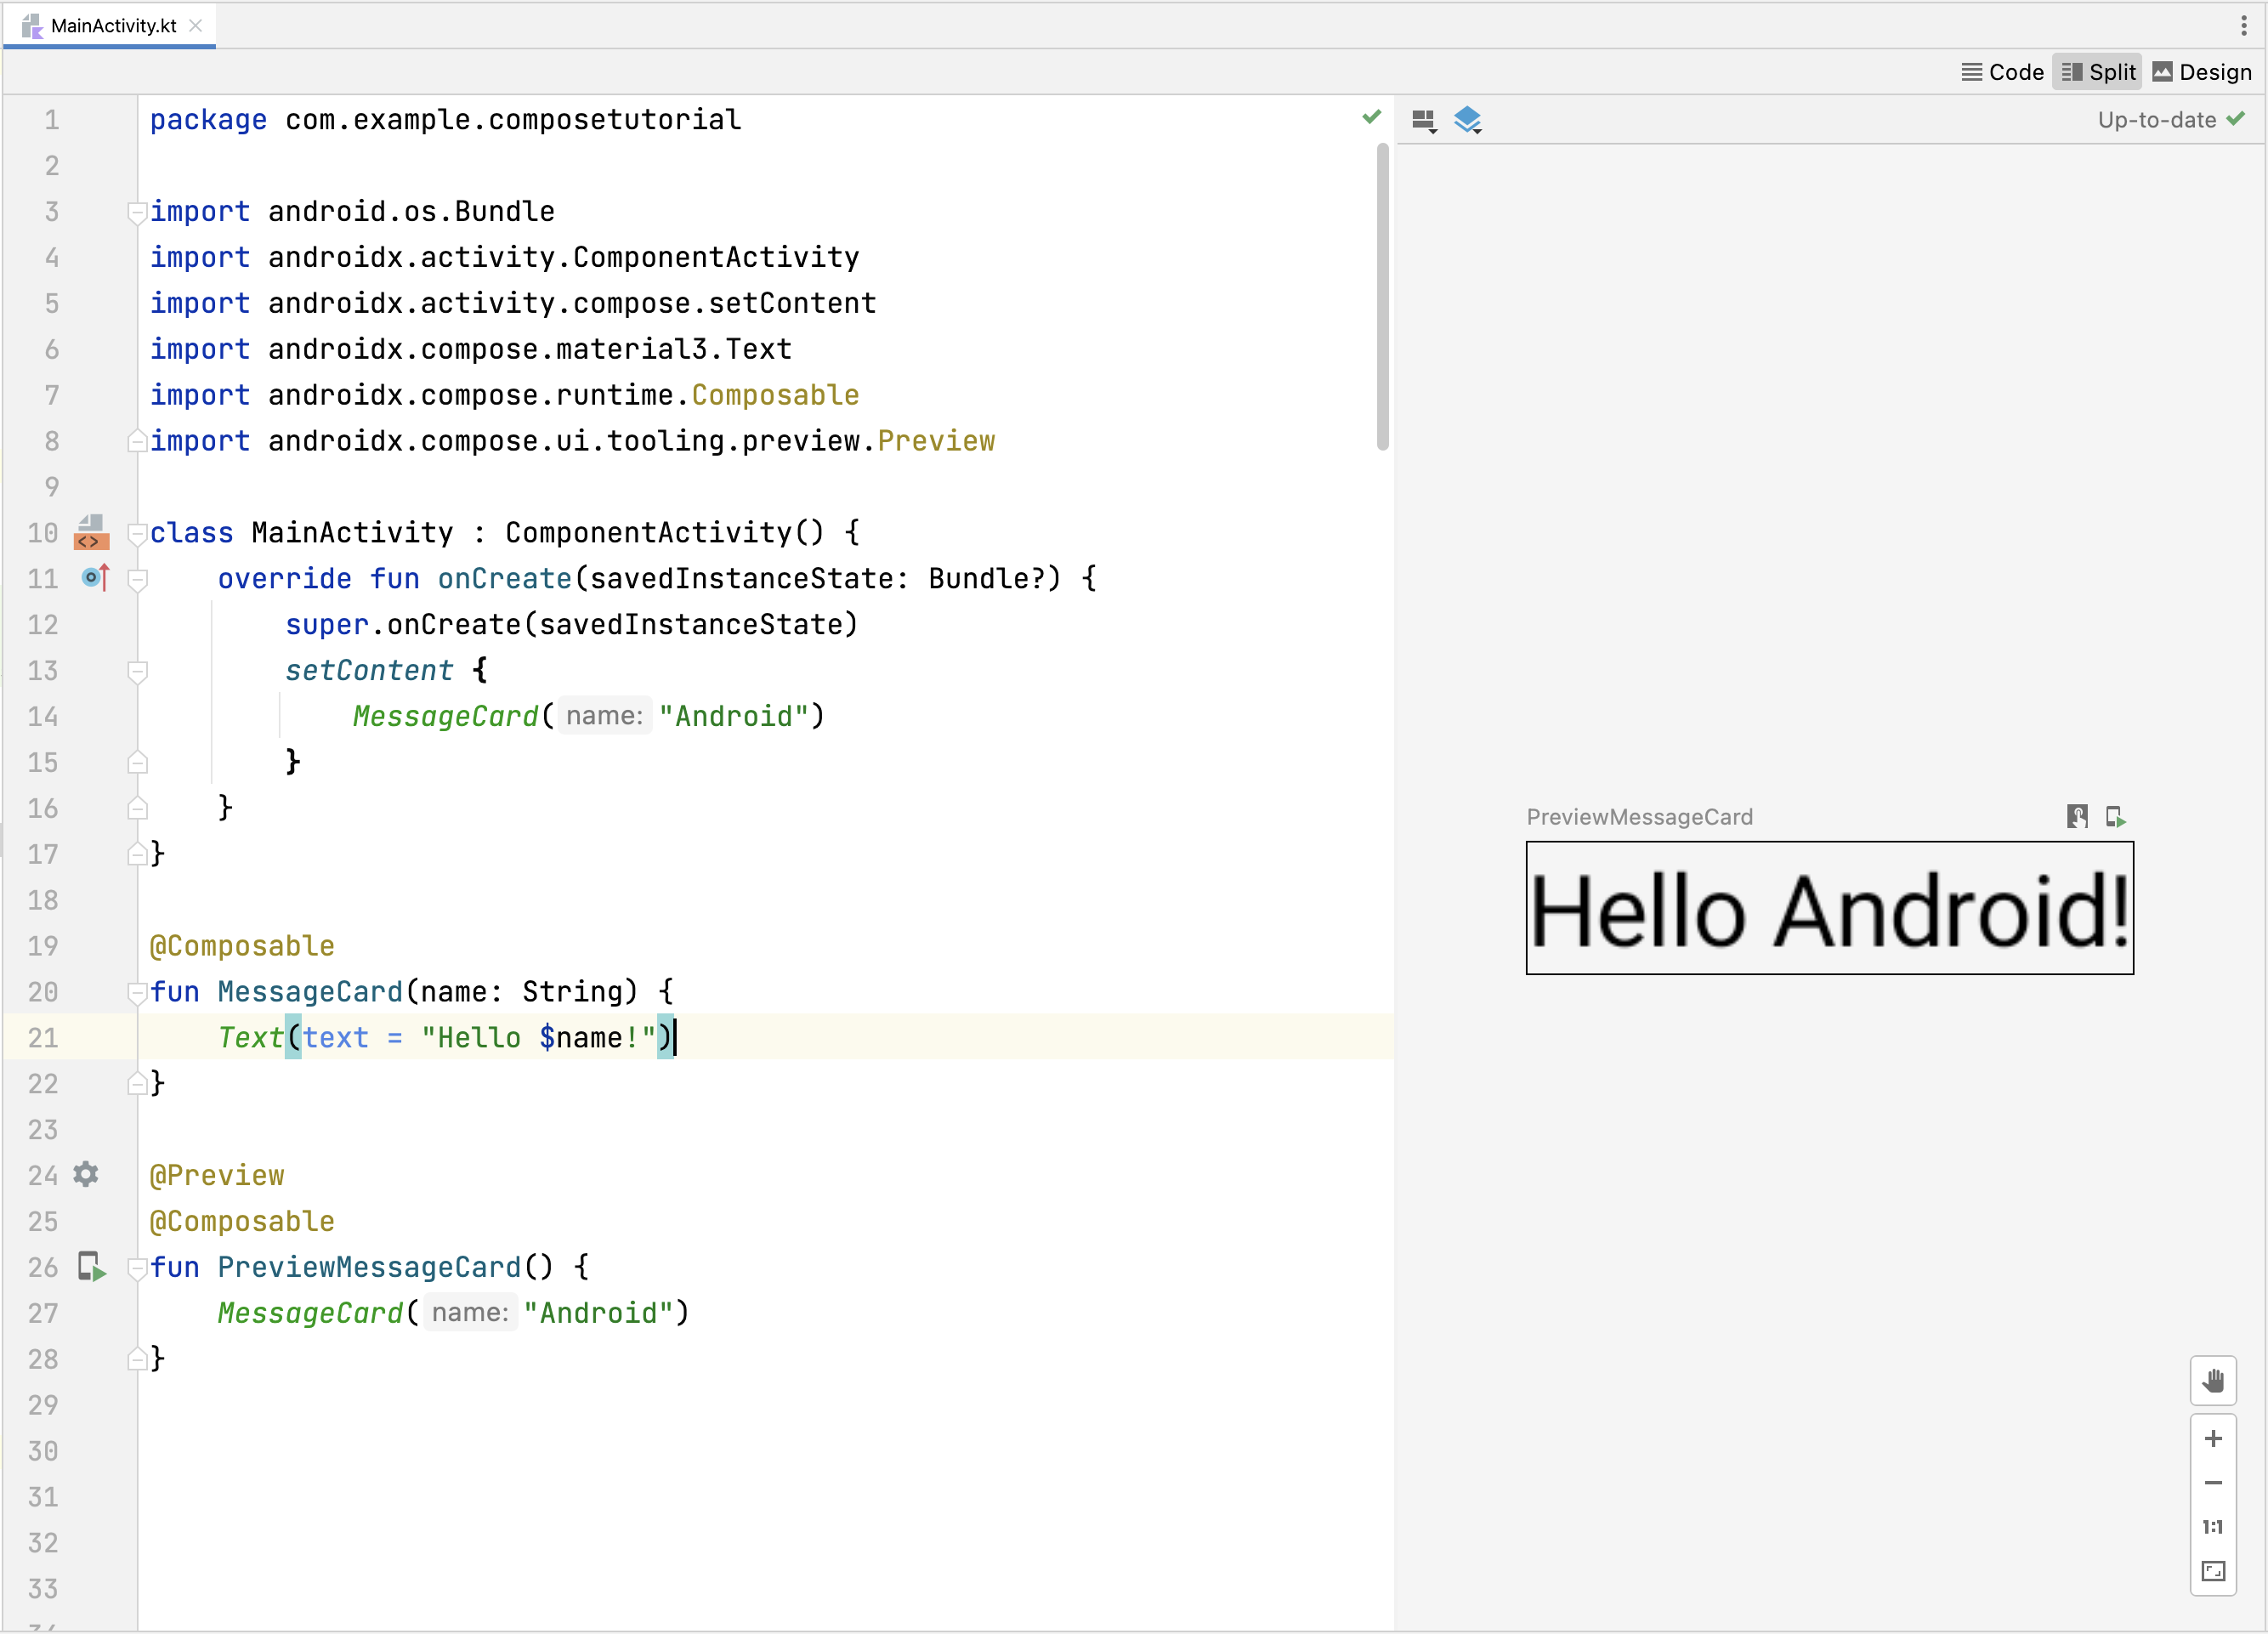
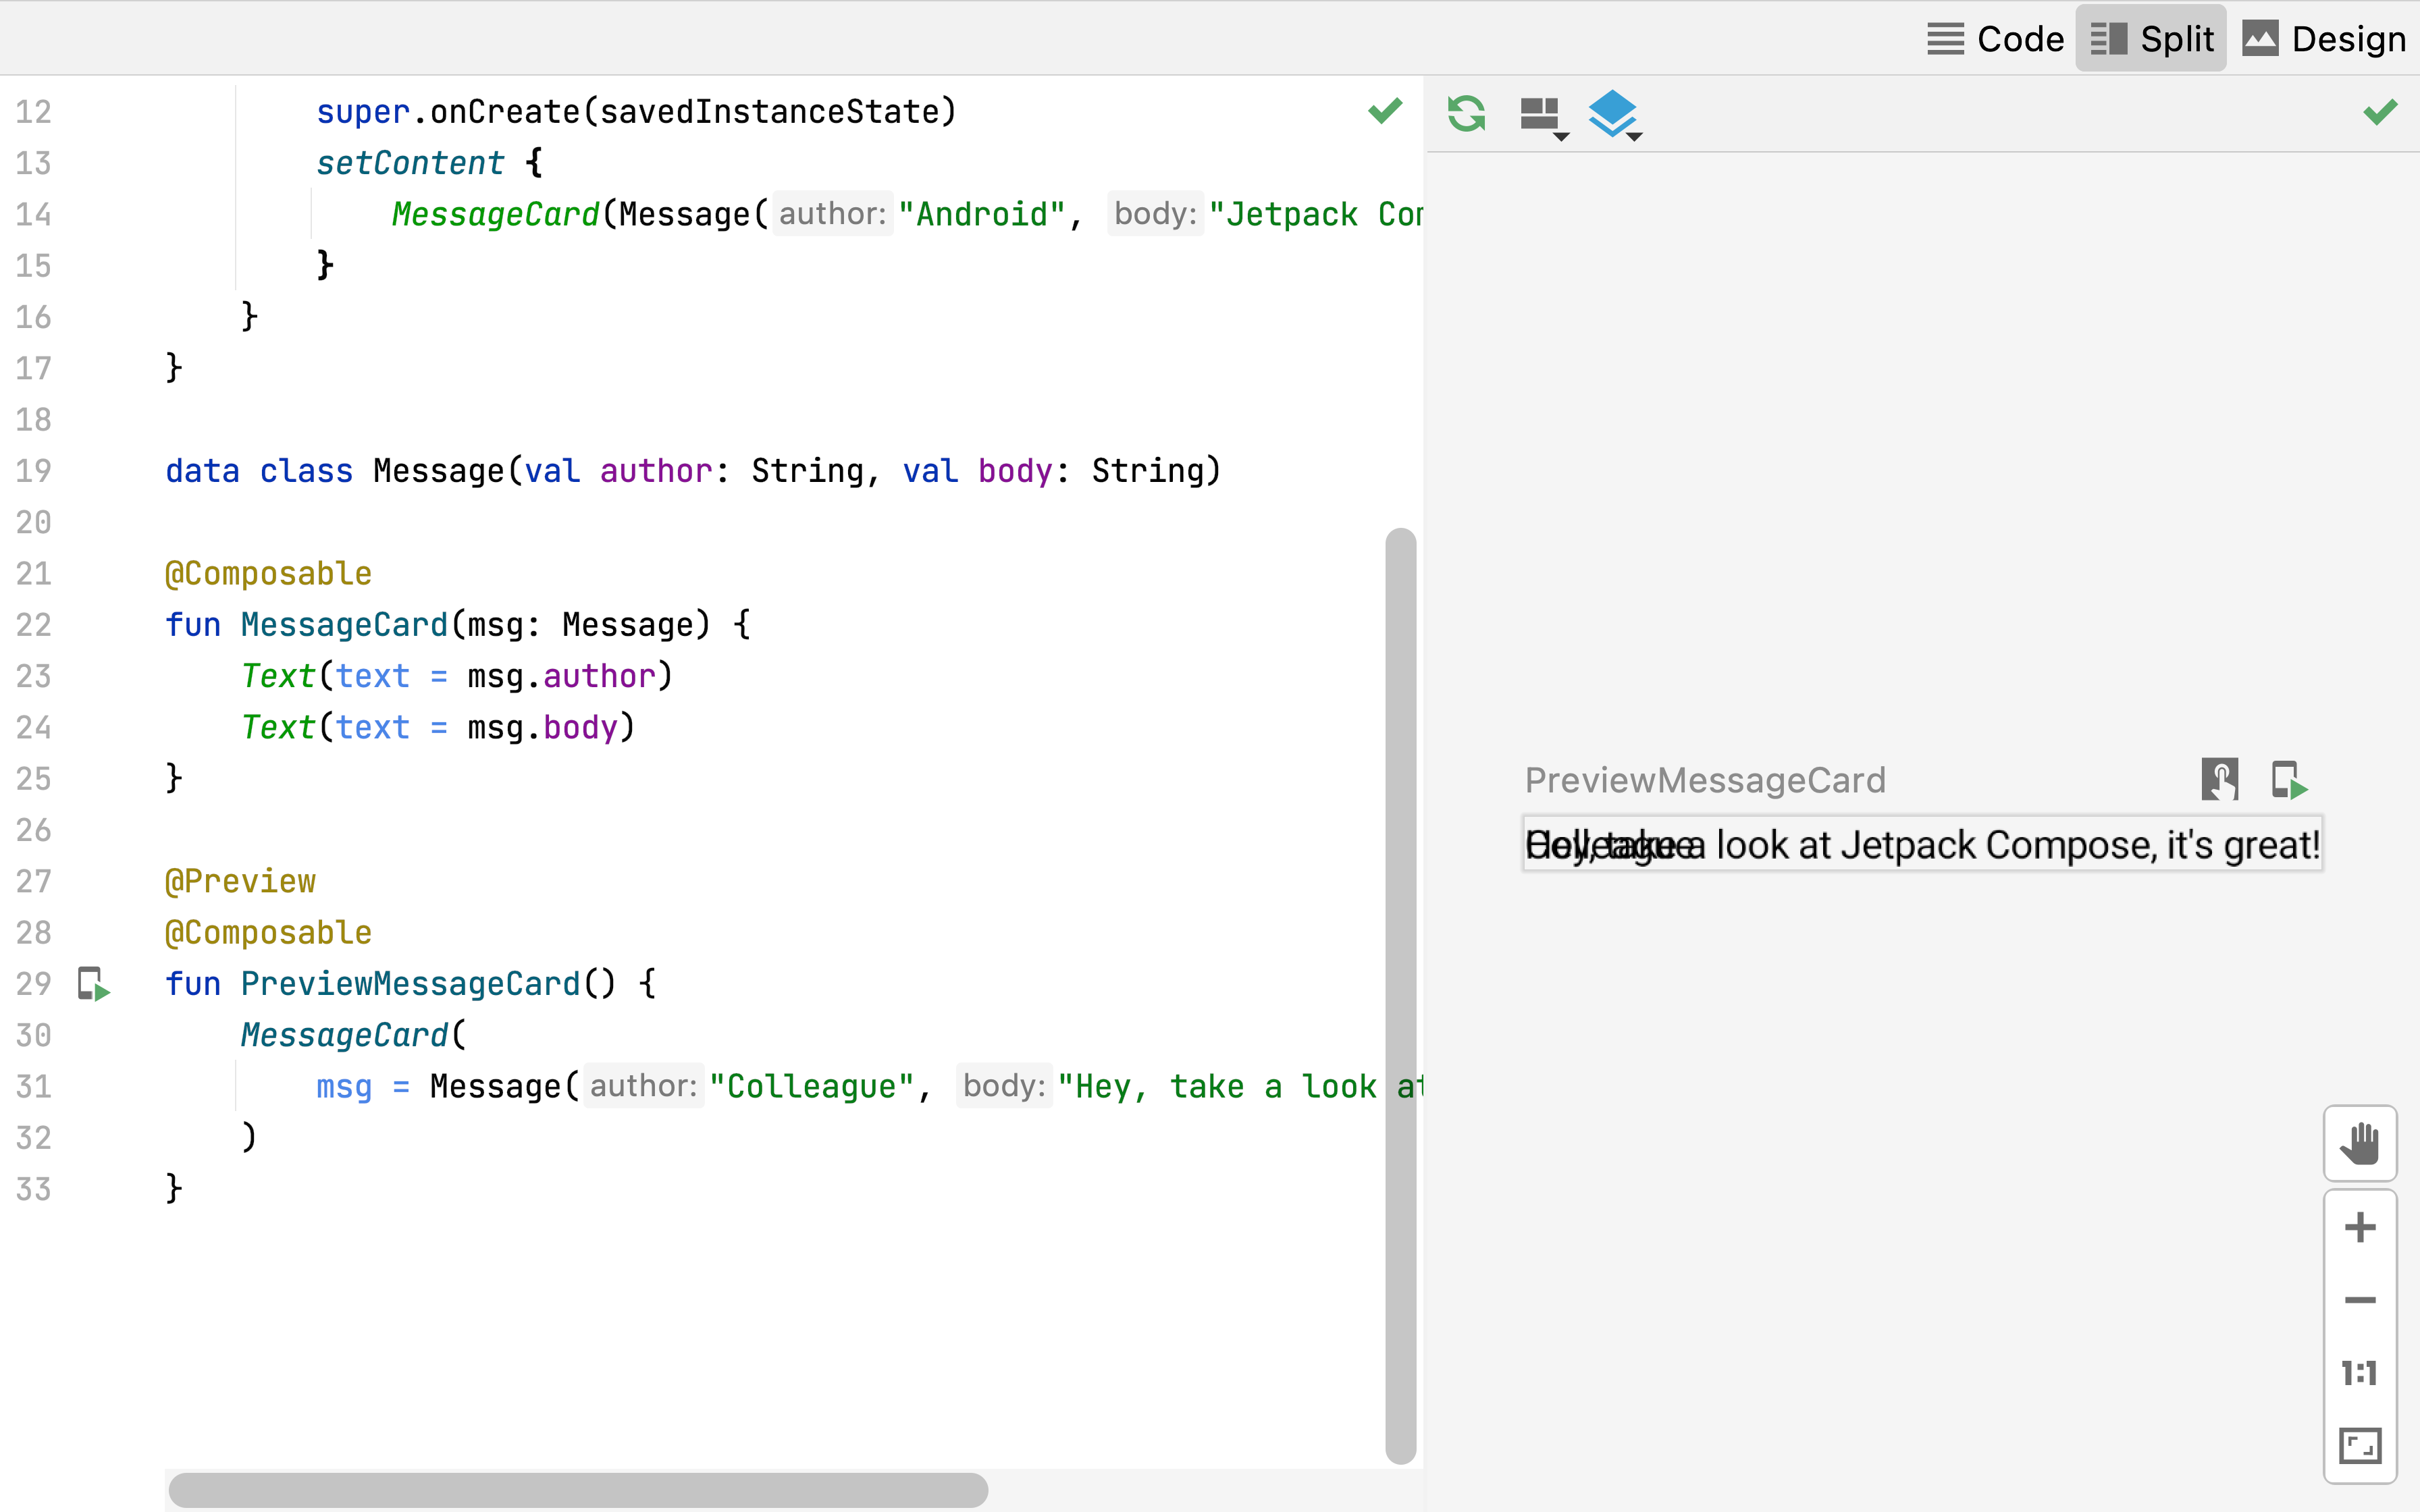
@Preview 注解允许您在 Android Studio 中预览可组合函数,而无需构建并将应用安装到 Android 设备或模拟器上。该注解必须用于不接受参数的可组合函数。因此,您不能直接预览 MessageCard 函数。相反,请创建第二个名为 PreviewMessageCard 的函数,该函数调用 MessageCard 并带有一个适当的参数。在 @Composable 之前添加 @Preview 注解。
// ...
import androidx.compose.ui.tooling.preview.Preview

@Composable
fun MessageCard(name: String) {
    Text(text = "Hello $name!")
}

@Preview
@Composable
fun PreviewMessageCard() {
    MessageCard("Android")
}

重新构建您的项目。应用本身不会改变,因为新的 PreviewMessageCard 函数未在任何地方调用,但 Android Studio 会添加一个预览窗口,您可以通过点击分屏(设计/代码)视图来展开该窗口。此窗口显示由标记有 @Preview 注解的可组合函数创建的 UI 元素的预览。要随时更新预览,请点击预览窗口顶部的刷新按钮。
import android.os.Bundle
import androidx.activity.ComponentActivity
import androidx.activity.compose.setContent
import androidx.compose.material3.Text

class MainActivity : ComponentActivity() {
    override fun onCreate(savedInstanceState: Bundle?) {
        super.onCreate(savedInstanceState)
        setContent {
            Text("Hello world!")
        }
    }
}

// ...
import androidx.compose.runtime.Composable

class MainActivity : ComponentActivity() {
    override fun onCreate(savedInstanceState: Bundle?) {
        super.onCreate(savedInstanceState)
        setContent {
            MessageCard("Android")
        }
    }
}

@Composable
fun MessageCard(name: String) {
    Text(text = "Hello $name!")
}

// ...
import androidx.compose.ui.tooling.preview.Preview

@Composable
fun MessageCard(name: String) {
    Text(text = "Hello $name!")
}

@Preview
@Composable
fun PreviewMessageCard() {
    MessageCard("Android")
}


添加多个文本
到目前为止,您已经构建了您的第一个可组合函数和预览!为了发现更多 Jetpack Compose 功能,您将构建一个简单的消息屏幕,其中包含一个消息列表,该列表可以通过一些动画进行扩展。
首先,通过显示消息作者的姓名和消息内容来使消息可组合项更丰富。您需要首先将可组合参数更改为接受 Message 对象而不是 String,并在 MessageCard 可组合项内部添加另一个 Text 可组合项。请务必也更新预览。
// ...

class MainActivity : ComponentActivity() {
    override fun onCreate(savedInstanceState: Bundle?) {
        super.onCreate(savedInstanceState)
        setContent {
            MessageCard(Message("Android", "Jetpack Compose"))
        }
    }
}

data class Message(val author: String, val body: String)

@Composable
fun MessageCard(msg: Message) {
    Text(text = msg.author)
    Text(text = msg.body)
}

@Preview
@Composable
fun PreviewMessageCard() {
    MessageCard(
        msg = Message("Lexi", "Hey, take a look at Jetpack Compose, it's great!")
    )
}
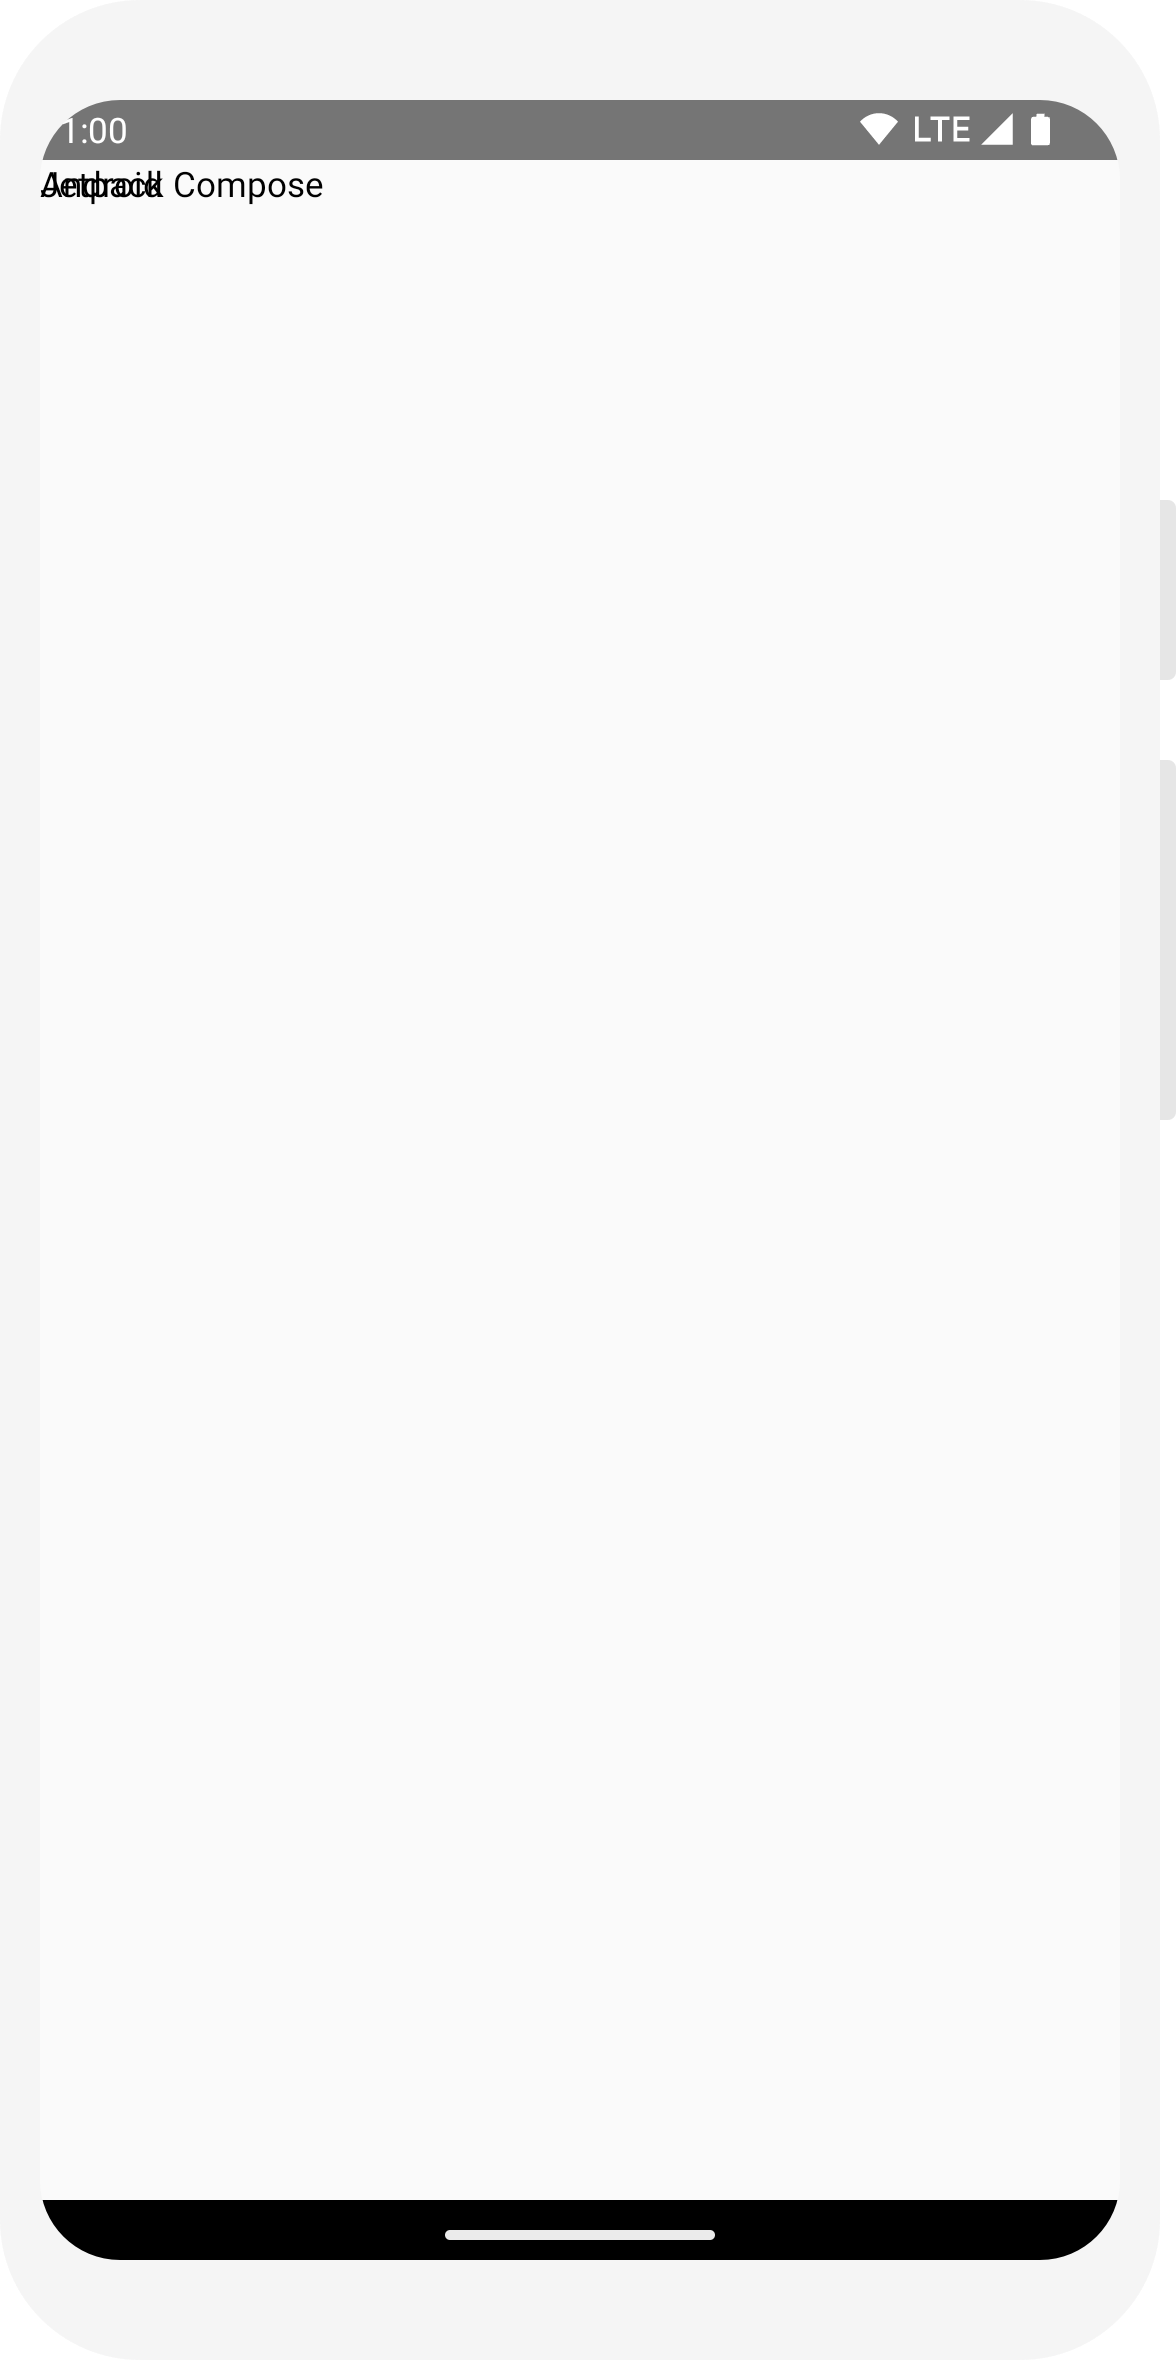
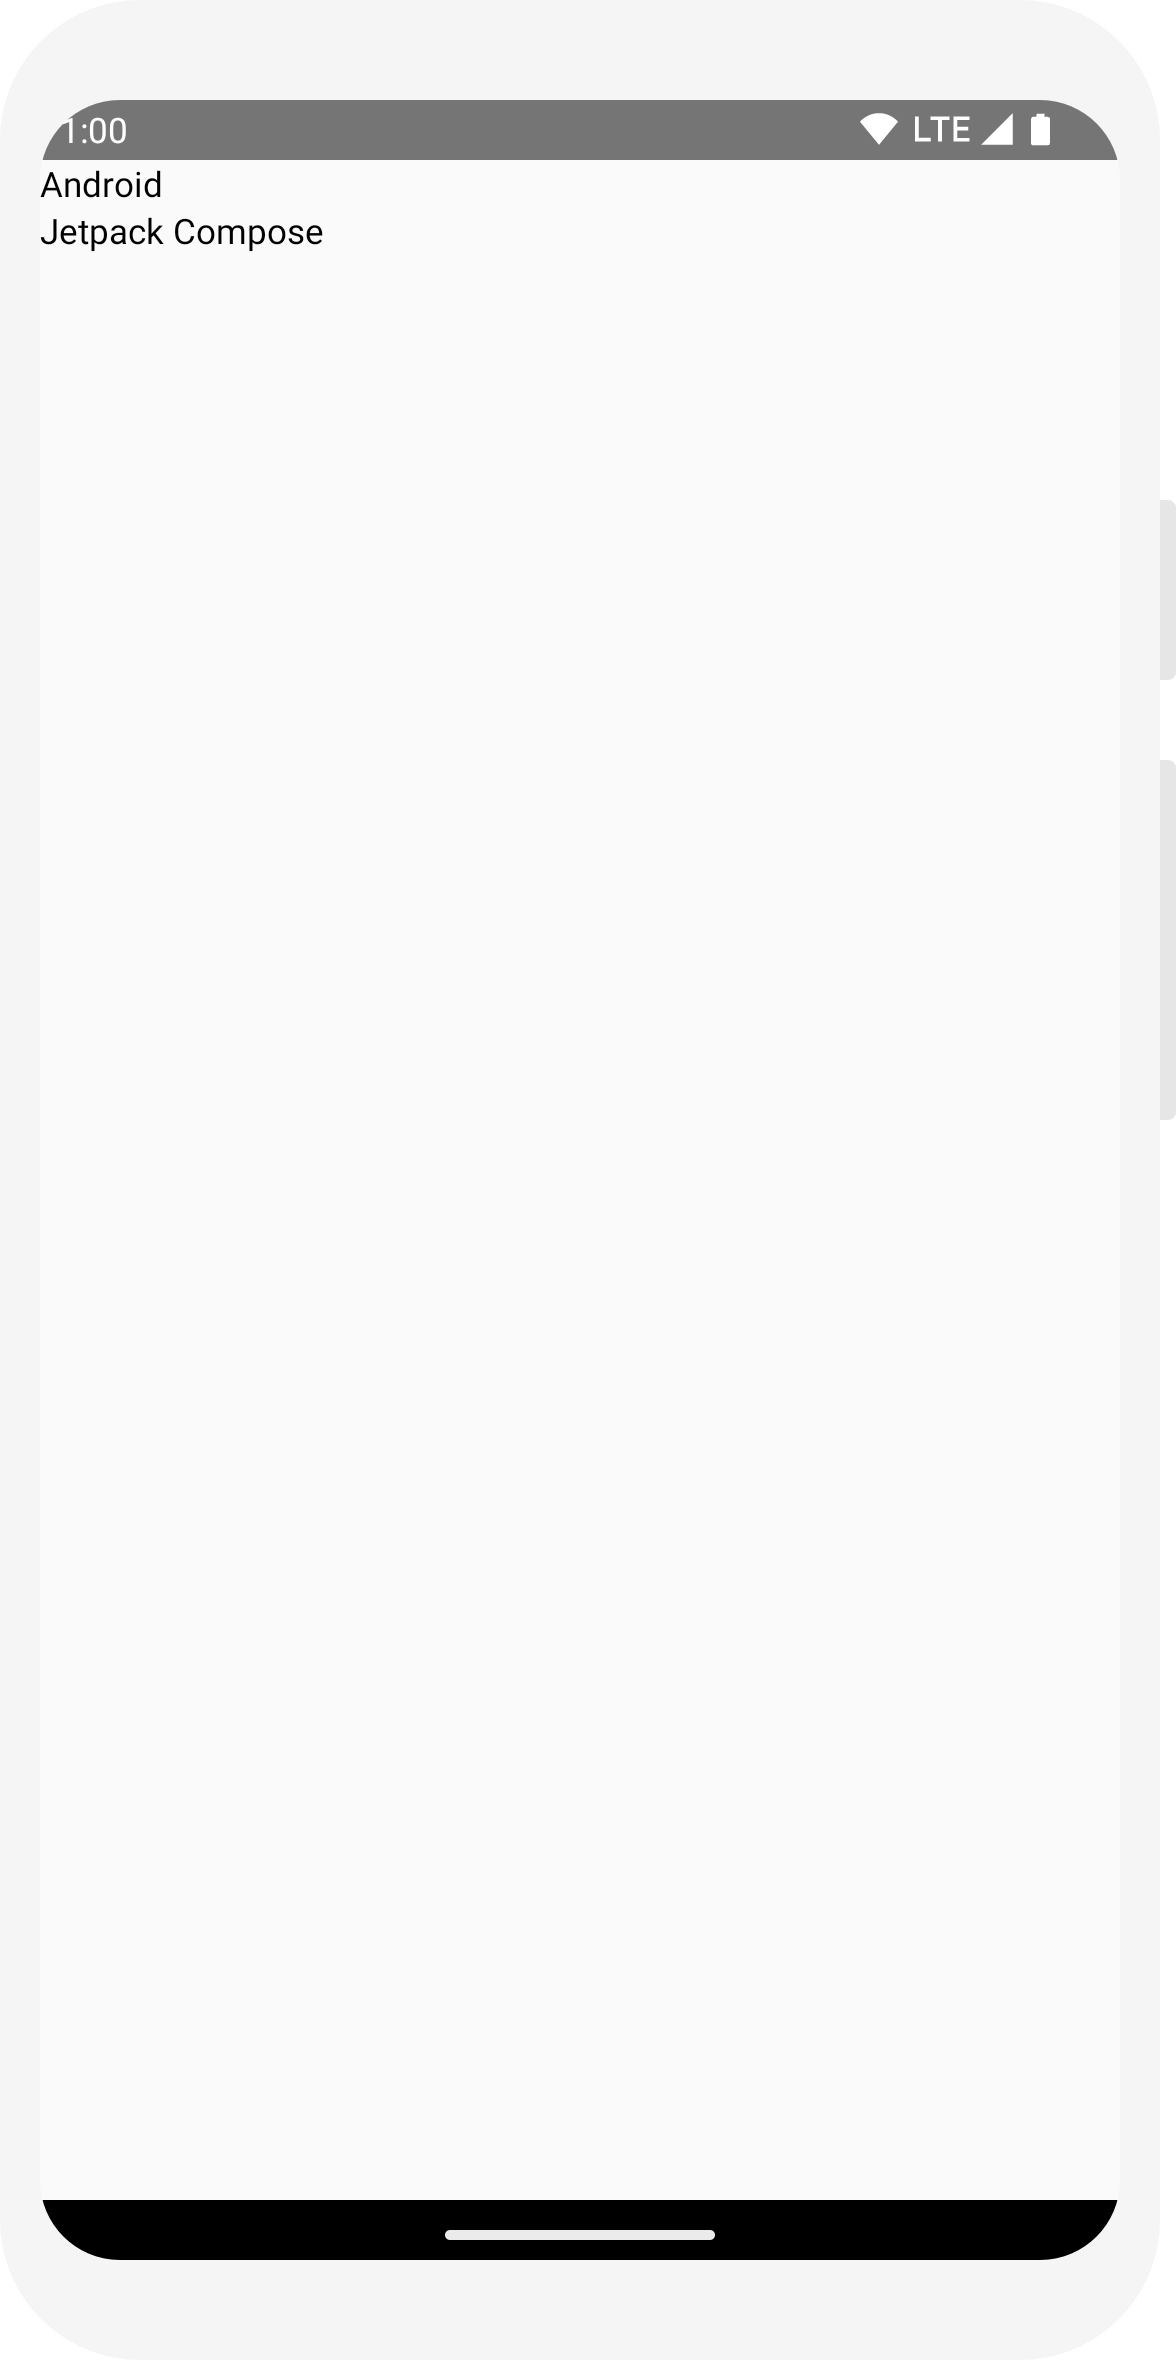
此代码在内容视图中创建了两个文本元素。然而,由于您没有提供任何关于如何排列它们的信息,这些文本元素相互重叠,导致文本不可读。
添加图像元素
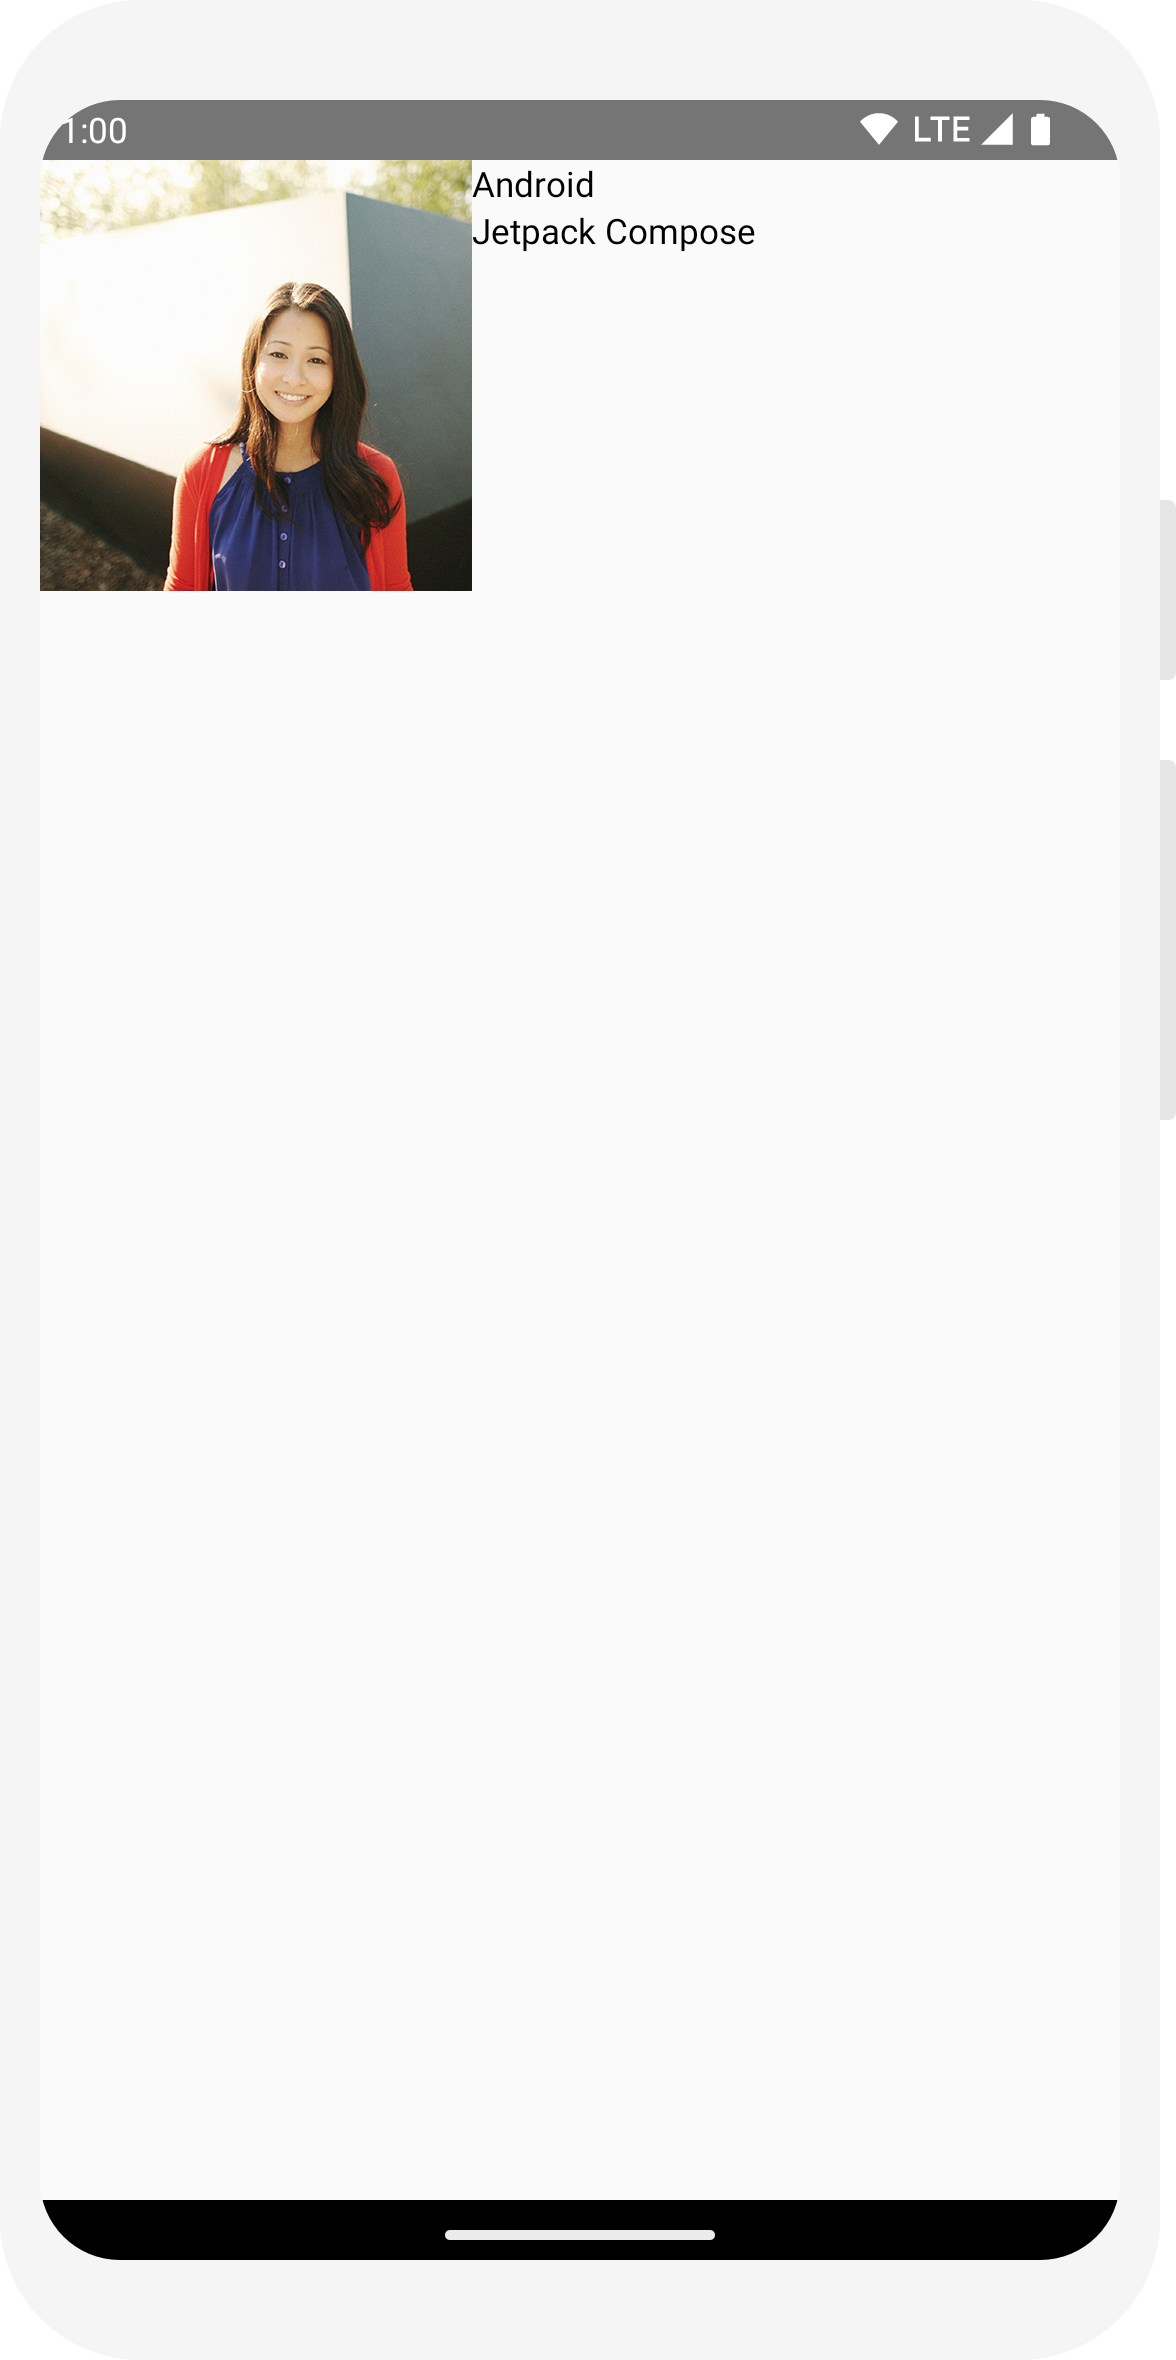
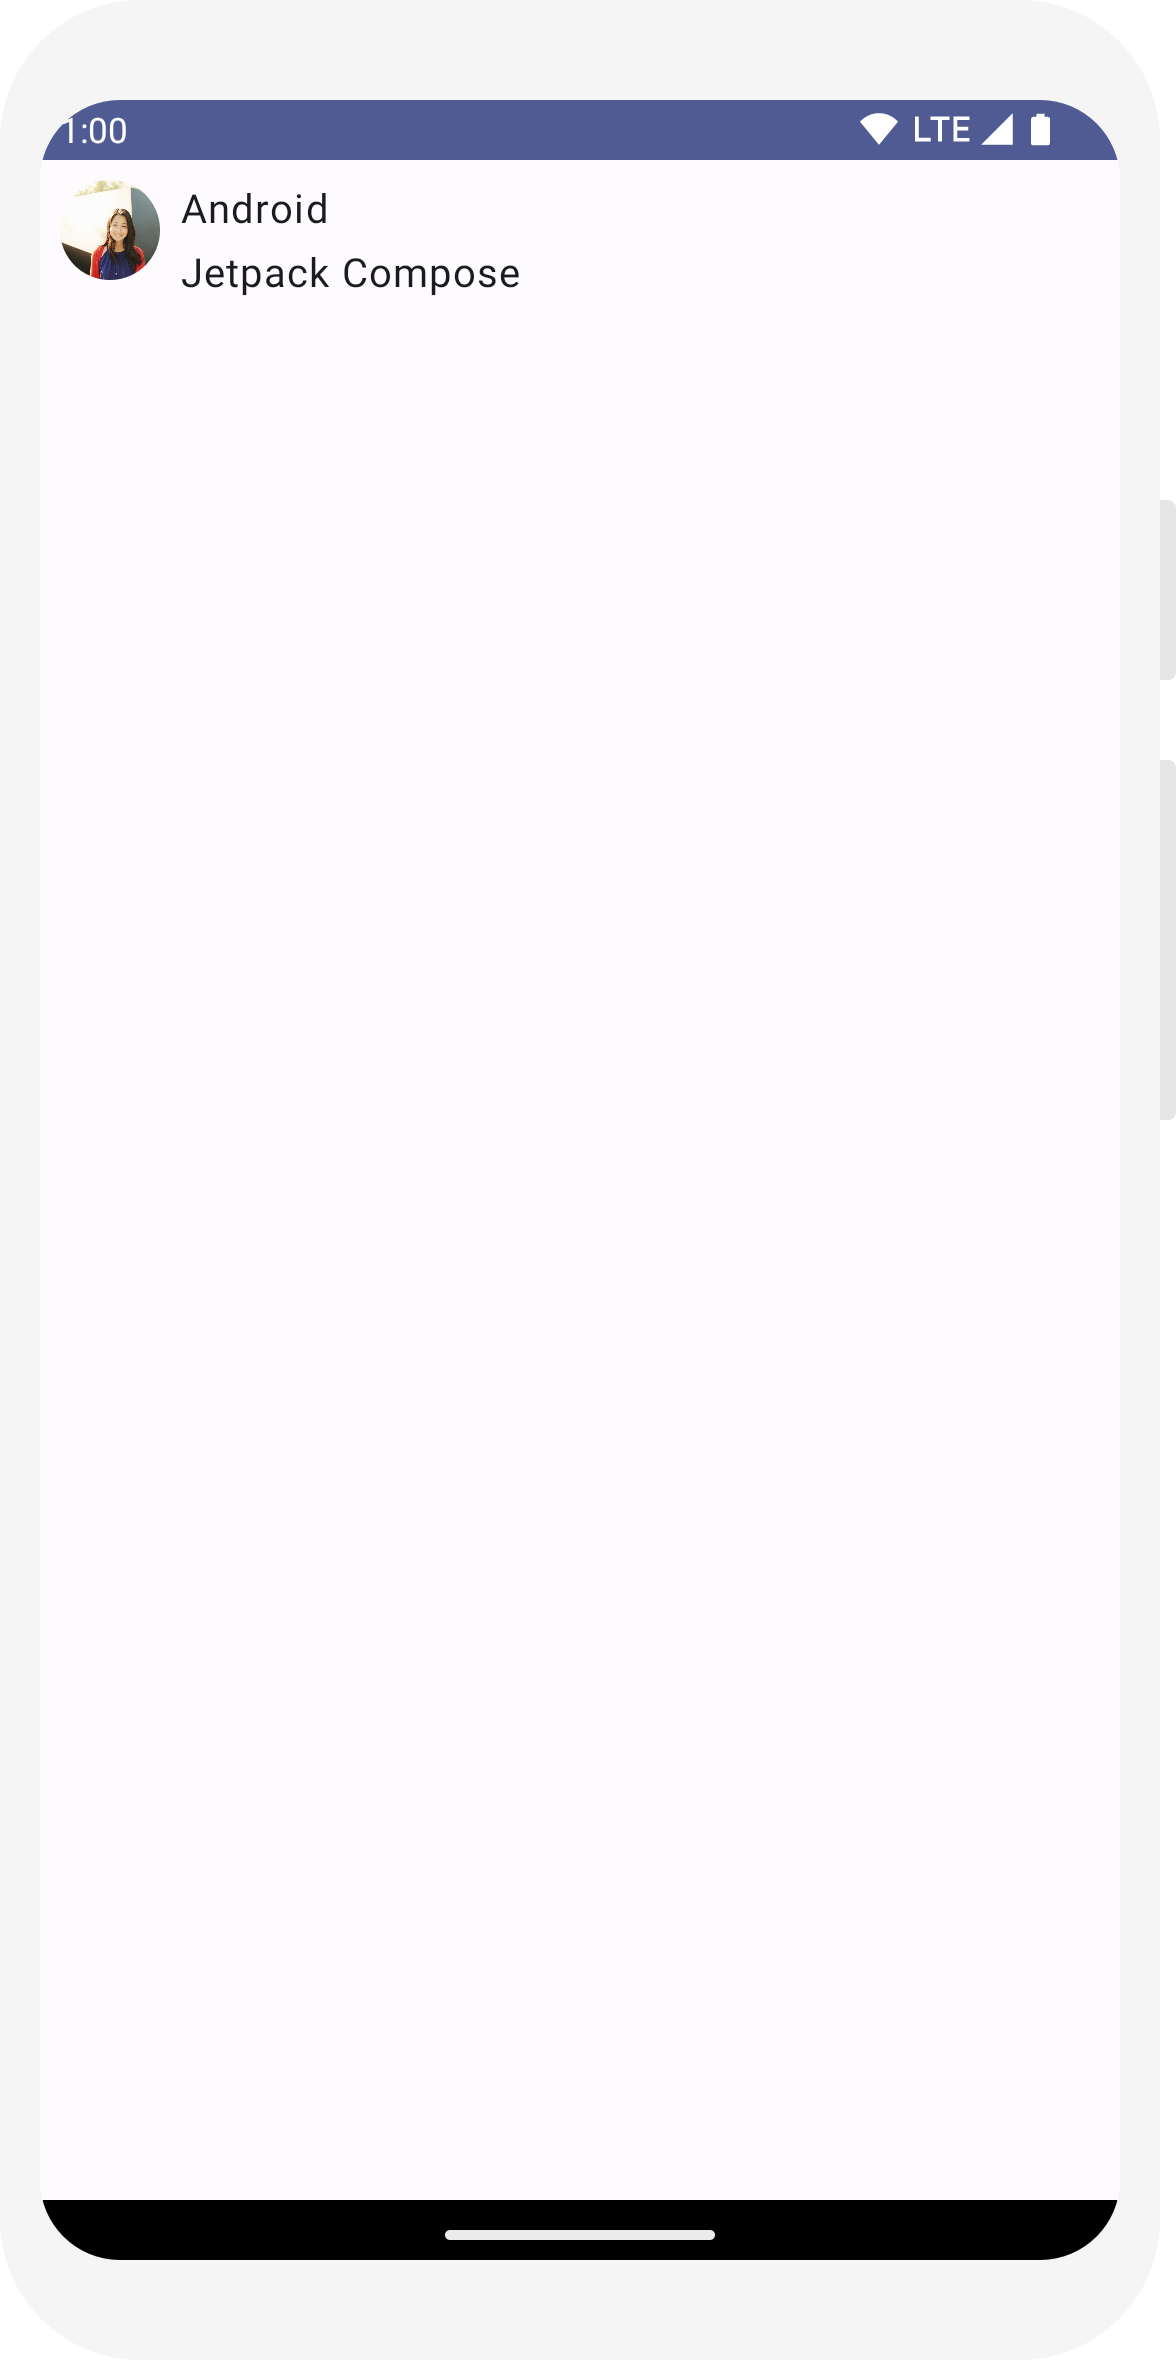
// ... import androidx.compose.foundation.Image import androidx.compose.foundation.layout.Row import androidx.compose.ui.res.painterResource @Composable fun MessageCard(msg: Message) { Row { Image( painter = painterResource(R.drawable.profile_picture), contentDescription = "Contact profile picture", ) Column { Text(text = msg.author) Text(text = msg.body) } } }
配置您的布局
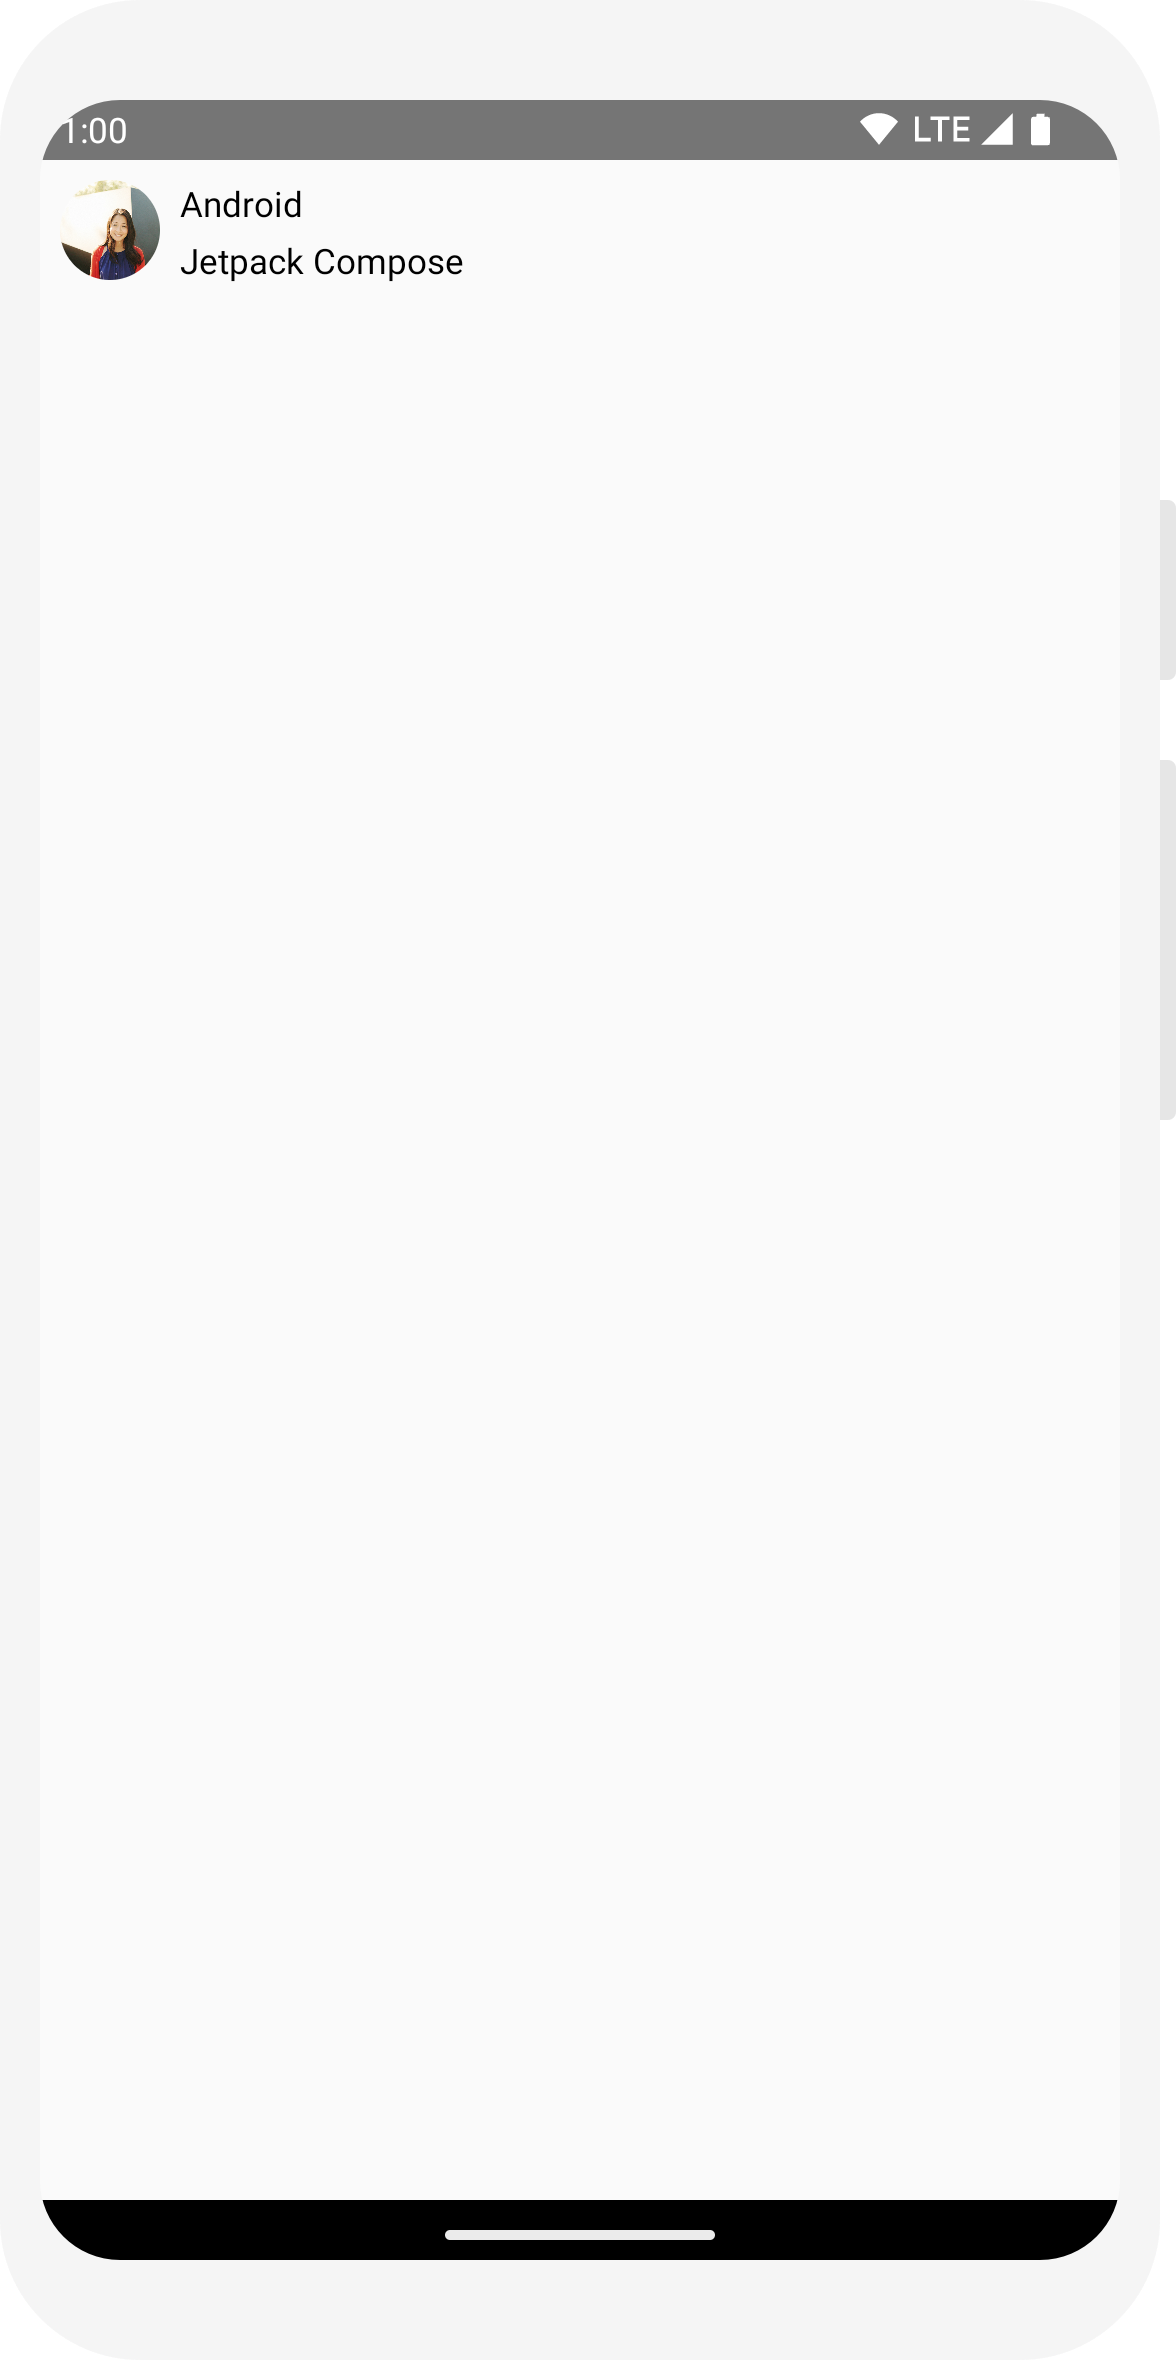
您的消息布局结构正确,但其元素间距不佳,并且图片过大!为了装饰或配置可组合项,Compose 使用修饰符。它们允许您更改可组合项的大小、布局、外观或添加高级交互,例如使元素可点击。您可以将它们链接起来以创建更丰富的可组合项。您将使用其中一些来改进布局。
// ... import androidx.compose.foundation.layout.Spacer import androidx.compose.foundation.layout.height import androidx.compose.foundation.layout.padding import androidx.compose.foundation.layout.size import androidx.compose.foundation.layout.width import androidx.compose.foundation.shape.CircleShape import androidx.compose.ui.Modifier import androidx.compose.ui.draw.clip import androidx.compose.ui.unit.dp @Composable fun MessageCard(msg: Message) { // Add padding around our message Row(modifier = Modifier.padding(all = 8.dp)) { Image( painter = painterResource(R.drawable.profile_picture), contentDescription = "Contact profile picture", modifier = Modifier // Set image size to 40 dp .size(40.dp) // Clip image to be shaped as a circle .clip(CircleShape) ) // Add a horizontal space between the image and the column Spacer(modifier = Modifier.width(8.dp)) Column { Text(text = msg.author) // Add a vertical space between the author and message texts Spacer(modifier = Modifier.height(4.dp)) Text(text = msg.body) } } }
// ... class MainActivity : ComponentActivity() { override fun onCreate(savedInstanceState: Bundle?) { super.onCreate(savedInstanceState) setContent { MessageCard(Message("Android", "Jetpack Compose")) } } } data class Message(val author: String, val body: String) @Composable fun MessageCard(msg: Message) { Text(text = msg.author) Text(text = msg.body) } @Preview @Composable fun PreviewMessageCard() { MessageCard( msg = Message("Lexi", "Hey, take a look at Jetpack Compose, it's great!") ) }

// ...
import androidx.compose.foundation.layout.Column

@Composable
fun MessageCard(msg: Message) {
    Column {
        Text(text = msg.author)
        Text(text = msg.body)
    }
}
// ...
import androidx.compose.foundation.Image
import androidx.compose.foundation.layout.Row
import androidx.compose.ui.res.painterResource

@Composable
fun MessageCard(msg: Message) {
    Row {
        Image(
            painter = painterResource(R.drawable.profile_picture),
            contentDescription = "Contact profile picture",
        )

       Column {
            Text(text = msg.author)
            Text(text = msg.body)
        }

    }

}

// ...
import androidx.compose.foundation.layout.Spacer
import androidx.compose.foundation.layout.height
import androidx.compose.foundation.layout.padding
import androidx.compose.foundation.layout.size
import androidx.compose.foundation.layout.width
import androidx.compose.foundation.shape.CircleShape
import androidx.compose.ui.Modifier
import androidx.compose.ui.draw.clip
import androidx.compose.ui.unit.dp

@Composable
fun MessageCard(msg: Message) {
    // Add padding around our message
    Row(modifier = Modifier.padding(all = 8.dp)) {
        Image(
            painter = painterResource(R.drawable.profile_picture),
            contentDescription = "Contact profile picture",
            modifier = Modifier
                // Set image size to 40 dp
                .size(40.dp)
                // Clip image to be shaped as a circle
                .clip(CircleShape)
        )

        // Add a horizontal space between the image and the column
        Spacer(modifier = Modifier.width(8.dp))

        Column {
            Text(text = msg.author)
            // Add a vertical space between the author and message texts
            Spacer(modifier = Modifier.height(4.dp))
            Text(text = msg.body)
        }
    }
}

第 3 课:Material Design
Compose 的构建旨在支持 Material Design 原则。其许多 UI 元素都开箱即用地实现了 Material Design。在本课程中,您将使用 Material Design 微件来设计您的应用样式。

使用 Material Design
您的消息设计现在有了布局,但看起来还不够好。
Jetpack Compose 开箱即用地提供了 Material Design 3 及其 UI 元素的实现。您将使用 Material Design 样式来改善 MessageCard 可组合项的外观。
首先,将 MessageCard 函数与项目中创建的 Material 主题 ComposeTutorialTheme 以及 Surface 进行封装。在 @Preview 和 setContent 函数中都要这样做。这样做将允许您的可组合项继承应用主题中定义的样式,从而确保整个应用的一致性。
Material Design 围绕三个支柱构建:Color(颜色)、Typography(排版)和 Shape(形状)。您将逐一添加它们。
注意: 空 Compose Activity 模板为您的项目生成一个默认主题,允许您自定义 MaterialTheme。如果您的项目名称与 ComposeTutorial 不同,您可以在 ui.theme 子包中的 Theme.kt 文件中找到您的自定义主题。
// ...

class MainActivity : ComponentActivity() {
    override fun onCreate(savedInstanceState: Bundle?) {
        super.onCreate(savedInstanceState)
        setContent {
            ComposeTutorialTheme {
                Surface(modifier = Modifier.fillMaxSize()) {
                    MessageCard(Message("Android", "Jetpack Compose"))
                }
            }
        }
    }
}

@Preview
@Composable
fun PreviewMessageCard() {
    ComposeTutorialTheme {
        Surface {
            MessageCard(
                msg = Message("Lexi", "Take a look at Jetpack Compose, it's great!")
            )
        }
    }
}
颜色
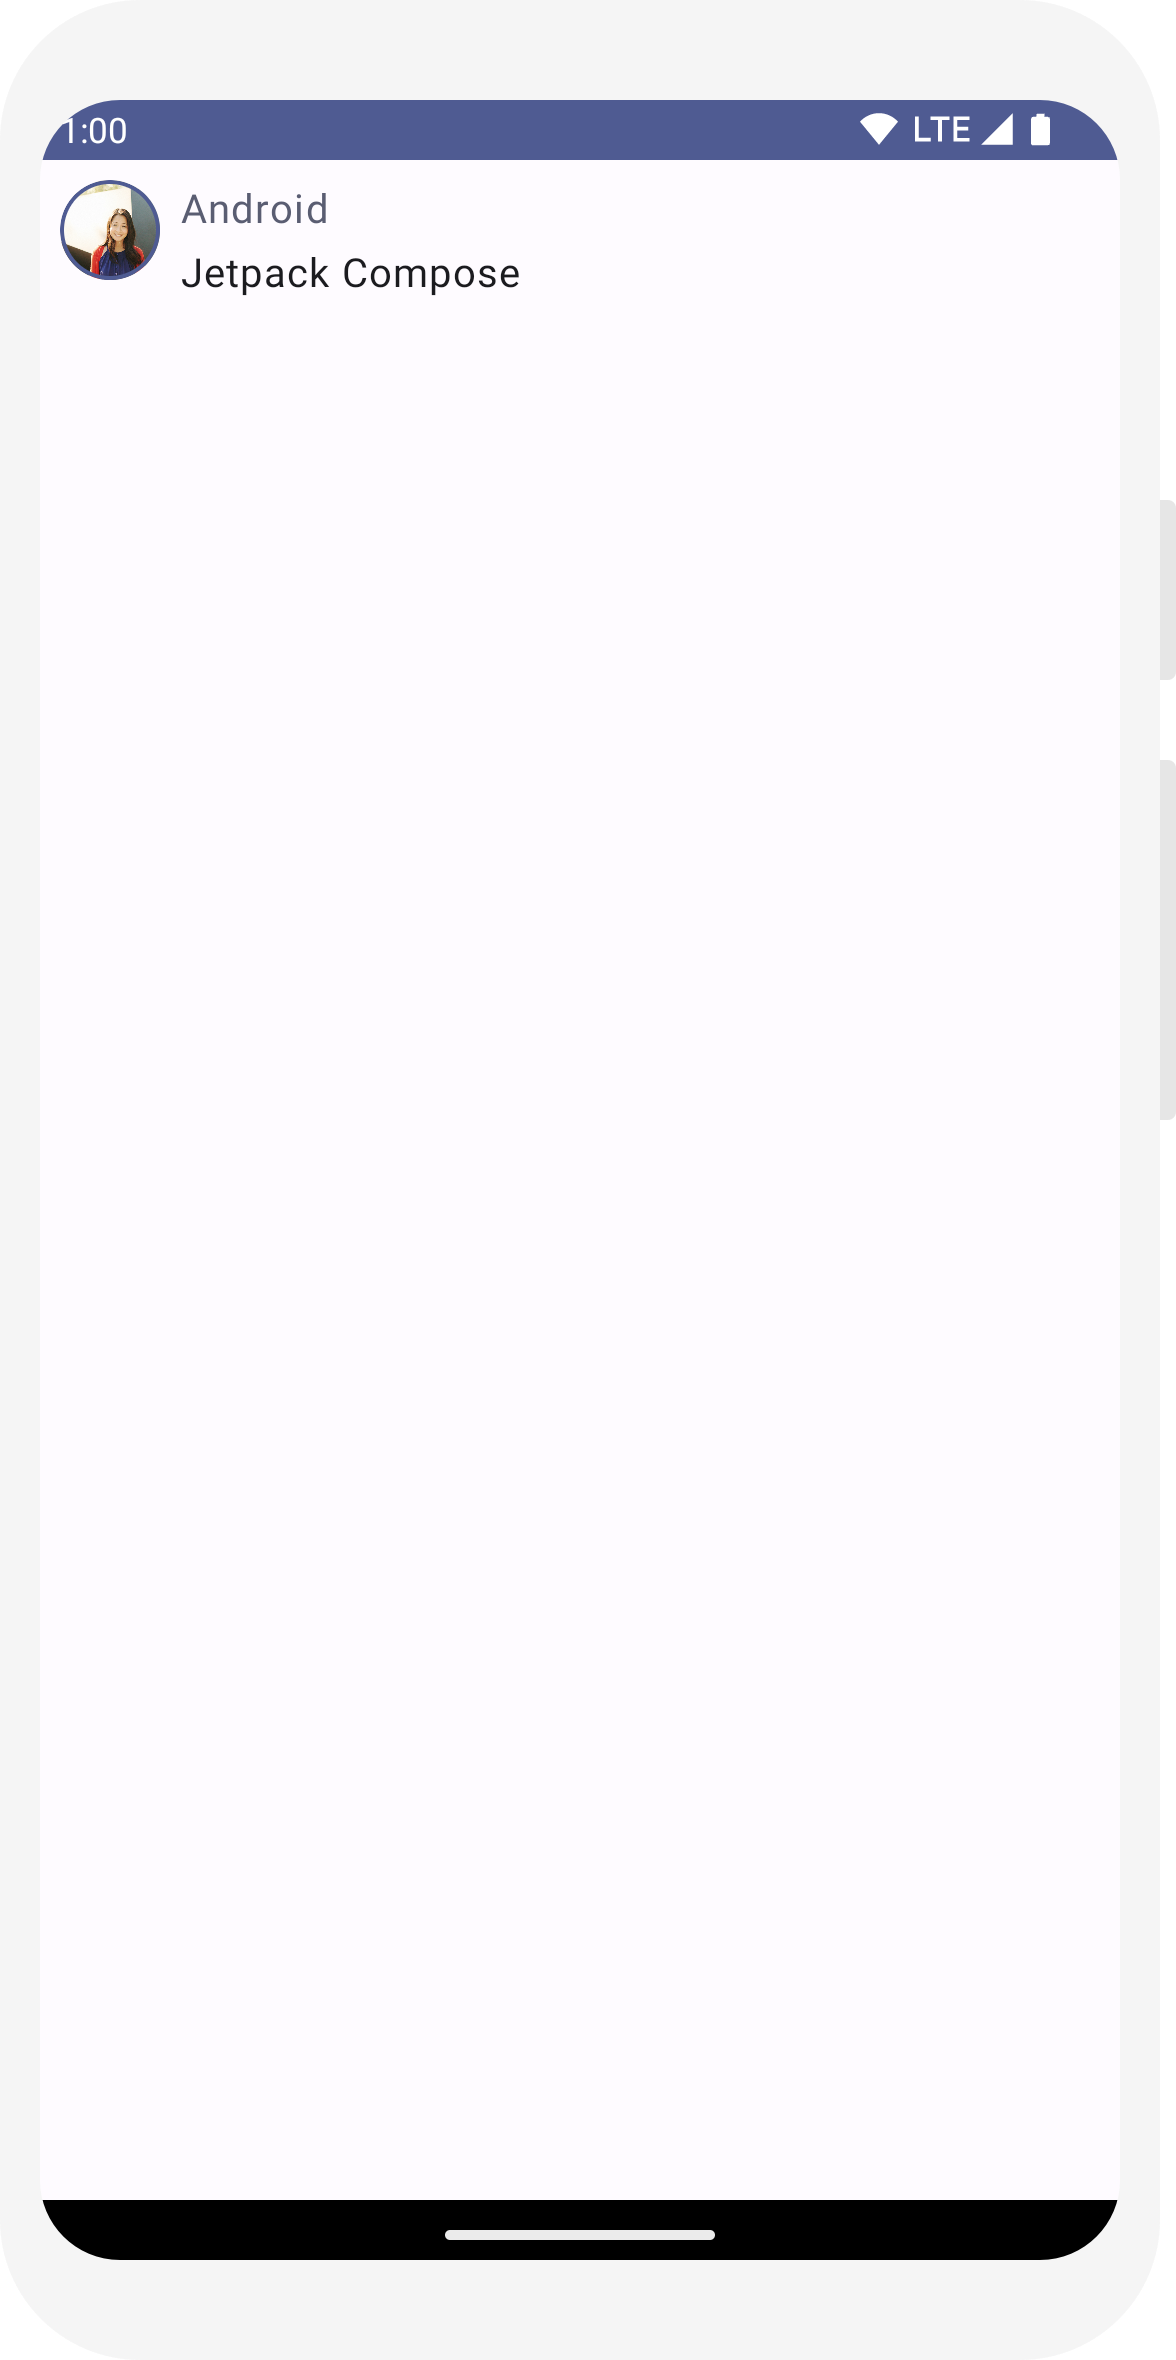
使用 MaterialTheme.colorScheme 通过封装主题中的颜色进行样式设置。您可以在需要颜色的任何地方使用这些主题值。此示例使用动态主题颜色(由设备偏好设置定义)。您可以在 MaterialTheme.kt 文件中将 dynamicColor 设置为 false 来更改此设置。
为标题设置样式并为图像添加边框。
// ...
import androidx.compose.foundation.border
import androidx.compose.material3.MaterialTheme

@Composable
fun MessageCard(msg: Message) {
   Row(modifier = Modifier.padding(all = 8.dp)) {
       Image(
           painter = painterResource(R.drawable.profile_picture),
           contentDescription = null,
           modifier = Modifier
               .size(40.dp)
               .clip(CircleShape)
               .border(1.5.dp, MaterialTheme.colorScheme.primary, CircleShape)
       )

       Spacer(modifier = Modifier.width(8.dp))

       Column {
           Text(
               text = msg.author,
               color = MaterialTheme.colorScheme.secondary
           )

           Spacer(modifier = Modifier.height(4.dp))
           Text(text = msg.body)
       }
   }
}
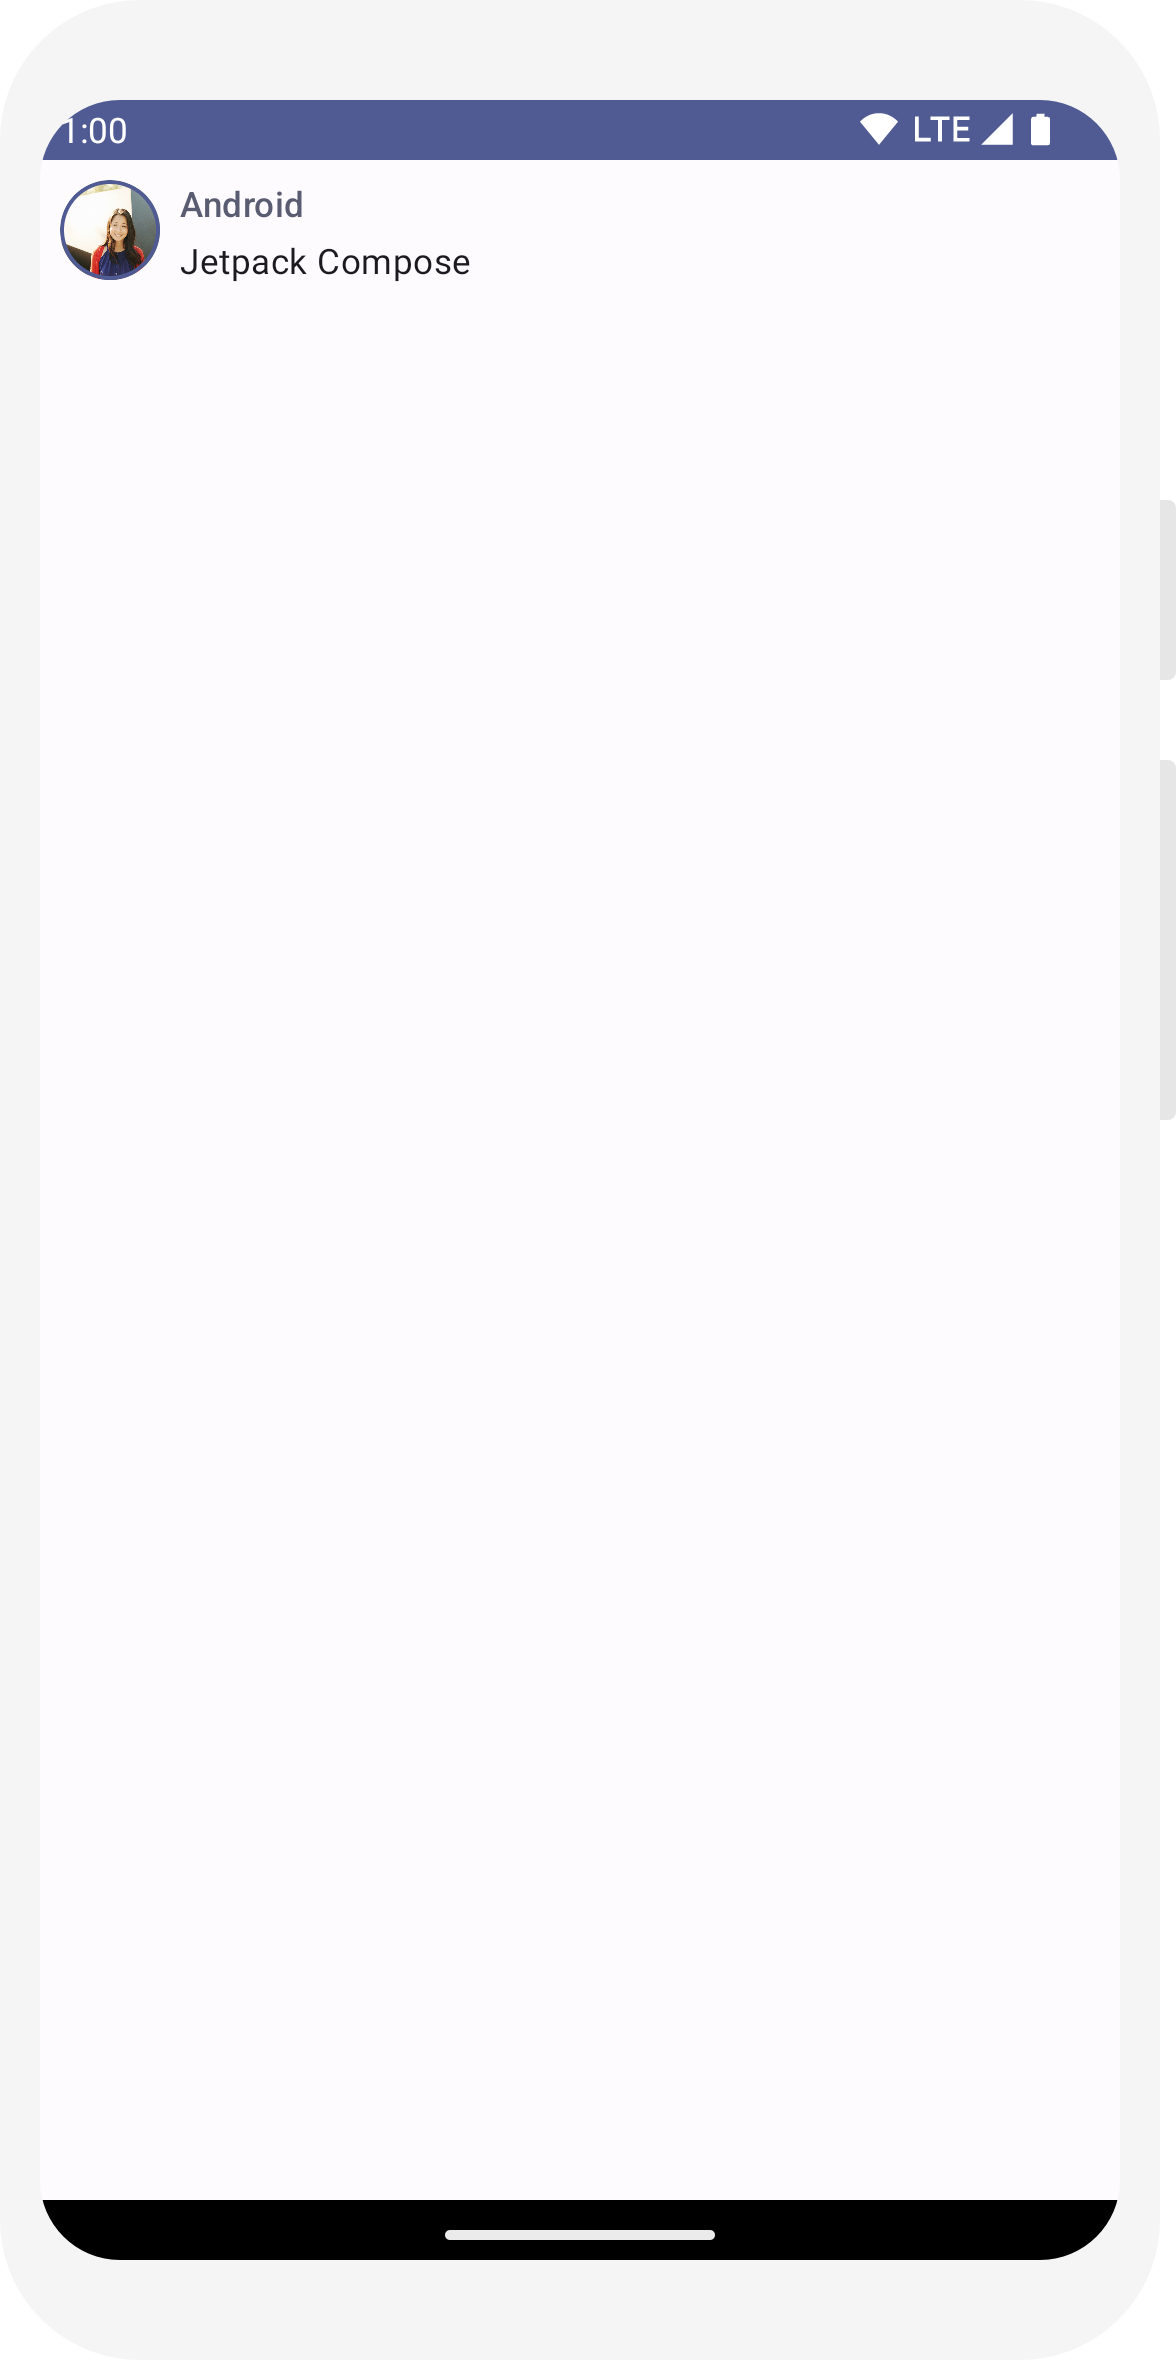
排版
Material 排版样式在 MaterialTheme 中可用,只需将它们添加到 Text 可组合项即可。
// ...

@Composable
fun MessageCard(msg: Message) {
   Row(modifier = Modifier.padding(all = 8.dp)) {
       Image(
           painter = painterResource(R.drawable.profile_picture),
           contentDescription = null,
           modifier = Modifier
               .size(40.dp)
               .clip(CircleShape)
               .border(1.5.dp, MaterialTheme.colorScheme.primary, CircleShape)
       )
       Spacer(modifier = Modifier.width(8.dp))

       Column {
           Text(
               text = msg.author,
               color = MaterialTheme.colorScheme.secondary,
               style = MaterialTheme.typography.titleSmall
           )

           Spacer(modifier = Modifier.height(4.dp))

           Text(
               text = msg.body,
               style = MaterialTheme.typography.bodyMedium
           )
       }
   }
}
形状
借助 Shape,您可以添加最后的润色。首先,将消息正文文本封装在一个 Surface 可组合项周围。这样做允许自定义消息正文的形状和高程。消息中还添加了内边距以获得更好的布局。
// ...
import androidx.compose.material3.Surface

@Composable
fun MessageCard(msg: Message) {
   Row(modifier = Modifier.padding(all = 8.dp)) {
       Image(
           painter = painterResource(R.drawable.profile_picture),
           contentDescription = null,
           modifier = Modifier
               .size(40.dp)
               .clip(CircleShape)
               .border(1.5.dp, MaterialTheme.colorScheme.primary, CircleShape)
       )
       Spacer(modifier = Modifier.width(8.dp))

       Column {
           Text(
               text = msg.author,
               color = MaterialTheme.colorScheme.secondary,
               style = MaterialTheme.typography.titleSmall
           )

           Spacer(modifier = Modifier.height(4.dp))

           Surface(shape = MaterialTheme.shapes.medium, shadowElevation = 1.dp) {
               Text(
                   text = msg.body,
                   modifier = Modifier.padding(all = 4.dp),
                   style = MaterialTheme.typography.bodyMedium
               )
           }
       }
   }
}
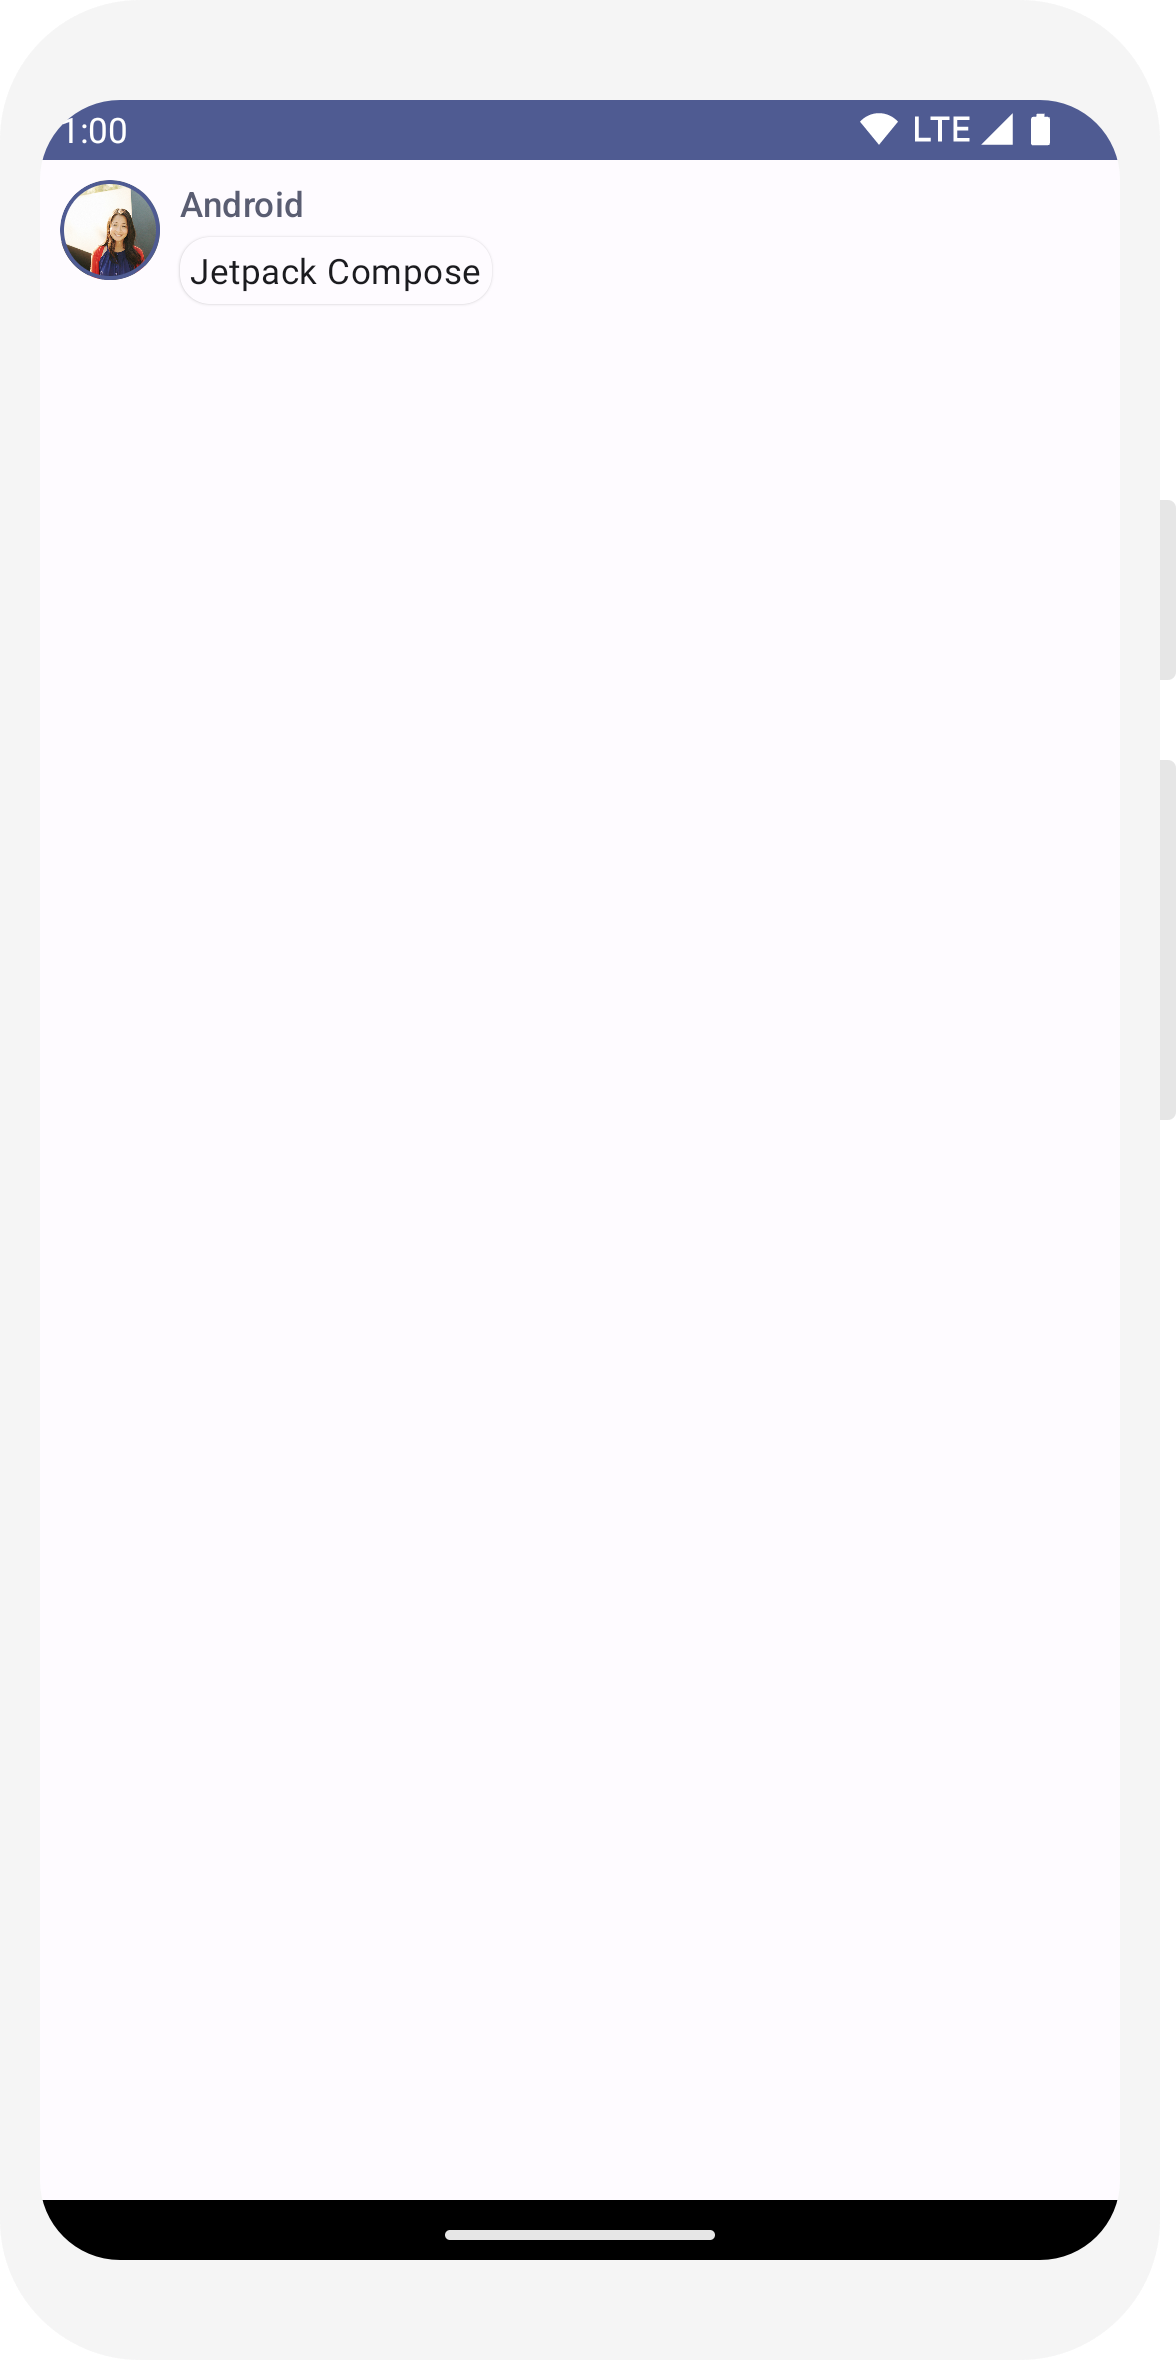
启用深色主题
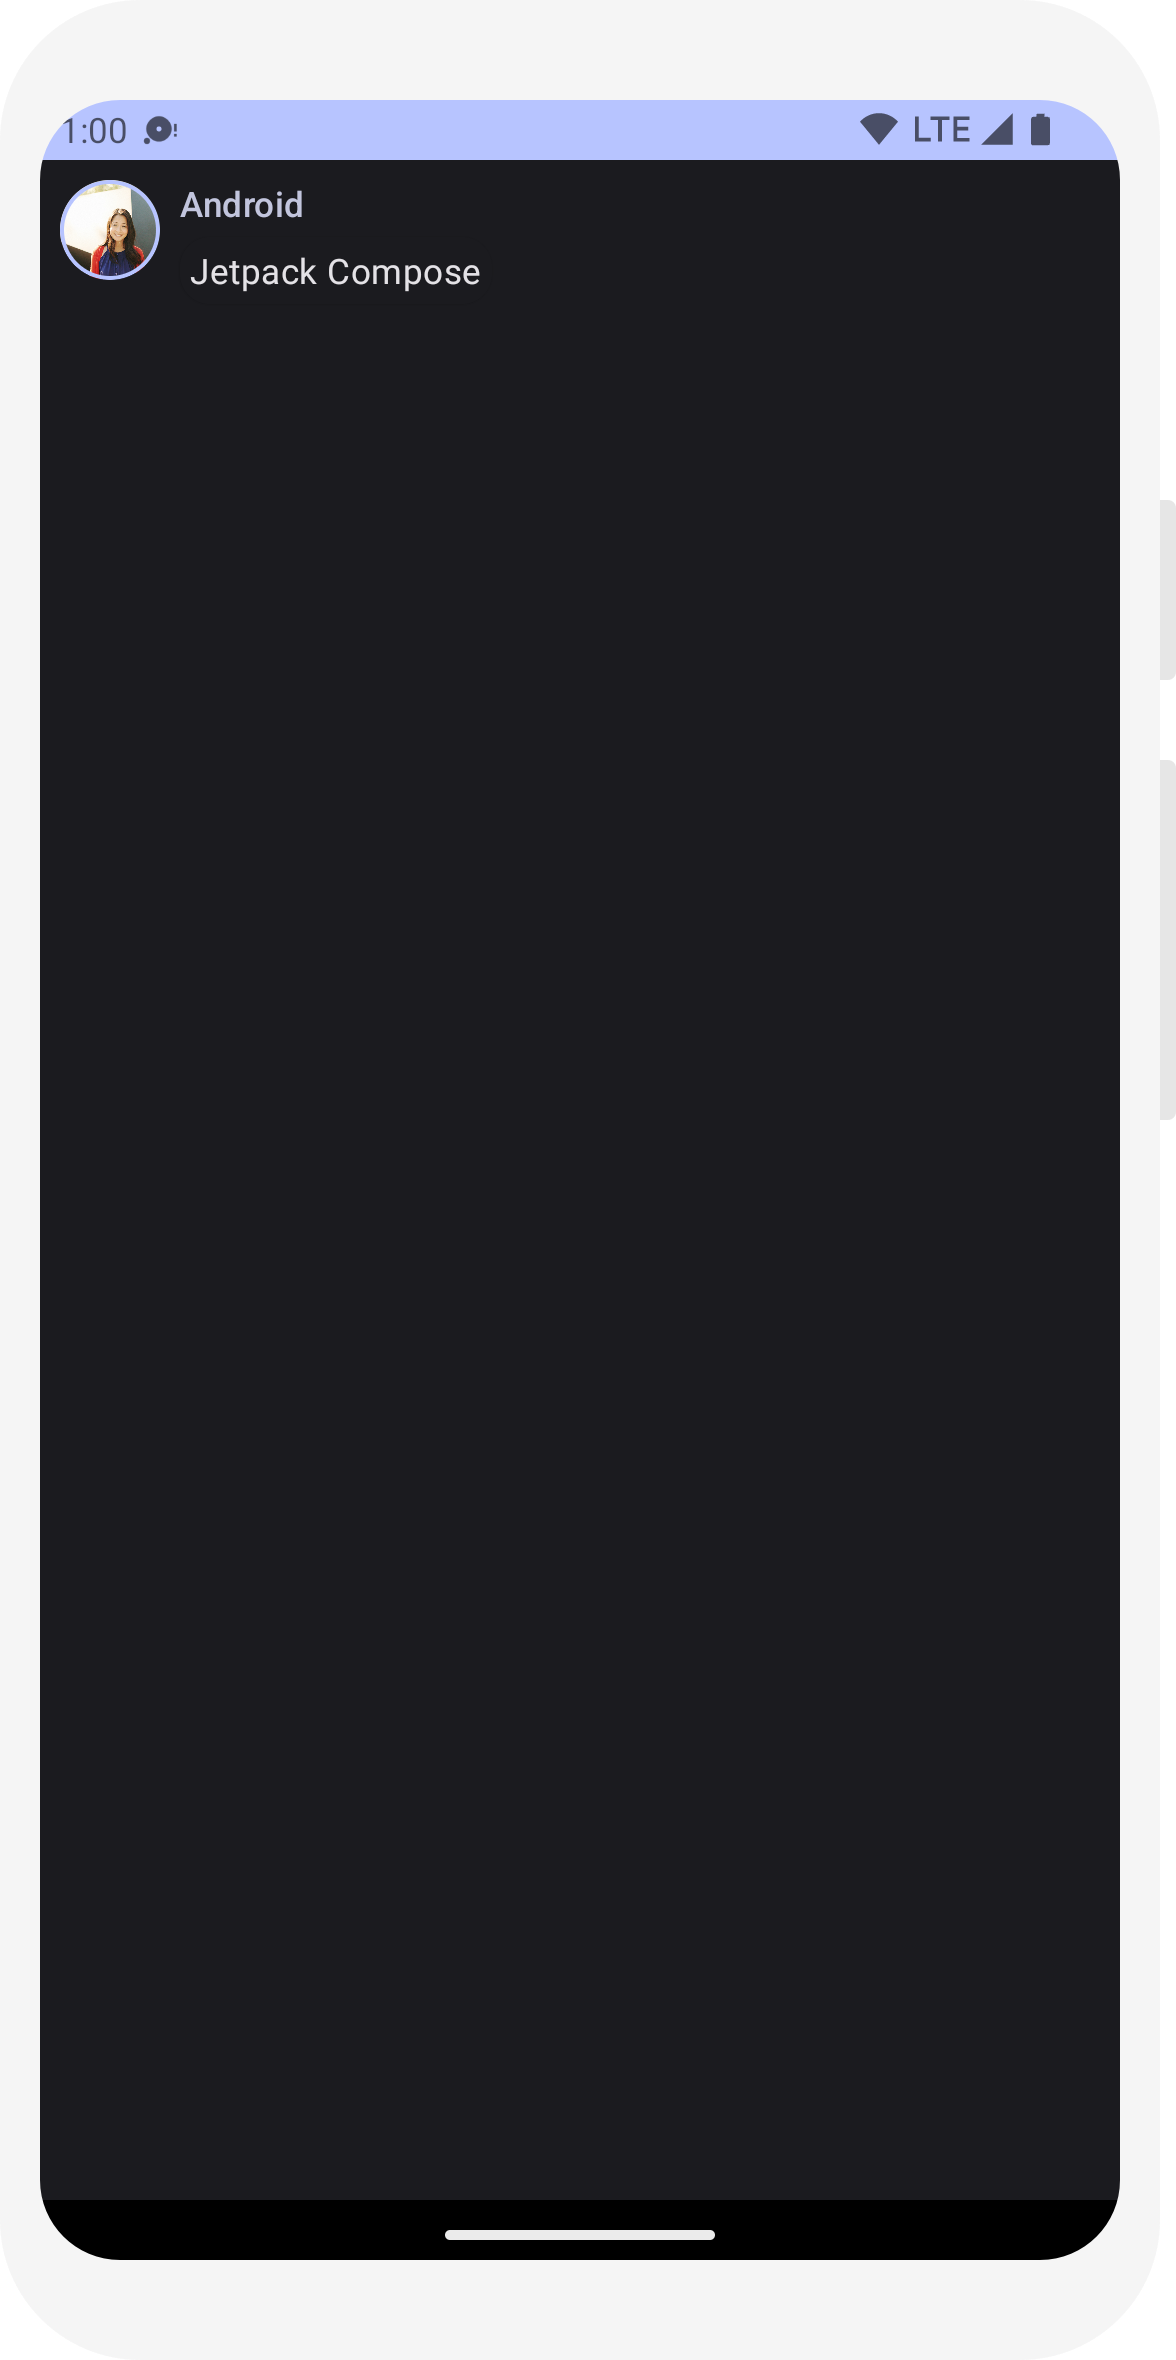
可以启用深色主题(或夜间模式),以避免屏幕过亮,尤其是在夜间,或者仅仅是为了节省设备电池。由于支持 Material Design,Jetpack Compose 默认可以处理深色主题。在使用 Material Design 颜色后,文本和背景将自动适应深色背景。
您可以在文件中创建多个预览作为单独的函数,或者向同一个函数添加多个注解。
添加新的预览注解并启用夜间模式。
// ...
import android.content.res.Configuration

@Preview(name = "Light Mode")
@Preview(
    uiMode = Configuration.UI_MODE_NIGHT_YES,
    showBackground = true,
    name = "Dark Mode"
)
@Composable
fun PreviewMessageCard() {
   ComposeTutorialTheme {
    Surface {
      MessageCard(
        msg = Message("Lexi", "Hey, take a look at Jetpack Compose, it's great!")
      )
    }
   }
}
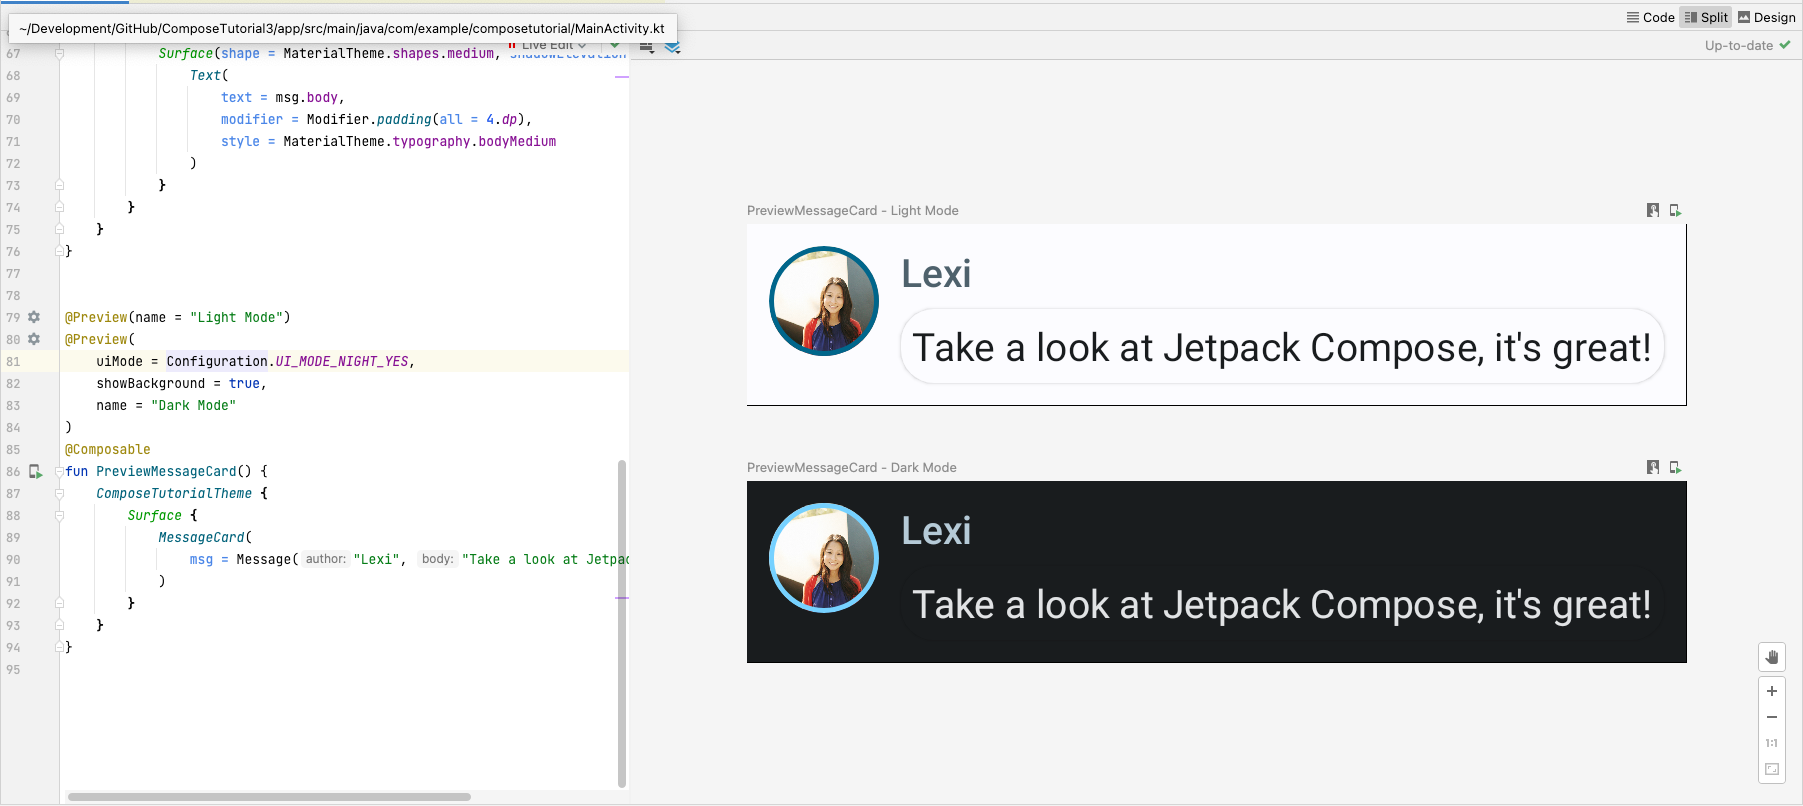
浅色和深色主题的颜色选择在 IDE 生成的 Theme.kt 文件中定义。
到目前为止,您已经创建了一个消息 UI 元素,它显示了一张图片和两个不同样式的文本,并且在浅色和深色主题下都看起来不错!
// ...
import android.content.res.Configuration

@Preview(name = "Light Mode")
@Preview(
    uiMode = Configuration.UI_MODE_NIGHT_YES,
    showBackground = true,
    name = "Dark Mode"
)
@Composable
fun PreviewMessageCard() {
   ComposeTutorialTheme {
    Surface {
      MessageCard(
        msg = Message("Lexi", "Hey, take a look at Jetpack Compose, it's great!")
      )
    }
   }
}

// ...

class MainActivity : ComponentActivity() {
    override fun onCreate(savedInstanceState: Bundle?) {
        super.onCreate(savedInstanceState)
        setContent {
            ComposeTutorialTheme {
                Surface(modifier = Modifier.fillMaxSize()) {
                    MessageCard(Message("Android", "Jetpack Compose"))
                }
            }
        }
    }
}

@Preview
@Composable
fun PreviewMessageCard() {
    ComposeTutorialTheme {
        Surface {
            MessageCard(
                msg = Message("Lexi", "Take a look at Jetpack Compose, it's great!")
            )
        }
    }
}

// ...
import androidx.compose.foundation.border
import androidx.compose.material3.MaterialTheme

@Composable
fun MessageCard(msg: Message) {
   Row(modifier = Modifier.padding(all = 8.dp)) {
       Image(
           painter = painterResource(R.drawable.profile_picture),
           contentDescription = null,
           modifier = Modifier
               .size(40.dp)
               .clip(CircleShape)
               .border(1.5.dp, MaterialTheme.colorScheme.primary, CircleShape)
       )

       Spacer(modifier = Modifier.width(8.dp))

       Column {
           Text(
               text = msg.author,
               color = MaterialTheme.colorScheme.secondary
           )

           Spacer(modifier = Modifier.height(4.dp))
           Text(text = msg.body)
       }
   }
}

// ...

@Composable
fun MessageCard(msg: Message) {
   Row(modifier = Modifier.padding(all = 8.dp)) {
       Image(
           painter = painterResource(R.drawable.profile_picture),
           contentDescription = null,
           modifier = Modifier
               .size(40.dp)
               .clip(CircleShape)
               .border(1.5.dp, MaterialTheme.colorScheme.primary, CircleShape)
       )
       Spacer(modifier = Modifier.width(8.dp))

       Column {
           Text(
               text = msg.author,
               color = MaterialTheme.colorScheme.secondary,
               style = MaterialTheme.typography.titleSmall
           )

           Spacer(modifier = Modifier.height(4.dp))

           Text(
               text = msg.body,
               style = MaterialTheme.typography.bodyMedium
           )
       }
   }
}

// ...
import androidx.compose.material3.Surface

@Composable
fun MessageCard(msg: Message) {
   Row(modifier = Modifier.padding(all = 8.dp)) {
       Image(
           painter = painterResource(R.drawable.profile_picture),
           contentDescription = null,
           modifier = Modifier
               .size(40.dp)
               .clip(CircleShape)
               .border(1.5.dp, MaterialTheme.colorScheme.primary, CircleShape)
       )
       Spacer(modifier = Modifier.width(8.dp))

       Column {
           Text(
               text = msg.author,
               color = MaterialTheme.colorScheme.secondary,
               style = MaterialTheme.typography.titleSmall
           )

           Spacer(modifier = Modifier.height(4.dp))

           Surface(shape = MaterialTheme.shapes.medium, shadowElevation = 1.dp) {
               Text(
                   text = msg.body,
                   modifier = Modifier.padding(all = 4.dp),
                   style = MaterialTheme.typography.bodyMedium
               )
           }
       }
   }
}

// ...
import android.content.res.Configuration

@Preview(name = "Light Mode")
@Preview(
    uiMode = Configuration.UI_MODE_NIGHT_YES,
    showBackground = true,
    name = "Dark Mode"
)
@Composable
fun PreviewMessageCard() {
   ComposeTutorialTheme {
    Surface {
      MessageCard(
        msg = Message("Lexi", "Hey, take a look at Jetpack Compose, it's great!")
      )
    }
   }
}

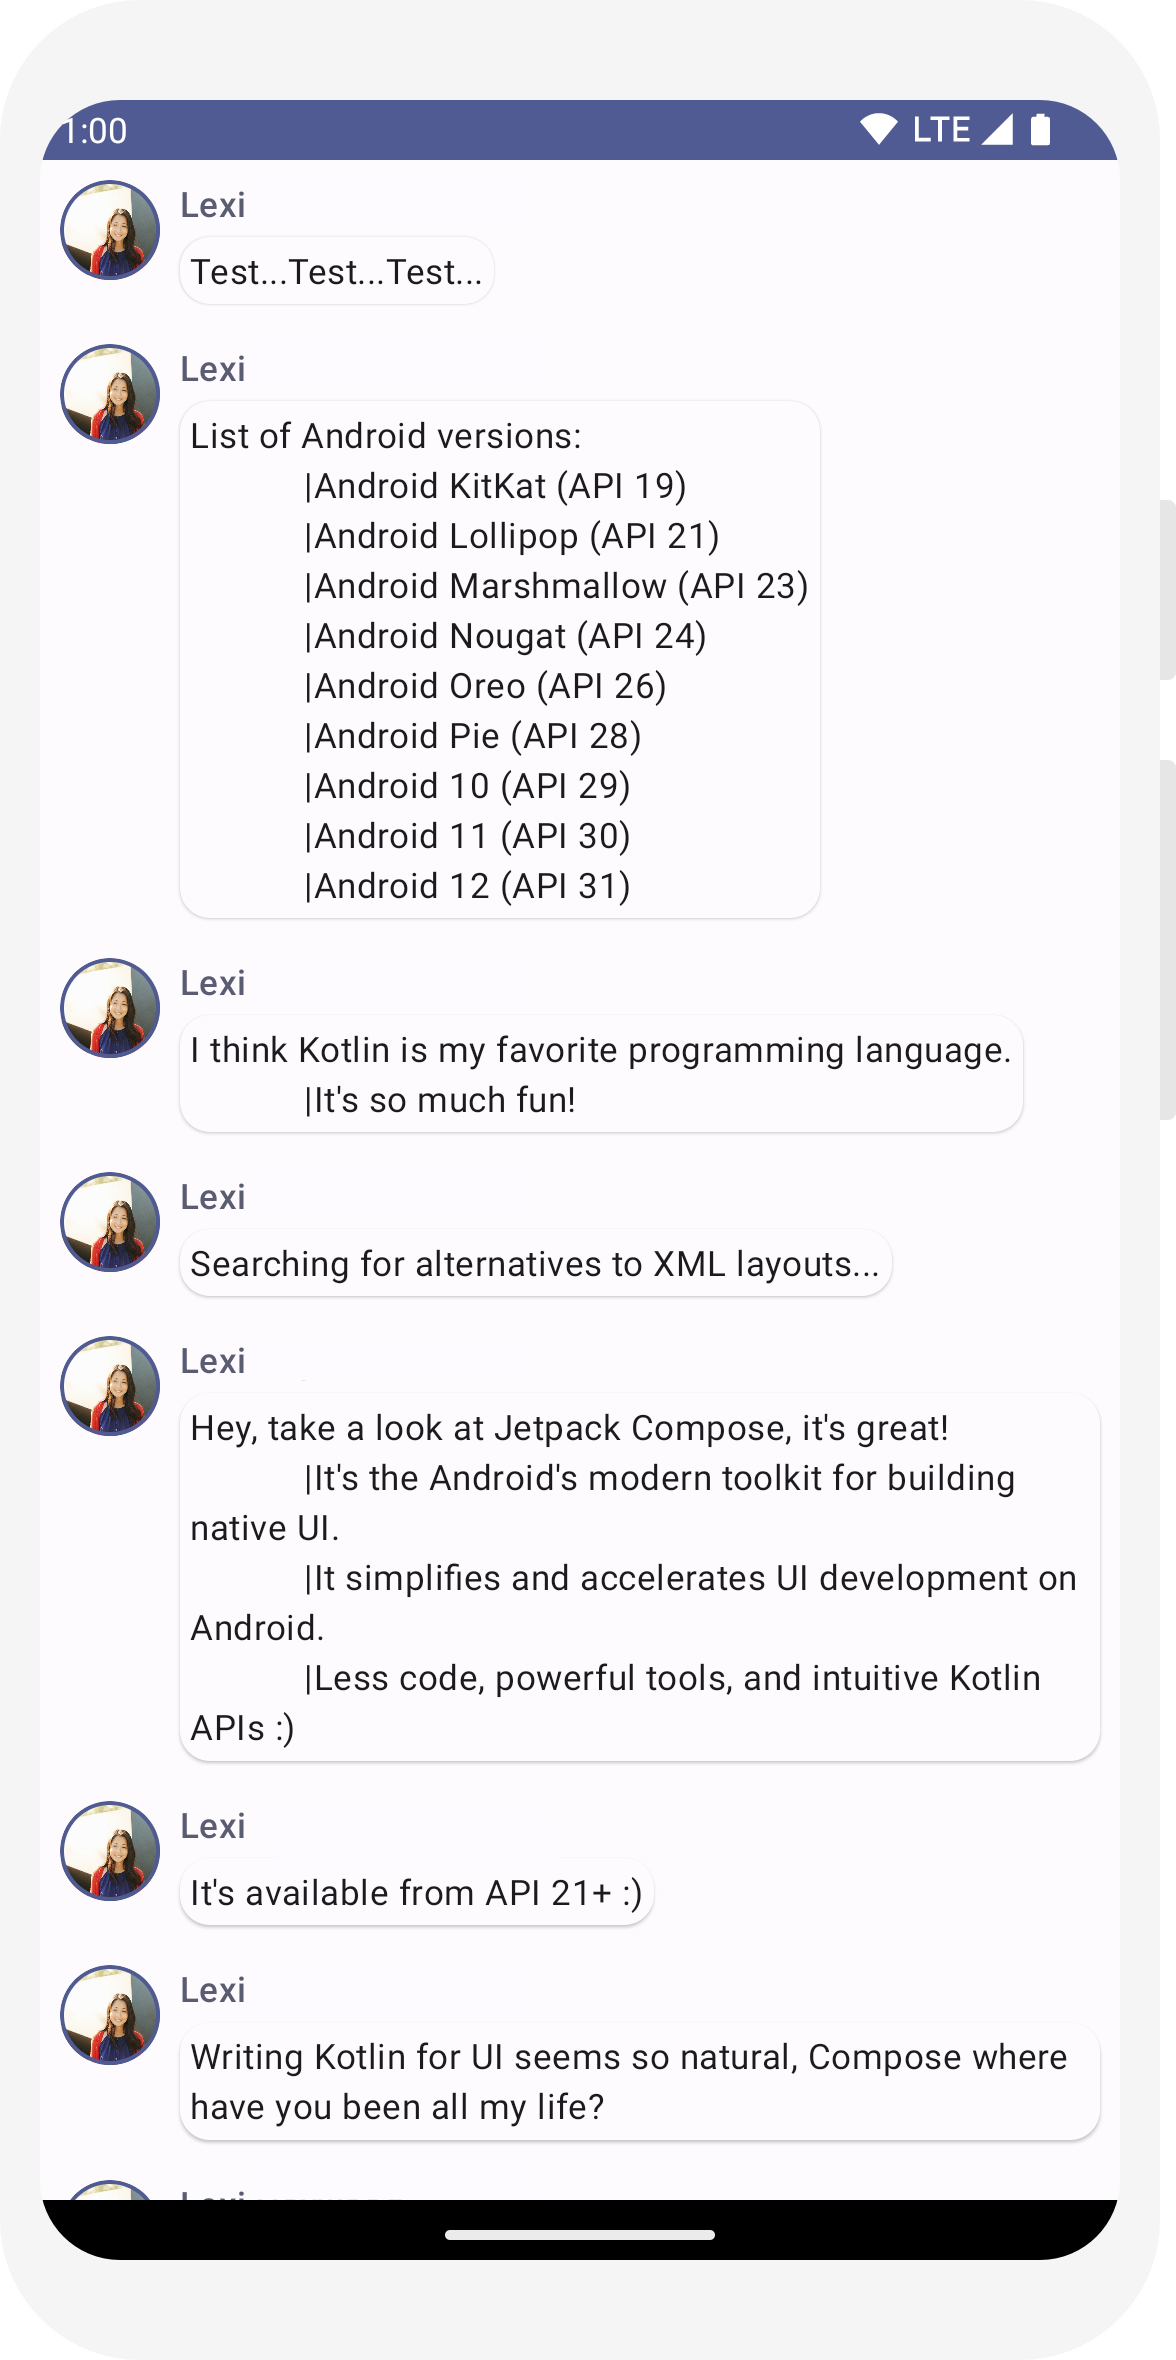
创建消息列表
只有一条消息的聊天会显得有些孤单,因此我们将把对话更改为包含多条消息。您需要创建一个 Conversation 函数来显示多条消息。对于此用例,请使用 Compose 的 LazyColumn 和 LazyRow。这些可组合项只渲染屏幕上可见的元素,因此它们被设计为对长列表非常高效。
在此代码片段中,您可以看到 LazyColumn 有一个 items 子项。它接受一个 List 作为参数,其 lambda 接收一个我们命名为 message(我们可以随意命名)的参数,它是 Message 的一个实例。简而言之,此 lambda 会为所提供 List 的每个项目调用。请将 示例数据集 复制到您的项目中,以帮助快速启动对话。
// ...
import androidx.compose.foundation.lazy.LazyColumn
import androidx.compose.foundation.lazy.items

@Composable
fun Conversation(messages: List<Message>) {
    LazyColumn {
        items(messages) { message ->
            MessageCard(message)
        }
    }
}

@Preview
@Composable
fun PreviewConversation() {
    ComposeTutorialTheme {
        Conversation(SampleData.conversationSample)
    }
}
展开消息时添加动画
对话变得越来越有趣。是时候玩转动画了!您将添加展开消息以显示更长内容的功能,并同时为内容大小和背景颜色添加动画。为了存储此本地 UI 状态,您需要跟踪消息是否已展开。要跟踪此状态更改,您必须使用函数 remember 和 mutableStateOf。
可组合函数可以通过使用 remember 在内存中存储本地状态,并跟踪传递给 mutableStateOf 的值的更改。使用此状态的可组合项(及其子项)在值更新时将自动重绘。这称为重组。
通过使用 Compose 的状态 API,如 remember 和 mutableStateOf,状态的任何更改都会自动更新 UI。
注意:您需要添加以下导入才能正确使用 Kotlin 的委托属性语法(by 关键字)。Alt+Enter 或 Option+Enter 会为您添加它们。
import androidx.compose.runtime.getValue import androidx.compose.runtime.setValue
// ...
import androidx.compose.foundation.clickable
import androidx.compose.runtime.getValue
import androidx.compose.runtime.mutableStateOf
import androidx.compose.runtime.remember
import androidx.compose.runtime.setValue

class MainActivity : ComponentActivity() {
   override fun onCreate(savedInstanceState: Bundle?) {
       super.onCreate(savedInstanceState)
       setContent {
           ComposeTutorialTheme {
               Conversation(SampleData.conversationSample)
           }
       }
   }
}

@Composable
fun MessageCard(msg: Message) {
    Row(modifier = Modifier.padding(all = 8.dp)) {
        Image(
            painter = painterResource(R.drawable.profile_picture),
            contentDescription = null,
            modifier = Modifier
                .size(40.dp)
                .clip(CircleShape)
                .border(1.5.dp, MaterialTheme.colorScheme.primary, CircleShape)
        )
        Spacer(modifier = Modifier.width(8.dp))

        // We keep track if the message is expanded or not in this
        // variable
        var isExpanded by remember { mutableStateOf(false) }

        // We toggle the isExpanded variable when we click on this Column
        Column(modifier = Modifier.clickable { isExpanded = !isExpanded }) {
            Text(
                text = msg.author,
                color = MaterialTheme.colorScheme.secondary,
                style = MaterialTheme.typography.titleSmall
            )

            Spacer(modifier = Modifier.height(4.dp))

            Surface(
                shape = MaterialTheme.shapes.medium,
                shadowElevation = 1.dp,
            ) {
                Text(
                    text = msg.body,
                    modifier = Modifier.padding(all = 4.dp),
                    // If the message is expanded, we display all its content
                    // otherwise we only display the first line
                    maxLines = if (isExpanded) Int.MAX_VALUE else 1,
                    style = MaterialTheme.typography.bodyMedium
                )
            }
        }
    }
}
现在,当您点击消息时,可以根据 isExpanded 更改消息内容的背景。您将使用 clickable 修饰符来处理可组合项上的点击事件。您将不再仅仅切换 Surface 的背景颜色,而是通过将其值从 MaterialTheme.colorScheme.surface 逐渐修改为 MaterialTheme.colorScheme.primary,反之亦然,来对背景颜色进行动画处理。为此,您将使用 animateColorAsState 函数。最后,您将使用 animateContentSize 修饰符来平滑地动画处理消息容器的大小。
// ...
import androidx.compose.animation.animateColorAsState
import androidx.compose.animation.animateContentSize

@Composable
fun MessageCard(msg: Message) {
    Row(modifier = Modifier.padding(all = 8.dp)) {
        Image(
            painter = painterResource(R.drawable.profile_picture),
            contentDescription = null,
            modifier = Modifier
                .size(40.dp)
                .clip(CircleShape)
                .border(1.5.dp, MaterialTheme.colorScheme.secondary, CircleShape)
        )
        Spacer(modifier = Modifier.width(8.dp))

        // We keep track if the message is expanded or not in this
        // variable
        var isExpanded by remember { mutableStateOf(false) }
        // surfaceColor will be updated gradually from one color to the other
        val surfaceColor by animateColorAsState(
            if (isExpanded) MaterialTheme.colorScheme.primary else MaterialTheme.colorScheme.surface,
        )

        // We toggle the isExpanded variable when we click on this Column
        Column(modifier = Modifier.clickable { isExpanded = !isExpanded }) {
            Text(
                text = msg.author,
                color = MaterialTheme.colorScheme.secondary,
                style = MaterialTheme.typography.titleSmall
            )

            Spacer(modifier = Modifier.height(4.dp))

            Surface(
                shape = MaterialTheme.shapes.medium,
                shadowElevation = 1.dp,
                // surfaceColor color will be changing gradually from primary to surface
                color = surfaceColor,
                // animateContentSize will change the Surface size gradually
                modifier = Modifier.animateContentSize().padding(1.dp)
            ) {
                Text(
                    text = msg.body,
                    modifier = Modifier.padding(all = 4.dp),
                    // If the message is expanded, we display all its content
                    // otherwise we only display the first line
                    maxLines = if (isExpanded) Int.MAX_VALUE else 1,
                    style = MaterialTheme.typography.bodyMedium
                )
            }
        }
    }
}
// ...
import androidx.compose.foundation.lazy.LazyColumn
import androidx.compose.foundation.lazy.items

@Composable
fun Conversation(messages: List<Message>) {
    LazyColumn {
        items(messages) { message ->
            MessageCard(message)
        }
    }
}

@Preview
@Composable
fun PreviewConversation() {
    ComposeTutorialTheme {
        Conversation(SampleData.conversationSample)
    }
}

// ...
import androidx.compose.foundation.clickable
import androidx.compose.runtime.getValue
import androidx.compose.runtime.mutableStateOf
import androidx.compose.runtime.remember
import androidx.compose.runtime.setValue

class MainActivity : ComponentActivity() {
   override fun onCreate(savedInstanceState: Bundle?) {
       super.onCreate(savedInstanceState)
       setContent {
           ComposeTutorialTheme {
               Conversation(SampleData.conversationSample)
           }
       }
   }
}

@Composable
fun MessageCard(msg: Message) {
    Row(modifier = Modifier.padding(all = 8.dp)) {
        Image(
            painter = painterResource(R.drawable.profile_picture),
            contentDescription = null,
            modifier = Modifier
                .size(40.dp)
                .clip(CircleShape)
                .border(1.5.dp, MaterialTheme.colorScheme.primary, CircleShape)
        )
        Spacer(modifier = Modifier.width(8.dp))

        // We keep track if the message is expanded or not in this
        // variable
        var isExpanded by remember { mutableStateOf(false) }

        // We toggle the isExpanded variable when we click on this Column
        Column(modifier = Modifier.clickable { isExpanded = !isExpanded }) {
            Text(
                text = msg.author,
                color = MaterialTheme.colorScheme.secondary,
                style = MaterialTheme.typography.titleSmall
            )

            Spacer(modifier = Modifier.height(4.dp))

            Surface(
                shape = MaterialTheme.shapes.medium,
                shadowElevation = 1.dp,
            ) {
                Text(
                    text = msg.body,
                    modifier = Modifier.padding(all = 4.dp),
                    // If the message is expanded, we display all its content
                    // otherwise we only display the first line
                    maxLines = if (isExpanded) Int.MAX_VALUE else 1,
                    style = MaterialTheme.typography.bodyMedium
                )
            }
        }
    }
}
// ...
import androidx.compose.animation.animateColorAsState
import androidx.compose.animation.animateContentSize

@Composable
fun MessageCard(msg: Message) {
    Row(modifier = Modifier.padding(all = 8.dp)) {
        Image(
            painter = painterResource(R.drawable.profile_picture),
            contentDescription = null,
            modifier = Modifier
                .size(40.dp)
                .clip(CircleShape)
                .border(1.5.dp, MaterialTheme.colorScheme.secondary, CircleShape)
        )
        Spacer(modifier = Modifier.width(8.dp))

        // We keep track if the message is expanded or not in this
        // variable
        var isExpanded by remember { mutableStateOf(false) }
        // surfaceColor will be updated gradually from one color to the other
        val surfaceColor by animateColorAsState(
            if (isExpanded) MaterialTheme.colorScheme.primary else MaterialTheme.colorScheme.surface,
        )

        // We toggle the isExpanded variable when we click on this Column
        Column(modifier = Modifier.clickable { isExpanded = !isExpanded }) {
            Text(
                text = msg.author,
                color = MaterialTheme.colorScheme.secondary,
                style = MaterialTheme.typography.titleSmall
            )

            Spacer(modifier = Modifier.height(4.dp))

            Surface(
                shape = MaterialTheme.shapes.medium,
                shadowElevation = 1.dp,
                // surfaceColor color will be changing gradually from primary to surface
                color = surfaceColor,
                // animateContentSize will change the Surface size gradually
                modifier = Modifier.animateContentSize().padding(1.dp)
            ) {
                Text(
                    text = msg.body,
                    modifier = Modifier.padding(all = 4.dp),
                    // If the message is expanded, we display all its content
                    // otherwise we only display the first line
                    maxLines = if (isExpanded) Int.MAX_VALUE else 1,
                    style = MaterialTheme.typography.bodyMedium
                )
            }
        }
    }
}
后续步骤
恭喜,您已完成 Compose 教程!您高效地构建了一个简单的聊天屏幕,其中显示了一个可展开和动画化的消息列表,包含图像和文本,并使用 Material Design 原则设计,包括深色主题和预览——所有这些都在不到 100 行代码中完成!
以下是您目前所学的内容
- 定义可组合函数
- 在您的可组合项中添加不同元素
- 使用布局可组合项构建您的 UI 组件
- 使用修饰符扩展可组合项
- 创建高效列表
- 跟踪和修改状态
- 在可组合项上添加用户交互
- 展开消息时对其进行动画处理
如果您想深入了解其中一些步骤,请浏览以下资源。

