Material Design 3 是 Material Design 的下一个演进版本。它包含更新的主题、组件和 Material You 个性化功能(如动态颜色)。它是对 Material Design 2 的更新,与 Android 12 及更高版本上的新视觉风格和系统 UI 保持一致。
本指南重点介绍如何从 Compose Material (androidx.compose.material) Jetpack 库 迁移到 Compose Material 3 (androidx.compose.material3) Jetpack 库。
方法
一般来说,您不应该长期在一个应用程序中同时使用 M2 和 M3。这是因为这两个设计系统及其相应的库在 UX/UI 设计和 Compose 实现方面存在很大差异。
您的应用程序可能使用某个设计系统,例如使用 Figma 创建的设计系统。在这种情况下,我们也强烈建议您或您的设计团队在开始 Compose 迁移之前将其从 M2 迁移到 M3。如果应用程序的 UX/UI 设计基于 M2,那么将其迁移到 M3 则没有意义。
此外,您迁移的方法应根据应用程序的大小、复杂性和 UX/UI 设计而有所不同。这样做有助于最大程度地减少对代码库的影响。您应该采取分阶段的方式进行迁移。
何时迁移
您应该尽快开始迁移。但是,务必考虑您的应用程序是否处于可以从 M2 **完全**迁移到 M3 的现实位置。在开始之前,有一些阻塞场景需要考虑调查。
| 场景 | 推荐的方法 |
|---|---|
| 无阻塞 | 开始分阶段迁移 |
| M2 中的某个组件在 M3 中尚不可用。请参阅下面 组件和布局 部分。 | 开始分阶段迁移 |
| 您或您的设计团队尚未将应用程序的设计系统从 M2 迁移到 M3 | 将设计系统从 M2 迁移到 M3,然后开始分阶段迁移 |
即使您受到上述场景的影响,也应在提交和发布应用程序更新之前采取分阶段的方式进行迁移。在这些情况下,您将并行使用 M2 和 M3,并在迁移到 M3 的同时逐步淘汰 M2。
分阶段方法
分阶段迁移的一般步骤如下所示
- 在 M2 依赖项旁边添加 M3 依赖项。
- 在 M2 版本的应用程序主题旁边添加 M3 版本的应用程序主题。
- 根据应用程序的大小和复杂性,将各个模块、屏幕或可组合项迁移到 M3(有关详细信息,请参阅下面的部分)。
- 完全迁移后,删除应用程序主题的 M2 版本。
- 删除 M2 依赖项。
依赖项
M3 具有与 M2 分开的包和版本
M2
implementation "androidx.compose.material:material:$m2-version"
M3
implementation "androidx.compose.material3:material3:$m3-version"
请参阅 Compose Material 3 版本发布页面 上的最新 M3 版本。
除主要 M2 和 M3 库之外的其他 Material 依赖项没有更改。它们使用 M2 和 M3 包和版本的混合,但这对迁移没有影响。它们可以与 M3 一起按原样使用
| 库 | 包和版本 |
|---|---|
| Compose Material 图标 | androidx.compose.material:material-icons-*:$m2-version |
| Compose Material 波纹 | androidx.compose.material:material-ripple:$m2-version |
实验性 API
某些 M3 API 被认为是实验性的。在这种情况下,您需要使用 ExperimentalMaterial3Api 注解在函数或文件级别选择加入。
import androidx.compose.material3.ExperimentalMaterial3Api

@OptIn(ExperimentalMaterial3Api::class)
@Composable
fun AppComposable() {
    // M3 composables
}
主题
在 M2 和 M3 中,主题可组合项都命名为 MaterialTheme,但导入包和参数不同
M2
import androidx.compose.material.MaterialTheme

MaterialTheme(
    colors = AppColors,
    typography = AppTypography,
    shapes = AppShapes
) {
    // M2 content
}
M3
import androidx.compose.material3.MaterialTheme

MaterialTheme(
    colorScheme = AppColorScheme,
    typography = AppTypography,
    shapes = AppShapes
) {
    // M3 content
}
颜色
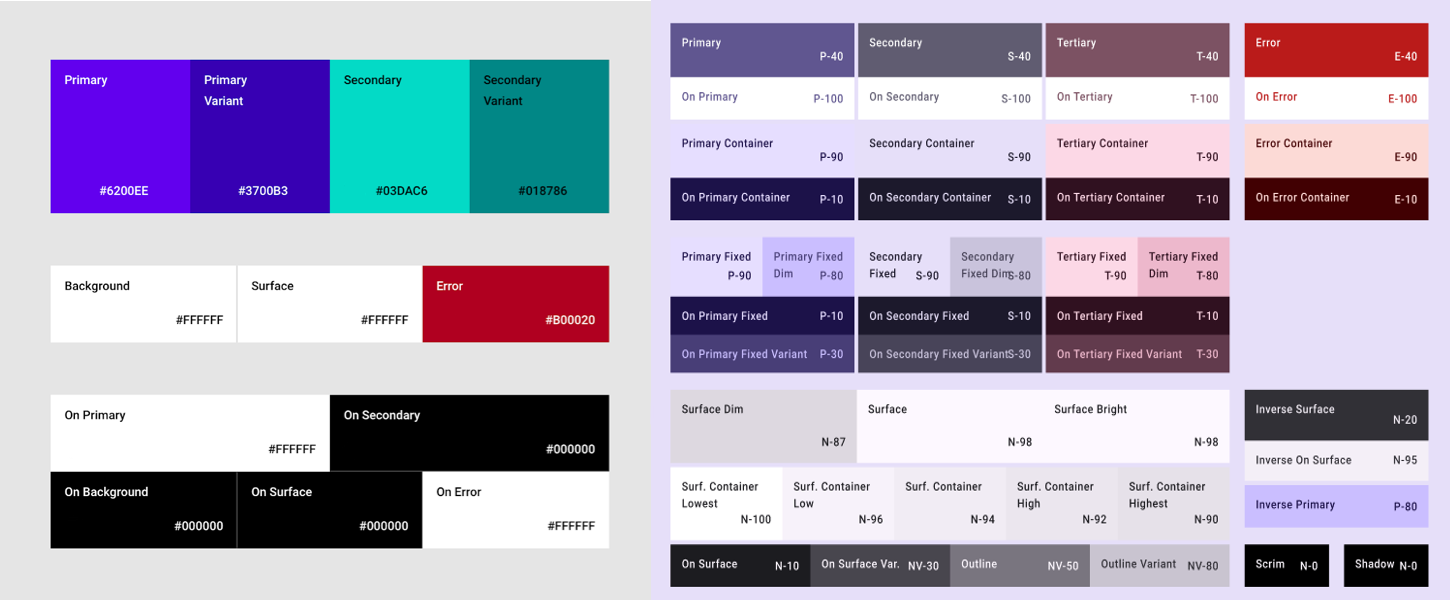
M3 中的 颜色系统 与 M2 有很大不同。颜色参数的数量有所增加,它们具有不同的名称,并且它们以不同的方式映射到 M3 组件。在 Compose 中,这适用于 M2 Colors 类、M3 ColorScheme 类和相关函数
M2
import androidx.compose.material.lightColors
import androidx.compose.material.darkColors

val AppLightColors = lightColors(
    // M2 light Color parameters
)
val AppDarkColors = darkColors(
    // M2 dark Color parameters
)
val AppColors = if (darkTheme) {
    AppDarkColors
} else {
    AppLightColors
}
M3
import androidx.compose.material3.lightColorScheme
import androidx.compose.material3.darkColorScheme

val AppLightColorScheme = lightColorScheme(
    // M3 light Color parameters
)
val AppDarkColorScheme = darkColorScheme(
    // M3 dark Color parameters
)
val AppColorScheme = if (darkTheme) {
    AppDarkColorScheme
} else {
    AppLightColorScheme
}
鉴于 M2 和 M3 颜色系统之间存在重大差异,因此 Color 参数没有合理的映射。相反,请使用 Material 主题构建器工具 生成 M3 颜色方案。在工具中使用 M2 颜色作为核心源颜色,工具将其扩展为 M3 颜色方案使用的色调调色板。以下映射建议作为起点
| M2 | Material 主题构建器 |
|---|---|
primary |
Primary |
primaryVariant |
Secondary |
secondary |
Tertiary |
surface 或 background |
Neutral |
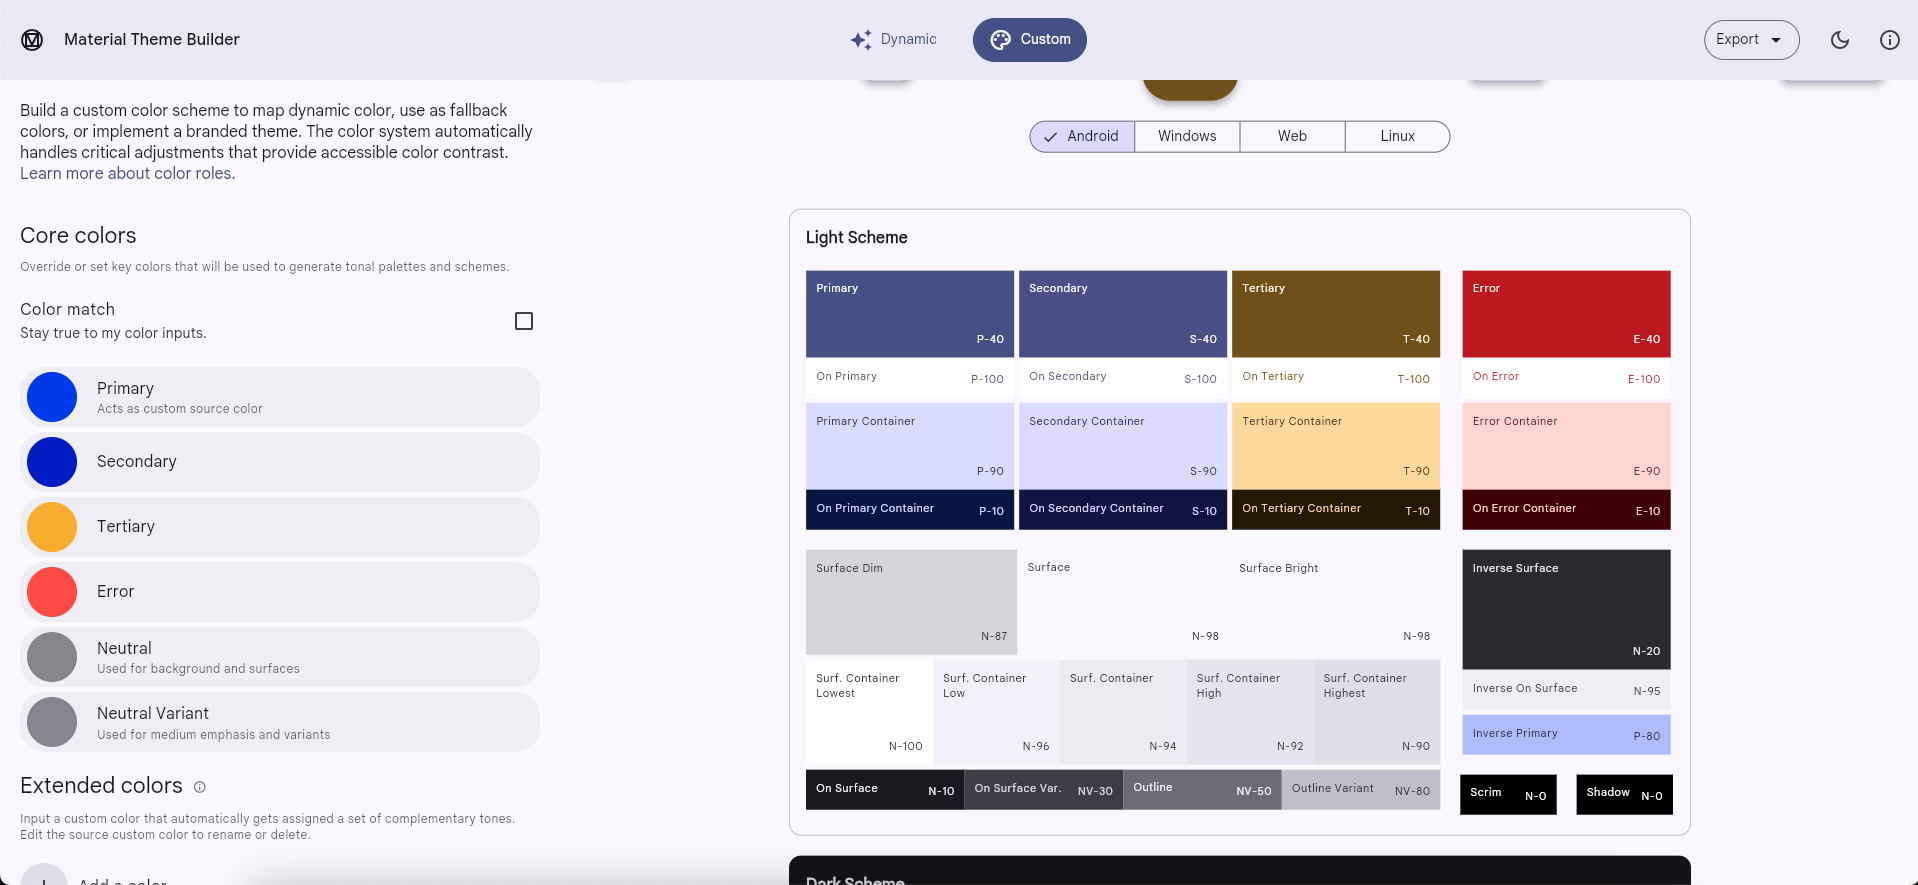
您可以从工具中复制亮色和暗色主题的颜色十六进制代码值,并使用它们来实现 M3 ColorScheme 实例。或者,Material 主题构建器可以导出 Compose 代码。
isLight
与 M2 Colors 类不同,M3 ColorScheme 类不包含 isLight 参数。通常,您应该尝试在主题级别对需要此信息的内容进行建模。例如
M2
import androidx.compose.material.lightColors
import androidx.compose.material.darkColors
import androidx.compose.material.MaterialTheme

@Composable
private fun AppTheme(
  darkTheme: Boolean = isSystemInDarkTheme(),
  content: @Composable () -> Unit
) {
  val colors = if (darkTheme) darkColors(…) else lightColors(…)
  MaterialTheme(
      colors = colors,
      content = content
  )
}

@Composable
fun AppComposable() {
    AppTheme {
        val cardElevation = if (MaterialTheme.colors.isLight) 0.dp else 4.dp
        …
    }
}
M3
import androidx.compose.material3.lightColorScheme
import androidx.compose.material3.darkColorScheme
import androidx.compose.material3.MaterialTheme

val LocalCardElevation = staticCompositionLocalOf { Dp.Unspecified }
@Composable
private fun AppTheme(
   darkTheme: Boolean = isSystemInDarkTheme(),
    content: @Composable () -> Unit
) {
   val cardElevation = if (darkTheme) 4.dp else 0.dp
    CompositionLocalProvider(LocalCardElevation provides cardElevation) {
        val colorScheme = if (darkTheme) darkColorScheme(…) else lightColorScheme(…)
        MaterialTheme(
            colorScheme = colorScheme,
            content = content
        )
    }
}

@Composable
fun AppComposable() {
    AppTheme {
        val cardElevation = LocalCardElevation.current
        …
    }
}
请参阅 Compose 中的自定义设计系统指南 以获取更多信息。
动态颜色
M3 中的一项新功能是 动态颜色。M3 ColorScheme 不使用自定义颜色,而是在 Android 12 及更高版本上使用设备壁纸颜色,使用以下函数
排版
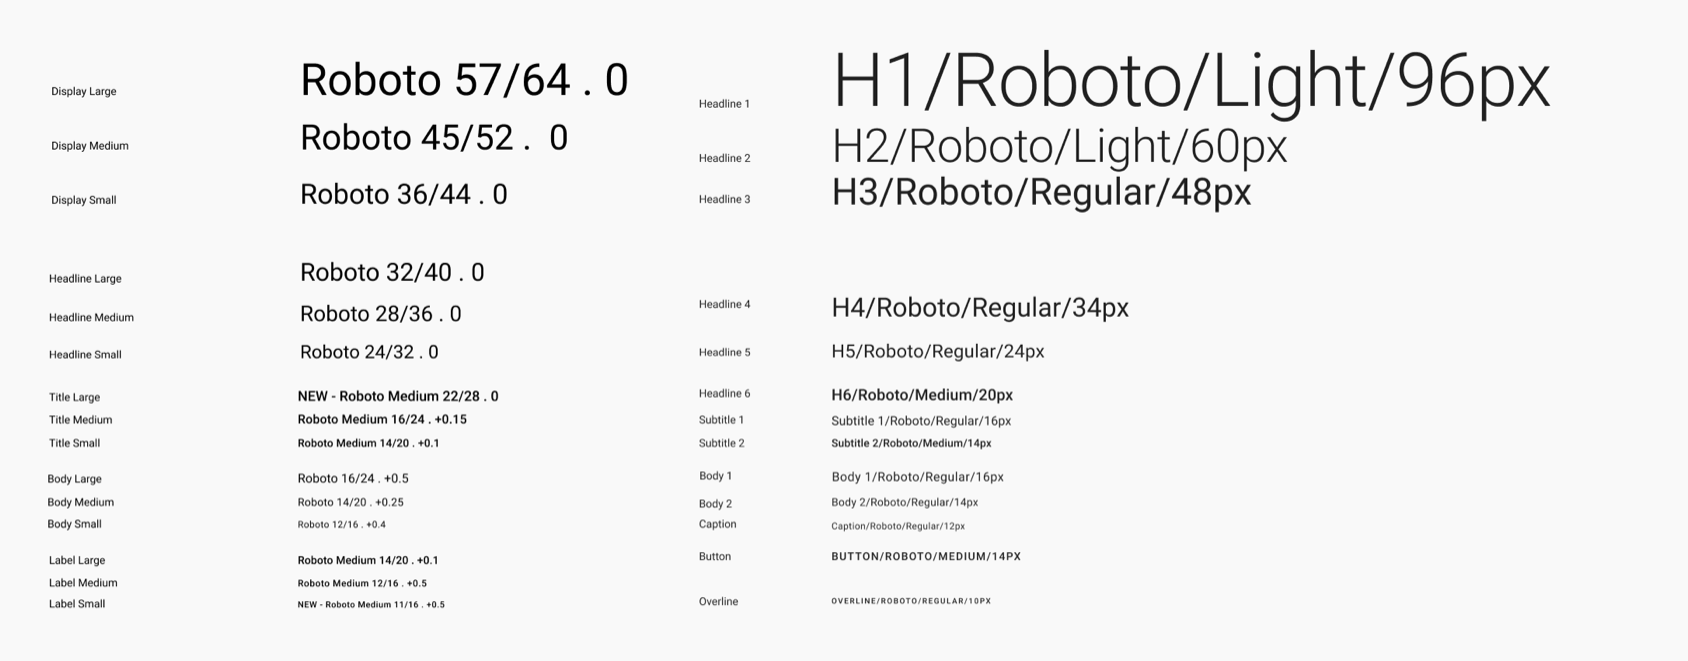
M3 中的 排版系统 与 M2 不同。排版参数的数量大致相同,但它们的名称不同,并且它们以不同的方式映射到 M3 组件。在 Compose 中,这适用于 M2 Typography 类和 M3 Typography 类
M2
import androidx.compose.material.Typography

val AppTypography = Typography(
    // M2 TextStyle parameters
)
M3
import androidx.compose.material3.Typography

val AppTypography = Typography(
    // M3 TextStyle parameters
)
以下 TextStyle 参数映射建议作为起点
| M2 | M3 |
|---|---|
h1 |
displayLarge |
h2 |
displayMedium |
h3 |
displaySmall |
| N/A | headlineLarge |
h4 |
headlineMedium |
h5 |
headlineSmall |
h6 |
titleLarge |
subtitle1 |
titleMedium |
subtitle2 |
titleSmall |
body1 |
bodyLarge |
body2 |
bodyMedium |
caption |
bodySmall |
button |
labelLarge |
| N/A | labelMedium |
overline |
labelSmall |
形状
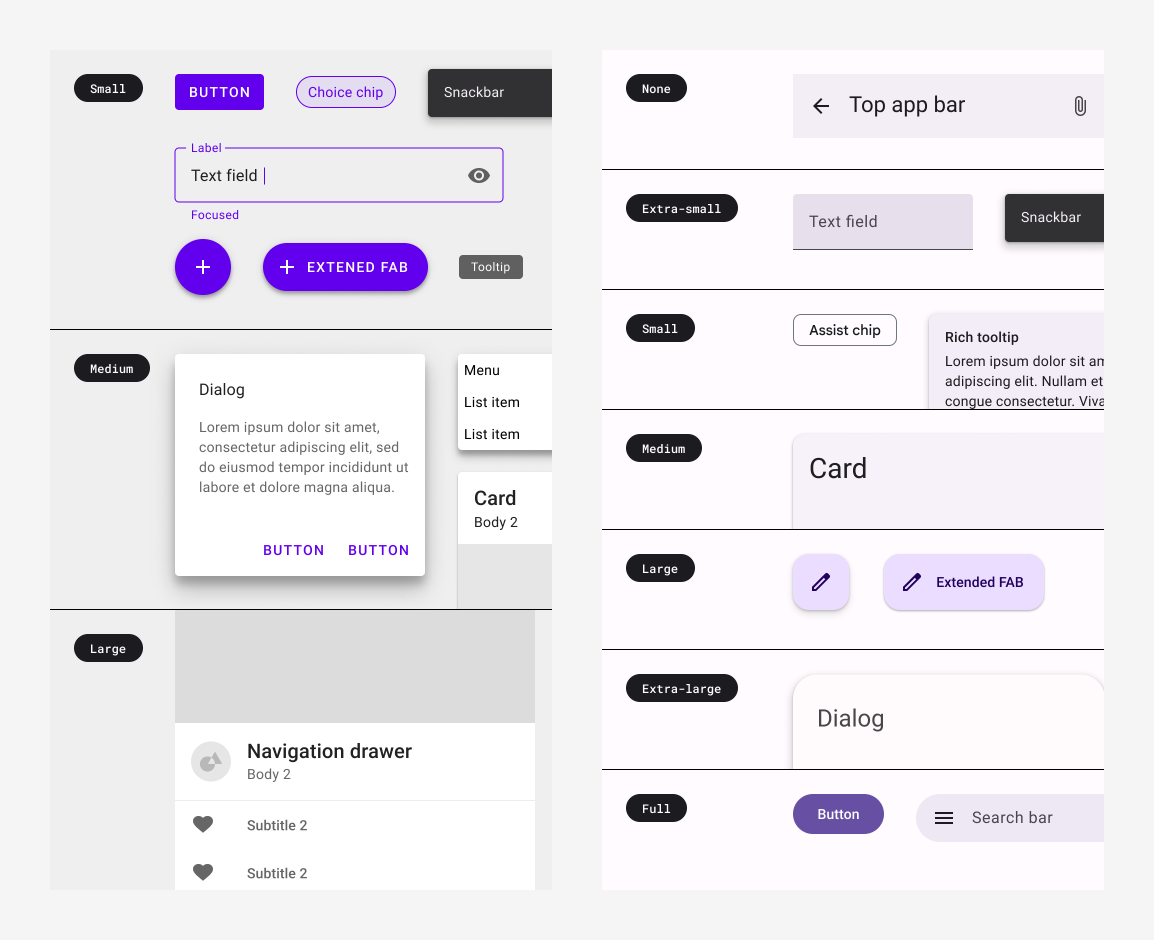
M3 中的 形状系统 与 M2 不同。形状参数的数量有所增加,它们的名称不同,并且它们以不同的方式映射到 M3 组件。在 Compose 中,这适用于 M2 Shapes 类和 M3 Shapes 类
M2
import androidx.compose.material.Shapes

val AppShapes = Shapes(
    // M2 Shape parameters
)
M3
import androidx.compose.material3.Shapes

val AppShapes = Shapes(
    // M3 Shape parameters
)
以下 Shape 参数映射建议作为起点
| M2 | M3 |
|---|---|
| N/A | extraSmall |
small |
small |
medium |
medium |
large |
large |
| N/A | extraLarge |
组件和布局
M2 中的大多数组件和布局在 M3 中都可用。但是,也有一些缺失的组件以及 M2 中不存在的新组件。此外,一些 M3 组件比 M2 中的等效组件具有更多变体。一般来说,M3 API 表面试图尽可能与 M2 中最接近的等效项相似。
鉴于更新的颜色、排版和形状系统,M3 组件倾向于以不同的方式映射到新的主题值。最好查看 Compose Material 3 源代码中的 tokens 目录 作为这些映射的真相来源。
虽然某些组件需要特殊考虑,但以下函数映射建议作为起点
缺少的 API:
| M2 | M3 |
|---|---|
androidx.compose.material.swipeable |
尚不可用 |
已替换的 API:
| M2 | M3 |
|---|---|
androidx.compose.material.BackdropScaffold |
没有 M3 等效项,请迁移到 Scaffold 或 BottomSheetScaffold 代替 |
androidx.compose.material.BottomDrawer |
没有 M3 等效项,请迁移到 ModalBottomSheet 代替 |
已重命名 API:
所有其他 API:
请查看 Compose Material 3 API 参考概述 上最新的 M3 组件和布局,并关注 发布页面 以获取新的和更新的 API。
脚手架、Snackbar 和导航抽屉
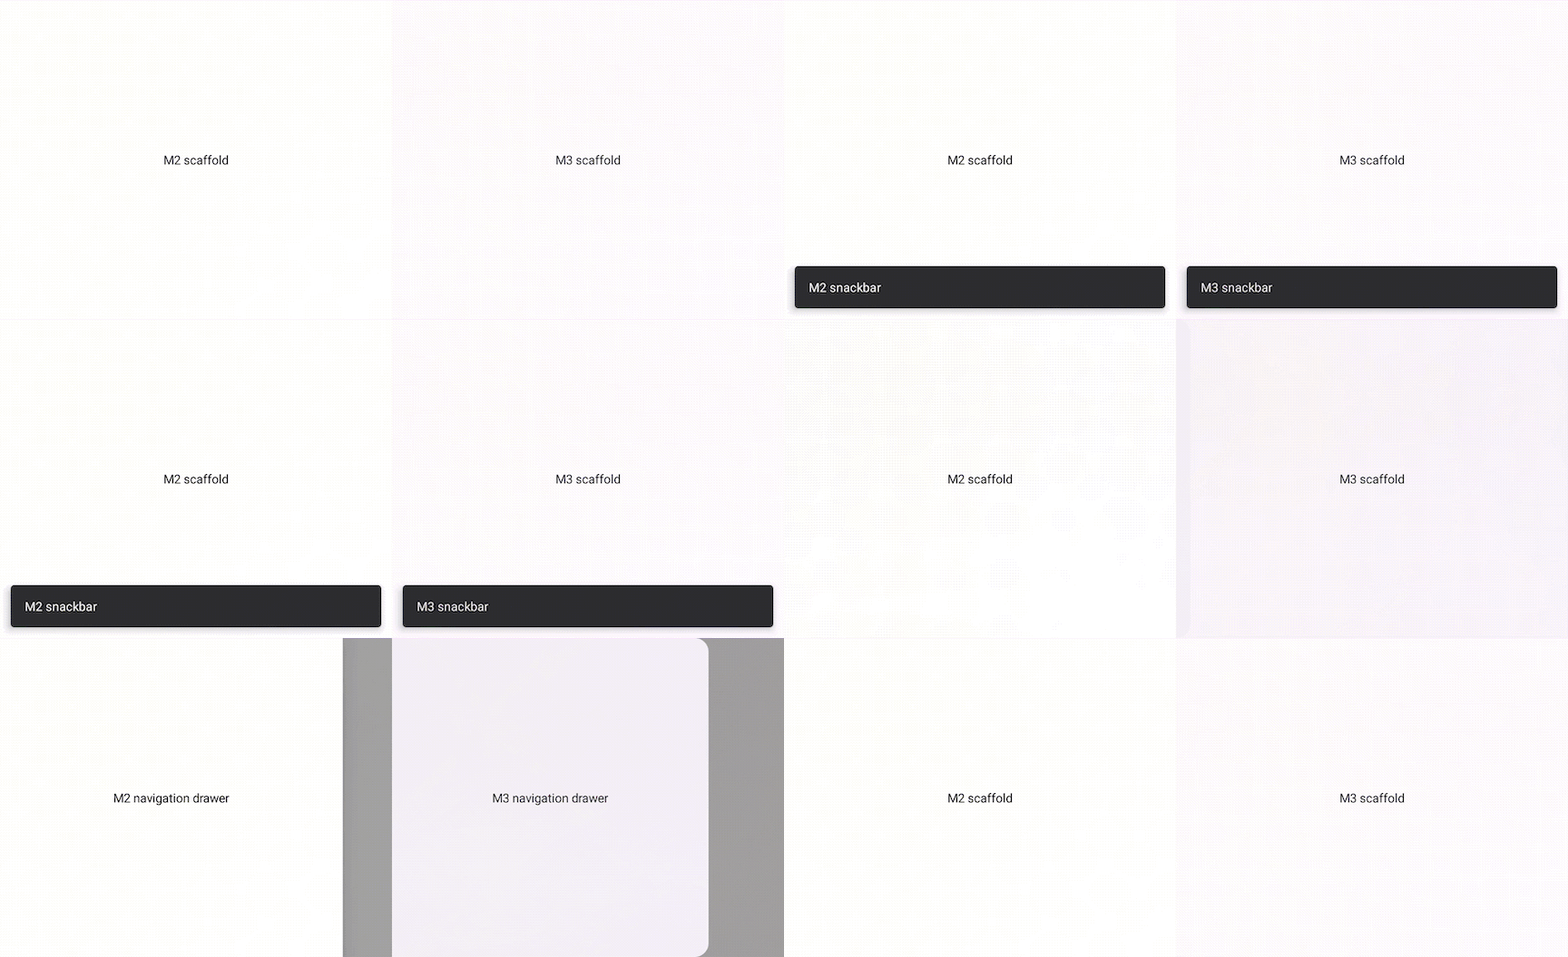
M3 中的脚手架与 M2 不同。在 M2 和 M3 中,主要的布局可组合项都命名为 Scaffold,但导入包和参数有所不同。
M2
import androidx.compose.material.Scaffold

Scaffold(
    // M2 scaffold parameters
)
M3
import androidx.compose.material3.Scaffold

Scaffold(
    // M3 scaffold parameters
)
M2 的 Scaffold 包含一个 backgroundColor 参数,在 M3 的 Scaffold 中已重命名为 containerColor。
M2
import androidx.compose.material.Scaffold

Scaffold(
    backgroundColor = …,
    content = { … }
)
M3
import androidx.compose.material3.Scaffold

Scaffold(
    containerColor = …,
    content = { … }
)
M2 的 ScaffoldState 类在 M3 中不再存在,因为它包含一个 drawerState 参数,该参数不再需要。要使用 M3 的 Scaffold 显示 Snackbar,请改用 SnackbarHostState。
M2
import androidx.compose.material.Scaffold
import androidx.compose.material.rememberScaffoldState

val scaffoldState = rememberScaffoldState()
val scope = rememberCoroutineScope()

Scaffold(
    scaffoldState = scaffoldState,
    content = {
        …
        scope.launch {
            scaffoldState.snackbarHostState.showSnackbar(…)
        }
    }
)
M3
import androidx.compose.material3.Scaffold
import androidx.compose.material3.SnackbarHost
import androidx.compose.material3.SnackbarHostState

val snackbarHostState = remember { SnackbarHostState() }
val scope = rememberCoroutineScope()

Scaffold(
    snackbarHost = { SnackbarHost(snackbarHostState) },
    content = {
        …
        scope.launch {
            snackbarHostState.showSnackbar(…)
        }
    }
)
M2 的 Scaffold 中的所有 drawer* 参数都已从 M3 的 Scaffold 中移除。这些参数包括 drawerShape 和 drawerContent 等。要使用 M3 的 Scaffold 显示抽屉,请改用导航抽屉可组合项(例如 ModalNavigationDrawer)。
M2
import androidx.compose.material.DrawerValue
import
import androidx.compose.material.Scaffold
import androidx.compose.material.rememberDrawerState
import androidx.compose.material.rememberScaffoldState

val scaffoldState = rememberScaffoldState(
    drawerState = rememberDrawerState(DrawerValue.Closed)
)
val scope = rememberCoroutineScope()

Scaffold(
    scaffoldState = scaffoldState,
    drawerContent = { … },
    drawerGesturesEnabled = …,
    drawerShape = …,
    drawerElevation = …,
    drawerBackgroundColor = …,
    drawerContentColor = …,
    drawerScrimColor = …,
    content = {
        …
        scope.launch {
            scaffoldState.drawerState.open()
        }
    }
)
M3
import androidx.compose.material3.DrawerValue
import androidx.compose.material3.ModalDrawerSheet
import androidx.compose.material3.ModalNavigationDrawer
import androidx.compose.material3.Scaffold
import androidx.compose.material3.rememberDrawerState

val drawerState = rememberDrawerState(DrawerValue.Closed)
val scope = rememberCoroutineScope()

ModalNavigationDrawer(
    drawerState = drawerState,
    drawerContent = {
        ModalDrawerSheet(
            drawerShape = …,
            drawerTonalElevation = …,
            drawerContainerColor = …,
            drawerContentColor = …,
            content = { … }
        )
    },
    gesturesEnabled = …,
    scrimColor = …,
    content = {
        Scaffold(
            content = {
                …
                scope.launch {
                    drawerState.open()
                }
            }
        )
    }
)
顶部应用栏
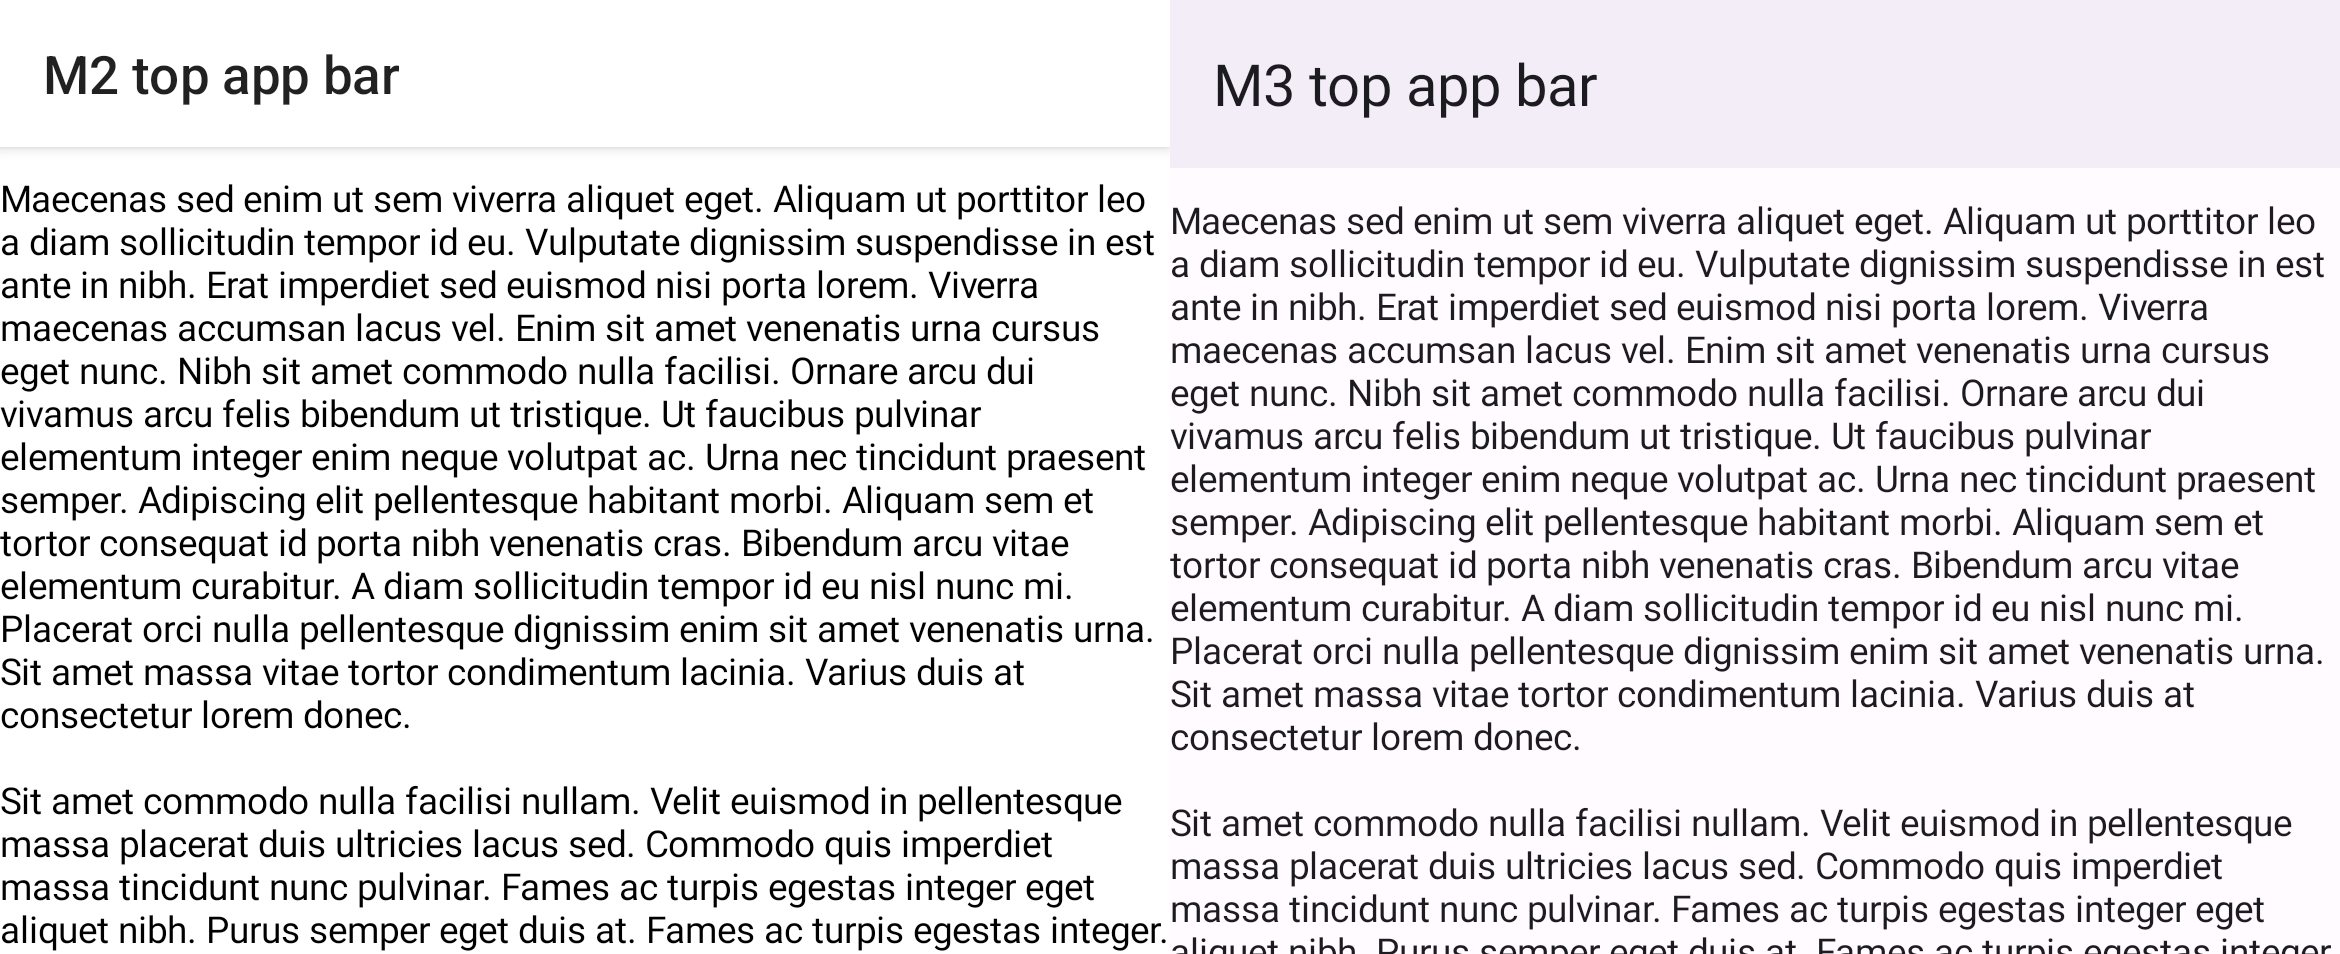
M3 中的 顶部应用栏 与 M2 中的不同。在 M2 和 M3 中,主要的顶部应用栏可组合项都命名为 TopAppBar,但导入包和参数有所不同。
M2
import androidx.compose.material.TopAppBar

TopAppBar(…)
M3
import androidx.compose.material3.TopAppBar

TopAppBar(…)
如果您之前在 M2 的 TopAppBar 中居中内容,请考虑使用 M3 的 CenterAlignedTopAppBar。还需要了解 MediumTopAppBar 和 LargeTopAppBar。
M3 顶部应用栏包含一个新的 scrollBehavior 参数,以便通过 TopAppBarScrollBehavior 类提供不同的滚动功能,例如更改高程。这与通过 Modifer.nestedScroll 滚动内容配合使用。在 M2 的 TopAppBar 中,可以通过手动更改 elevation 参数来实现这一点。
M2
import androidx.compose.material.AppBarDefaults
import androidx.compose.material.Scaffold
import androidx.compose.material.TopAppBar

val state = rememberLazyListState()
val isAtTop by remember {
    derivedStateOf {
        state.firstVisibleItemIndex == 0 && state.firstVisibleItemScrollOffset == 0
    }
}

Scaffold(
    topBar = {
        TopAppBar(
            elevation = if (isAtTop) {
                0.dp
            } else {
                AppBarDefaults.TopAppBarElevation
            },
            …
        )
    },
    content = {
        LazyColumn(state = state) { … }
    }
)
M3
import androidx.compose.material3.Scaffold
import androidx.compose.material3.TopAppBar
import androidx.compose.material3.TopAppBarDefaults

val scrollBehavior = TopAppBarDefaults.pinnedScrollBehavior()

Scaffold(
    modifier = Modifier.nestedScroll(scrollBehavior.nestedScrollConnection),
    topBar = {
        TopAppBar(
            scrollBehavior = scrollBehavior,
            …
        )
    },
    content = {
        LazyColumn { … }
    }
)
底部导航/导航栏

M2 中的底部导航在 M3 中已重命名为 导航栏。在 M2 中,有 BottomNavigation 和 BottomNavigationItem 可组合项,而在 M3 中,有 NavigationBar 和 NavigationBarItem 可组合项。
M2
import androidx.compose.material.BottomNavigation
import androidx.compose.material.BottomNavigationItem

BottomNavigation {
    BottomNavigationItem(…)
    BottomNavigationItem(…)
    BottomNavigationItem(…)
}
M3
import androidx.compose.material3.NavigationBar
import androidx.compose.material3.NavigationBarItem

NavigationBar {
    NavigationBarItem(…)
    NavigationBarItem(…)
    NavigationBarItem(…)
}
按钮、图标按钮和 FAB
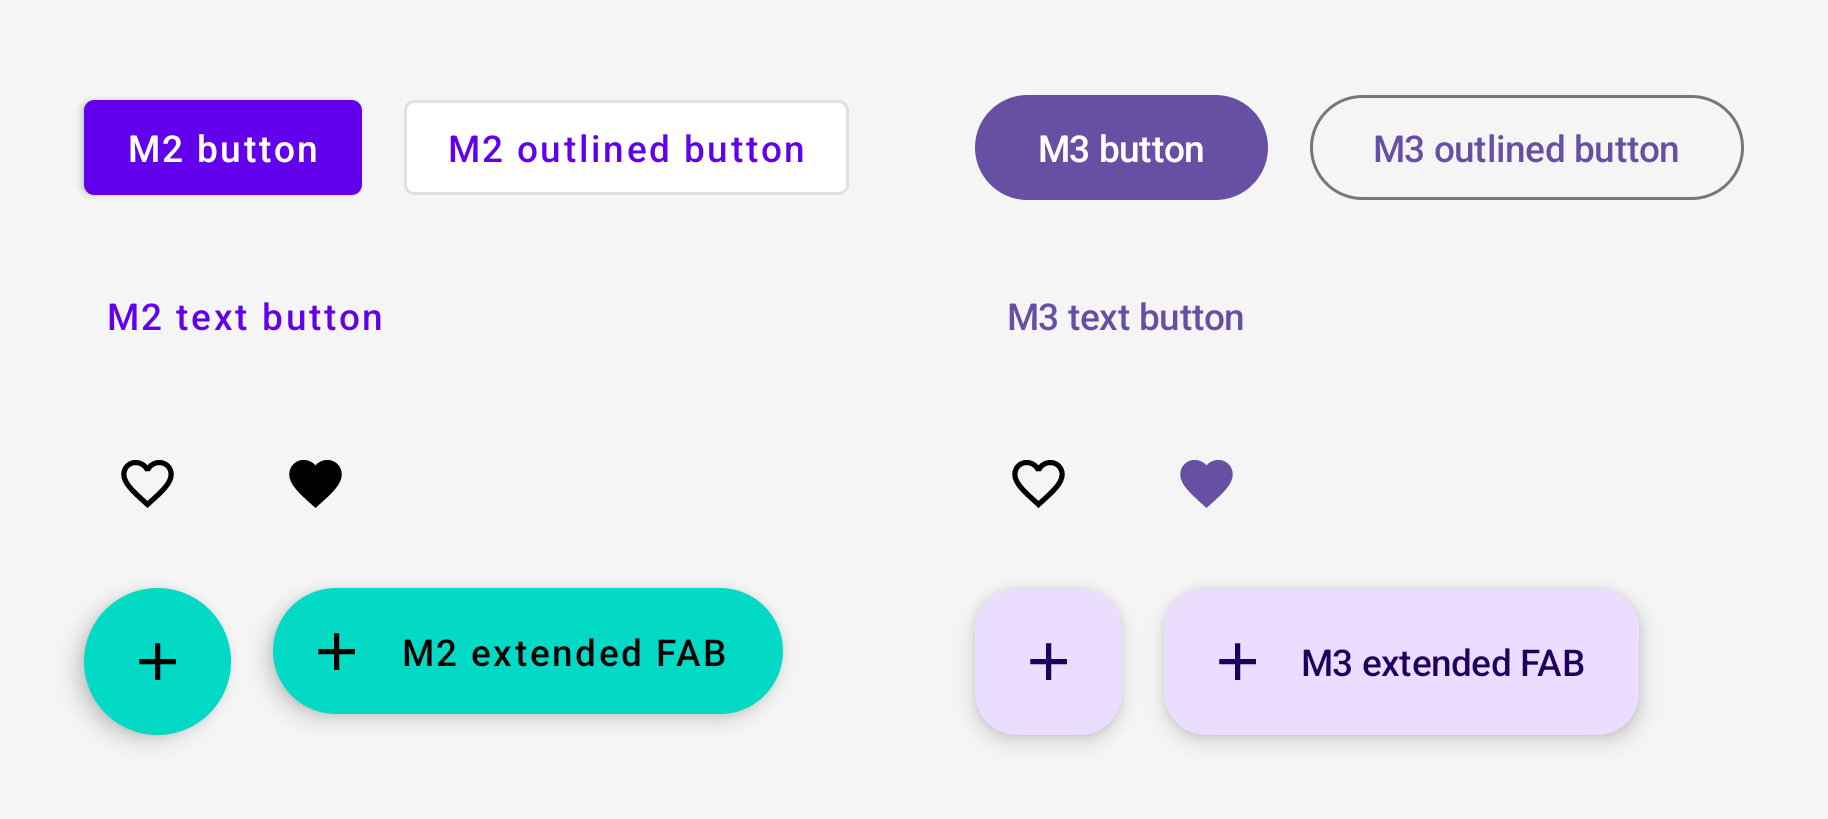
M3 中的 按钮、图标按钮和浮动操作按钮 (FAB) 与 M2 中的不同。M3 包含所有 M2 按钮可组合项。
M2
import androidx.compose.material.Button
import androidx.compose.material.ExtendedFloatingActionButton
import androidx.compose.material.FloatingActionButton
import androidx.compose.material.IconButton
import androidx.compose.material.IconToggleButton
import androidx.compose.material.OutlinedButton
import androidx.compose.material.TextButton

// M2 buttons
Button(…)
OutlinedButton(…)
TextButton(…)
// M2 icon buttons
IconButton(…)
IconToggleButton(…)
// M2 FABs
FloatingActionButton(…)
ExtendedFloatingActionButton(…)
M3
import androidx.compose.material3.Button
import androidx.compose.material3.ExtendedFloatingActionButton
import androidx.compose.material3.FloatingActionButton
import androidx.compose.material3.IconButton
import androidx.compose.material3.IconToggleButton
import androidx.compose.material3.OutlinedButton
import androidx.compose.material3.TextButton

// M3 buttons
Button(…)
OutlinedButton(…)
TextButton(…)
// M3 icon buttons
IconButton(…)
IconToggleButton(…)
// M3 FABs
FloatingActionButton(…)
ExtendedFloatingActionButton(…)
M3 还包括新的按钮变体。请在 Compose Material 3 API 参考概述 中查看它们。
开关

M3 中的 开关 与 M2 中的不同。在 M2 和 M3 中,开关可组合项都命名为 Switch,但导入包有所不同。
M2
import androidx.compose.material.Switch

Switch(…)
M3
import androidx.compose.material3.Switch

Switch(…)
表面和高程
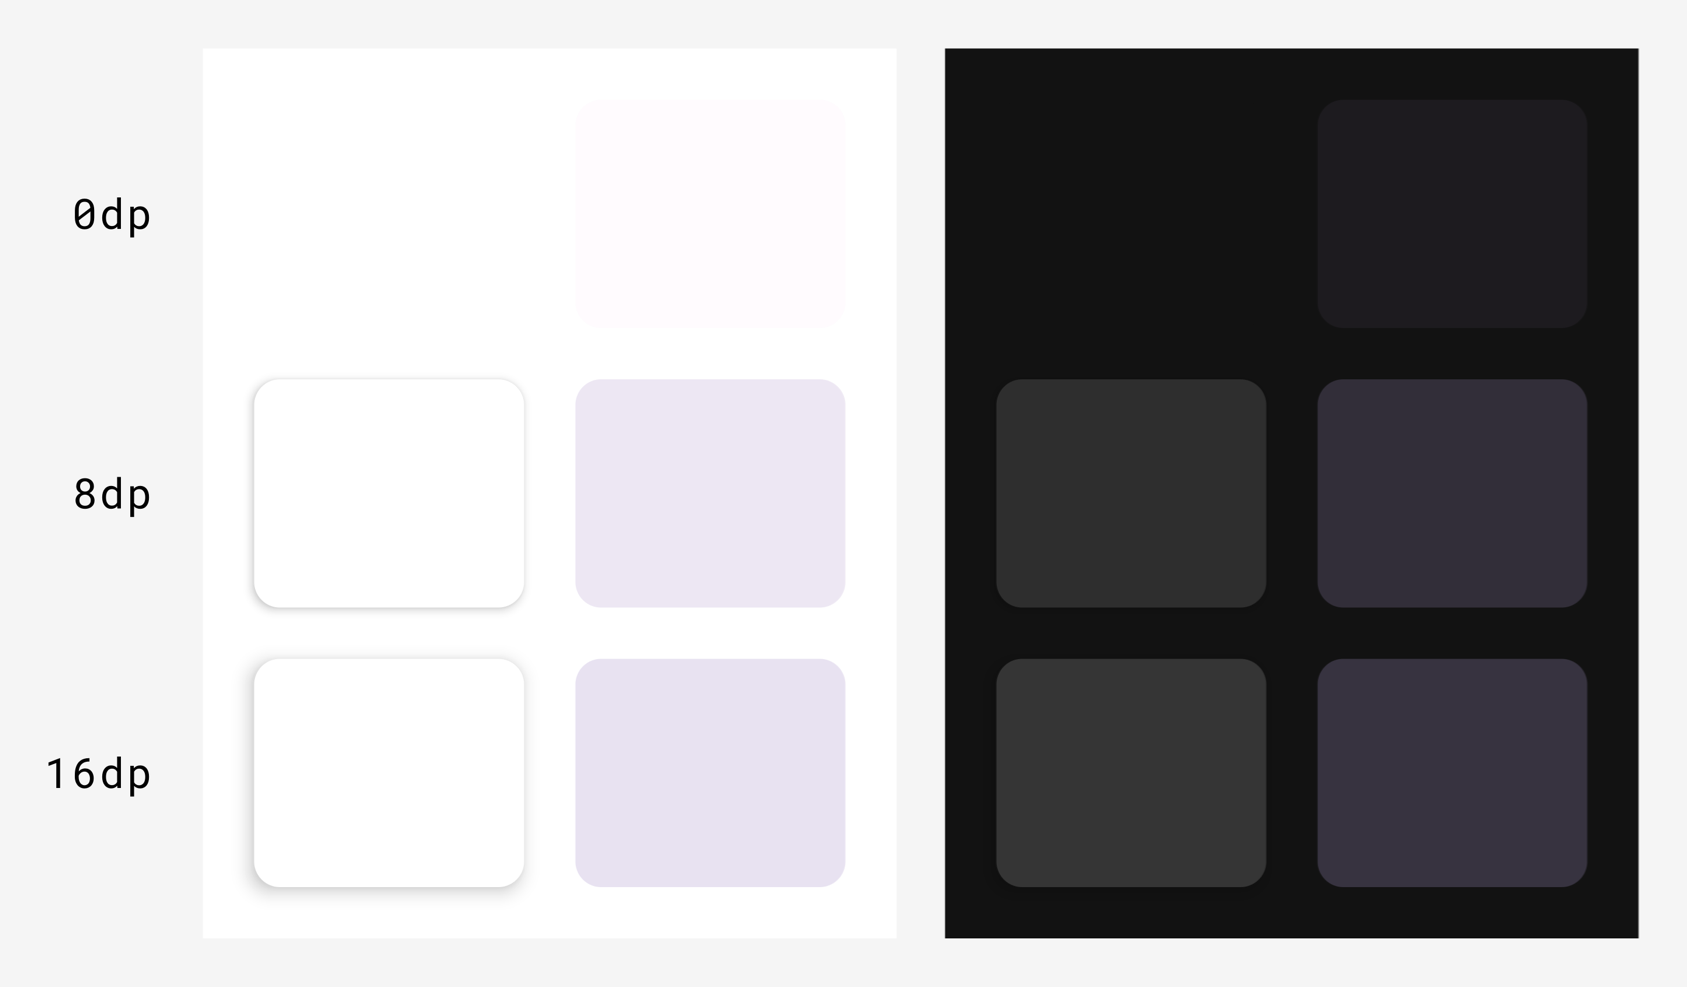
M3 中的表面和高程系统与 M2 中的不同。M3 中有两种类型的高程。
- 阴影高程(投射阴影,与 M2 相同)
- 色调高程(叠加颜色,M3 新增)
在 Compose 中,这适用于 M2 的 Surface 函数和 M3 的 Surface 函数。
M2
import androidx.compose.material.Surface

Surface(
    elevation = …
) { … }
M3
import androidx.compose.material3.Surface

Surface(
    shadowElevation = …,
    tonalElevation = …
) { … }
您可以将 M2 中的 elevation Dp 值用于 M3 中的 shadowElevation 和/或 tonalElevation,具体取决于 UX/UI 设计偏好。Surface 是大多数组件背后的支持可组合项,因此组件可组合项也可能会公开必须以相同方式迁移的高程参数。
M3 中的色调高程取代了 M2 深色主题中的高程叠加概念。因此,M3 中不存在 ElevationOverlay 和 LocalElevationOverlay,并且 M2 中的 LocalAbsoluteElevation 在 M3 中已更改为 LocalAbsoluteTonalElevation。
强调和内容 Alpha
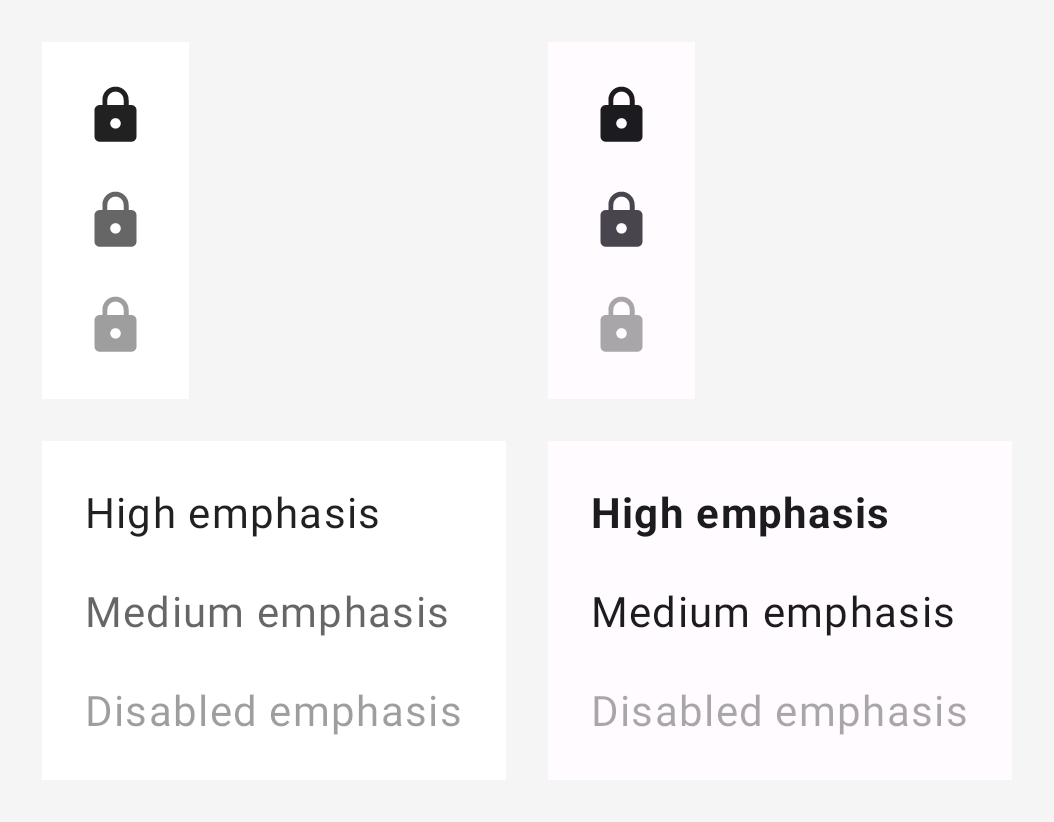
M3 中的强调与 M2 中的显著不同。在 M2 中,强调涉及使用带有一定 Alpha 值的 on 颜色来区分文本和图标等内容。在 M3 中,现在有两种不同的方法。
- 使用 on 颜色及其扩展的 M3 颜色系统中的 variant on 颜色。
- 对文本使用不同的字体粗细。
因此,M3 中不存在 ContentAlpha 和 LocalContentAlpha,需要替换它们。
以下映射建议作为起点。
| M2 | M3 |
|---|---|
onSurface 与 ContentAlpha.high |
onSurface 通常情况下,FontWeight.Medium - FontWeight.Black 用于文本。 |
使用 ContentAlpha.medium 的 onSurface |
通常使用 onSurfaceVariant,文本使用 FontWeight.Thin - FontWeight.Normal |
使用 ContentAlpha.disabled 的 onSurface |
onSurface.copy(alpha = 0.38f) |
以下是 M2 和 M3 中图标强调的示例
M2
import androidx.compose.material.ContentAlpha
import androidx.compose.material.LocalContentAlpha

// High emphasis
CompositionLocalProvider(LocalContentAlpha provides ContentAlpha.high) {
    Icon(…)
}
// Medium emphasis
CompositionLocalProvider(LocalContentAlpha provides ContentAlpha.medium) {
    Icon(…)
}
// Disabled emphasis
CompositionLocalProvider(LocalContentAlpha provides ContentAlpha.disabled) {
    Icon(…)
}
M3
import androidx.compose.material3.LocalContentColor

// High emphasis
CompositionLocalProvider(LocalContentColor provides MaterialTheme.colorScheme.onSurface) {
    Icon(…)
}
// Medium emphasis
CompositionLocalProvider(LocalContentColor provides MaterialTheme.colorScheme.onSurfaceVariant) {
    Icon(…)
}
// Disabled emphasis
CompositionLocalProvider(LocalContentColor provides MaterialTheme.colorScheme.onSurface.copy(alpha = 0.38f)) {
    Icon(…)
}
以下是 M2 和 M3 中文本强调的示例
M2
import androidx.compose.material.ContentAlpha
import androidx.compose.material.LocalContentAlpha

// High emphasis
CompositionLocalProvider(LocalContentAlpha provides ContentAlpha.high) {
    Text(…)
}
// Medium emphasis
CompositionLocalProvider(LocalContentAlpha provides ContentAlpha.medium) {
    Text(…)
}
// Disabled emphasis
CompositionLocalProvider(LocalContentAlpha provides ContentAlpha.disabled) {
    Text(…)
}
M3
import androidx.compose.material3.LocalContentColor

// High emphasis
Text(
    …,
    fontWeight = FontWeight.Bold
)
// Medium emphasis
Text(
    …,
    fontWeight = FontWeight.Normal
)
// Disabled emphasis
CompositionLocalProvider(LocalContentColor provides MaterialTheme.colorScheme.onSurface.copy(alpha = 0.38f)) {
    Text(
        …,
        fontWeight = FontWeight.Normal
    )
}
背景和容器
M2 中的背景在 M3 中称为容器。通常,您可以将 M2 中的 background* 参数替换为 M3 中的 container*,并使用相同的值。例如
M2
Badge(
    backgroundColor = MaterialTheme.colors.primary
) { … }
M3
Badge(
    containerColor = MaterialTheme.colorScheme.primary
) { … }
有用链接
要了解有关从 M2 迁移到 M3 的更多信息,请查阅以下其他资源。
文档
示例应用
- Reply M3 示例应用
- Jetchat 示例应用 M2 到 M3 迁移
- Jetnews 示例应用 M2 到 M3 迁移
- Now in Android M3 hero 应用:core-designsystem 模块
视频
API 参考和源代码
为您推荐
- 注意:当 JavaScript 关闭时,会显示链接文本
- Compose 中的 Material Design 2
- Compose 中的 Material Design 3
- Compose 中的自定义设计系统
