除了 Canvas 可组合项之外,Compose 还提供了一些有用的图形 Modifiers,可帮助绘制自定义内容。这些修饰符很有用,因为它们可以应用于任何可组合项。
绘图修饰符
Compose 中的所有绘图命令都使用绘图修饰符完成。Compose 中有三个主要的绘图修饰符
绘图的基本修饰符是 drawWithContent,您可以在其中确定可组合项的绘制顺序以及在修饰符内发出的绘图命令。drawBehind 是 drawWithContent 的一个便捷包装器,其绘制顺序设置为可组合项内容的后面。drawWithCache 在其内部调用 onDrawBehind 或 onDrawWithContent,并提供了一种缓存其中创建的对象的机制。
Modifier.drawWithContent:选择绘制顺序
Modifier.drawWithContent 允许您在可组合项内容之前或之后执行 DrawScope 操作。请务必调用 drawContent 以呈现可组合项的实际内容。使用此修饰符,您可以决定操作顺序,如果希望在自定义绘图操作之前或之后绘制内容。
例如,如果您希望在内容上渲染径向渐变以在 UI 上创建手电筒钥匙孔效果,您可以执行以下操作
var pointerOffset by remember { mutableStateOf(Offset(0f, 0f)) } Column( modifier = Modifier .fillMaxSize() .pointerInput("dragging") { detectDragGestures { change, dragAmount -> pointerOffset += dragAmount } } .onSizeChanged { pointerOffset = Offset(it.width / 2f, it.height / 2f) } .drawWithContent { drawContent() // draws a fully black area with a small keyhole at pointerOffset that’ll show part of the UI. drawRect( Brush.radialGradient( listOf(Color.Transparent, Color.Black), center = pointerOffset, radius = 100.dp.toPx(), ) ) } ) { // Your composables here }
Modifier.drawBehind:在可组合项后面绘制
Modifier.drawBehind 允许您在屏幕上绘制的可组合项内容后面执行 DrawScope 操作。如果您查看 Canvas 的实现,您可能会注意到它只是 Modifier.drawBehind 的一个便捷包装器。
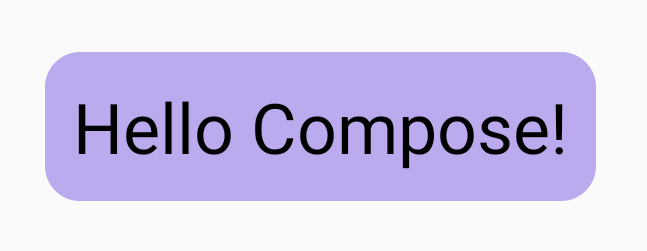
在 Text 后面绘制圆角矩形
Text( "Hello Compose!", modifier = Modifier .drawBehind { drawRoundRect( Color(0xFFBBAAEE), cornerRadius = CornerRadius(10.dp.toPx()) ) } .padding(4.dp) )
产生以下结果
Modifier.drawWithCache:绘制和缓存绘制对象
Modifier.drawWithCache 保持其内部创建的对象处于缓存状态。只要绘图区域的大小相同,或者读取的任何状态对象未更改,这些对象就会被缓存。此修饰符对于提高绘图调用的性能很有用,因为它避免了重新分配在绘制时创建的对象(例如:Brush、Shader、Path 等)。
或者,您也可以使用 remember 在修饰符外部缓存对象。但是,这并非始终可能,因为您并非始终可以访问组合。如果对象仅用于绘图,则使用 drawWithCache 可能会提高性能。
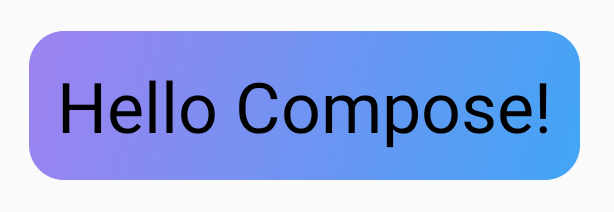
例如,如果您创建了一个 Brush 以在 Text 后面绘制渐变,则使用 drawWithCache 会缓存 Brush 对象,直到绘图区域的大小发生变化
Text( "Hello Compose!", modifier = Modifier .drawWithCache { val brush = Brush.linearGradient( listOf( Color(0xFF9E82F0), Color(0xFF42A5F5) ) ) onDrawBehind { drawRoundRect( brush, cornerRadius = CornerRadius(10.dp.toPx()) ) } } )
图形修饰符
Modifier.graphicsLayer:将变换应用于可组合项
Modifier.graphicsLayer 是一个修饰符,它使可组合项的内容绘制到一个绘制图层中。图层提供了一些不同的功能,例如
- 其绘图指令的隔离(类似于
RenderNode)。作为图层一部分捕获的绘图指令可以通过渲染管道有效地重新发出,而无需重新执行应用程序代码。 - 应用于图层中包含的所有绘图指令的变换。
- 用于组合功能的光栅化。当图层被光栅化时,其绘图指令会被执行,并且输出会被捕获到一个离屏缓冲区中。合成后续帧的此类缓冲区比执行各个指令更快,但当应用缩放或旋转等变换时,它将表现为位图。
变换
Modifier.graphicsLayer 为其绘图指令提供隔离;例如,可以使用 Modifier.graphicsLayer 应用各种变换。这些可以进行动画处理或修改,而无需重新执行绘图 lambda。
Modifier.graphicsLayer 不会更改可组合项的测量大小或放置,因为它仅影响绘制阶段。这意味着如果可组合项最终绘制在其布局边界之外,则它可能会与其他可组合项重叠。
可以使用此修饰符应用以下变换
缩放 - 增大尺寸
scaleX 和 scaleY 分别沿水平或垂直方向放大或缩小内容。1.0f 的值表示缩放不变,0.5f 的值表示维度的一半。
Image( painter = painterResource(id = R.drawable.sunset), contentDescription = "Sunset", modifier = Modifier .graphicsLayer { this.scaleX = 1.2f this.scaleY = 0.8f } )
平移
可以使用 graphicsLayer 更改 translationX 和 translationY,translationX 将可组合项向左或向右移动。translationY 将可组合项向上或向下移动。
Image( painter = painterResource(id = R.drawable.sunset), contentDescription = "Sunset", modifier = Modifier .graphicsLayer { this.translationX = 100.dp.toPx() this.translationY = 10.dp.toPx() } )
旋转
设置 rotationX 以水平旋转,rotationY 以垂直旋转,rotationZ 以 Z 轴旋转(标准旋转)。此值以度数指定(0-360)。
Image( painter = painterResource(id = R.drawable.sunset), contentDescription = "Sunset", modifier = Modifier .graphicsLayer { this.rotationX = 90f this.rotationY = 275f this.rotationZ = 180f } )
原点
可以指定 transformOrigin。然后将其用作变换发生的点。到目前为止,所有示例都使用了 TransformOrigin.Center,它位于 (0.5f, 0.5f)。如果您将原点指定为 (0f, 0f),则变换将从可组合项的左上角开始。
如果您使用 rotationZ 变换更改原点,您可以看到该项目围绕可组合项的左上角旋转
Image( painter = painterResource(id = R.drawable.sunset), contentDescription = "Sunset", modifier = Modifier .graphicsLayer { this.transformOrigin = TransformOrigin(0f, 0f) this.rotationX = 90f this.rotationY = 275f this.rotationZ = 180f } )
裁剪和形状
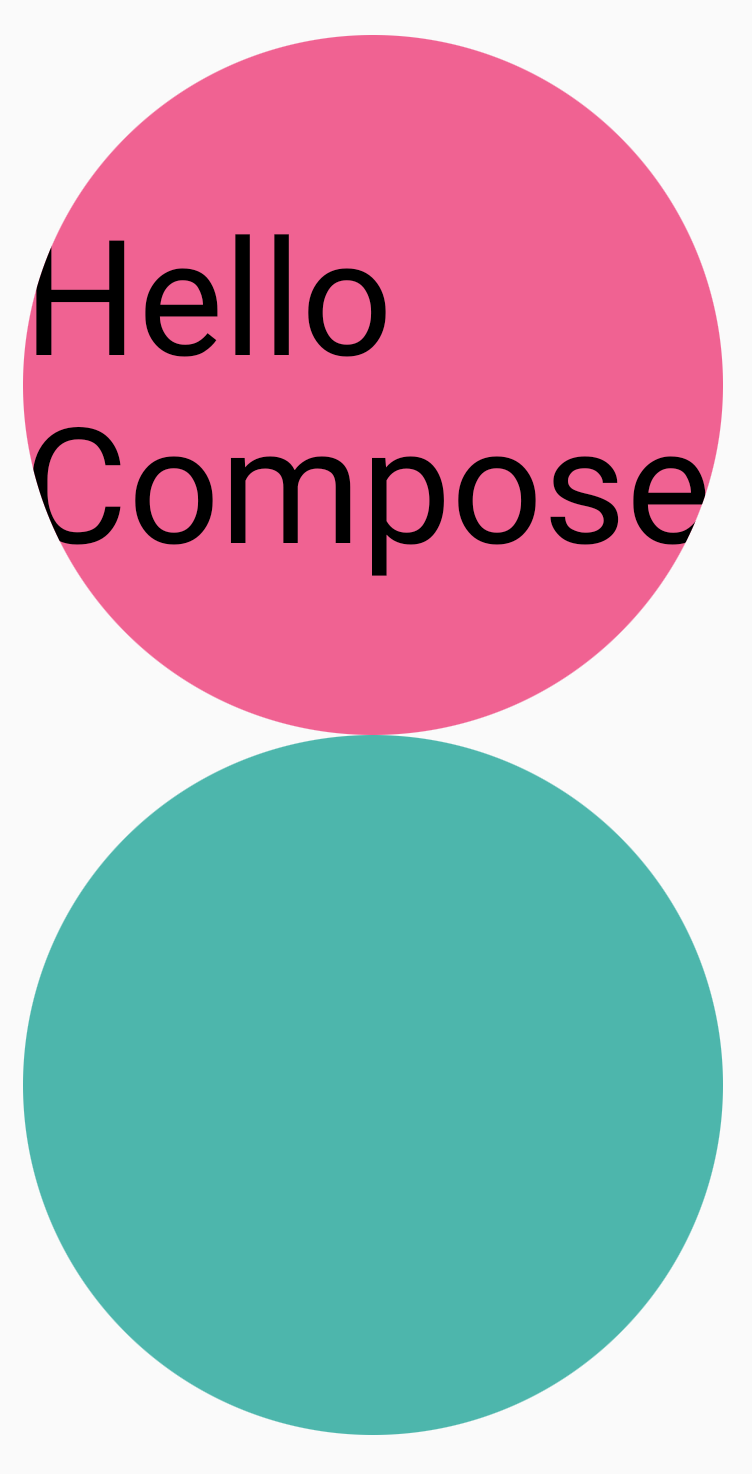
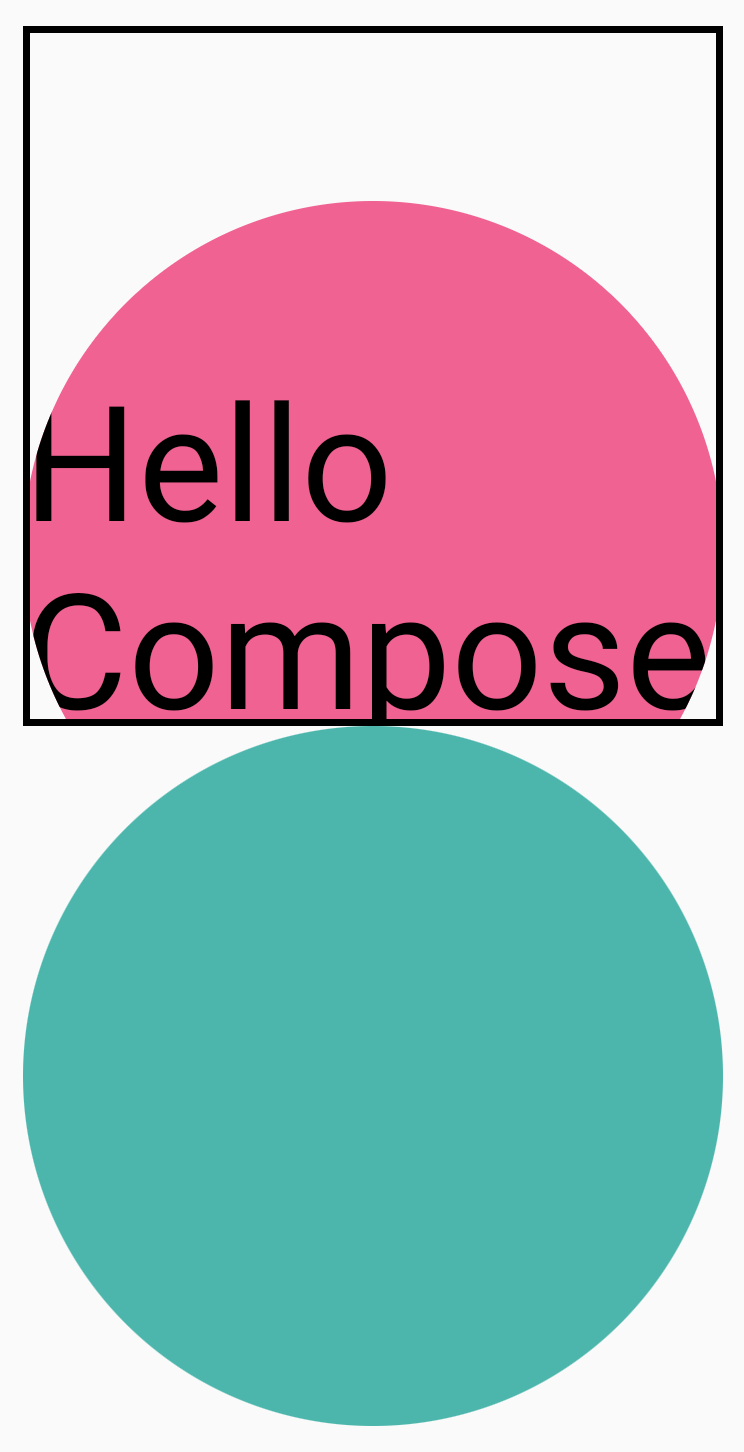
当 clip = true 时,Shape 指定内容裁剪到的轮廓。在此示例中,我们设置了两个框以具有两个不同的裁剪 - 一个使用 graphicsLayer clip 变量,另一个使用便捷包装器 Modifier.clip。
Column(modifier = Modifier.padding(16.dp)) { Box( modifier = Modifier .size(200.dp) .graphicsLayer { clip = true shape = CircleShape } .background(Color(0xFFF06292)) ) { Text( "Hello Compose", style = TextStyle(color = Color.Black, fontSize = 46.sp), modifier = Modifier.align(Alignment.Center) ) } Box( modifier = Modifier .size(200.dp) .clip(CircleShape) .background(Color(0xFF4DB6AC)) ) }
第一个框(显示“Hello Compose”的文本)的内容被裁剪为圆形
然后,如果您将 translationY 应用于顶部粉红色圆圈,您会看到可组合项的边界仍然相同,但圆圈绘制在底部圆圈下方(并在其边界之外)。
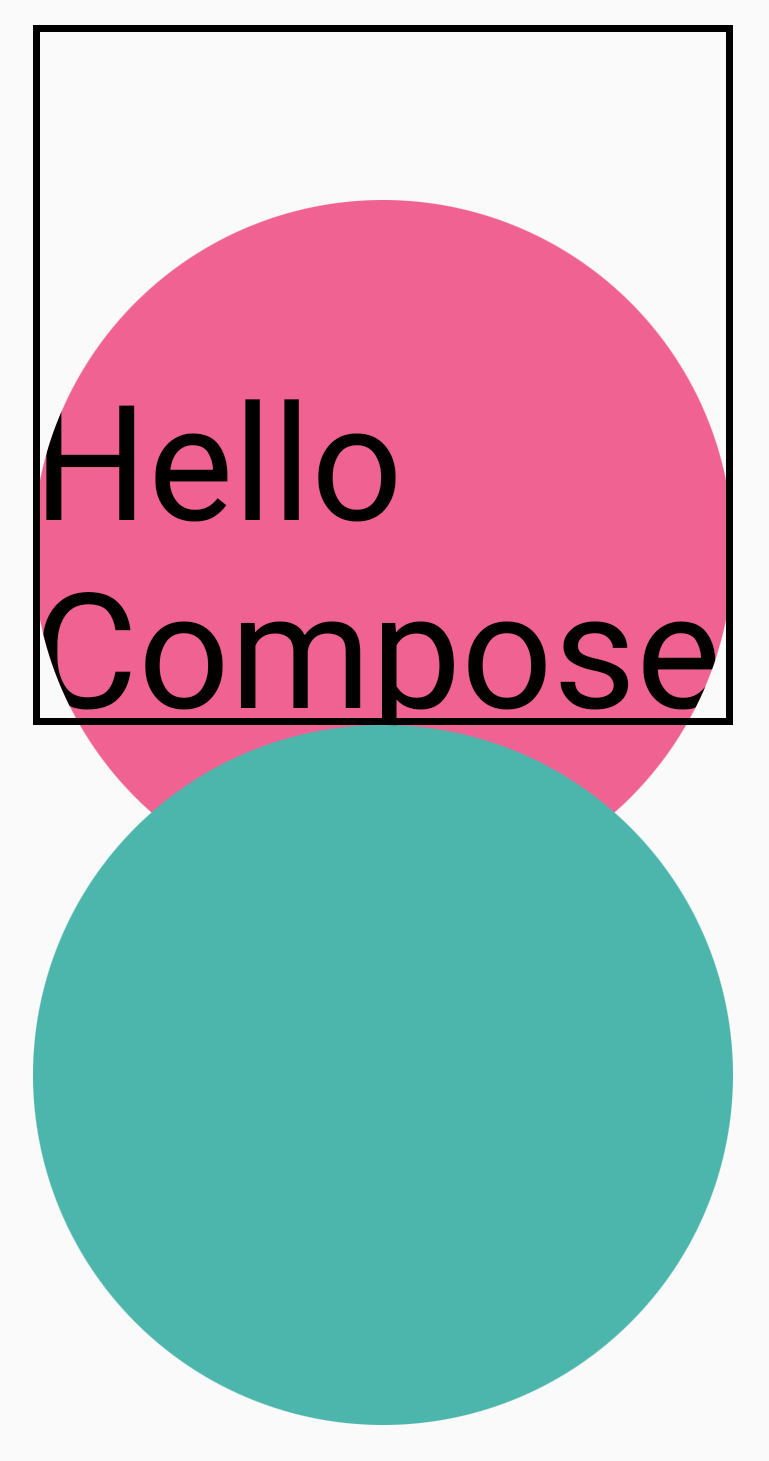
要将可组合项裁剪到其绘制的区域,您可以在修饰符链的开头添加另一个 Modifier.clip(RectangleShape)。然后,内容保留在原始边界内。
Column(modifier = Modifier.padding(16.dp)) { Box( modifier = Modifier .clip(RectangleShape) .size(200.dp) .border(2.dp, Color.Black) .graphicsLayer { clip = true shape = CircleShape translationY = 50.dp.toPx() } .background(Color(0xFFF06292)) ) { Text( "Hello Compose", style = TextStyle(color = Color.Black, fontSize = 46.sp), modifier = Modifier.align(Alignment.Center) ) } Box( modifier = Modifier .size(200.dp) .clip(RoundedCornerShape(500.dp)) .background(Color(0xFF4DB6AC)) ) }
Alpha
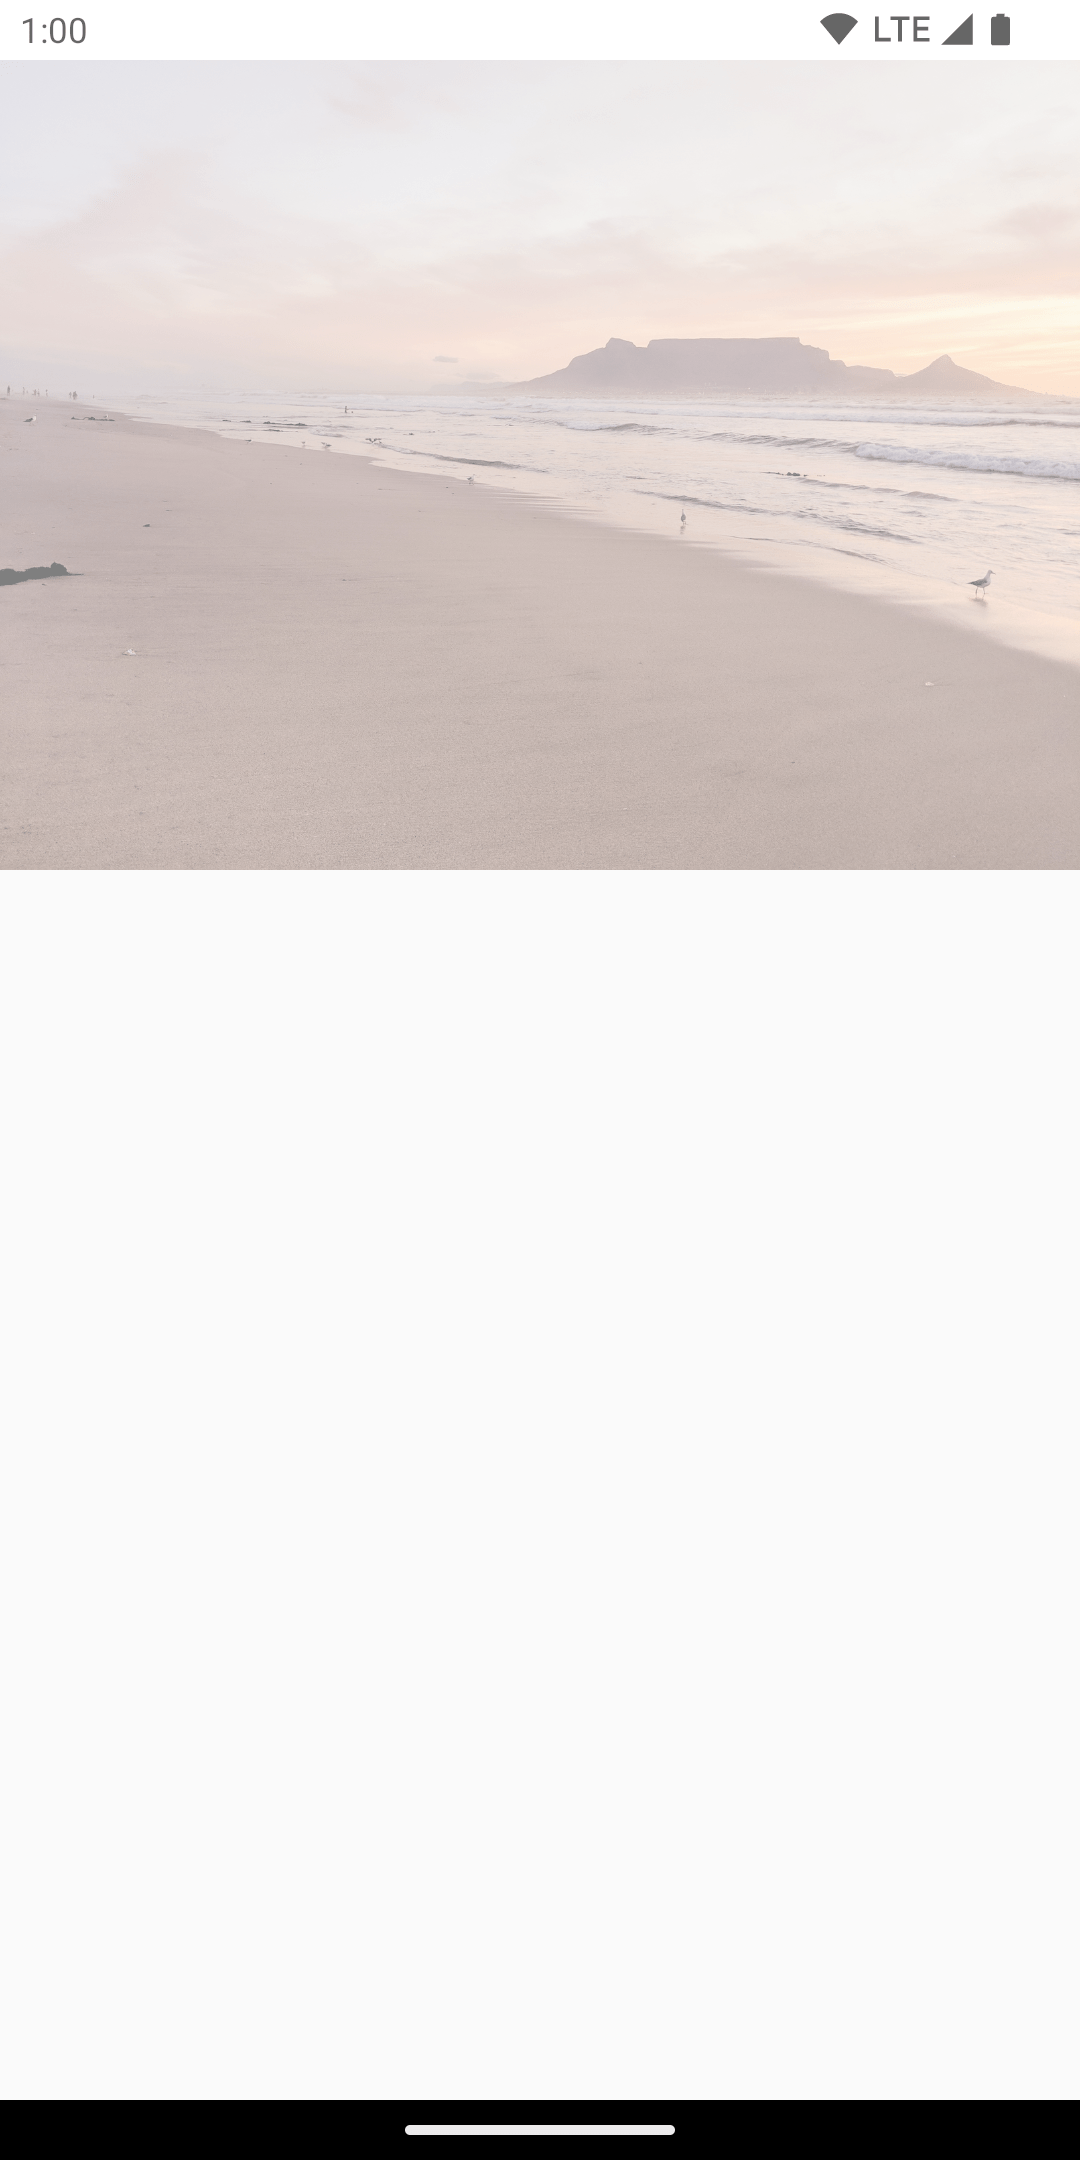
Modifier.graphicsLayer 可用于为整个图层设置 alpha(不透明度)。1.0f 表示完全不透明,0.0f 表示不可见。
Image( painter = painterResource(id = R.drawable.sunset), contentDescription = "clock", modifier = Modifier .graphicsLayer { this.alpha = 0.5f } )
合成策略
使用 alpha 和透明度可能并不像更改单个 alpha 值那样简单。除了更改 alpha 之外,还可以选择在 graphicsLayer 上设置 CompositingStrategy。CompositingStrategy 确定可组合项的内容如何与已绘制在屏幕上的其他内容合成(组合)。
不同的策略是
自动(默认)
合成的策略由 graphicsLayer 的其他参数决定。如果 alpha 小于 1.0f 或设置了 RenderEffect,它会将图层渲染到离屏缓冲区中。每当 alpha 小于 1f 时,都会自动创建一个合成图层来渲染内容,然后将这个离屏缓冲区以相应的 alpha 值绘制到目标位置。设置 RenderEffect 或 overscroll 将始终将内容渲染到离屏缓冲区中,而不管设置的 CompositingStrategy 是什么。
离屏
可组合项的内容在渲染到目标位置之前始终光栅化到离屏纹理或位图。这对于将 BlendMode 操作应用于遮罩内容以及在渲染复杂的绘图指令集时提高性能很有用。
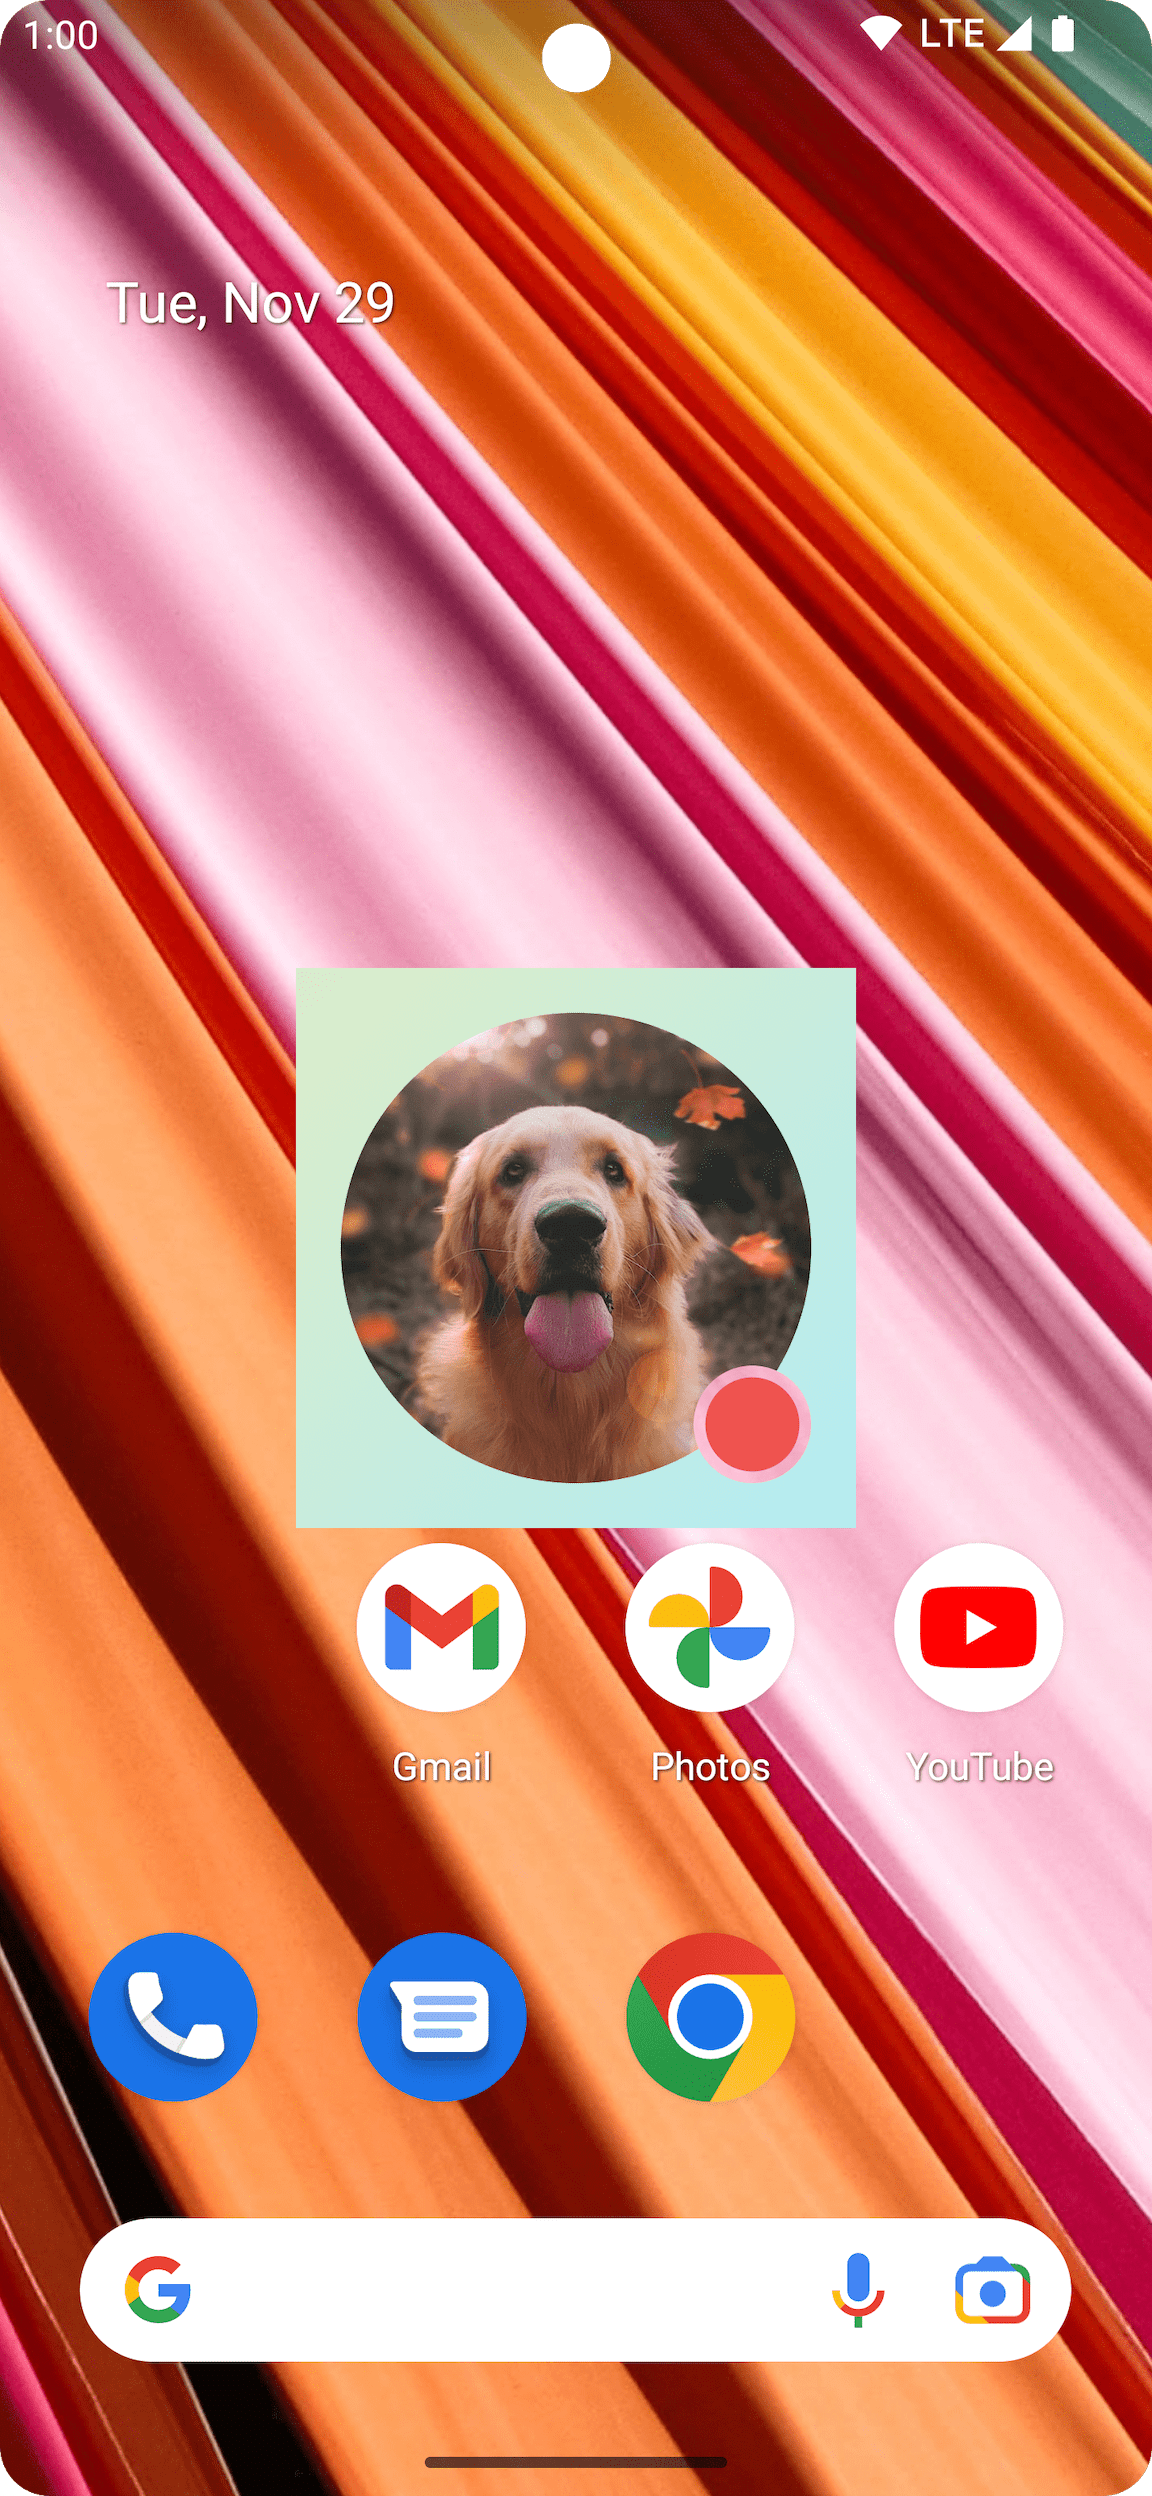
使用 CompositingStrategy.Offscreen 的一个示例是使用 BlendModes。查看下面的示例,假设您想通过发出使用 BlendMode.Clear 的绘制命令来移除 Image 可组合项的某些部分。如果您未将 compositingStrategy 设置为 CompositingStrategy.Offscreen,则 BlendMode 会与其下方的所有内容交互。
Image( painter = painterResource(id = R.drawable.dog), contentDescription = "Dog", contentScale = ContentScale.Crop, modifier = Modifier .size(120.dp) .aspectRatio(1f) .background( Brush.linearGradient( listOf( Color(0xFFC5E1A5), Color(0xFF80DEEA) ) ) ) .padding(8.dp) .graphicsLayer { compositingStrategy = CompositingStrategy.Offscreen } .drawWithCache { val path = Path() path.addOval( Rect( topLeft = Offset.Zero, bottomRight = Offset(size.width, size.height) ) ) onDrawWithContent { clipPath(path) { // this draws the actual image - if you don't call drawContent, it wont // render anything this@onDrawWithContent.drawContent() } val dotSize = size.width / 8f // Clip a white border for the content drawCircle( Color.Black, radius = dotSize, center = Offset( x = size.width - dotSize, y = size.height - dotSize ), blendMode = BlendMode.Clear ) // draw the red circle indication drawCircle( Color(0xFFEF5350), radius = dotSize * 0.8f, center = Offset( x = size.width - dotSize, y = size.height - dotSize ) ) } } )
通过将 CompositingStrategy 设置为 Offscreen,它会创建一个离屏纹理来执行命令(仅将 BlendMode 应用于此可组合项的内容)。然后将其渲染到屏幕上已渲染内容的顶部,而不影响已绘制的内容。

如果您没有使用 CompositingStrategy.Offscreen,则应用 BlendMode.Clear 的结果将清除目标中的所有像素,而不管之前设置了什么内容——使窗口的渲染缓冲区(黑色)可见。许多涉及 alpha 的 BlendModes 在没有离屏缓冲区的情况下将无法按预期工作。请注意红色圆形指示符周围的黑环

为了进一步理解这一点:如果应用具有半透明的窗口背景,并且您没有使用 CompositingStrategy.Offscreen,则 BlendMode 将与整个应用交互。它将清除所有像素以显示下方应用或壁纸,如本例所示
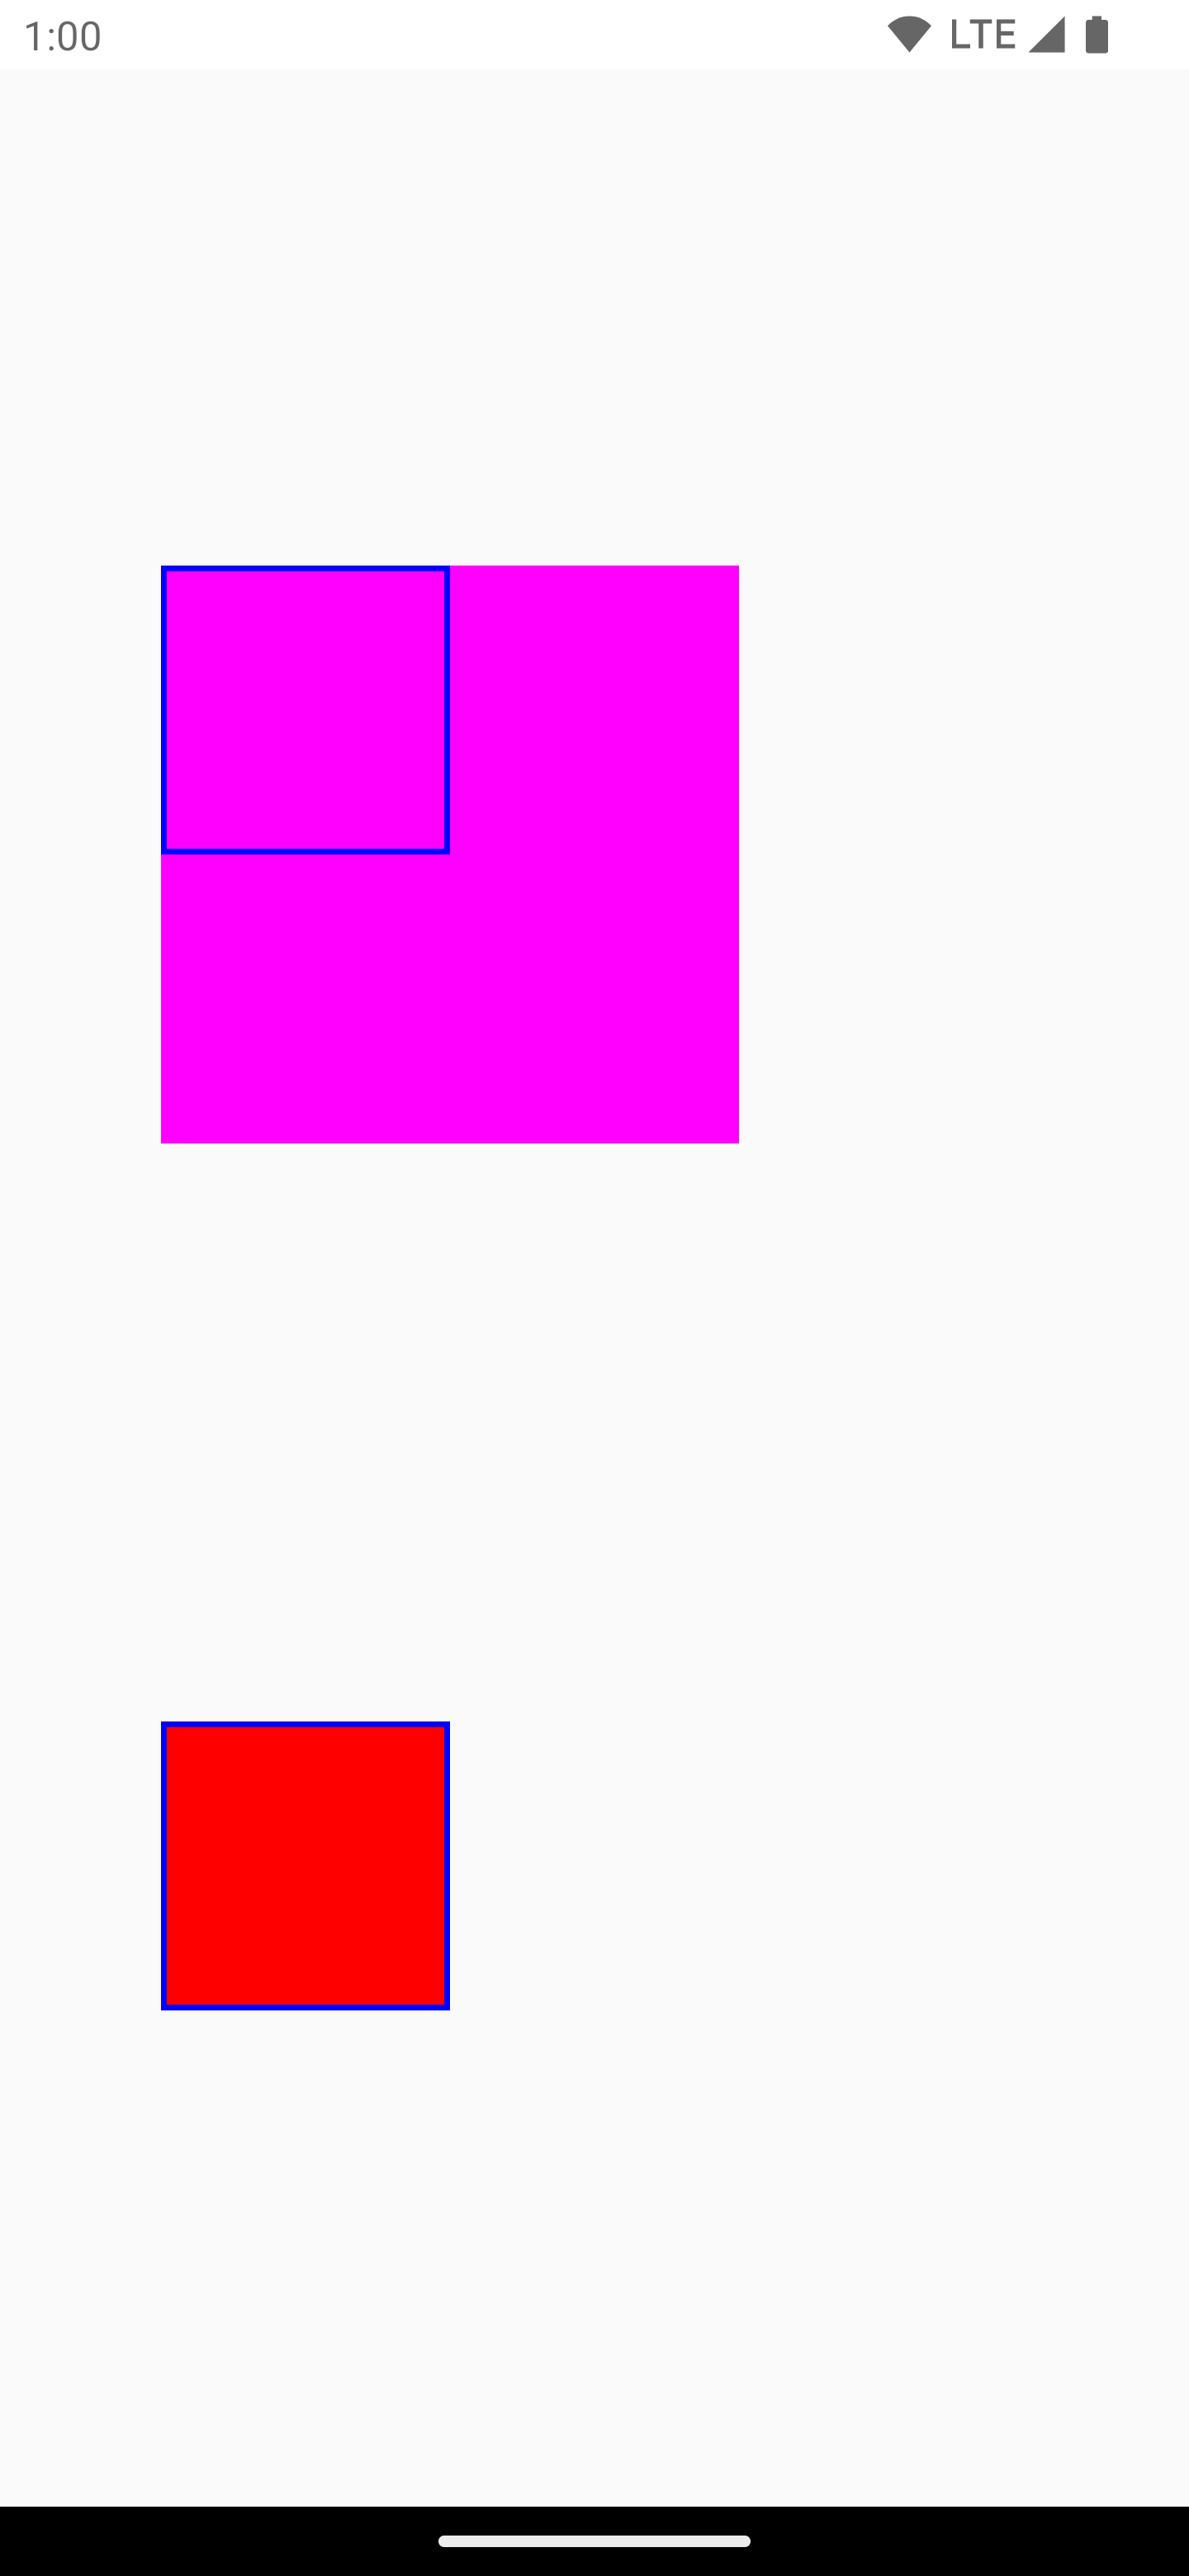
值得注意的是,当使用 CompositingStrategy.Offscreen 时,会创建一个与绘图区域大小相同的离屏纹理并将其渲染回屏幕。使用此策略执行的任何绘图命令默认情况下都将裁剪到此区域。下面的代码片段说明了切换到使用离屏纹理时的差异
@Composable fun CompositingStrategyExamples() { Column( modifier = Modifier .fillMaxSize() .wrapContentSize(Alignment.Center) ) { // Does not clip content even with a graphics layer usage here. By default, graphicsLayer // does not allocate + rasterize content into a separate layer but instead is used // for isolation. That is draw invalidations made outside of this graphicsLayer will not // re-record the drawing instructions in this composable as they have not changed Canvas( modifier = Modifier .graphicsLayer() .size(100.dp) // Note size of 100 dp here .border(2.dp, color = Color.Blue) ) { // ... and drawing a size of 200 dp here outside the bounds drawRect(color = Color.Magenta, size = Size(200.dp.toPx(), 200.dp.toPx())) } Spacer(modifier = Modifier.size(300.dp)) /* Clips content as alpha usage here creates an offscreen buffer to rasterize content into first then draws to the original destination */ Canvas( modifier = Modifier // force to an offscreen buffer .graphicsLayer(compositingStrategy = CompositingStrategy.Offscreen) .size(100.dp) // Note size of 100 dp here .border(2.dp, color = Color.Blue) ) { /* ... and drawing a size of 200 dp. However, because of the CompositingStrategy.Offscreen usage above, the content gets clipped */ drawRect(color = Color.Red, size = Size(200.dp.toPx(), 200.dp.toPx())) } } }
调制 Alpha
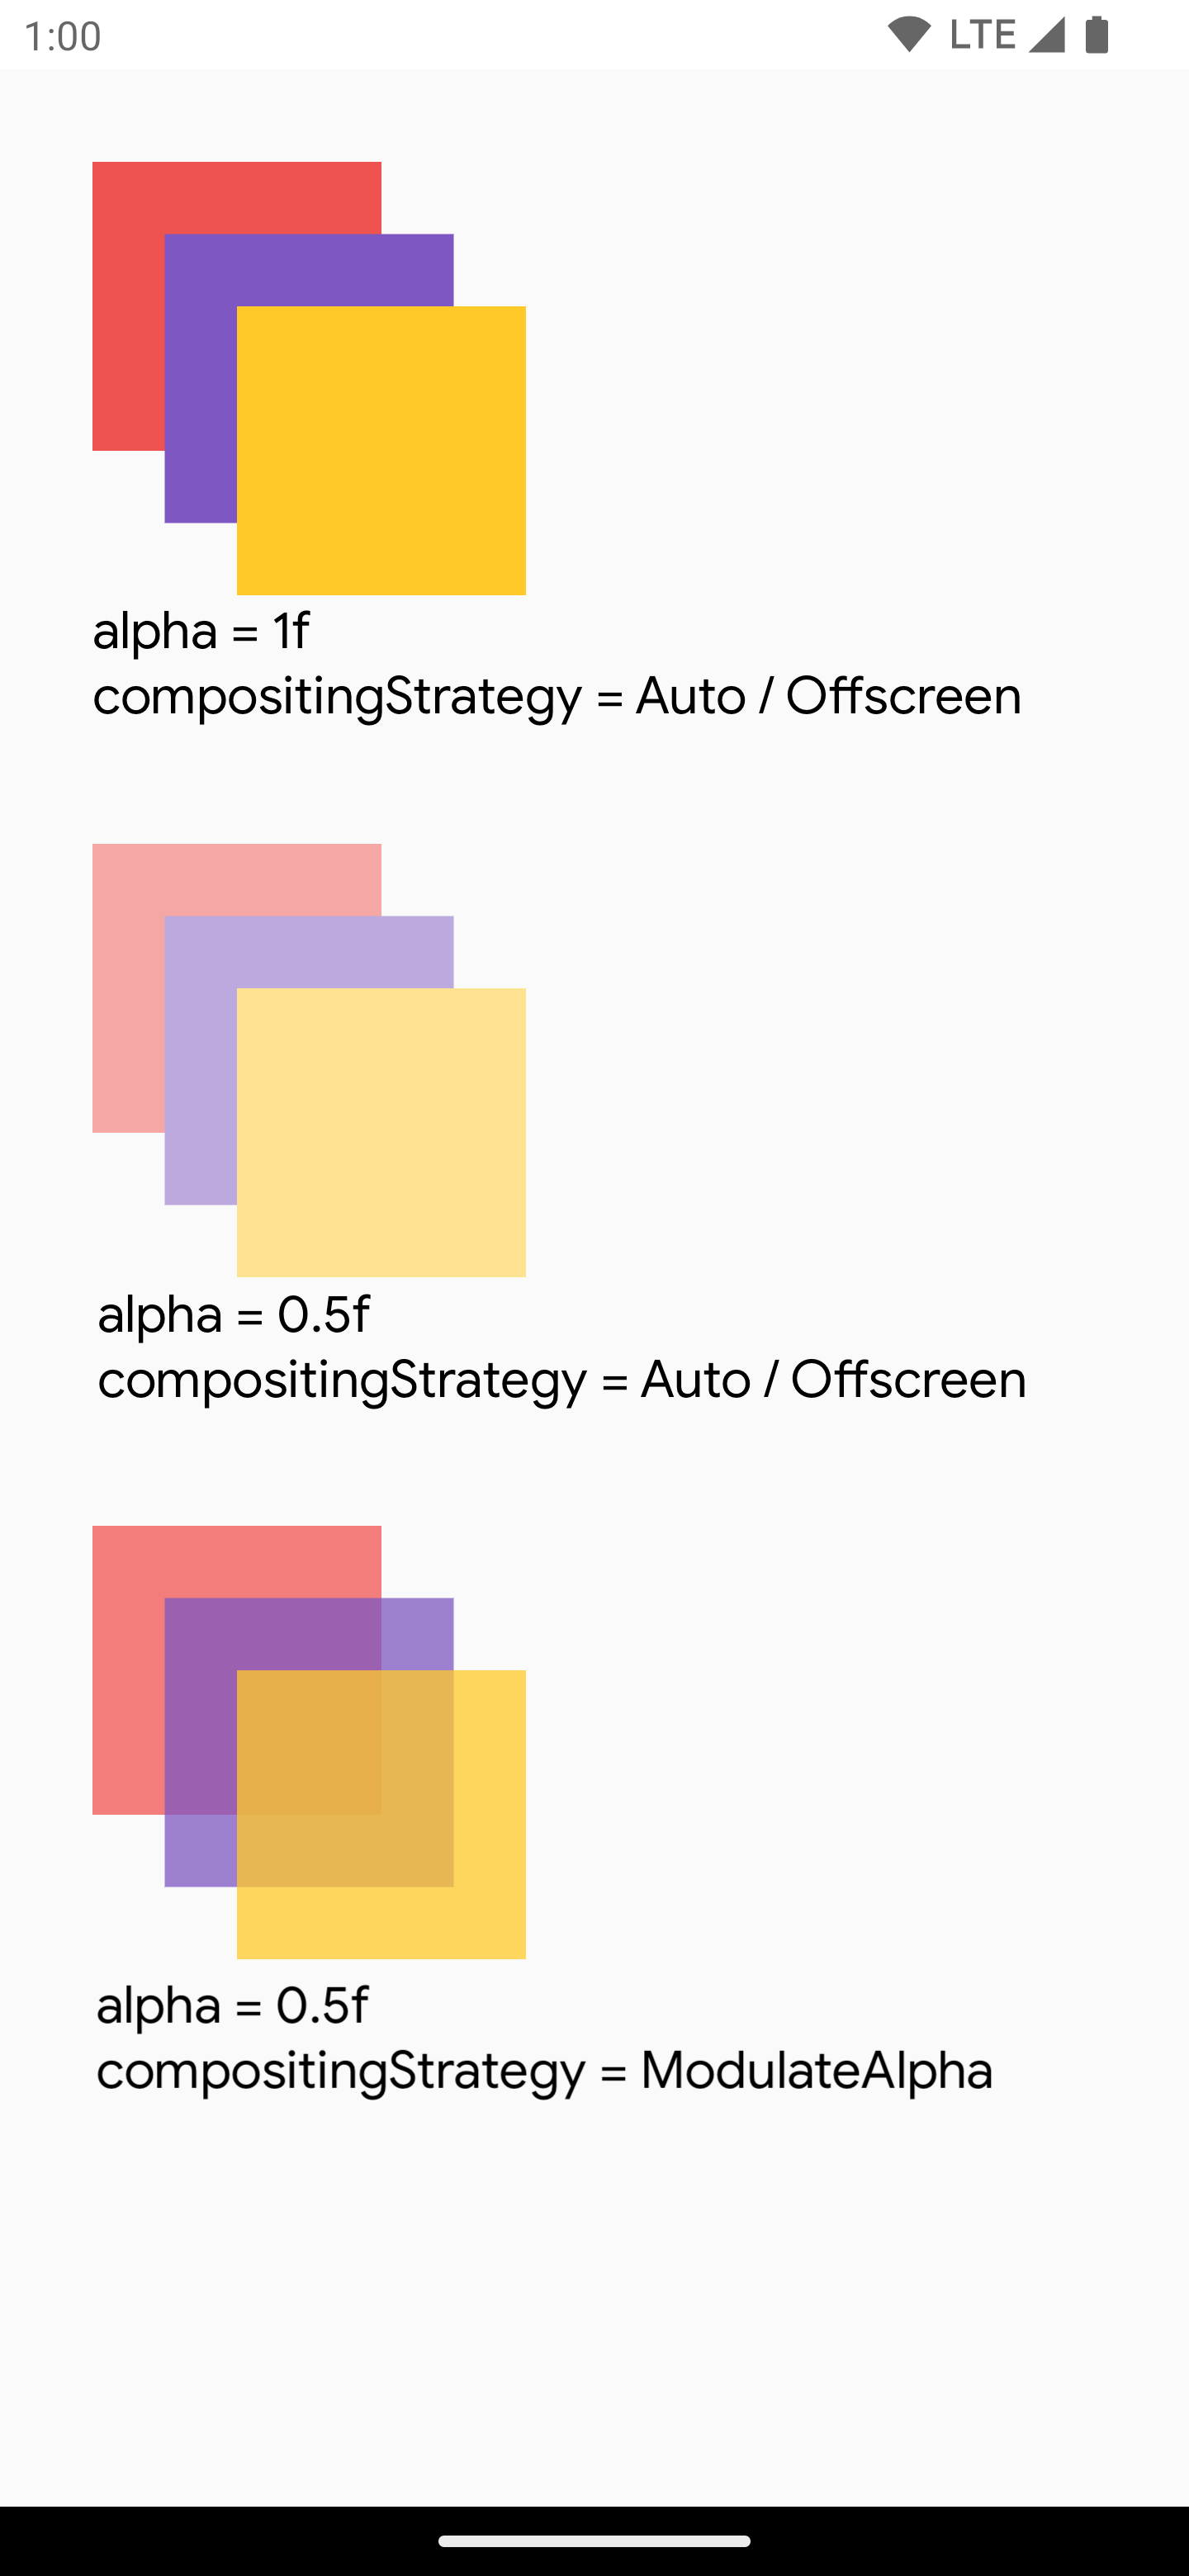
此 合成策略 会调制 graphicsLayer 中记录的每个绘图指令的 alpha 值。除非设置了 RenderEffect,否则它不会为低于 1.0f 的 alpha 值创建离屏缓冲区,因此对于 alpha 渲染来说,它可以更高效。但是,它可能会为重叠内容提供不同的结果。对于预先知道内容不会重叠的用例,这可以提供比 alpha 值小于 1 的 CompositingStrategy.Auto 更好的性能。
下面是不同合成策略的另一个示例 - 将不同的 alpha 值应用于可组合项的不同部分,并应用 Modulate 策略
@Preview @Composable fun CompositingStrategy_ModulateAlpha() { Column( modifier = Modifier .fillMaxSize() .padding(32.dp) ) { // Base drawing, no alpha applied Canvas( modifier = Modifier.size(200.dp) ) { drawSquares() } Spacer(modifier = Modifier.size(36.dp)) // Alpha 0.5f applied to whole composable Canvas( modifier = Modifier .size(200.dp) .graphicsLayer { alpha = 0.5f } ) { drawSquares() } Spacer(modifier = Modifier.size(36.dp)) // 0.75f alpha applied to each draw call when using ModulateAlpha Canvas( modifier = Modifier .size(200.dp) .graphicsLayer { compositingStrategy = CompositingStrategy.ModulateAlpha alpha = 0.75f } ) { drawSquares() } } } private fun DrawScope.drawSquares() { val size = Size(100.dp.toPx(), 100.dp.toPx()) drawRect(color = Red, size = size) drawRect( color = Purple, size = size, topLeft = Offset(size.width / 4f, size.height / 4f) ) drawRect( color = Yellow, size = size, topLeft = Offset(size.width / 4f * 2f, size.height / 4f * 2f) ) } val Purple = Color(0xFF7E57C2) val Yellow = Color(0xFFFFCA28) val Red = Color(0xFFEF5350)
将可组合项的内容写入位图
一个常见的用例是从可组合项创建 Bitmap。要将可组合项的内容复制到 Bitmap,请使用 rememberGraphicsLayer() 创建一个 GraphicsLayer。
使用 drawWithContent() 和 graphicsLayer.record{} 将绘图命令重定向到新图层。然后使用 drawLayer 在可见画布中绘制图层
val coroutineScope = rememberCoroutineScope() val graphicsLayer = rememberGraphicsLayer() Box( modifier = Modifier .drawWithContent { // call record to capture the content in the graphics layer graphicsLayer.record { // draw the contents of the composable into the graphics layer this@drawWithContent.drawContent() } // draw the graphics layer on the visible canvas drawLayer(graphicsLayer) } .clickable { coroutineScope.launch { val bitmap = graphicsLayer.toImageBitmap() // do something with the newly acquired bitmap } } .background(Color.White) ) { Text("Hello Android", fontSize = 26.sp) }
您可以将位图保存到磁盘并共享它。有关更多详细信息,请参阅 完整的示例代码片段。在尝试保存到磁盘之前,请务必检查设备上的权限。
自定义绘图修饰符
要创建自己的自定义修饰符,请实现 DrawModifier 接口。这使您可以访问 ContentDrawScope,它与使用 Modifier.drawWithContent() 时公开的内容相同。然后,您可以将常见的绘图操作提取到自定义绘图修饰符中以清理代码并提供方便的包装器;例如,Modifier.background() 是一个方便的 DrawModifier。
例如,如果您想实现一个垂直翻转内容的 Modifier,您可以按如下方式创建一个:
class FlippedModifier : DrawModifier { override fun ContentDrawScope.draw() { scale(1f, -1f) { this@draw.drawContent() } } } fun Modifier.flipped() = this.then(FlippedModifier())
然后使用应用于 Text 的此翻转修饰符
Text( "Hello Compose!", modifier = Modifier .flipped() )

其他资源
有关使用 graphicsLayer 和自定义绘图的更多示例,请查看以下资源
为您推荐
- 注意:当 JavaScript 关闭时,链接文本将显示
- Compose 中的图形
- 自定义图像 {:#customize-image}
- Jetpack Compose 的 Kotlin
