
在 Android 应用中,手动依赖注入或服务定位器可能会带来问题,具体取决于您的项目规模。您可以使用 Dagger 来管理依赖项,从而在项目规模扩大时限制其复杂性。
Dagger 会自动生成模仿您原本需要手动编写的代码。由于代码是在编译时生成的,因此它比其他基于反射的解决方案(例如 Guice)更具可追溯性和更高的性能。
使用 Dagger 的好处
Dagger 使您免于编写繁琐且容易出错的样板代码,具体方法如下:
生成您在手动依赖注入 (DI) 部分中手动实现的
AppContainer代码(应用图)。为应用图中可用的类创建工厂。这是在内部满足依赖项的方式。
通过使用 作用域来决定是重用依赖项还是创建新实例。
为特定流程创建容器,就像您在上一部分中使用 Dagger 子组件处理登录流程一样。这通过在不再需要对象时释放内存来提高您应用的性能。
只要您声明了类的依赖项并指定了如何使用注解来满足它们,Dagger 就会在构建时自动完成所有这些工作。Dagger 生成的代码与您手动编写的代码类似。在内部,Dagger 创建了一个对象图,它可以引用该图来查找提供类实例的方法。对于图中的每个类,Dagger 都会生成一个 工厂类型 类,它在内部使用该类来获取该类型的实例。
在构建时,Dagger 会遍历您的代码并:
构建并验证依赖图,确保:
- 每个对象的依赖项都可以满足,从而避免运行时异常。
- 不存在依赖循环,从而避免无限循环。
生成在运行时用于创建实际对象及其依赖项的类。
Dagger 中的一个简单用例:生成工厂
为了演示如何使用 Dagger,让我们为下图所示的 UserRepository 类创建一个简单的 工厂。
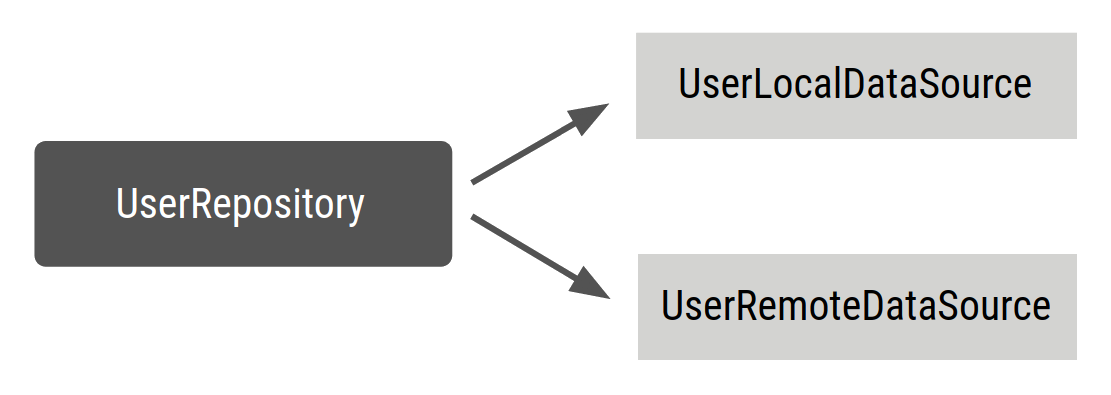
如下定义 UserRepository:
Kotlin
class UserRepository(
    private val localDataSource: UserLocalDataSource,
    private val remoteDataSource: UserRemoteDataSource
) { ... }
Java
public class UserRepository {

    private final UserLocalDataSource userLocalDataSource;
    private final UserRemoteDataSource userRemoteDataSource;

    public UserRepository(UserLocalDataSource userLocalDataSource, UserRemoteDataSource userRemoteDataSource) {
        this.userLocalDataSource = userLocalDataSource;
        this.userRemoteDataSource = userRemoteDataSource;
    }

    ...
}
将 @Inject 注解添加到 UserRepository 构造函数中,以便 Dagger 知道如何创建 UserRepository。
Kotlin
// @Inject lets Dagger know how to create instances of this object
class UserRepository @Inject constructor(
    private val localDataSource: UserLocalDataSource,
    private val remoteDataSource: UserRemoteDataSource
) { ... }
Java
public class UserRepository {

    private final UserLocalDataSource userLocalDataSource;
    private final UserRemoteDataSource userRemoteDataSource;

    // @Inject lets Dagger know how to create instances of this object
    @Inject
    public UserRepository(UserLocalDataSource userLocalDataSource, UserRemoteDataSource userRemoteDataSource) {
        this.userLocalDataSource = userLocalDataSource;
        this.userRemoteDataSource = userRemoteDataSource;
    }
}
在上面的代码片段中,您正在告诉 Dagger:
如何使用
@Inject注解的构造函数创建UserRepository实例。它的依赖项是什么:
UserLocalDataSource和UserRemoteDataSource。
现在 Dagger 知道如何创建 UserRepository 的实例,但它不知道如何创建其依赖项。如果您也注解其他类,Dagger 就会知道如何创建它们。
Kotlin
// @Inject lets Dagger know how to create instances of these objects
class UserLocalDataSource @Inject constructor() { ... }
class UserRemoteDataSource @Inject constructor() { ... }
Java
public class UserLocalDataSource {
    @Inject
    public UserLocalDataSource() { }
}

public class UserRemoteDataSource {
    @Inject
    public UserRemoteDataSource() { }
}
Dagger 组件
Dagger 可以创建项目中依赖项的图表,它可以使用该图表来查找在需要时从何处获取这些依赖项。要让 Dagger 执行此操作,您需要创建一个接口并用 @Component 注解它。Dagger 会创建一个容器,就像您手动进行依赖注入时所做的那样。
在 @Component 接口内部,您可以定义返回所需类(即 UserRepository)实例的函数。@Component 告诉 Dagger 生成一个包含满足它所公开类型所需的所有依赖项的容器。这称为 Dagger 组件;它包含一个由 Dagger 知道如何提供的对象及其各自依赖项组成的图表。
Kotlin
// @Component makes Dagger create a graph of dependencies
@Component
interface ApplicationGraph {
    // The return type  of functions inside the component interface is
    // what can be provided from the container
    fun repository(): UserRepository
}
Java
// @Component makes Dagger create a graph of dependencies
@Component
public interface ApplicationGraph {
    // The return type  of functions inside the component interface is
    // what can be consumed from the graph
    UserRepository userRepository();
}
当您构建项目时,Dagger 会为您生成 ApplicationGraph 接口的一个实现:DaggerApplicationGraph。通过其注解处理器,Dagger 创建了一个依赖图,该图包含三个类(UserRepository、UserLocalDatasource 和 UserRemoteDataSource)之间的关系,并且只有一个入口点:获取 UserRepository 实例。您可以按如下方式使用它:
Kotlin
// Create an instance of the application graph
val applicationGraph: ApplicationGraph = DaggerApplicationGraph.create()
// Grab an instance of UserRepository from the application graph
val userRepository: UserRepository = applicationGraph.repository()
Java
// Create an instance of the application graph
ApplicationGraph applicationGraph = DaggerApplicationGraph.create();

// Grab an instance of UserRepository from the application graph
UserRepository userRepository = applicationGraph.userRepository();
每次请求时,Dagger 都会创建一个新的 UserRepository 实例。
Kotlin
val applicationGraph: ApplicationGraph = DaggerApplicationGraph.create()

val userRepository: UserRepository = applicationGraph.repository()
val userRepository2: UserRepository = applicationGraph.repository()

assert(userRepository != userRepository2)
Java
ApplicationGraph applicationGraph = DaggerApplicationGraph.create();

UserRepository userRepository = applicationGraph.userRepository();
UserRepository userRepository2 = applicationGraph.userRepository();

assert(userRepository != userRepository2)
有时,您需要在容器中拥有依赖项的唯一实例。您可能出于以下几个原因需要这样做:
您希望将此类型作为依赖项的其他类型共享同一个实例,例如登录流程中多个
ViewModel对象使用相同的LoginUserData。创建一个对象成本高昂,您不希望每次将其声明为依赖项时都创建一个新实例(例如,JSON 解析器)。
在此示例中,您可能希望在图中提供 UserRepository 的唯一实例,以便每次请求 UserRepository 时,您始终获得相同的实例。这在您的示例中很有用,因为在具有更复杂应用图的实际应用中,您可能有多个 ViewModel 对象依赖于 UserRepository,并且您不希望在每次需要提供 UserRepository 时都创建 UserLocalDataSource 和 UserRemoteDataSource 的新实例。
在手动依赖注入中,您通过将 UserRepository 的同一个实例传递给 ViewModel 类的构造函数来完成此操作;但在 Dagger 中,由于您没有手动编写该代码,因此必须让 Dagger 知道您想要使用同一个实例。这可以通过 作用域注解来完成。
使用 Dagger 进行作用域限定
您可以使用作用域注解将对象的生命周期限制为其组件的生命周期。这意味着每次需要提供该类型时,都会使用依赖项的同一个实例。
为了在 ApplicationGraph 中请求存储库时获得 UserRepository 的唯一实例,请为 @Component 接口和 UserRepository 使用相同的范围注解。您可以使用 Dagger 所使用的 javax.inject 包中已有的 @Singleton 注解。
Kotlin
// Scope annotations on a @Component interface informs Dagger that classes annotated
// with this annotation (i.e. @Singleton) are bound to the life of the graph and so
// the same instance of that type is provided every time the type is requested.
@Singleton
@Component
interface ApplicationGraph {
    fun repository(): UserRepository
}

// Scope this class to a component using @Singleton scope (i.e. ApplicationGraph)
@Singleton
class UserRepository @Inject constructor(
    private val localDataSource: UserLocalDataSource,
    private val remoteDataSource: UserRemoteDataSource
) { ... }
Java
// Scope annotations on a @Component interface informs Dagger that classes annotated
// with this annotation (i.e. @Singleton) are scoped to the graph and the same
// instance of that type is provided every time the type is requested.
@Singleton
@Component
public interface ApplicationGraph {
    UserRepository userRepository();
}

// Scope this class to a component using @Singleton scope (i.e. ApplicationGraph)
@Singleton
public class UserRepository {

    private final UserLocalDataSource userLocalDataSource;
    private final UserRemoteDataSource userRemoteDataSource;

    @Inject
    public UserRepository(UserLocalDataSource userLocalDataSource, UserRemoteDataSource userRemoteDataSource) {
        this.userLocalDataSource = userLocalDataSource;
        this.userRemoteDataSource = userRemoteDataSource;
    }
}
或者,您可以创建并使用自定义作用域注解。您可以按如下方式创建作用域注解:
Kotlin
// Creates MyCustomScope
@Scope
@MustBeDocumented
@Retention(value = AnnotationRetention.RUNTIME)
annotation class MyCustomScope
Java
// Creates MyCustomScope
@Scope
@Retention(RetentionPolicy.RUNTIME)
public @interface MyCustomScope {}
然后,您可以像以前一样使用它。
Kotlin
@MyCustomScope
@Component
interface ApplicationGraph {
    fun repository(): UserRepository
}

@MyCustomScope
class UserRepository @Inject constructor(
    private val localDataSource: UserLocalDataSource,
    private val service: UserService
) { ... }
Java
@MyCustomScope
@Component
public interface ApplicationGraph {
    UserRepository userRepository();
}

@MyCustomScope
public class UserRepository {

    private final UserLocalDataSource userLocalDataSource;
    private final UserRemoteDataSource userRemoteDataSource;

    @Inject
    public UserRepository(UserLocalDataSource userLocalDataSource, UserRemoteDataSource userRemoteDataSource) {
        this.userLocalDataSource = userLocalDataSource;
        this.userRemoteDataSource = userRemoteDataSource;
    }
}
在这两种情况下,对象都使用与注解 @Component 接口相同的范围提供。因此,每次调用 applicationGraph.repository() 时,您都会获得 UserRepository 的同一个实例。
Kotlin
val applicationGraph: ApplicationGraph = DaggerApplicationGraph.create()

val userRepository: UserRepository = applicationGraph.repository()
val userRepository2: UserRepository = applicationGraph.repository()

assert(userRepository == userRepository2)
Java
ApplicationGraph applicationGraph = DaggerApplicationGraph.create();

UserRepository userRepository = applicationGraph.userRepository();
UserRepository userRepository2 = applicationGraph.userRepository();

assert(userRepository == userRepository2)
总结
在更复杂的场景中使用 Dagger 之前,了解其优势和基本工作原理非常重要。
在下一页,您将学习如何将 Dagger 添加到 Android 应用程序中。