
1. 开始之前
SociaLite 展示了如何使用各种 Android 平台 API 来实现社交网络应用中常见的功能,并利用各种 Jetpack API 来实现更复杂的功能,这些功能可以在更多设备上可靠运行,并且所需的代码更少。
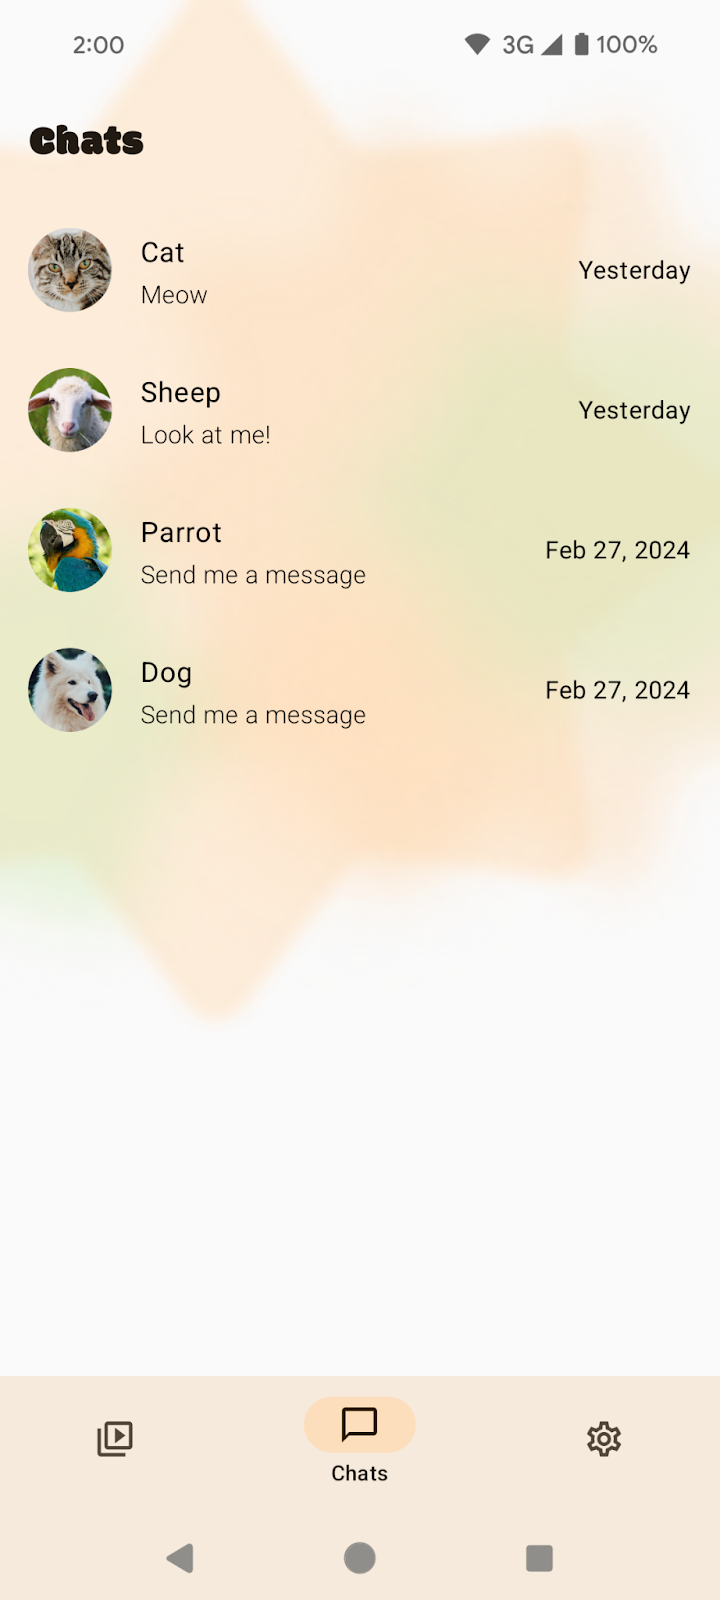
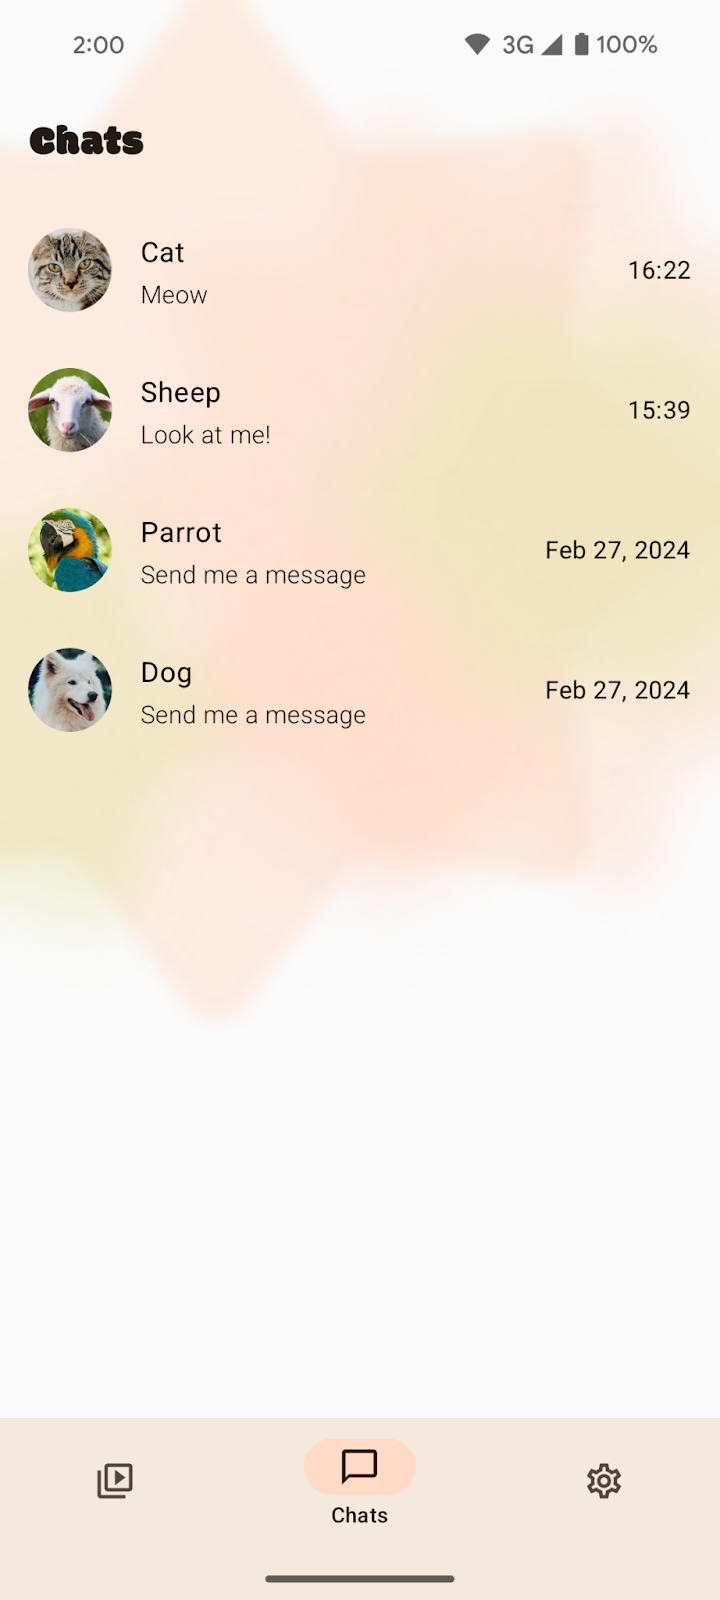
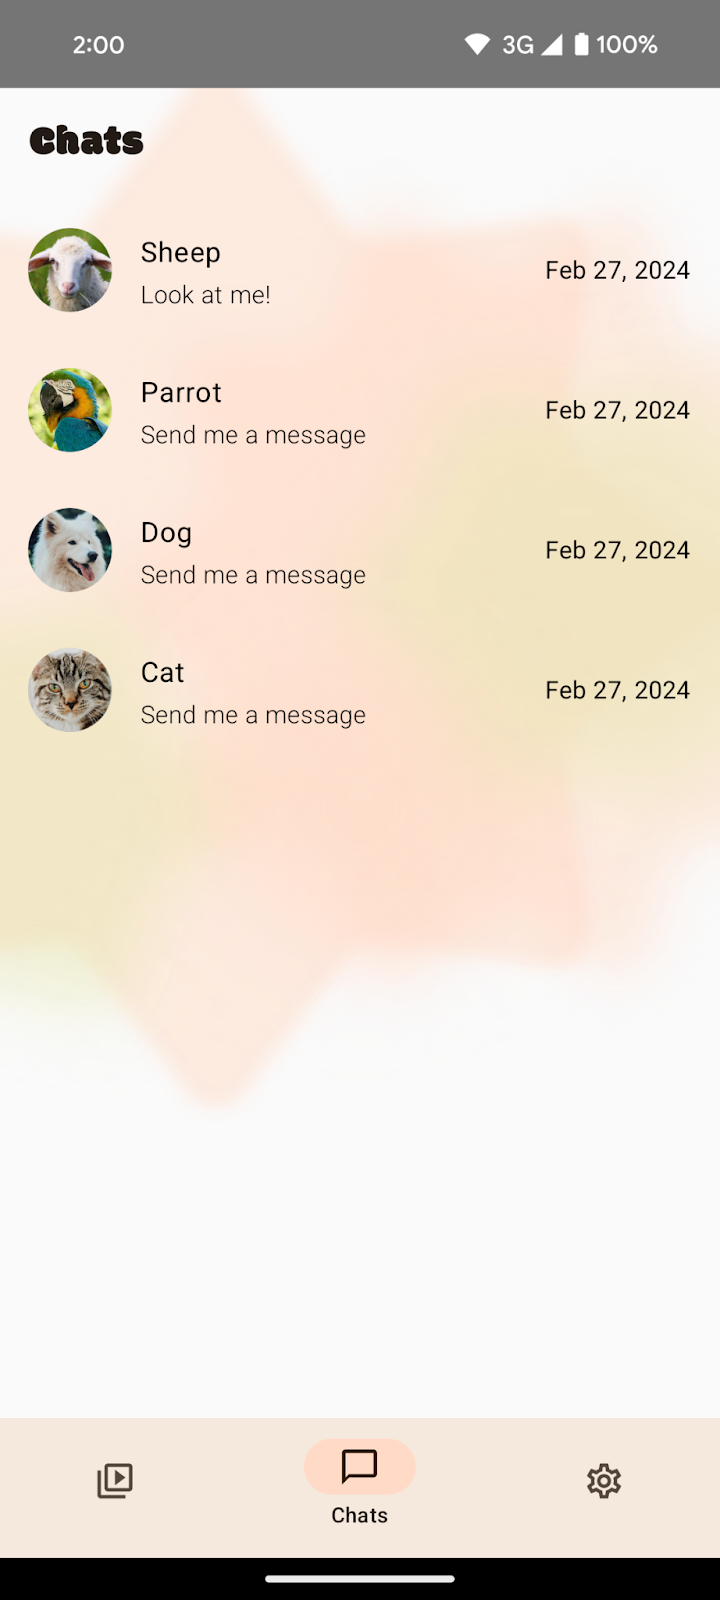
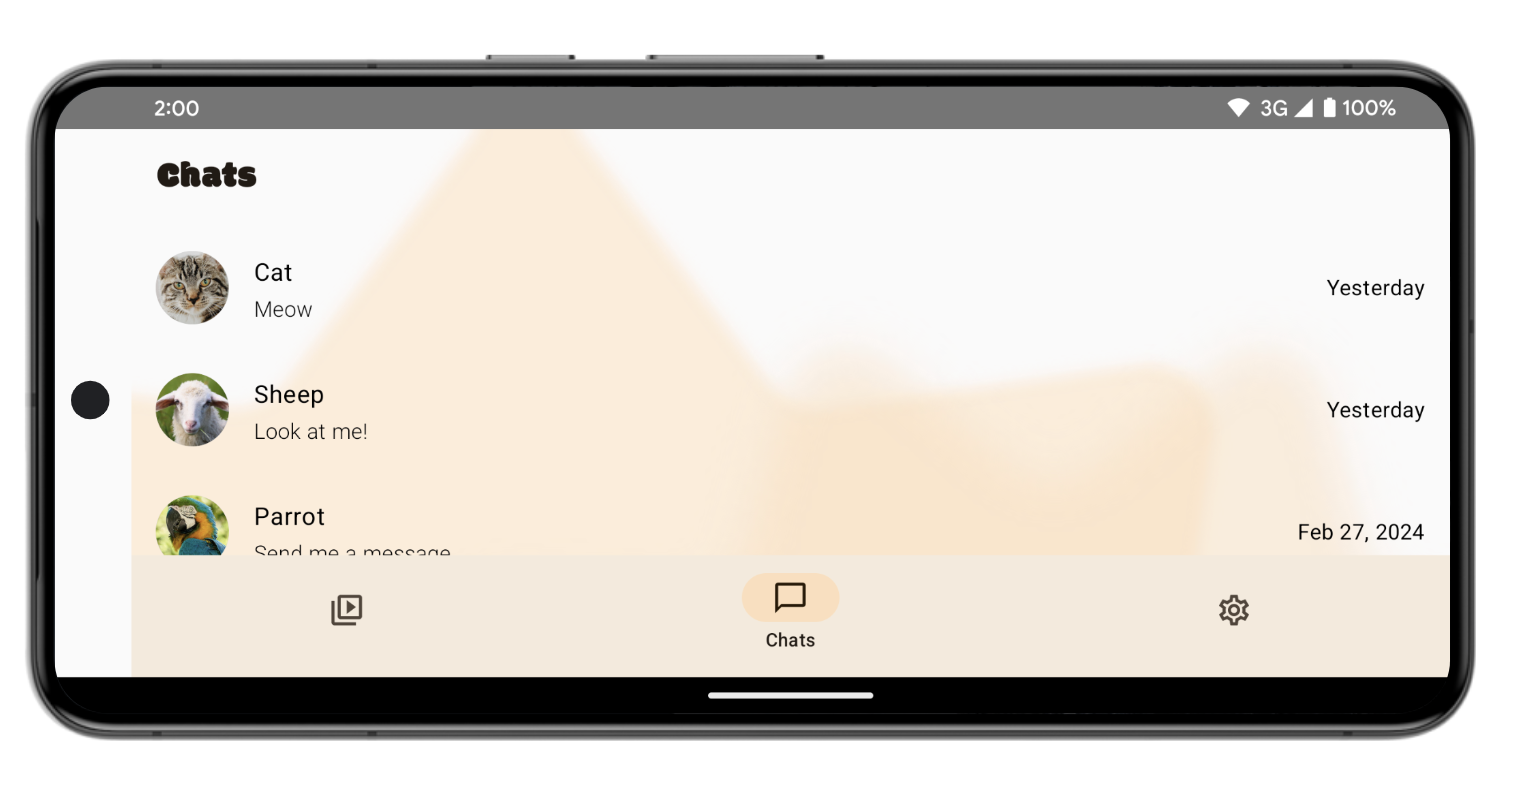
本 Codelab 将引导你完成使 SociaLite 应用兼容 Android 15 全面屏强制行为的过程,并以向后兼容的方式使应用实现全面屏效果。实现全面屏后,根据你的设备和导航模式,SociaLite 将如下所示
|
|
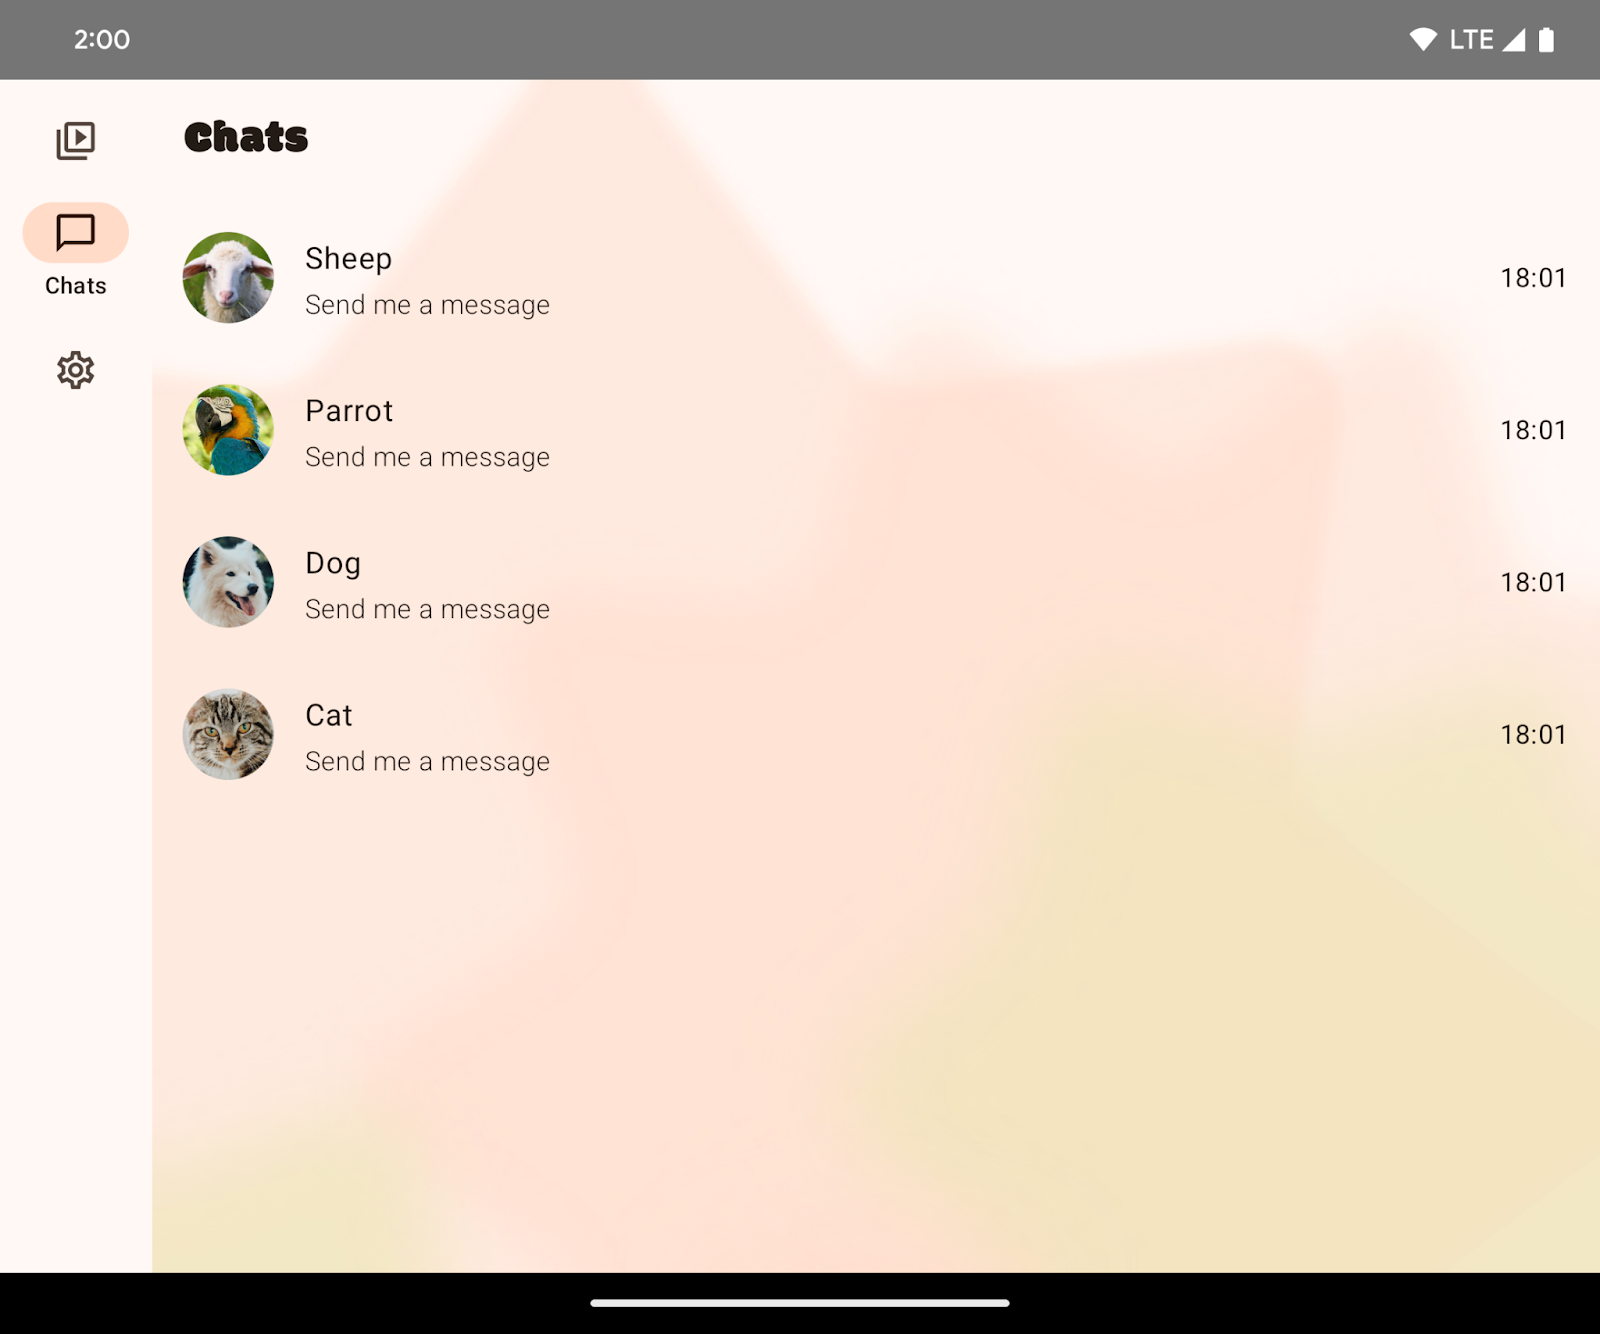
三键导航下的 SociaLite | 手势导航下的 SociaLite |
|
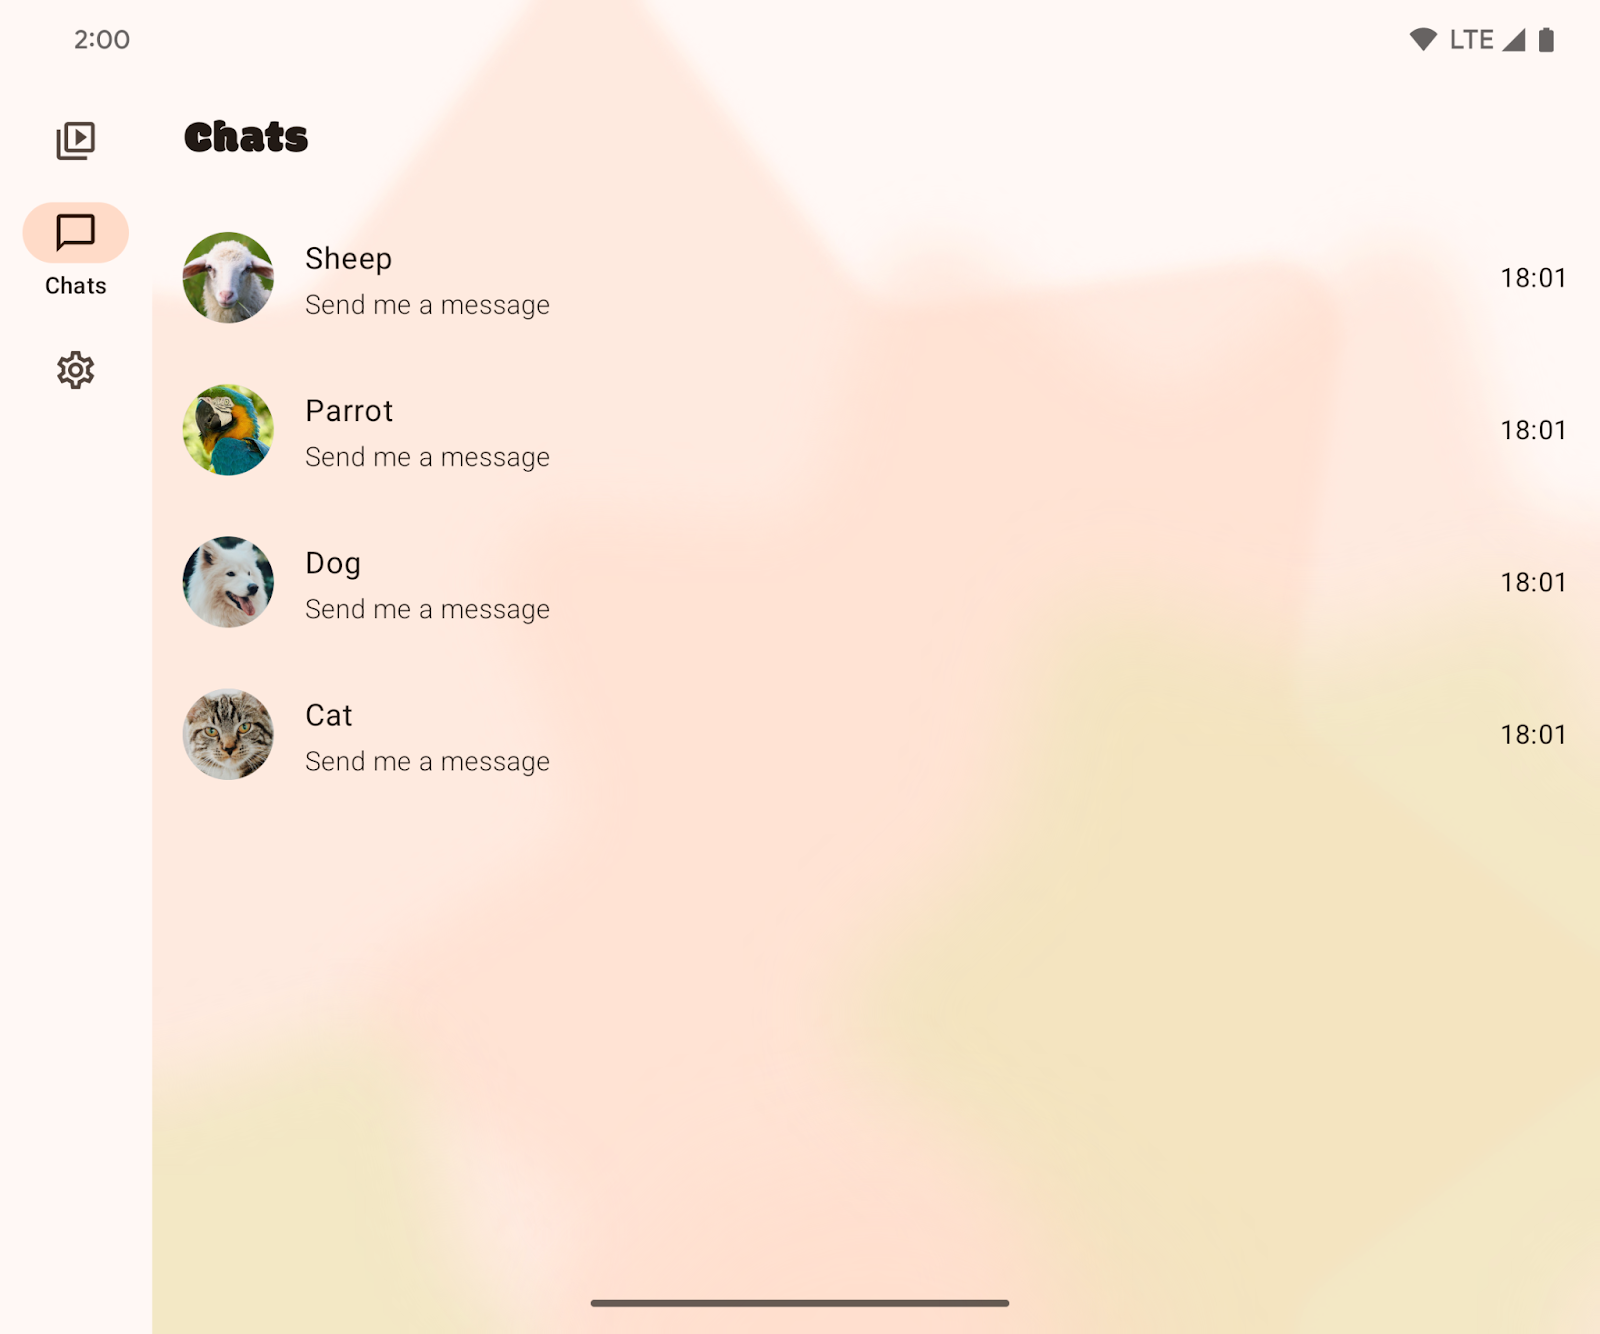
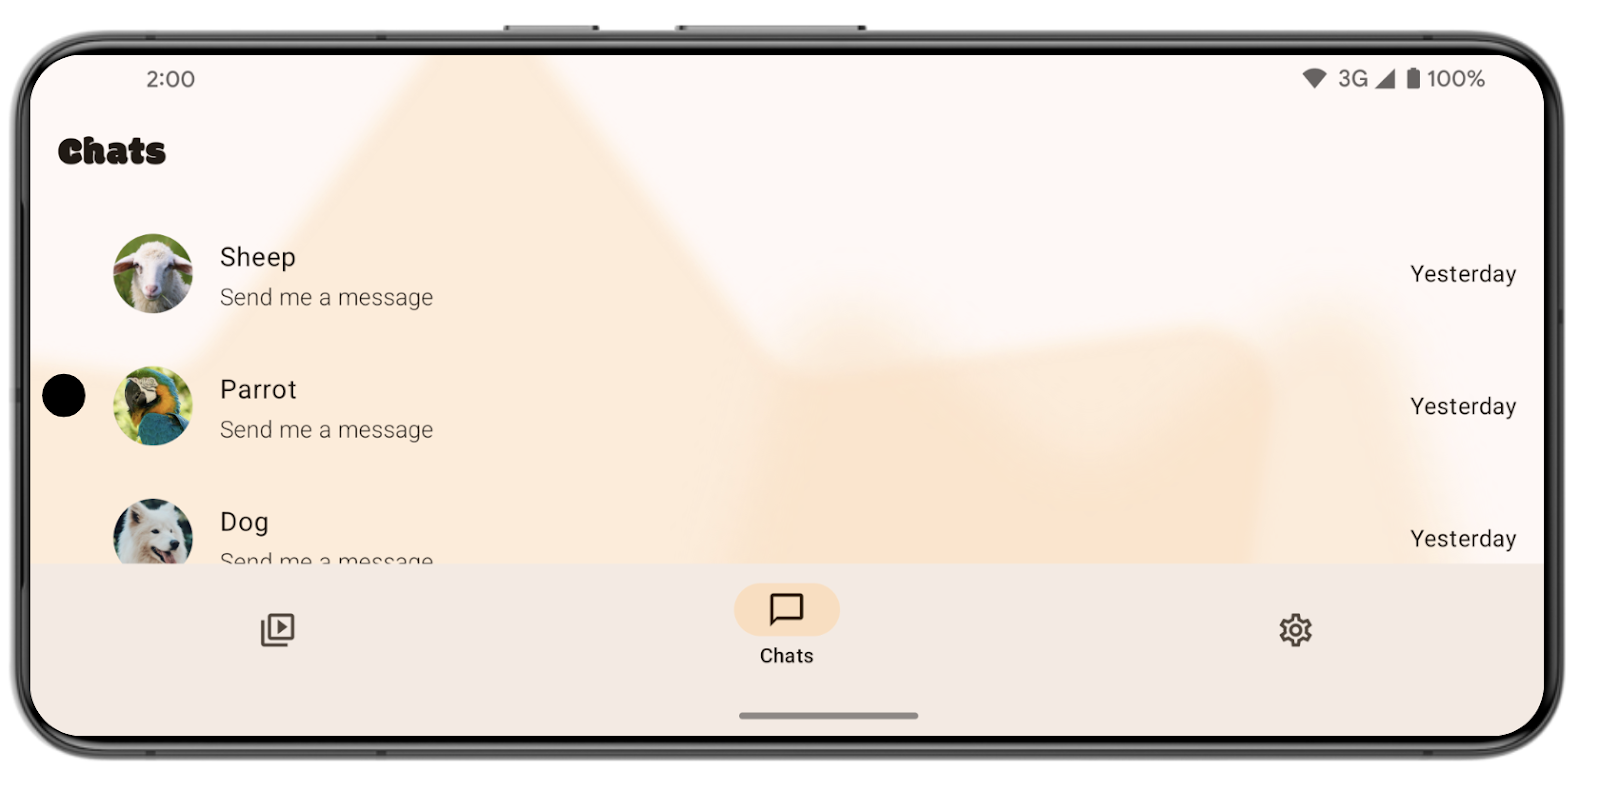
大屏设备上的 SociaLite |
前提条件
- 基本的 Kotlin 知识。
- 完成设置 Android Studio Codelab,或者熟悉如何在模拟器或运行 Android 15 的实体设备中使用 Android Studio 并测试应用。
你将学到什么
- 如何处理 Android 15 全面屏变更。
- 如何以向后兼容的方式使你的应用实现全面屏效果。
你需要准备什么
- 最新版本的 Android Studio。
- 运行 Android 15 Beta 1 或更高版本的测试设备或模拟器。
- Android 15 Beta 1 或更高版本的 SDK。
2. 获取入门代码
- 从 GitHub 下载入门代码。
或者,克隆仓库并检出 codelab_improve_android_experience_2024 分支。
$ git clone git@github.com:android/socialite.git
$ cd socialite
$ git checkout codelab_improve_android_experience_2024
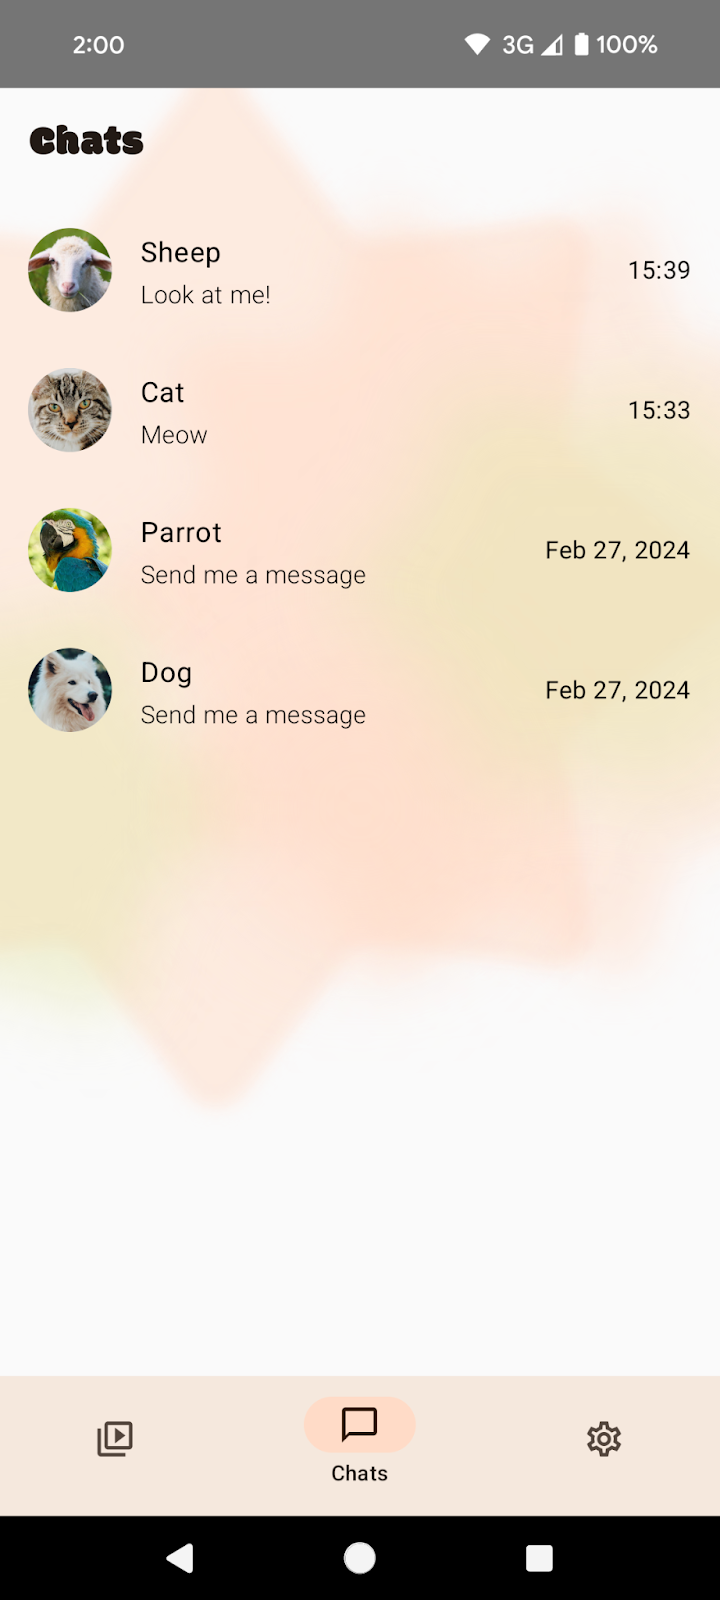
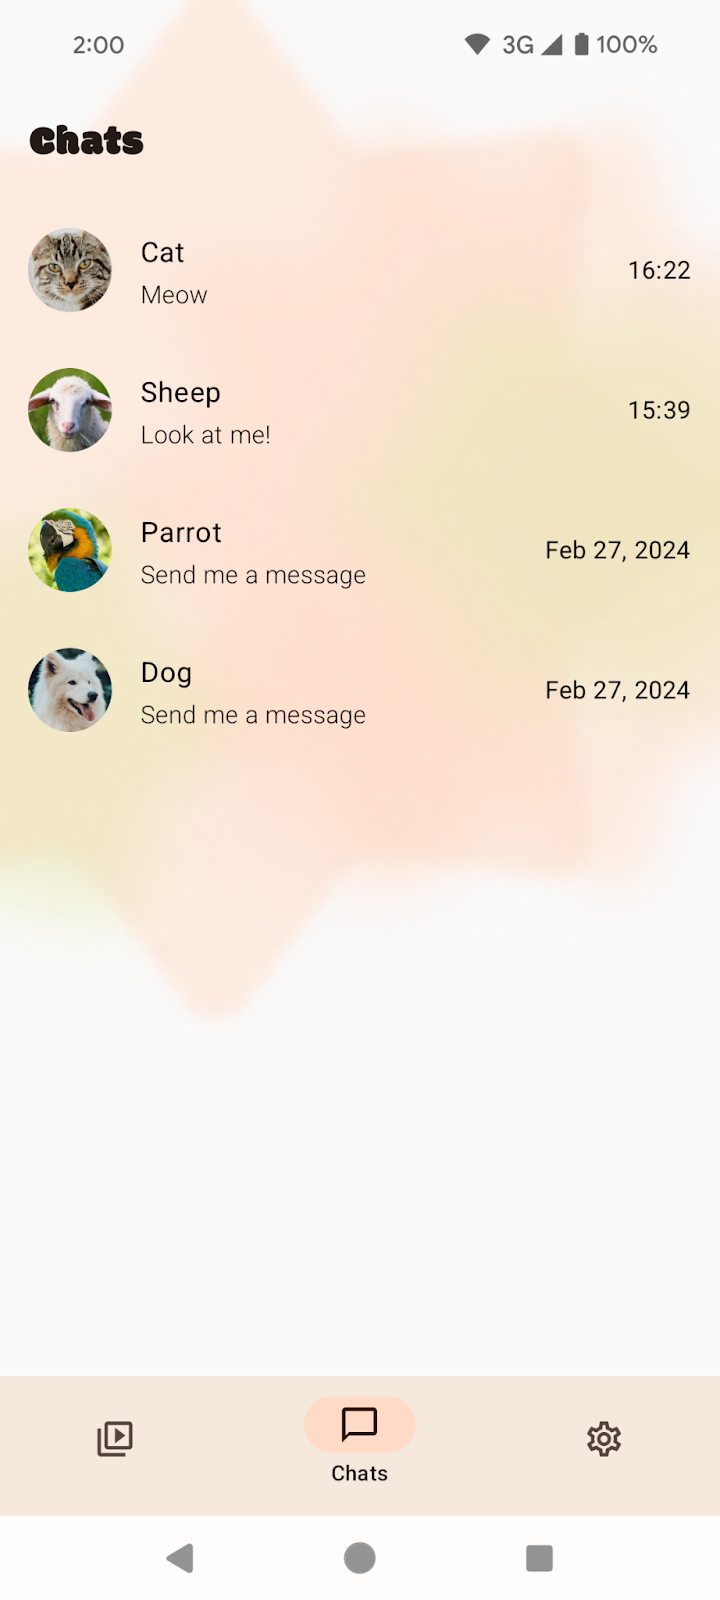
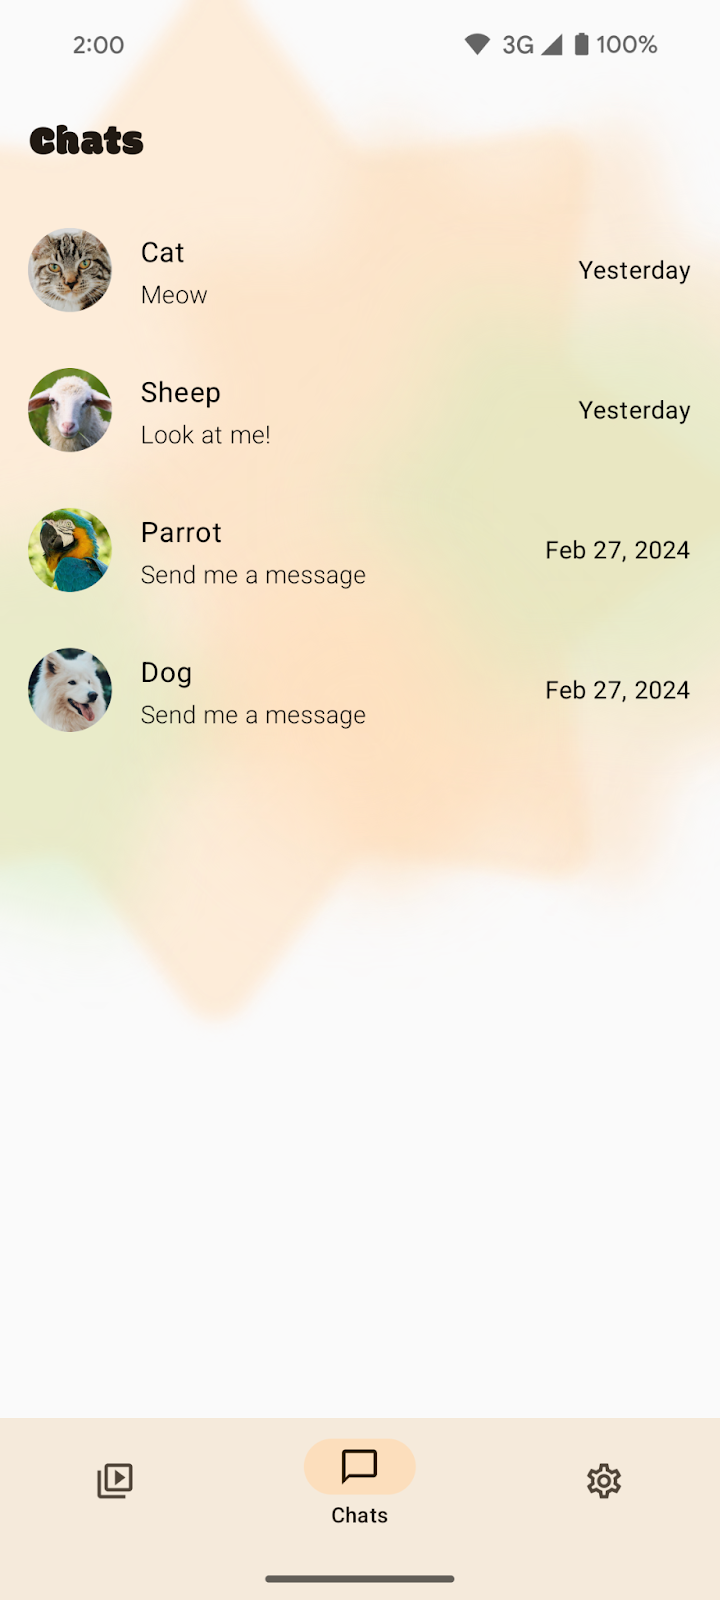
- 在 Android Studio 中打开 SociaLite,并在你的 Android 15 设备或模拟器上运行该应用。你会看到如下所示的屏幕之一
|
|
三键导航 | 手势导航 |
|
大屏 |
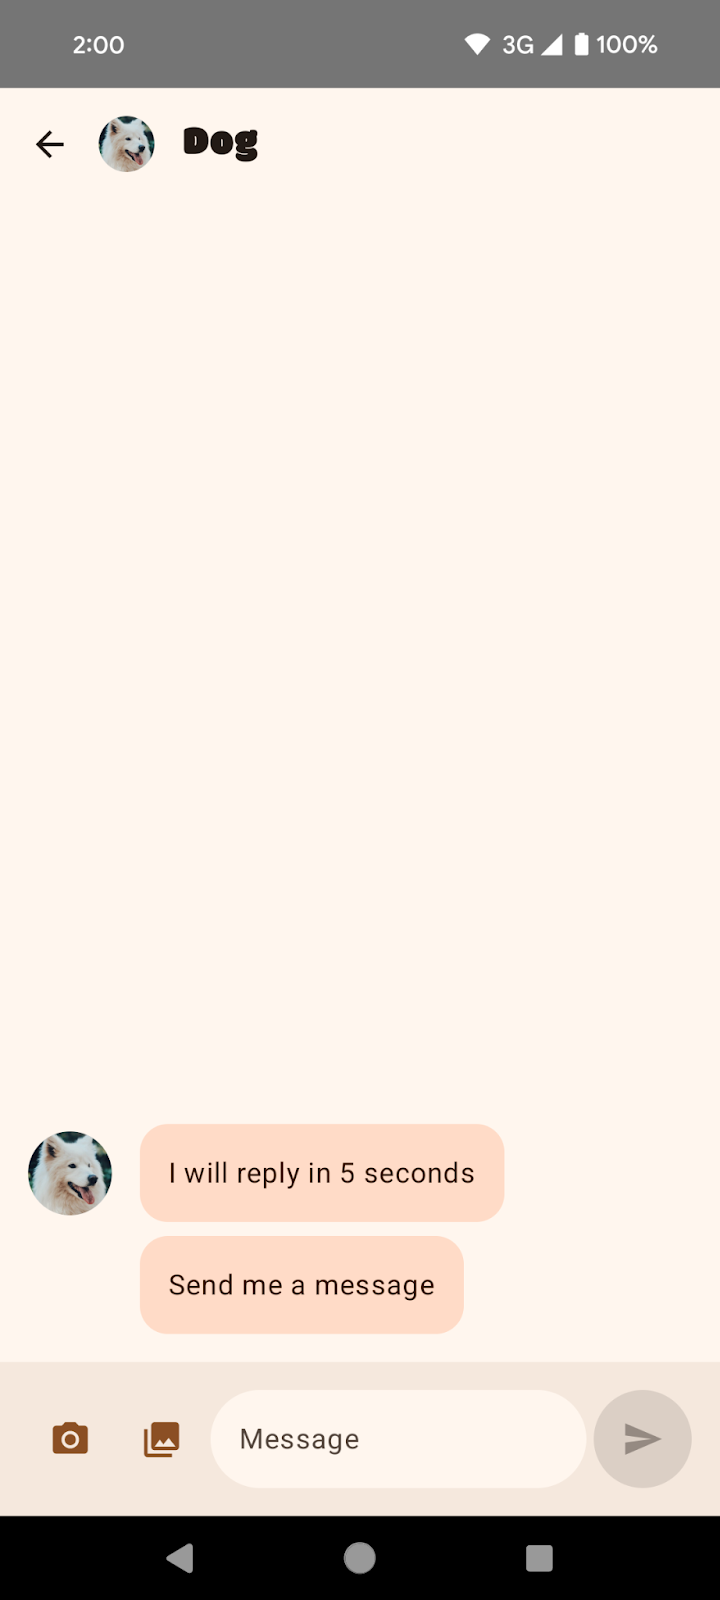
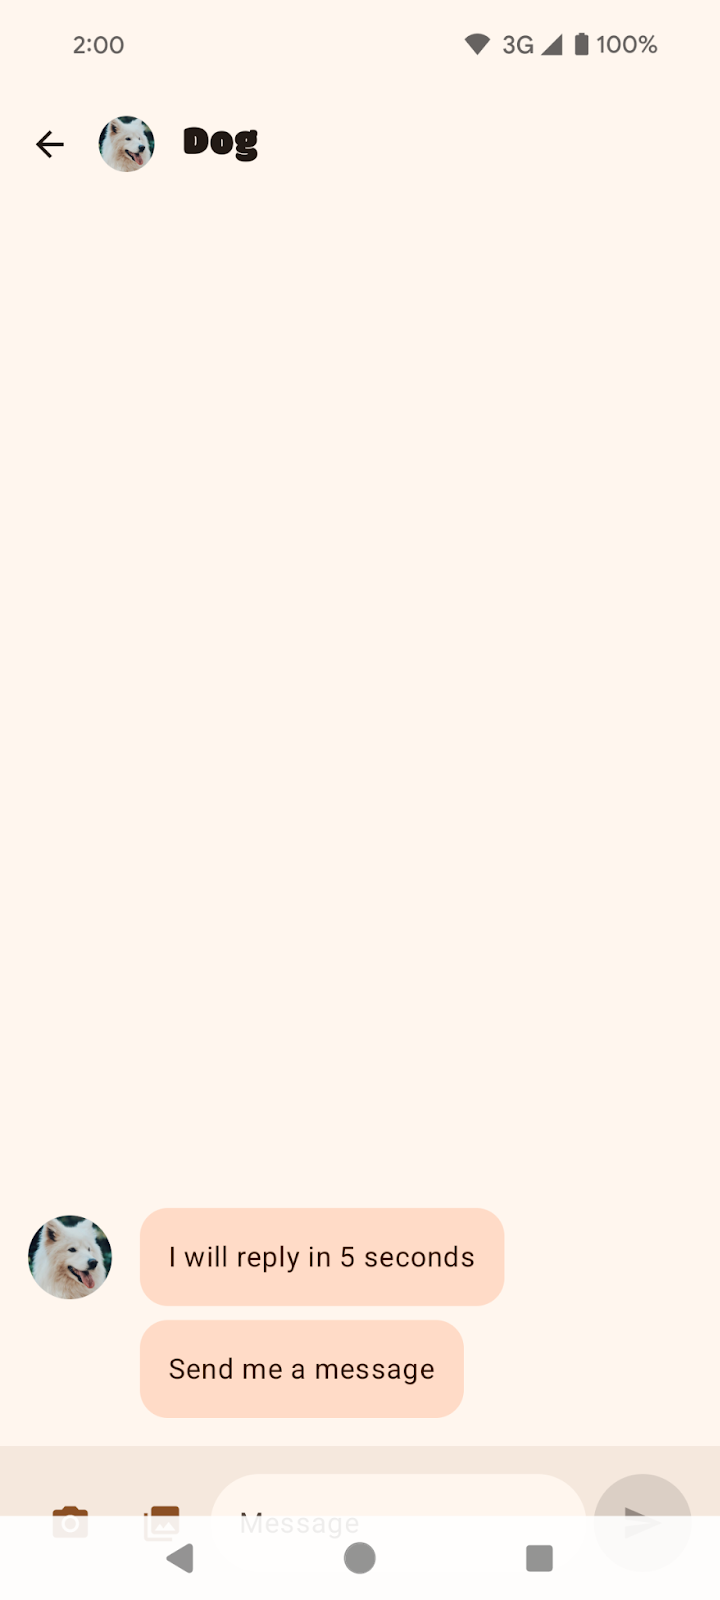
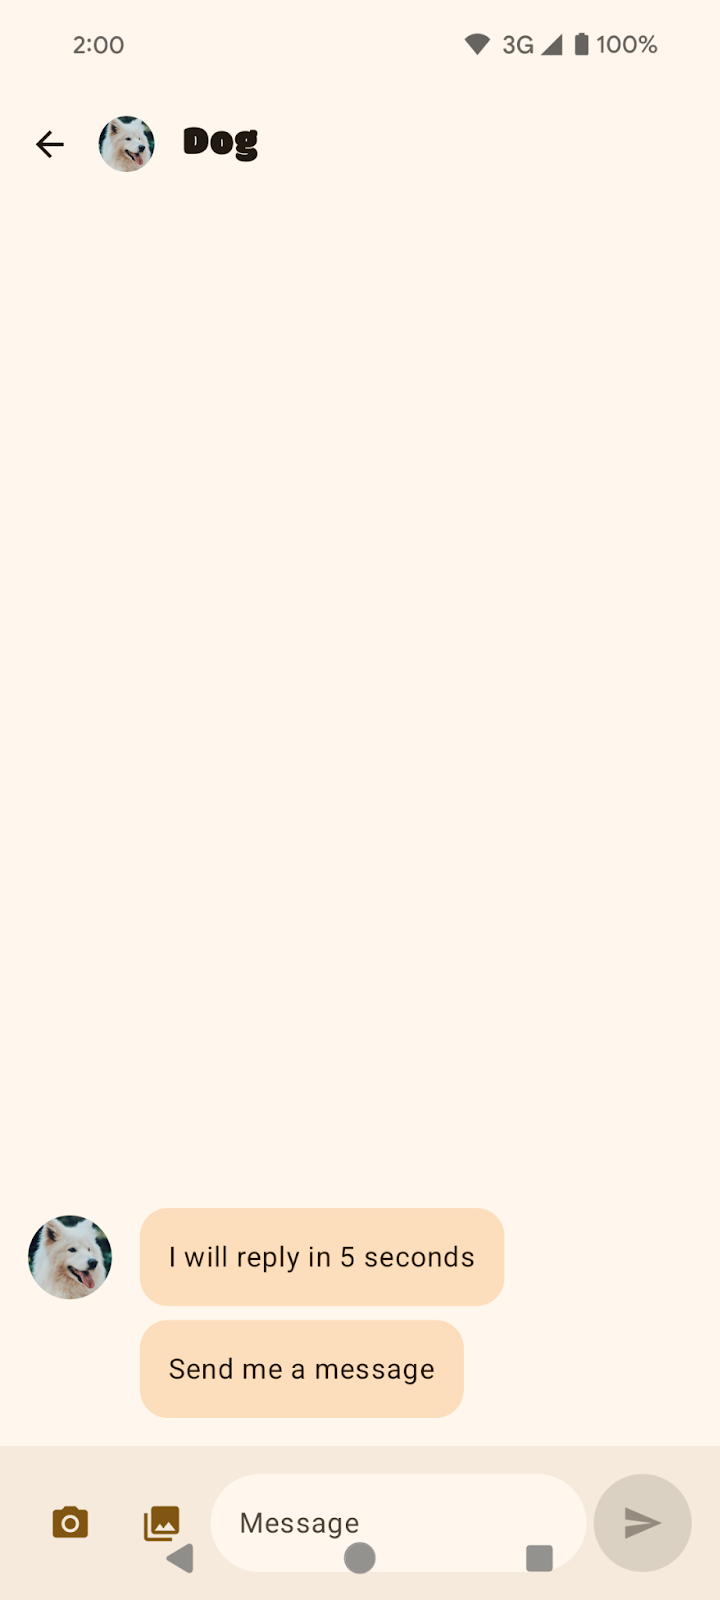
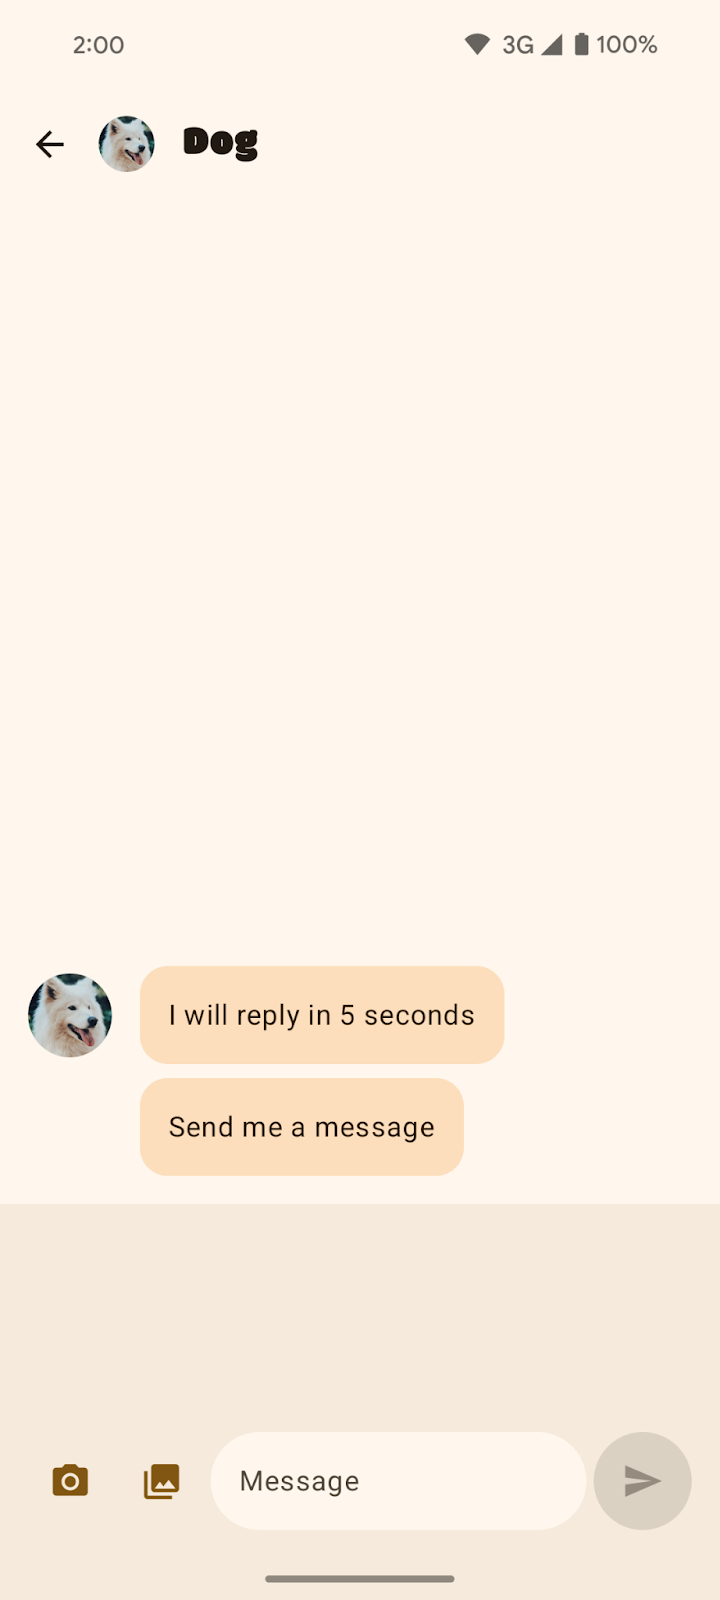
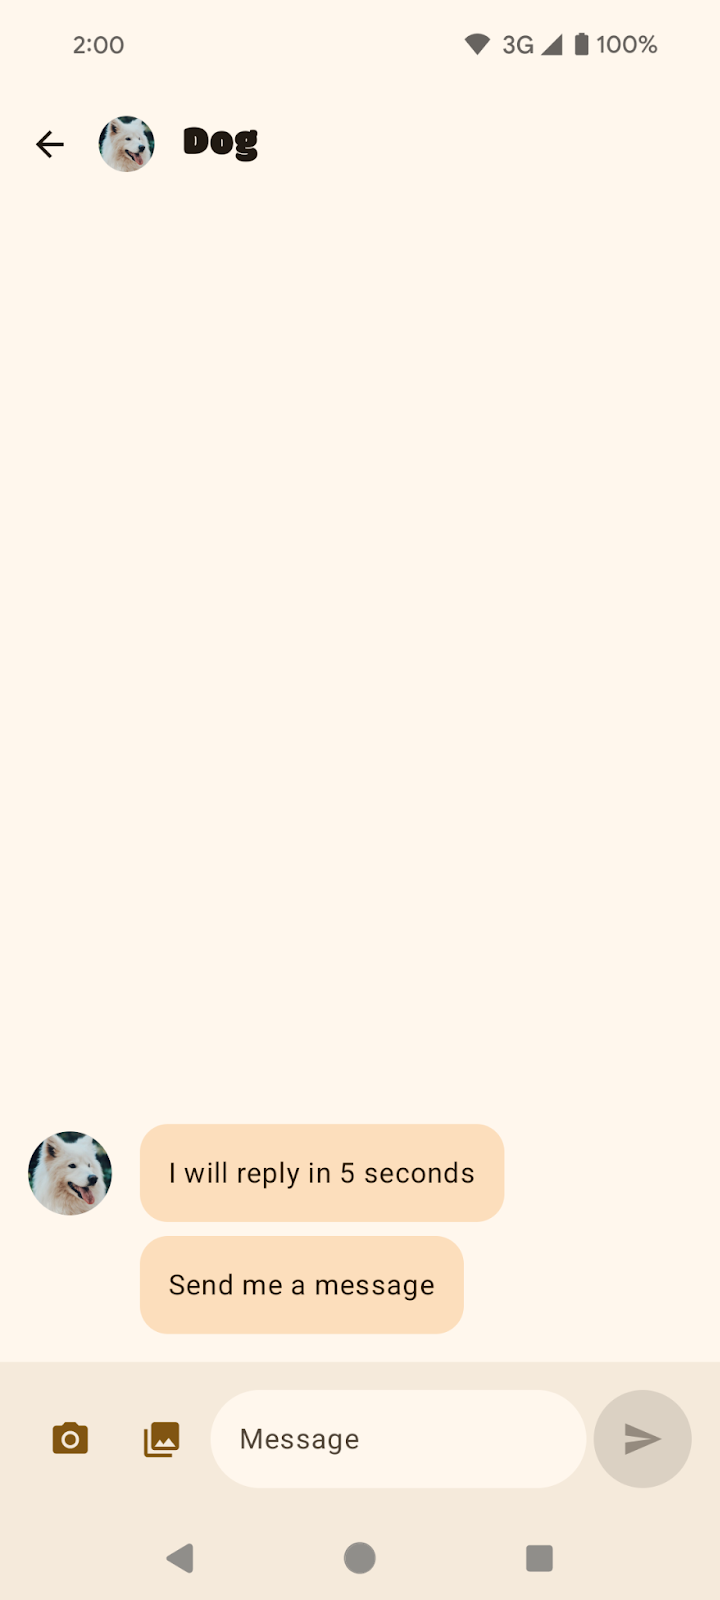
- 在聊天页面,选择其中一个对话,例如与狗的对话。
|
|
三键导航下的狗聊天消息 | 手势导航下的狗聊天消息 |
3. 在 Android 15 上使你的应用实现全面屏效果
什么是全面屏?
应用可以在系统栏(如状态栏和导航栏)后面绘制内容,从而提供更精致的用户体验并充分利用显示空间。这被称为实现全面屏效果。
如何处理 Android 15 全面屏变更
在 Android 15 之前,你的应用界面默认被限制在布局时避开系统栏区域,例如状态栏和导航栏。应用需要选择启用全面屏效果。根据应用的不同,选择启用可能非常简单,也可能很麻烦。
从 Android 15 开始,你的应用将默认实现全面屏效果。你将看到以下默认行为
- 三键导航栏是半透明的。
- 手势导航栏是透明的。
- 状态栏是透明的。
- 除非内容应用了内边距或填充,否则内容将在系统栏(如导航栏、状态栏和标题栏)后面绘制。
这确保了全面屏作为提升应用质量的一种手段不会被忽视,并减少了你的应用实现全面屏所需的工作。然而,此更改可能会对你的应用产生负面影响。将目标 SDK 升级到 Android 15 后,你将在 SociaLite 中看到两个负面影响示例。
将目标 SDK 值更改为 Android 15
- 在 SociaLite 应用的 build.gradle 文件中,将目标 SDK 和编译 SDK 版本更改为 Android 15 或
VanillaIceCream。
如果你在 Android 15 正式发布之前学习本 Codelab,代码将如下所示
android {
    namespace = "com.google.android.samples.socialite"
    compileSdkPreview = "VanillaIceCream"

    defaultConfig {
        applicationId = "com.google.android.samples.socialite"
        minSdk = 21
        targetSdkPreview = "VanillaIceCream"
        ...
    }
...
}
如果你在 Android 15 正式发布之后学习本 Codelab,代码将如下所示
android {
    namespace = "com.google.android.samples.socialite"
    compileSdk = 35

    defaultConfig {
        applicationId = "com.google.android.samples.socialite"
        minSdk = 21
        targetSdk = 35
        ...
    }
...
}
- 重新构建 SociaLite 并观察以下问题
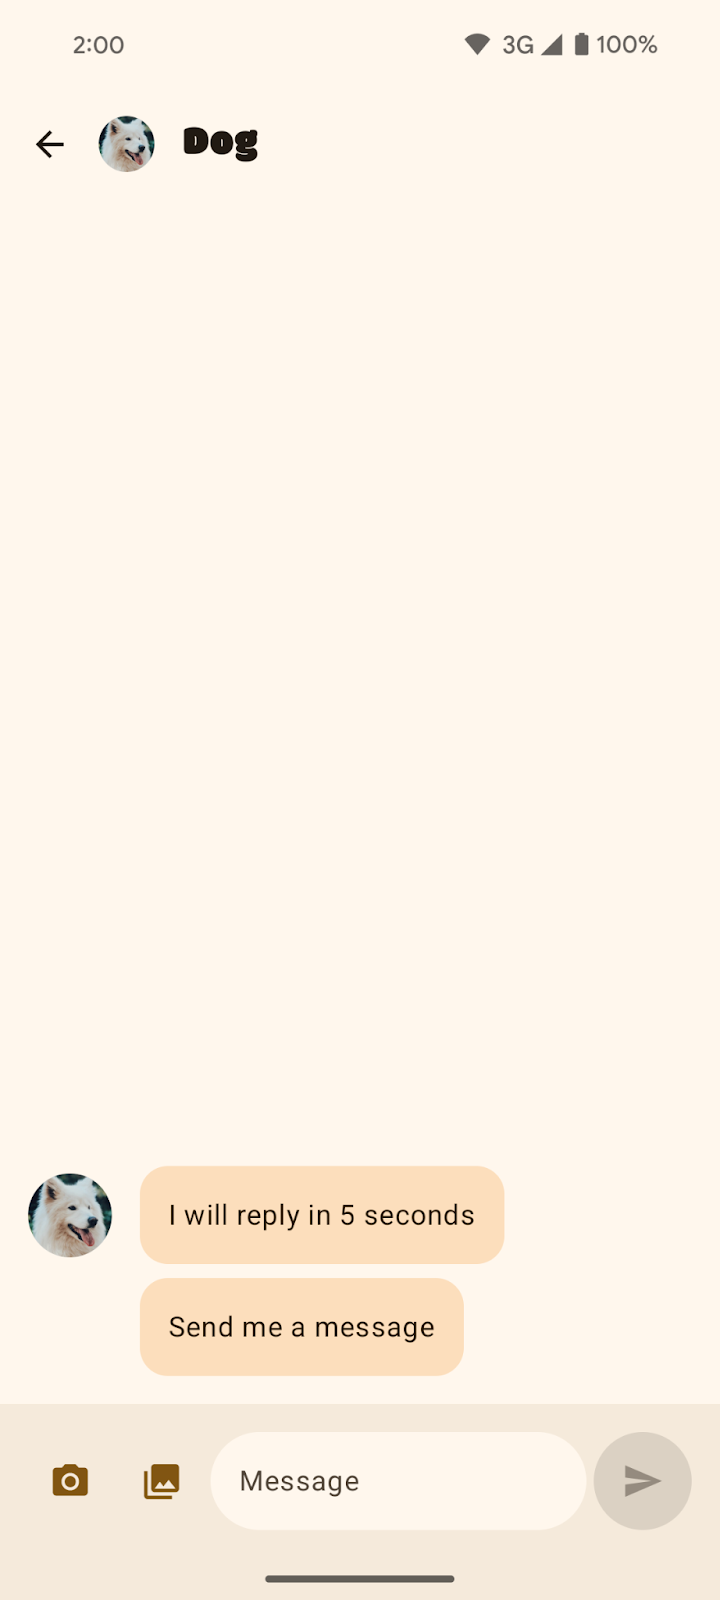
- 三键导航背景保护与导航栏不匹配。对于手势导航,聊天屏幕看起来是全面屏的,无需你进行任何干预。然而,三键导航存在背景保护,应将其移除。
|
|
三键导航下的聊天屏幕 | 手势导航下的聊天屏幕 |
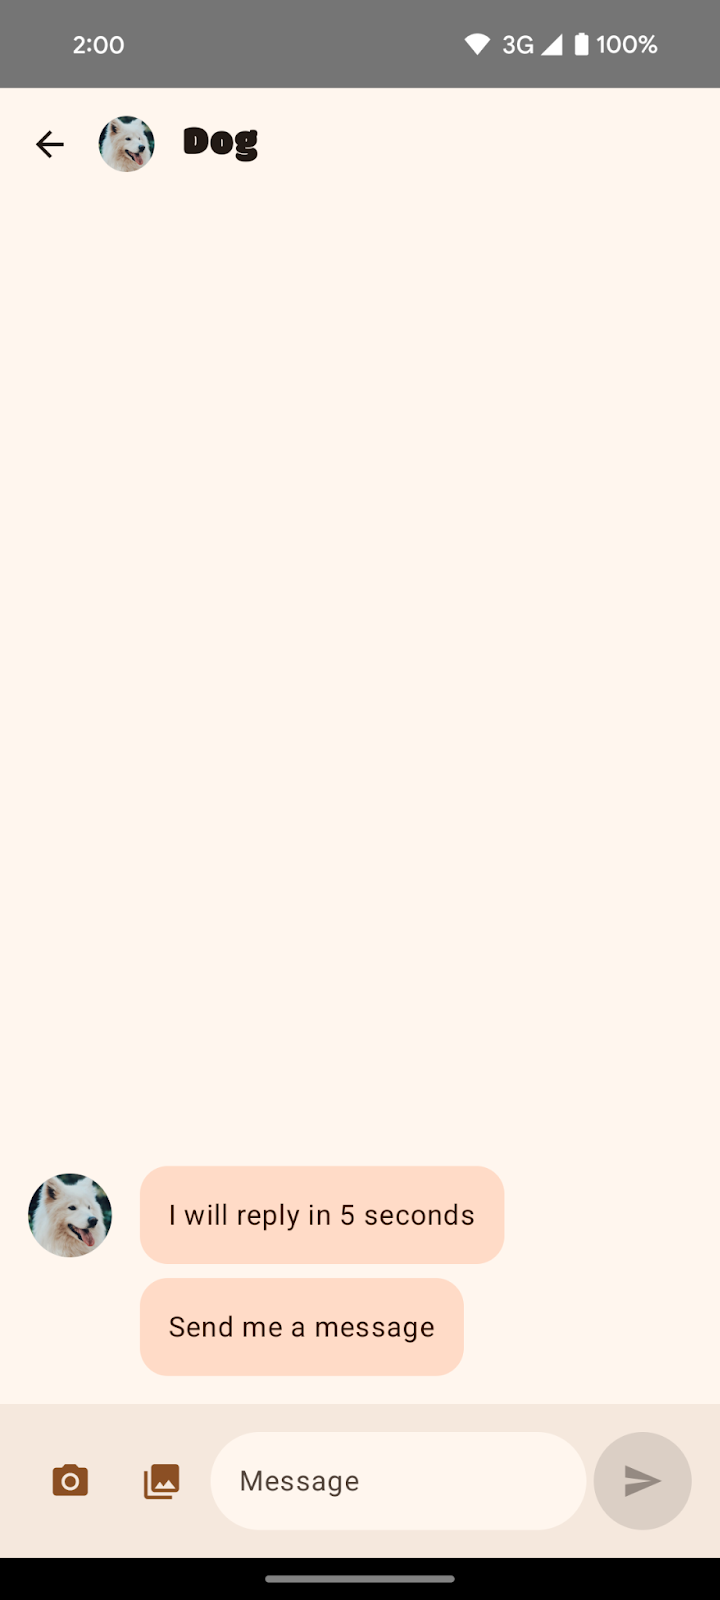
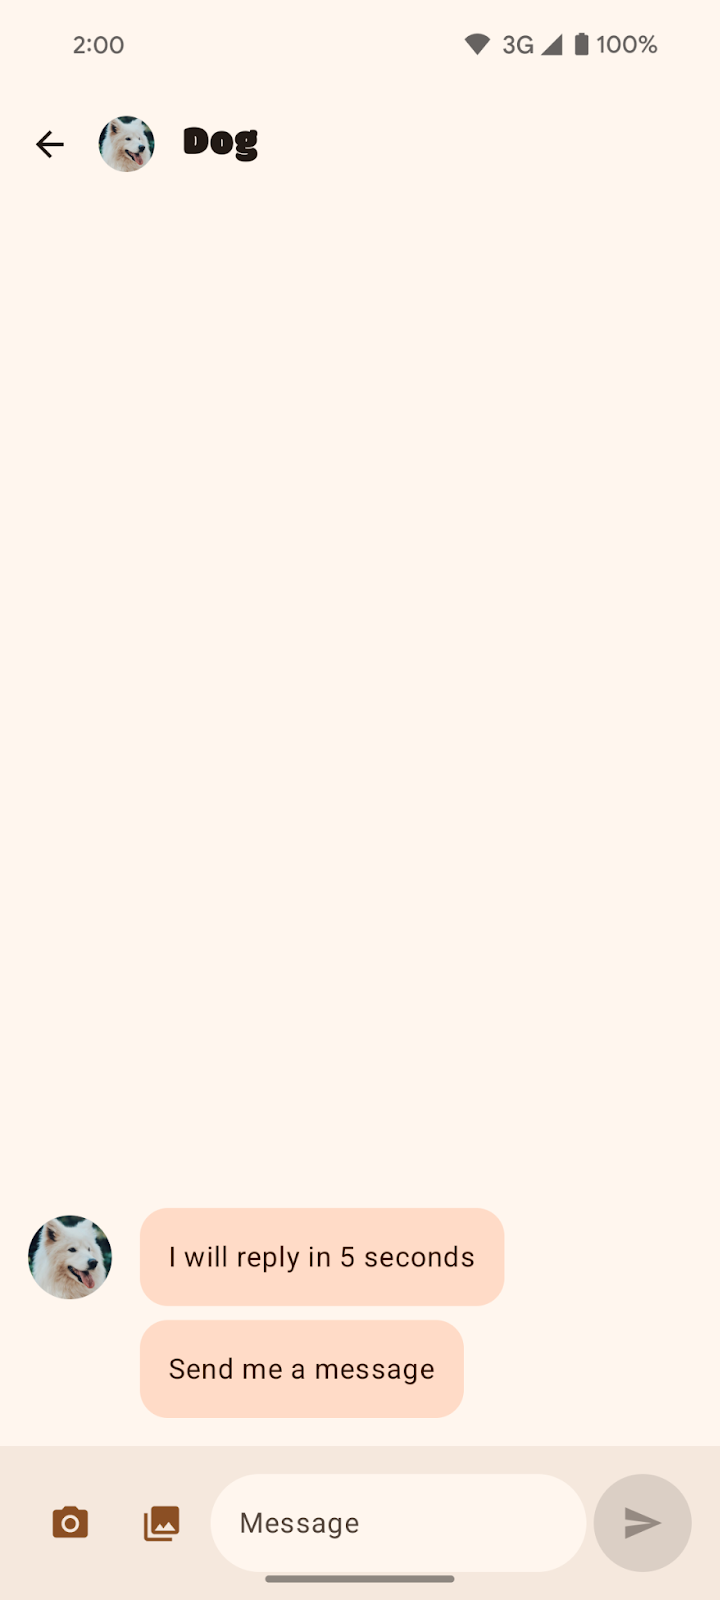
- 界面被遮挡。对话中的底部界面元素被导航栏遮挡。这在三键导航中最为明显。
|
|
三键导航下的狗聊天消息 | 手势导航下的狗聊天消息 |
修复 SociaLite
要移除默认的三键导航背景保护,请按照以下步骤操作
- 在
MainActivity.kt文件中,通过将 window.isNavigationBarContrastEnforced 属性设置为 false 来移除默认背景保护。
class MainActivity : ComponentActivity() {
    override fun onCreate(savedInstanceState: Bundle?) {
        installSplashScreen()
        super.onCreate(savedInstanceState)
        setContent {
            // Add this block:
            if (Build.VERSION.SDK_INT >= Build.VERSION_CODES.Q) {
                window.isNavigationBarContrastEnforced = false
            }
        }
    }
    ...
}
window.isNavigationBarContrastEnforced 确保在请求完全透明背景时,导航栏具有足够的对比度。通过将此属性设置为 false,你实际上是将三键导航背景设置为透明。window.isNavigationBarContrastEnforced 只会影响三键导航,对手势导航没有影响。
- 重新运行应用,并在你的 Android 15 设备上查看其中一个对话。时间轴、聊天和设置屏幕现在都显示为全面屏。应用的
NavigationBar(包含时间轴、聊天和设置按钮)绘制在系统透明的三键导航栏后面。
|
|
移除带状后效果的聊天屏幕 | 手势导航没有变化 |
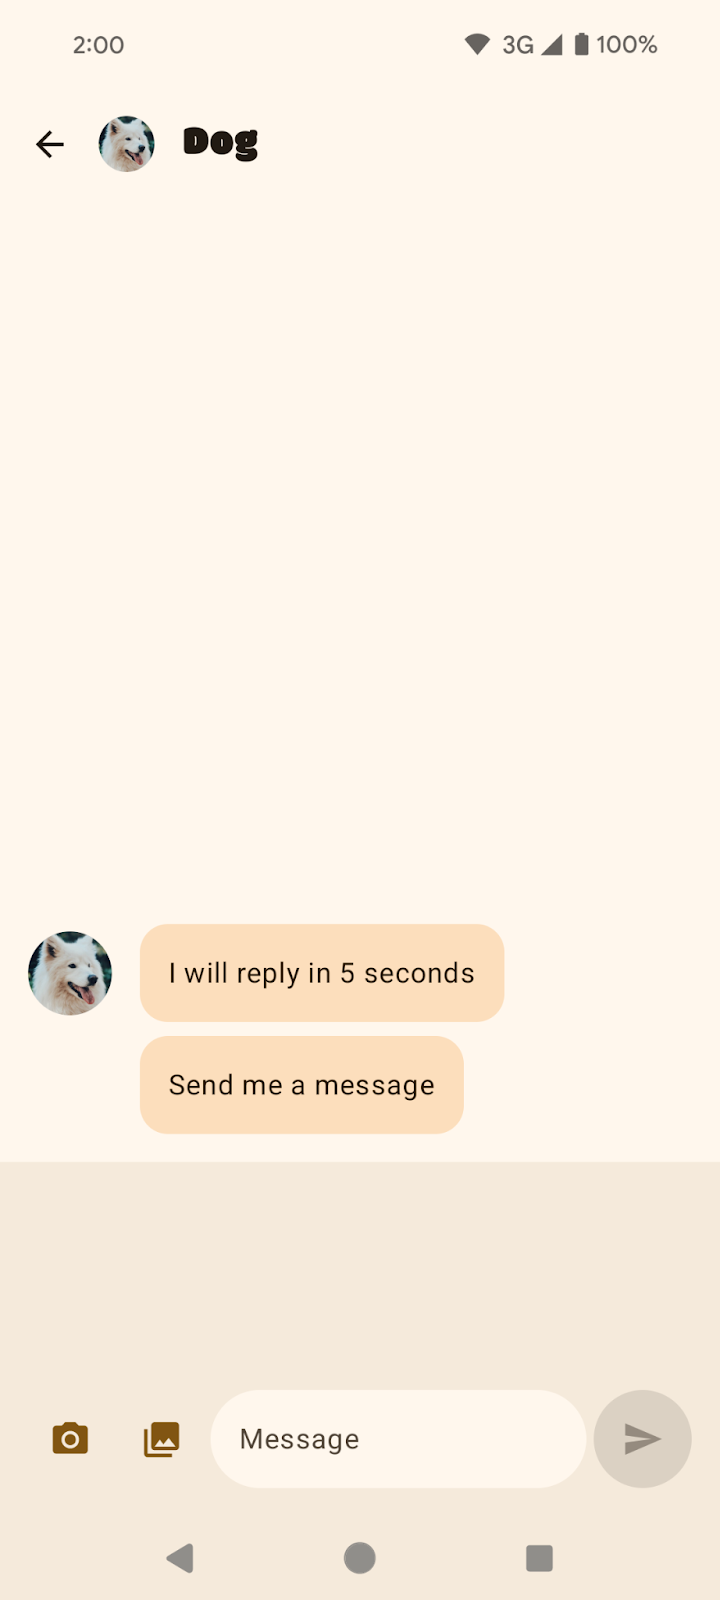
然而,请注意对话的 InputBar 仍然被系统栏遮挡。你需要正确处理内边距来解决此问题。
|
|
三键导航下的狗对话。底部的输入字段被系统导航栏遮挡。 | 手势导航下的狗对话。底部的输入字段被系统导航栏遮挡。 |

在 SociaLite 中,InputBar 被遮挡。实际上,当你旋转到横屏模式或在大屏设备上时,你可能会发现顶部、底部、左侧和右侧的元素被遮挡。你需要考虑如何处理所有这些用例的内边距。对于 SociaLite,你应用填充来提升 InputBar 的可点击内容。
要应用内边距来修复被遮挡的界面,请按照以下步骤操作
- 导航到
ui/chat/ChatScreen.kt文件,然后找到大约第 178 行的ChatContent可组合项,其中包含对话屏幕的界面。ChatContent利用Scaffold轻松构建界面。默认情况下,Scaffold提供有关系统界面的信息(例如系统栏的深度),作为内边距,你可以通过Scaffold的填充值(innerPadding参数)来使用。使用Scaffold的innerPadding为InputBar添加填充。 - 在
ChatContent中大约第 214 行找到InputBar。这是一个自定义的可组合项,用于创建用户编写消息的界面。预览效果如下所示
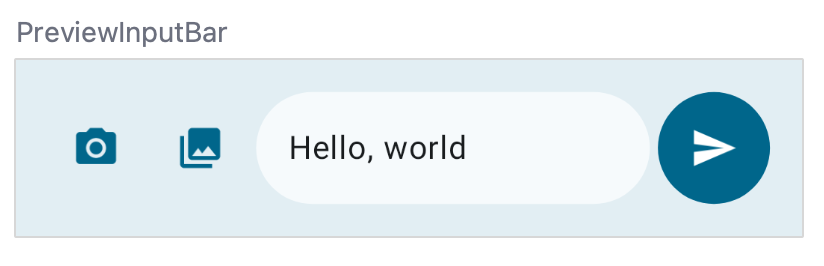
InputBar 接受一个 contentPadding 并将其作为填充应用于包含其余界面的 Row 可组合项。填充将应用于 Row 可组合项的所有侧边。你可以在大约第 432 行看到此代码。以下是 InputBar 可组合项以供参考(不要添加此代码)
// Don't add this code because it's only for reference.
@Composable
private fun InputBar(
    contentPadding: PaddingValues,
    ...,
) {
    Surface(...) {
        Row(
            modifier = Modifier
                .padding(contentPadding)
            ...
        ) {
            IconButton(...) { ... } // take picture
            IconButton(...) { ... } // attach picture
            TextField(...) // write message
            FilledIconButton(...){ ... } // send message
            }
        }
    }
}
- 返回
ChatContent中的InputBar,并更改contentPadding以使用系统栏内边距。这部分代码大约在第 220 行。
InputBar(
    ...
    contentPadding = innerPadding, //Add this line.
    // contentPadding = PaddingValues(0.dp), // Remove this line.
    ...
 )
- 在你的 Android 15 设备上重新运行应用。
|
|
三键导航下的狗对话,内边距应用不正确。 | 手势导航下的狗对话,内边距应用不正确。 |
底部填充已应用,因此按钮不再被系统栏遮挡;然而,顶部填充也已应用。顶部填充包含了 TopAppBar 和系统栏的深度。Scaffold 将填充值传递给其内容,以便其可以避开顶部应用栏和系统栏。
- 要修复顶部填充,创建一个
innerPaddingPaddingValues的副本,将顶部填充设置为0.dp,然后将修改后的副本传递给contentPadding。
InputBar(
    ...
    contentPadding = innerPadding.copy(layoutDirection, top = 0.dp), //Add this line.
    // contentPadding = innerPadding, // Remove this line.
    ...
 )
- 在你的 Android 15 设备上重新运行应用。
|
|
三键导航下的狗对话,内边距应用正确。 | 手势导航下的狗对话,内边距应用正确。 |
恭喜!你已使 SociaLite 兼容 Android 15 全面屏平台变更。接下来,你将学习如何以向后兼容的方式使 SociaLite 实现全面屏效果。
4. 以向后兼容的方式使 SociaLite 实现全面屏效果
SociaLite 现在在 Android 15 上是全面屏效果,但在较旧的 Android 设备上仍然不是全面屏效果。要使 SociaLite 在较旧的 Android 设备上实现全面屏效果,请在 MainActivity.kt 文件中设置内容之前调用 enableEdgeToEdge。
class MainActivity : ComponentActivity() {
    override fun onCreate(savedInstanceState: Bundle?) {
        installSplashScreen()
        enableEdgeToEdge() // Add this line.
        window.isNavigationBarContrastEnforced = false
        super.onCreate(savedInstanceState)
        setContent {... }
    }
}
enableEdgeToEdge 的导入语句是 import androidx.activity.enableEdgeToEdge。依赖项是 AndroidX Activity 1.8.0 或更高版本。
有关如何以向后兼容的方式使你的应用实现全面屏效果以及如何处理内边距的深入概述,请参阅以下指南
全面屏部分的学习路径到此结束。下一部分是可选的,讨论了可能适用于你的应用的其他全面屏考量。
5. 可选:其他全面屏考量
跨架构处理内边距
组件
你可能已经注意到,更改目标 SDK 值后,SociaLite 中的许多组件没有发生位移。SociaLite 采用最佳实践进行架构设计,因此处理此平台更改非常容易。最佳实践包括以下内容
- 使用 Material Design 3 组件(
androidx.compose.material3),例如TopAppBar、BottomAppBar和NavigationBar,因为它们会自动应用内边距。 - 如果你的应用改为在 Compose 中使用 Material 2 组件(
androidx.compose.material),这些组件本身不会自动处理内边距。但是,你可以获取内边距并手动应用它们。在androidx.compose.material 1.6.0及更高版本中,对于BottomAppBar、TopAppBar、BottomNavigation和NavigationRail,请使用windowInsets参数手动应用内边距。同样,对于Scaffold,请使用contentWindowInsets参数。否则,请手动将内边距作为填充应用。 - 如果你的应用使用 Views 和 Material 组件(
com.google.android.material),大多数基于 Views 的 Material 组件(例如BottomNavigationView、BottomAppBar、NavigationRailView和NavigationView)会处理内边距,因此可能不需要额外的工作。但是,如果使用AppBarLayout,则需要添加android:fitsSystemWindows="true"。 - 如果你的应用使用 Views 和
BottomSheet、SideSheet或自定义容器,请使用ViewCompat.setOnApplyWindowInsetsListener应用填充。对于RecyclerView,请使用此监听器应用填充,并添加clipToPadding="false"。 - 对于复杂界面,使用
Scaffold(或NavigationSuiteScaffold或ListDetailPaneScaffold),而不是Surface。Scaffold让你轻松放置TopAppBar、BottomAppBar、NavigationBar和NavigationRail。
可滚动内容
你的应用可能包含列表,并且随着 Android 15 的更改,列表的最后一个项目可能会被系统的导航栏遮挡。
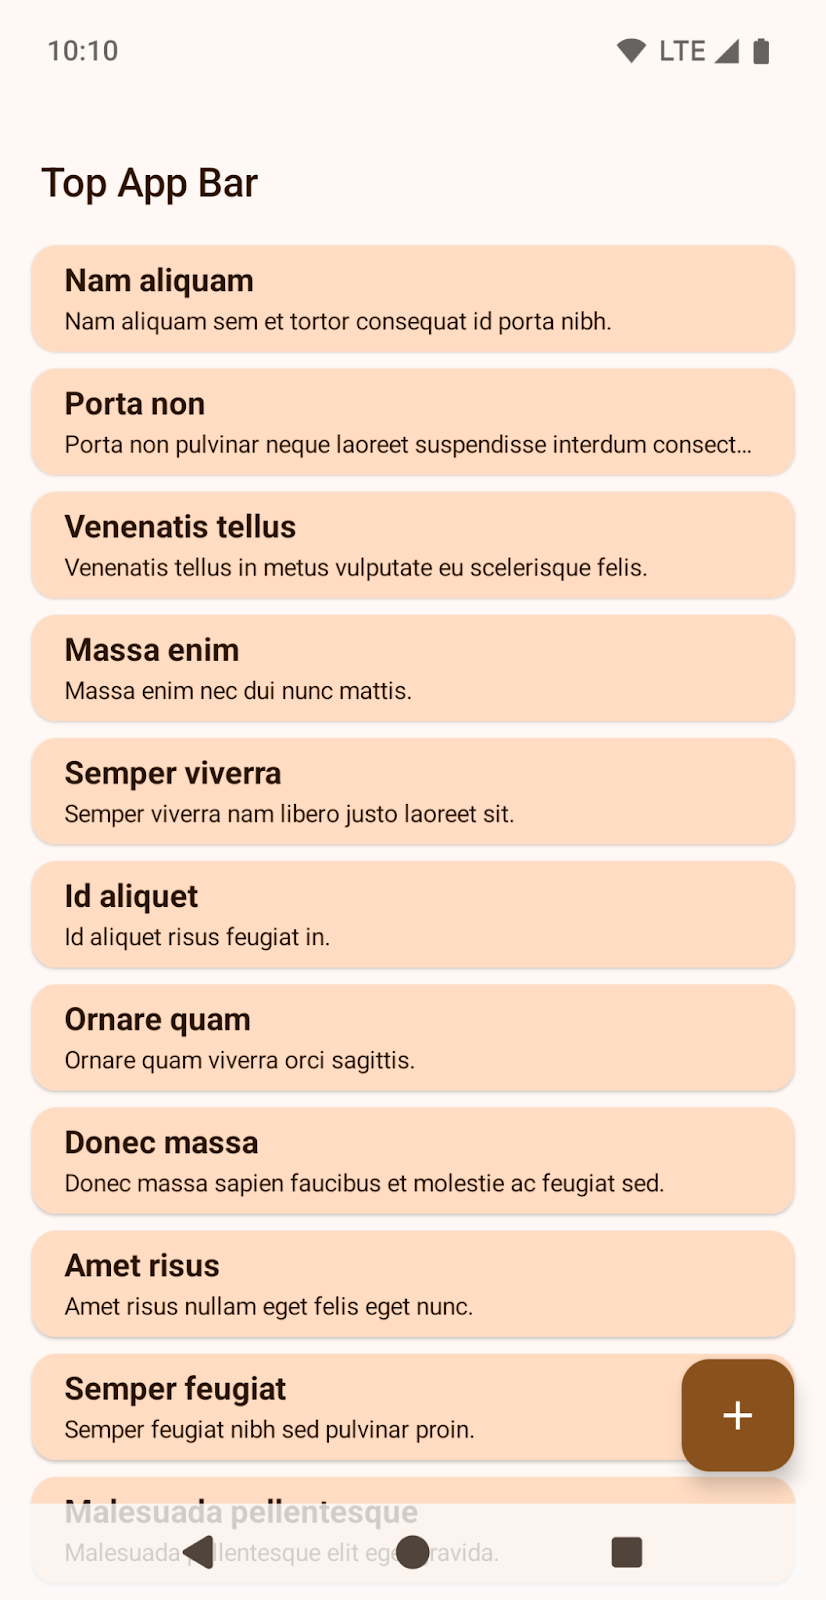
显示列表中的最后一个项目被三键导航遮挡。
使用 Compose 实现可滚动内容
在 Compose 中,使用 LazyColumn 的 contentPadding 为最后一个项目添加空间,除非你使用 TextField
Scaffold { innerPadding ->
    LazyColumn(
        contentPadding = innerPadding
    ) {
        // Content that does not contain TextField
    }
}

显示列表中的最后一个项目未被三键导航遮挡。
对于 TextField,请使用 Spacer 在 LazyColumn 中绘制最后一个 TextField。更多信息请参阅内边距使用。
LazyColumn(
    Modifier.imePadding()
) {
    // Content with TextField
    item {
        Spacer(
            Modifier.windowInsetsBottomHeight(
                WindowInsets.systemBars
            )
        )
    }
}
使用 Views 实现可滚动内容
对于 RecyclerView 或 NestedScrollView,添加 android:clipToPadding="false"。
<androidx.recyclerview.widget.RecyclerView
    android:id="@+id/recycler"
    android:layout_width="match_parent"
    android:layout_height="match_parent"
    android:clipToPadding="false"
    app:layoutManager="LinearLayoutManager" />
使用 setOnApplyWindowInsetsListener 从窗口内边距提供左、右和底部填充
ViewCompat.setOnApplyWindowInsetsListener(binding.recycler) { v, insets ->
    val i = insets.getInsets(
        WindowInsetsCompat.Type.systemBars() + WindowInsetsCompat.Type.displayCutout()
    )
    v.updatePadding(
        left = i.left,
        right = i.right,
        bottom = i.bottom + bottomPadding,
    )
    WindowInsetsCompat.CONSUMED
}
使用 LAYOUT_IN_DISPLAY_CUTOUT_MODE_ALWAYS
在目标 SDK 为 35 之前,SocialLite 在横屏模式下是这样显示的,左边缘有一个大的白色框来容纳相机刘海。在三键导航中,按钮位于右侧。
在目标 SDK 为 35 之后,SociaLite 将如下所示,左边缘不再有一个大的白色框来容纳相机刘海。要实现此效果,Android 会自动设置 LAYOUT_IN_DISPLAY_CUTOUT_MODE_ALWAYS。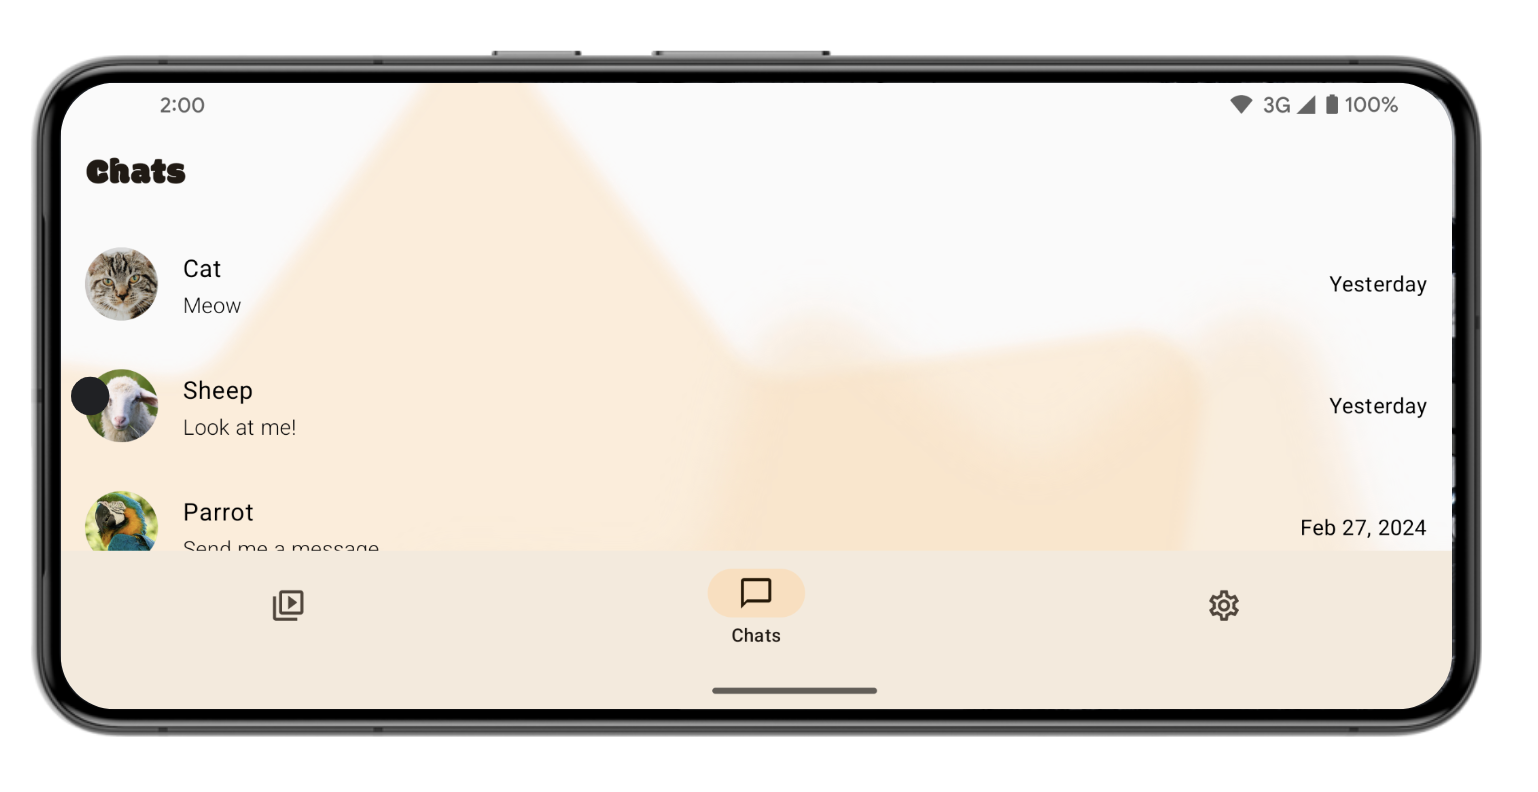
根据你的应用,你可能希望在此处处理内边距。
要在 SociaLite 中执行此操作,请按照以下步骤操作
- 在
ui/ContactRow.kt文件中,找到 Row 可组合项。 - 修改填充以考虑显示屏刘海。
@Composable
fun ChatRow(
   chat: ChatDetail,
   onClick: (() -> Unit)?,
   modifier: Modifier = Modifier,
) {
   // Add layoutDirection, displayCutout, startPadding, and endPadding.
   val layoutDirection = LocalLayoutDirection.current
   val displayCutout = WindowInsets.displayCutout.asPaddingValues()
   val startPadding = displayCutout.calculateStartPadding(layoutDirection)
   val endPadding = displayCutout.calculateEndPadding(layoutDirection)
   Row(
       modifier = modifier
           ...
           // .padding(16.dp) // Remove this line.
           // Add this block:
           .padding(
               PaddingValues(
                   top = 16.dp,
                   bottom = 16.dp,
                   // Ensure content is not occluded by display cutouts
                   // when rotating the device.
                   start = startPadding.coerceAtLeast(16.dp),
                   end = endPadding.coerceAtLeast(16.dp)
               )
           ),
       ...
   ) { ... }
处理显示屏刘海后,SociaLite 如下所示
你可以在开发者选项屏幕的显示屏刘海下测试各种显示屏刘海配置。
如果你的应用有一个非浮动窗口(例如 Activity),并且使用了 LAYOUT_IN_DISPLAY_CUTOUT_MODE_DEFAULT、LAYOUT_IN_DISPLAY_CUTOUT_MODE_NEVER 或 LAYOUT_IN_DISPLAY_CUTOUT_MODE_SHORT_EDGES,从 Android 15 Beta 2 开始,Android 会将这些刘海模式解释为 LAYOUT_IN_DISPLAY_CUTOUT_MODE_ALWAYS。此前,在 Android 15 Beta 1 中,你的应用会崩溃。
标题栏也是系统栏
标题栏也是系统栏,因为它描述了自由形式窗口的系统界面窗口装饰,例如顶部的标题栏。你可以在 Android Studio 的桌面模拟器中查看标题栏。在以下屏幕截图中,标题栏位于应用的顶部。

在 Compose 中,如果你使用 Scaffold 的 PaddingValues、safeContent、safeDrawing 或内置的 WindowInsets.systemBars,你的应用将按预期显示。但是,如果你使用 statusBar 处理内边距,你的应用内容可能不会按预期显示,因为状态栏未考虑标题栏。
在 Views 中,如果你手动使用 WindowInsetsCompat.systemBars 处理内边距,你的应用将按预期显示。如果你手动使用 WindowInsetsCompat.statusBars 处理内边距,你的应用可能不会按预期显示,因为状态栏不是标题栏。
处于沉浸式模式的应用基本不受 Android 15 全面屏强制行为的影响,因为沉浸式应用本身就已实现全面屏效果。
保护系统栏
你可能希望你的应用在手势导航下拥有透明导航栏,但在三键导航下拥有半透明或不透明导航栏。
在 Android 15 中,半透明的三键导航是默认行为,因为平台将 window.isNavigationBarContrastEnforced 属性设置为 true。手势导航仍然是透明的。
三键导航默认为半透明。
|
通常情况下,半透明的三键导航就足够了。然而,在某些情况下,你的应用可能需要不透明的三键导航。首先,将 |
通常情况下,半透明的三按钮导航栏应该足够使用。然而,在某些情况下,您的应用可能需要一个不透明的三按钮导航栏。首先,将 window.isNavigationBarContrastEnforced 属性设置为 false。然后,对于 View,使用 WindowInsetsCompat.tappableElement;对于 Compose,使用 WindowInsets.tappableElement。如果这些值为 0,则用户正在使用手势导航。否则,用户正在使用三按钮导航。如果用户正在使用三按钮导航,请在导航栏后面绘制一个视图或框。一个 Compose 示例如下所示:
class MainActivity : ComponentActivity() {
    override fun onCreate(savedInstanceState: Bundle?) {
        super.onCreate(savedInstanceState)
        setContent {
            window.isNavigationBarContrastEnforced = false
            MyTheme {
                Surface(...) {
                    MyContent(...)
                    ProtectNavigationBar()
                }
            }
        }
    }
}


// Use only if required.
@Composable
fun ProtectNavigationBar(modifier: Modifier = Modifier) {
   val density = LocalDensity.current
   val tappableElement = WindowInsets.tappableElement
   val bottomPixels = tappableElement.getBottom(density)
   val usingTappableBars = remember(bottomPixels) {
       bottomPixels != 0
   }
   val barHeight = remember(bottomPixels) {
       tappableElement.asPaddingValues(density).calculateBottomPadding()
   }

   Column(
       modifier = modifier.fillMaxSize(),
       verticalArrangement = Arrangement.Bottom
   ) {
       if (usingTappableBars) {
           Box(
               modifier = Modifier
                   .background(MaterialTheme.colorScheme.background)
                   .fillMaxWidth()
                   .height(barHeight)
           )
       }
   }
}
|
不透明的三键导航 |
6. 查看解决方案代码
MainActivity.kt 文件的 onCreate 方法应如下所示
class MainActivity : ComponentActivity() {
   override fun onCreate(savedInstanceState: Bundle?) {
       installSplashScreen()
       enableEdgeToEdge()
       window.isNavigationBarContrastEnforced = false
       super.onCreate(savedInstanceState)
       setContent {
           Main(
               shortcutParams = extractShortcutParams(intent),
           )
       }
   }
}
ChatScreen.kt 文件中的 ChatContent 可组合项应处理内边距
private fun ChatContent(...) {
   ...
   Scaffold(...) { innerPadding ->
       Column {
           ...
           InputBar(
               input = input,
               onInputChanged = onInputChanged,
               onSendClick = onSendClick,
               onCameraClick = onCameraClick,
               onPhotoPickerClick = onPhotoPickerClick,
               contentPadding = innerPadding.copy(
                    layoutDirection, top = 0.dp
                ),
               sendEnabled = sendEnabled,
               modifier = Modifier
                   .fillMaxWidth()
                   .windowInsetsPadding(
                       WindowInsets.ime.exclude(WindowInsets.navigationBars)
                    ),
            )
       }
   }
}
解决方案代码位于主分支中。如果你已经下载了 SociaLite
git checkout main
或者,你可以再次下载代码以查看主分支,可以直接下载或通过 git 下载
git clone git@github.com:android/socialite.git