1. 简介
您将学习的内容
- 分页库的主要组件是什么。
- 如何将分页库添加到您的项目中。
您将构建的内容
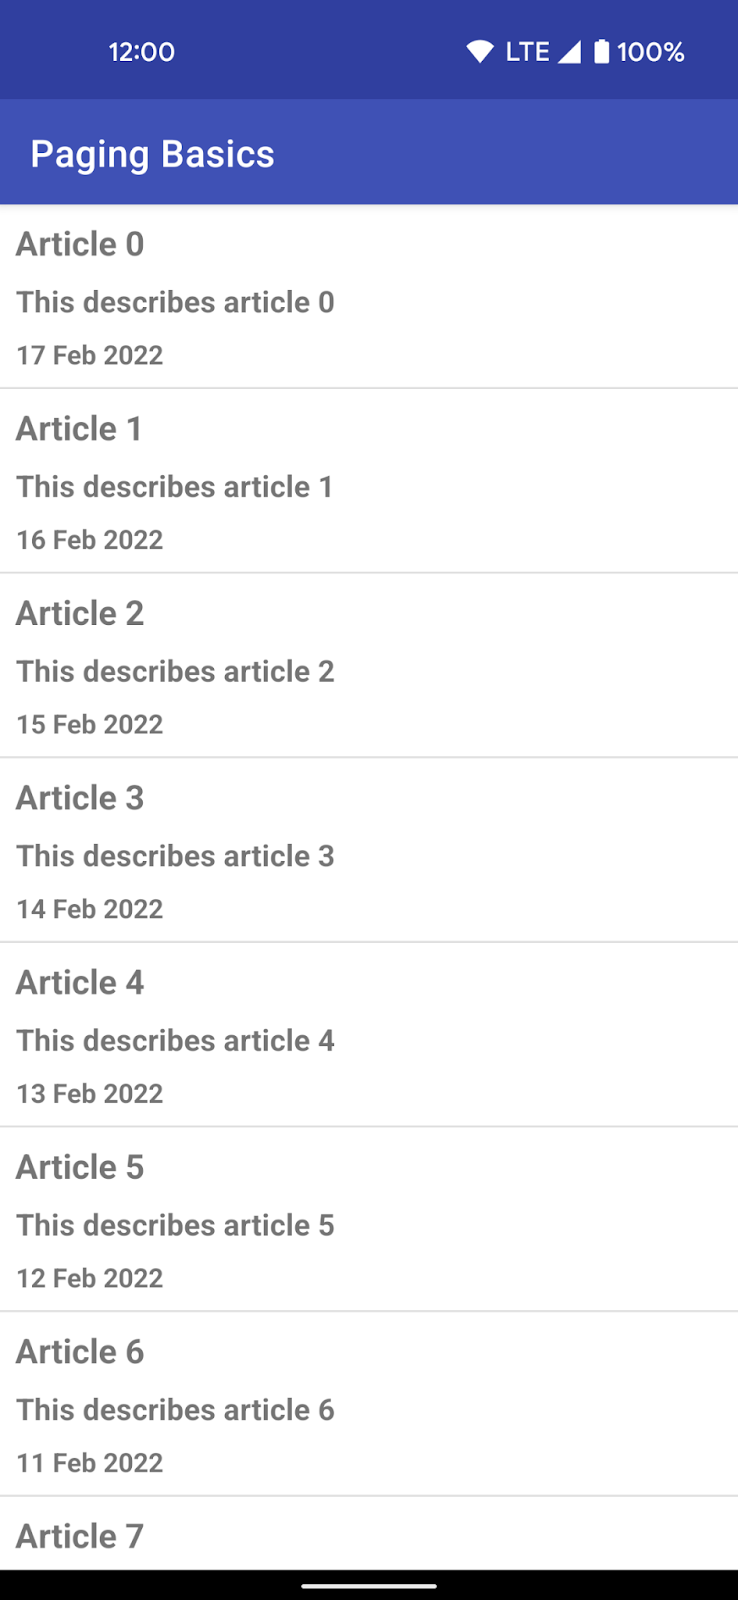
在这个代码实验室中,您将从一个示例应用开始,该应用已经显示了文章列表。列表是静态的,包含 500 篇文章,所有文章都保存在手机内存中。

随着您学习代码实验室的进度,您将
- …了解分页的概念。
- …了解分页库的核心组件。
- …学习如何使用分页库实现分页。
完成后,您将拥有一个应用
- …成功实现分页。
- …在获取更多数据时有效地与用户进行通信。
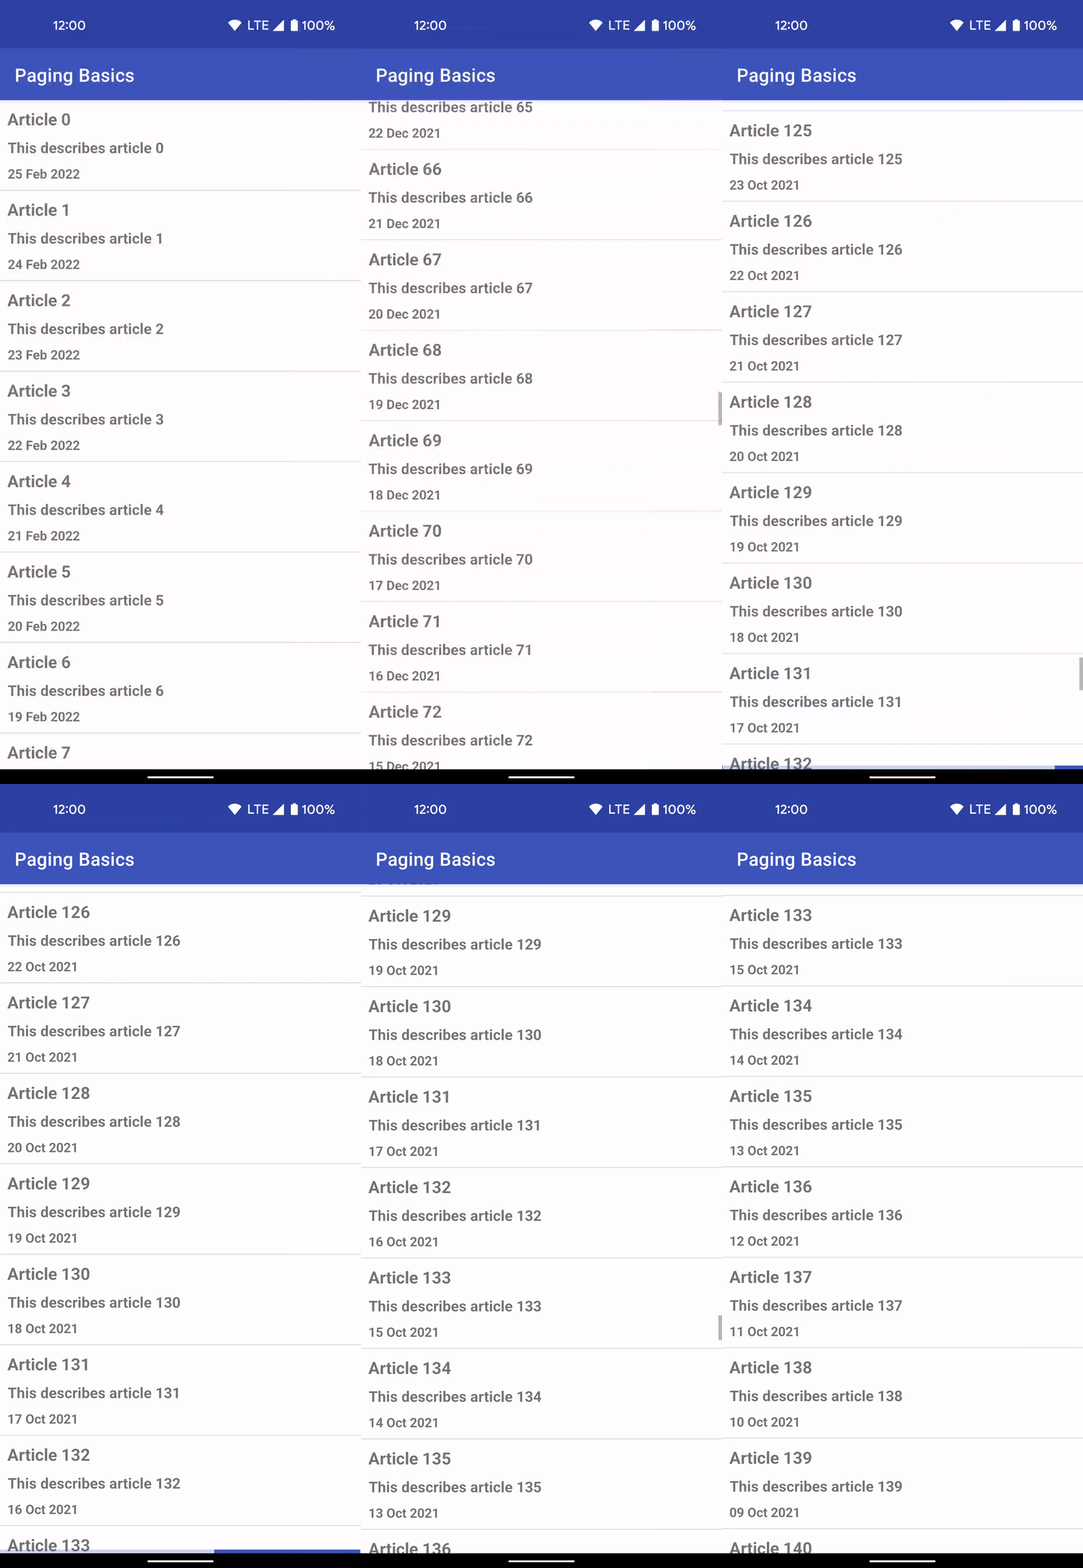
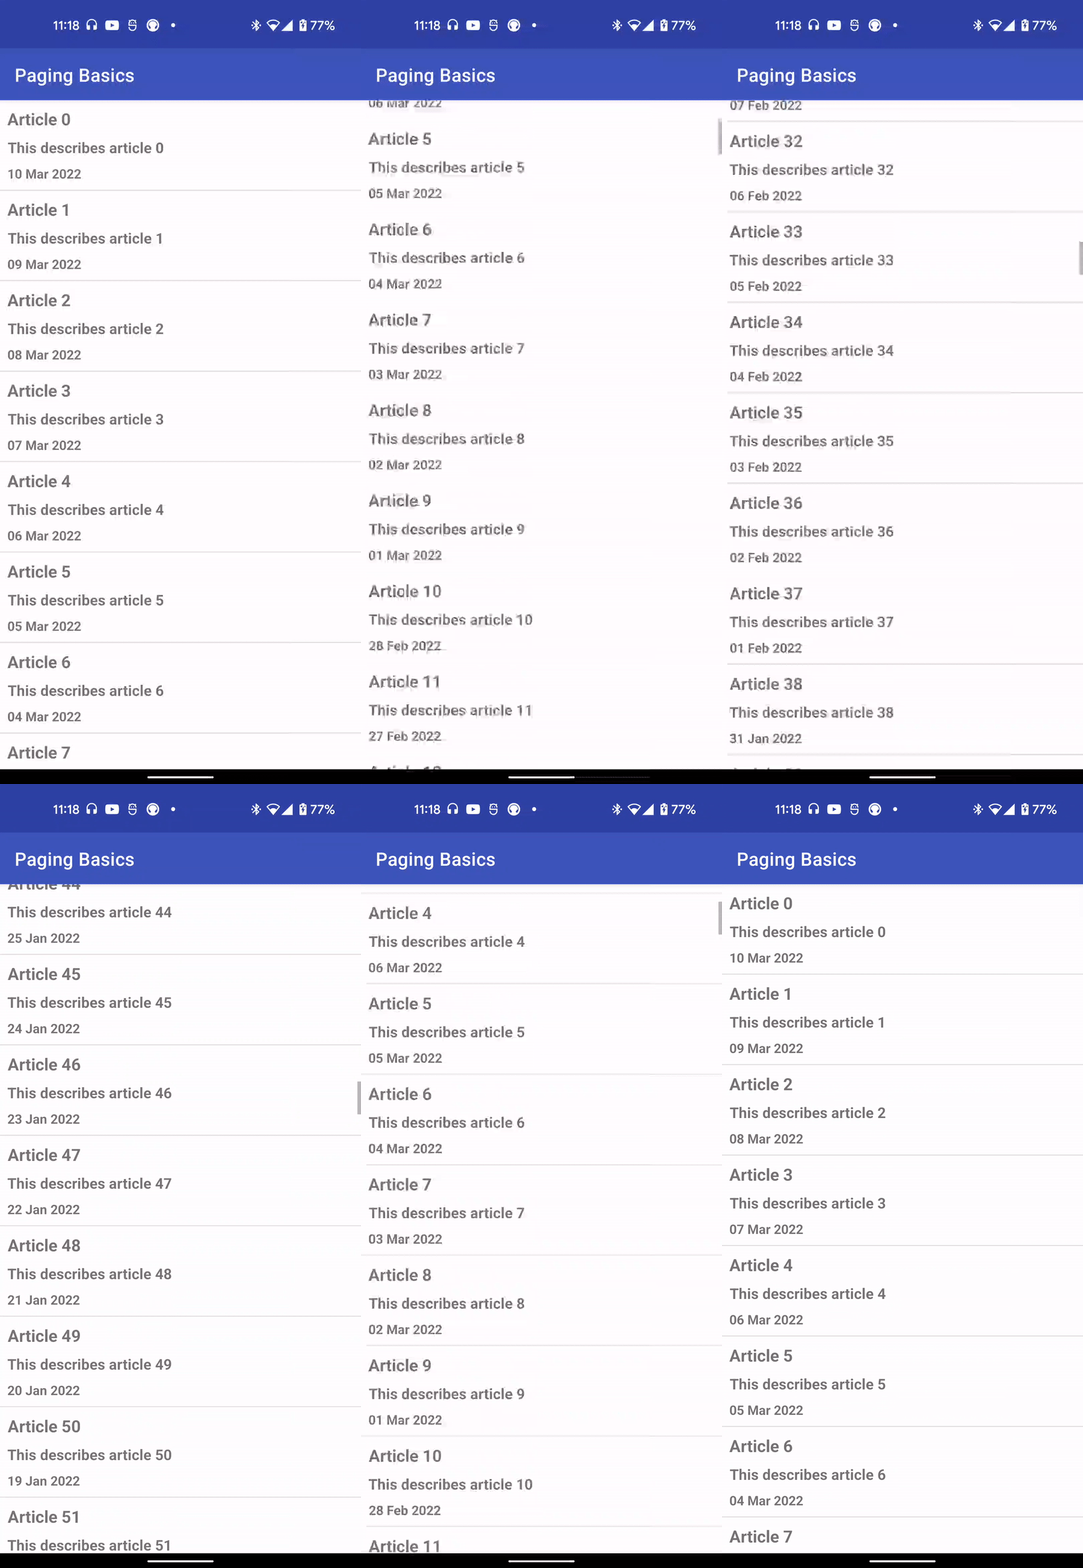
以下是我们将最终获得的 UI 的快速预览

您需要的内容
锦上添花
- 熟悉以下架构组件:ViewModel、视图绑定和应用架构指南中建议的架构。要了解架构组件的介绍,请查看Room with a View 代码实验室。
- 熟悉协程和 Kotlin Flow。要了解 Flow 的介绍,请查看使用 Kotlin Flow 和 LiveData 的高级协程代码实验室。
2. 设置您的环境
在此步骤中,您将下载整个代码实验室的代码,然后运行一个简单的示例应用。
为了让您尽快入门,我们为您准备了一个启动项目。
如果您已安装 git,只需运行以下命令。要检查是否安装了 git,请在终端或命令行中输入git --version,并验证其是否正确执行。
git clone https://github.com/googlecodelabs/android-paging
如果您没有 git,您可以点击以下按钮下载此代码实验室的所有代码:
代码被组织到两个文件夹中,basic 和 advanced。对于此代码实验室,我们只关注 basic 文件夹。
在 basic 文件夹中,还有另外两个文件夹:start 和 end。我们将从 start 文件夹中的代码开始,在代码实验室结束时,start 文件夹中的代码应与 end 文件夹中的代码相同。
- 在 Android Studio 中打开
basic/start目录中的项目。 - 在设备或模拟器上运行
app运行配置。

我们应该看到一个文章列表!滚动到末尾以验证列表是静态的——换句话说,当我们到达列表末尾时不会获取更多项目。滚动回顶部以验证我们仍然拥有所有项目。
3. 分页简介
向用户显示信息最常见的方法之一是使用列表。但是,有时这些列表只是向用户提供可用所有内容的一小部分。当用户滚动浏览可用的信息时,通常会期望获取更多数据来补充已查看的信息。每次获取数据时,都需要高效且无缝,以便增量加载不会影响用户体验。增量加载还提供了性能优势,因为应用无需一次在内存中保存大量数据。
这个增量获取信息的过程称为分页,其中每个页对应于要获取的一块数据。要请求一页,正在分页的数据源通常需要一个查询来定义所需的信息。本代码实验室的其余部分将介绍分页库,并演示它如何帮助您快速有效地在应用中实现分页。
分页库的核心组件
分页库的核心组件如下所示
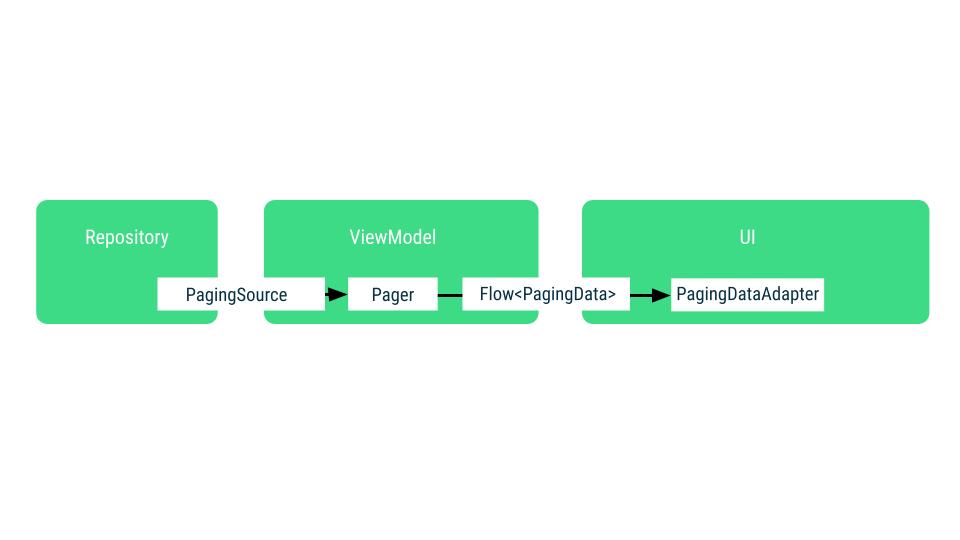
PagingSource- 用于为特定页面查询加载数据块的基类。它是数据层的一部分,通常从DataSource类中公开,随后由Repository公开,供ViewModel使用。PagingConfig- 定义确定分页行为的参数的类。这包括页面大小、是否启用占位符等等。Pager- 负责生成PagingData流的类。它依赖于PagingSource来执行此操作,应该在ViewModel中创建。PagingData- 分页数据的容器。数据的每次刷新都将有一个单独的对应PagingData发射,其自身支持PagingSource。PagingDataAdapter- 一个RecyclerView.Adapter子类,用于在RecyclerView中呈现PagingData。PagingDataAdapter可以连接到 KotlinFlow、LiveData、RxJavaFlowable、RxJavaObservable,甚至可以使用工厂方法连接到静态列表。PagingDataAdapter侦听内部PagingData加载事件,并在加载页面时有效地更新 UI。

在以下部分,您将实现上述每个组件的示例。
4. 项目概述
目前形式的应用显示的是静态的文章列表。每篇文章都有标题、描述和创建日期。对于少量项目,静态列表运行良好,但随着数据集的增大,它无法很好地扩展。我们将通过使用分页库实现分页来解决这个问题,但首先让我们回顾一下应用中已有的组件。
该应用遵循应用架构指南中推荐的架构。以下是您将在每个包中找到的内容
数据层
ArticleRepository:负责提供文章列表并将其保存在内存中。Article:表示数据模型的类,这是从数据层提取的信息的表示。
UI 层:
Activity、RecyclerView.Adapter和RecyclerView.ViewHolder:负责在 UI 中显示列表的类。ViewModel:负责创建 UI 需要显示的状态的状态持有者。
存储库使用 articleStream 字段在一个 Flow 中公开其所有文章。这反过来又由 UI 层中的 ArticleViewModel 读取,然后它使用 state 字段(一个StateFlow)为 ArticleActivity 中的 UI 做好准备。
从存储库公开文章作为 Flow 使存储库能够随着时间的推移更新呈现的文章。例如,如果文章的标题发生更改,则可以轻松地将其更改传达给 articleStream 的收集器。在 ViewModel 中使用 StateFlow 作为 UI 状态可确保即使我们停止收集 UI 状态(例如,当 Activity 在配置更改期间重新创建时),我们也可以在我们开始再次收集它的那一刻继续进行。
如前所述,存储库中当前的 articleStream 仅显示当天的新闻。虽然这可能对某些用户来说足够了,但其他用户可能希望在滚动浏览当天所有可用文章后查看较旧的文章。此期望使文章的显示成为分页的理想选择。我们应该探索对文章进行分页的其他原因包括:
ViewModel在itemsStateFlow中将所有加载的项目保存在内存中。当数据集变得非常大时,这是一个主要问题,因为它会影响性能。- 当列表中的文章发生更改时,更新其中一篇文章或多篇文章的成本会随着文章列表的增大而增加。
Paging库帮助解决了所有这些问题,同时为在您的应用程序中增量获取数据(分页)提供了一致的API。
5. 定义数据源
在实现分页时,我们希望确保满足以下条件
- 正确处理来自UI的数据请求,确保不会同时针对同一查询触发多个请求。
- 在内存中保持可管理数量的检索数据。
- 触发请求以获取更多数据以补充我们已经获取的数据。
我们可以使用PagingSource实现所有这些。 PagingSource通过指定如何增量获取数据块来定义数据源。然后,PagingData对象根据用户在RecyclerView中滚动时生成的加载提示从PagingSource中提取数据。
我们的PagingSource将加载文章。在data/Article.kt中,您可以找到如下定义的模型:
data class Article(
    val id: Int,
    val title: String,
    val description: String,
    val created: LocalDateTime,
)
要构建PagingSource,您需要定义以下内容
- 分页键的类型 - 我们用来请求更多数据的页面查询类型的定义。在本例中,我们获取特定文章 ID 之后或之前的文章,因为 ID 保证是有序且递增的。
- 加载的数据类型 - 每个页面返回一个文章
List,因此类型为Article。 - 数据从哪里检索 - 通常,这将是数据库、网络资源或任何其他分页数据源。但是,在这个代码实验室中,我们使用的是本地生成的数据。
在data包中,让我们在一个名为ArticlePagingSource.kt的新文件中创建一个PagingSource实现
package com.example.android.codelabs.paging.data

import androidx.paging.PagingSource
import androidx.paging.PagingState

class ArticlePagingSource : PagingSource<Int, Article>() {
    override suspend fun load(params: LoadParams<Int>): LoadResult<Int, Article> {
        TODO("Not yet implemented")
    }
   override fun getRefreshKey(state: PagingState<Int, Article>): Int? {
        TODO("Not yet implemented")
    }
}
PagingSource要求我们实现两个函数:load()和getRefreshKey()。
load()函数将由Paging库调用,以异步获取更多数据,以便在用户滚动时显示。 LoadParams对象保留与加载操作相关的信息,包括以下内容
- 要加载的页面的键 - 如果这是第一次调用
load(),则LoadParams.key将为null。在这种情况下,您必须定义初始页面键。对于我们的项目,我们使用文章 ID 作为键。让我们还在ArticlePagingSource文件的顶部添加一个STARTING_KEY常量0作为初始页面键。 - 加载大小 - 请求加载的项目数。
load()函数返回一个LoadResult。LoadResult可以是以下类型之一
LoadResult.Page,如果结果成功。LoadResult.Error,如果发生错误。LoadResult.Invalid,如果PagingSource应该失效,因为它无法再保证其结果的完整性。
LoadResult.Page有三个必需的参数
data:已获取项目的List。prevKey:如果需要获取当前页面之前的项目,则load()方法使用的键。nextKey:如果需要获取当前页面之后的项目,则load()方法使用的键。
...和两个可选参数
itemsBefore:在加载的数据之前显示的占位符数量。itemsAfter:在加载的数据之后显示的占位符数量。
我们的加载键是Article.id字段。我们可以将其用作键,因为Article ID 对于每篇文章都会增加 1;也就是说,文章 ID 是连续的单调递增整数。
nextKey或prevKey如果在相应方向上没有更多数据要加载,则为null。在本例中,对于prevKey
- 如果
startKey与STARTING_KEY相同,我们返回null,因为我们无法在此键之后加载更多项目。 - 否则,我们获取列表中的第一个项目并在其后面加载
LoadParams.loadSize,确保永远不会返回小于STARTING_KEY的键。我们通过定义ensureValidKey()方法来实现。
添加以下检查分页键是否有效的函数
class ArticlePagingSource : PagingSource<Int, Article>() {
   ...
   /**
     * Makes sure the paging key is never less than [STARTING_KEY]
     */
    private fun ensureValidKey(key: Int) = max(STARTING_KEY, key)
}
对于nextKey
- 由于我们支持加载无限项目,我们传入
range.last + 1。
此外,因为每篇文章都有一个created字段,我们还需要为它生成一个值。将以下内容添加到文件的顶部
private val firstArticleCreatedTime = LocalDateTime.now()

class ArticlePagingSource : PagingSource<Int, Article>() {
   ...
}
所有这些代码都到位后,我们现在可以实现load()函数了
import kotlin.math.max
...

private val firstArticleCreatedTime = LocalDateTime.now()

class ArticlePagingSource : PagingSource<Int, Article>() {
   override suspend fun load(params: LoadParams<Int>): LoadResult<Int, Article> {
        // Start paging with the STARTING_KEY if this is the first load
        val start = params.key ?: STARTING_KEY
        // Load as many items as hinted by params.loadSize
        val range = start.until(start + params.loadSize)

        return LoadResult.Page(
            data = range.map { number ->
                Article(
                    // Generate consecutive increasing numbers as the article id
                    id = number,
                    title = "Article $number",
                    description = "This describes article $number",
                    created = firstArticleCreatedTime.minusDays(number.toLong())
                )
            },

            // Make sure we don't try to load items behind the STARTING_KEY
            prevKey = when (start) {
                STARTING_KEY -> null
                else -> ensureValidKey(key = range.first - params.loadSize)
            },
            nextKey = range.last + 1
        )
    }

    ...
}
接下来,我们需要实现getRefreshKey()。当Paging库需要重新加载UI的项目,因为其支持的PagingSource中的数据已更改时,将调用此方法。其支持的PagingSource的数据已更改并需要在UI中更新的情况称为失效。失效时,Paging库会创建一个新的PagingSource来重新加载数据,并通过发出新的PagingData来通知UI。我们将在后面的部分详细了解失效。
从新的PagingSource加载时,将调用getRefreshKey()以提供新的PagingSource应开始加载的键,以确保用户在刷新后不会丢失他们在列表中的当前位置。
分页库中的失效由于以下两种原因之一而发生
- 您在
PagingAdapter上调用了refresh()。 - 您在
PagingSource上调用了invalidate()。
返回的键(在本例中为Int)将通过LoadParams参数传递给新PagingSource中load()方法的下一次调用。为了防止项目在失效后跳动,我们需要确保返回的键将加载足够多的项目以填充屏幕。这增加了新的项目集包含失效数据中存在的项目的可能性,这有助于保持当前的滚动位置。让我们看看我们应用程序中的实现
   // The refresh key is used for the initial load of the next PagingSource, after invalidation
   override fun getRefreshKey(state: PagingState<Int, Article>): Int? {
        // In our case we grab the item closest to the anchor position
        // then return its id - (state.config.pageSize / 2) as a buffer
        val anchorPosition = state.anchorPosition ?: return null
        val article = state.closestItemToPosition(anchorPosition) ?: return null
        return ensureValidKey(key = article.id - (state.config.pageSize / 2))
    }
在上段代码中,我们使用了PagingState.anchorPosition。如果您想知道分页库如何知道获取更多项目,这是一个线索!当UI尝试从PagingData读取项目时,它会尝试在特定索引处读取。如果读取了数据,则该数据将显示在UI中。但是,如果没有数据,则分页库知道它需要获取数据来满足失败的读取请求。读取时成功获取数据的最后一个索引是anchorPosition。
刷新时,我们获取最接近anchorPosition的Article的键作为加载键。这样,当我们从新的PagingSource开始再次加载时,获取的项目集将包含已加载的项目,从而确保流畅一致的用户体验。
完成这些操作后,您就完全定义了PagingSource。下一步是将其连接到UI。
6. 为UI生成PagingData
在当前实现中,我们在ArticleRepository中使用Flow<List<Article>>将加载的数据公开给ViewModel。ViewModel反过来使用stateIn运算符维护始终可用的数据状态,以便公开给UI。
使用Paging库,我们将从ViewModel公开Flow<PagingData<Article>>。PagingData是一种包装我们已加载数据的类型,它可以帮助Paging库决定何时获取更多数据,并确保我们不会两次请求同一页面。
要构造PagingData,我们将根据我们想要用来将PagingData传递到应用程序其他层的API,使用Pager类中的几种不同的构建器方法之一
- Kotlin
Flow- 使用Pager.flow。 LiveData- 使用Pager.liveData。- RxJava
Flowable- 使用Pager.flowable。 - RxJava
Observable- 使用Pager.observable。
由于我们已经在应用程序中使用了Flow,我们将继续使用这种方法;但我们将使用Flow<PagingData<Article>>而不是Flow<List<Article>>。
无论您使用哪种PagingData构建器,您都必须传递以下参数
PagingConfig。此类设置有关如何从PagingSource加载内容的选项,例如提前加载的距离、初始加载的请求大小等等。您必须定义的唯一必需参数是页面大小——每页应加载多少项。默认情况下,Paging 会将您加载的所有页面保存在内存中。为确保用户滚动时不会浪费内存,请在PagingConfig中设置maxSize参数。默认情况下,如果 Paging 可以计算未加载的项并且enablePlaceholders配置标志为true,则 Paging 将返回空项目作为尚未加载内容的占位符。这样,您就可以在适配器中显示占位符视图。为了简化此代码实验室中的工作,让我们通过传递enablePlaceholders = false来禁用占位符。- 定义如何创建
PagingSource的函数。在我们的例子中,我们将创建一个ArticlePagingSource,因此我们需要一个函数来告诉 Paging 库如何做到这一点。
让我们修改我们的ArticleRepository!
更新 ArticleRepository
- 删除
articlesStream字段。 - 添加一个名为
articlePagingSource()的方法,该方法返回我们刚刚创建的ArticlePagingSource。
class ArticleRepository {

    fun articlePagingSource() = ArticlePagingSource()
}
清理 ArticleRepository
Paging 库为我们做了很多事情
- 处理内存缓存。
- 当用户接近列表末尾时请求数据。
这意味着可以删除ArticleRepository中的所有其他内容,除了articlePagingSource()。您的ArticleRepository文件现在应该如下所示
package com.example.android.codelabs.paging.data

import androidx.paging.PagingSource

class ArticleRepository {
    fun articlePagingSource() = ArticlePagingSource()
}
您现在应该在ArticleViewModel中遇到编译错误。让我们看看需要在那里进行哪些更改!
7. 在 ViewModel 中请求和缓存 PagingData
在解决编译错误之前,让我们回顾一下ViewModel。
class ArticleViewModel(...) : ViewModel() {

    val items: StateFlow<List<Article>> = ...
}
为了在ViewModel中集成 Paging 库,我们将把items的返回类型从StateFlow<List<Article>>更改为Flow<PagingData<Article>>。为此,首先在文件的顶部添加一个名为ITEMS_PER_PAGE的私有常量
private const val ITEMS_PER_PAGE = 50

class ArticleViewModel {
    ...
}
接下来,我们将items更新为Pager实例输出的结果。我们通过向Pager传递两个参数来实现这一点
- 一个
PagingConfig,其pageSize为ITEMS_PER_PAGE,并且禁用了占位符 - 一个
PagingSourceFactory,它提供我们刚刚创建的ArticlePagingSource实例。
class ArticleViewModel(...) : ViewModel() {

   val items: Flow<PagingData<Article>> = Pager(
        config = PagingConfig(pageSize = ITEMS_PER_PAGE, enablePlaceholders = false),
        pagingSourceFactory = { repository.articlePagingSource() }
    )
        .flow
        ...
}
接下来,为了通过配置或导航更改保持分页状态,我们使用cachedIn()方法,并向其传递androidx.lifecycle.viewModelScope。
完成上述更改后,我们的ViewModel应该如下所示
package com.example.android.codelabs.paging.ui

import androidx.lifecycle.ViewModel
import androidx.lifecycle.viewModelScope
import androidx.paging.Pager
import androidx.paging.PagingConfig
import androidx.paging.PagingData
import androidx.paging.cachedIn
import com.example.android.codelabs.paging.data.Article
import com.example.android.codelabs.paging.data.ArticleRepository
import com.example.android.codelabs.paging.data.ITEMS_PER_PAGE
import kotlinx.coroutines.flow.Flow

private const val ITEMS_PER_PAGE = 50

class ArticleViewModel(
    private val repository: ArticleRepository,
) : ViewModel() {

    val items: Flow<PagingData<Article>> = Pager(
        config = PagingConfig(pageSize = ITEMS_PER_PAGE, enablePlaceholders = false),
        pagingSourceFactory = { repository.articlePagingSource() }
    )
        .flow
        .cachedIn(viewModelScope)
}
关于PagingData,需要注意的另一点是,它是一个自包含的类型,包含要显示在RecyclerView中的数据的可变更新流。每个PagingData的发出都是完全独立的,如果由于底层数据集的变化导致支持PagingSource失效,则可能会为单个查询发出多个PagingData实例。因此,PagingData的Flows应该独立于其他Flows公开。
就是这样!我们现在在ViewModel中拥有了分页功能!
8. 使适配器与 PagingData 一起工作
要将PagingData绑定到RecyclerView,请使用PagingDataAdapter。PagingDataAdapter会在PagingData内容加载时收到通知,然后它会向RecyclerView发出更新信号。
更新ArticleAdapter以使用PagingData流
- 现在,
ArticleAdapter实现了ListAdapter。改为使其实现PagingDataAdapter。其余的类体保持不变
import androidx.paging.PagingDataAdapter
...

class ArticleAdapter : PagingDataAdapter<Article, RepoViewHolder>(ARTICLE_DIFF_CALLBACK) {
// body is unchanged
}
到目前为止,我们已经进行了很多更改,但是现在我们只需一步之遥即可运行应用程序——我们只需要连接 UI!
9. 在 UI 中使用 PagingData
在我们当前的实现中,我们有一个名为binding.setupScrollListener()的方法,如果满足某些条件,它会调用ViewModel来加载更多数据。Paging 库会自动完成所有这些操作,因此我们可以删除此方法及其用法。
接下来,由于ArticleAdapter不再是ListAdapter而是PagingDataAdapter,我们进行两个小的更改
- 我们将
ViewModel上的Flow的终端运算符切换为collectLatest,而不是collect。 - 我们使用
submitData()而不是submitList()来通知ArticleAdapter更改。
我们在pagingData Flow上使用collectLatest,以便在发出新的pagingData实例时取消对先前pagingData发出的收集。
进行这些更改后,Activity应该如下所示
import kotlinx.coroutines.flow.collectLatest


class ArticleActivity : AppCompatActivity() {

    override fun onCreate(savedInstanceState: Bundle?) {
        super.onCreate(savedInstanceState)
        val binding = ActivityArticlesBinding.inflate(layoutInflater)
        val view = binding.root
        setContentView(view)

        val viewModel by viewModels<ArticleViewModel>(
            factoryProducer = { Injection.provideViewModelFactory(owner = this) }
        )

        val items = viewModel.items
        val articleAdapter = ArticleAdapter()

        binding.bindAdapter(articleAdapter = articleAdapter)

        lifecycleScope.launch {
            repeatOnLifecycle(Lifecycle.State.STARTED) {
                items.collectLatest {
                    articleAdapter.submitData(it)
                }
            }
        }
    }
}

private fun ActivityArticlesBinding.bindAdapter(
    articleAdapter: ArticleAdapter
) {
    list.adapter = articleAdapter
    list.layoutManager = LinearLayoutManager(list.context)
    val decoration = DividerItemDecoration(list.context, DividerItemDecoration.VERTICAL)
    list.addItemDecoration(decoration)
}
应用程序现在应该可以编译和运行。您已成功将应用程序迁移到 Paging 库!

10. 在 UI 中显示加载状态
当 Paging 库正在获取更多项以在 UI 中显示时,最好向用户指示正在加载更多数据。幸运的是,Paging 库提供了一种方便的方法,可以使用CombinedLoadStates类型访问其加载状态。
CombinedLoadStates实例描述了加载数据的 Paging 库中所有组件的加载状态。在我们的例子中,我们只对ArticlePagingSource的LoadState感兴趣,因此我们将主要使用CombinedLoadStates.source字段中的LoadStates类型。您可以通过PagingDataAdapter.loadStateFlow通过PagingDataAdapter访问CombinedLoadStates。
CombinedLoadStates.source是LoadStates类型,包含三种不同类型的LoadState的字段
LoadStates.append:对于用户当前位置之后正在获取的项目的LoadState。LoadStates.prepend:对于用户当前位置之前正在获取的项目的LoadState。LoadStates.refresh:用于初始加载的LoadState。
每个LoadState本身可以是以下之一:
LoadState.Loading:正在加载项目。LoadState.NotLoading:未加载项目。LoadState.Error:加载出错。
在我们的例子中,我们只关心LoadState是否为LoadState.Loading,因为我们的ArticlePagingSource不包含错误情况。
首先,我们在UI的顶部和底部添加进度条,以指示双向获取的加载状态。
在activity_articles.xml中,添加两个LinearProgressIndicator进度条,如下所示:
<androidx.constraintlayout.widget.ConstraintLayout xmlns:android="http://schemas.android.com/apk/res/android"
    xmlns:app="http://schemas.android.com/apk/res-auto"
    xmlns:tools="http://schemas.android.com/tools"
    android:layout_width="match_parent"
    android:layout_height="match_parent"
    tools:context=".ui.ArticleActivity">

    <androidx.recyclerview.widget.RecyclerView
        android:id="@+id/list"
        android:layout_width="0dp"
        android:layout_height="0dp"
        android:scrollbars="vertical"
        app:layout_constraintBottom_toBottomOf="parent"
        app:layout_constraintEnd_toEndOf="parent"
        app:layout_constraintStart_toStartOf="parent"
        app:layout_constraintTop_toTopOf="parent" />

    <com.google.android.material.progressindicator.LinearProgressIndicator
        android:id="@+id/prepend_progress"
        android:layout_width="0dp"
        android:layout_height="wrap_content"
        android:indeterminate="true"
        app:layout_constraintEnd_toEndOf="parent"
        app:layout_constraintStart_toStartOf="parent"
        app:layout_constraintTop_toTopOf="parent" />

    <com.google.android.material.progressindicator.LinearProgressIndicator
        android:id="@+id/append_progress"
        android:layout_width="0dp"
        android:layout_height="wrap_content"
        android:indeterminate="true"
        app:layout_constraintBottom_toBottomOf="parent"
        app:layout_constraintEnd_toEndOf="parent"
        app:layout_constraintStart_toStartOf="parent" />

</androidx.constraintlayout.widget.ConstraintLayout>
接下来,我们通过从PagingDataAdapter收集LoadStatesFlow来响应CombinedLoadState。在ArticleActivity.kt中收集状态。
override fun onCreate(savedInstanceState: Bundle?) {
        super.onCreate(savedInstanceState)
        ...

        lifecycleScope.launch {
            repeatOnLifecycle(Lifecycle.State.STARTED) {
                articleAdapter.loadStateFlow.collect {
                    binding.prependProgress.isVisible = it.source.prepend is Loading
                    binding.appendProgress.isVisible = it.source.append is Loading
                }
            }
        }
        lifecycleScope.launch {
        ...
    }
最后,我们在ArticlePagingSource中添加一点延迟来模拟加载。
private const val LOAD_DELAY_MILLIS = 3_000L

class ArticlePagingSource : PagingSource<Int, Article>() {

    override suspend fun load(params: LoadParams<Int>): LoadResult<Int, Article> {
        val start = params.key ?: STARTING_KEY
        val range = startKey.until(startKey + params.loadSize)

        if (start != STARTING_KEY) delay(LOAD_DELAY_MILLIS)
        return ...

}
再次运行应用程序并滚动到列表底部。您应该会看到底部进度条在分页库获取更多项目时显示,并在完成后消失!

11. 总结
让我们快速回顾一下我们所涵盖的内容。我们……
- ……探讨了分页的概述以及为什么它必要。
- ……通过创建一个
Pager,定义一个PagingSource,并发出PagingData,从而向我们的应用程序添加了分页功能。 - ……使用
cachedIn运算符在ViewModel中缓存PagingData。 - ……使用
PagingDataAdapter在UI中使用PagingData。 - ……使用
PagingDataAdapter.loadStateFlow响应CombinedLoadStates。
就是这样!要了解更高级的分页概念,请查看高级分页codelab!
