
1. 简介
此 Codelab 演示了 Paging Library 的高级用法。如果您是分页概念的新手,或者对 Paging Library 还不熟悉,请查看 Paging 基础知识 Codelab 。
您将学到什么
- Paging 3 的主要组件是什么。
- 如何在项目中添加 Paging 3。
- 如何使用 Paging 3 API 为列表添加页眉或页脚。
- 如何使用 Paging 3 API 添加列表分隔符。
- 如何从网络和数据库进行分页。
您将构建什么
在此 Codelab 中,您将从一个示例应用开始,该应用已显示 GitHub 代码库列表。每当用户滚动到显示列表的末尾时,就会触发新的网络请求,并在屏幕上显示其结果。
您将通过一系列步骤添加代码,以实现以下目标
- 迁移到 Paging library 组件。
- 为列表添加加载状态页眉和页脚。
- 在每次新的代码库搜索之间显示加载进度。
- 在列表中添加分隔符。
- 添加数据库支持,以便从网络和数据库进行分页。
以下是您的应用最终的外观
您需要什么
- Android Studio Arctic Fox.
- 熟悉以下架构组件: LiveData 、 ViewModel 、 View Binding 以及“ 应用架构指南 ”中建议的架构。
- 熟悉协程和 Kotlin Flow。
如需架构组件入门,请查看 使用视图的 Room Codelab 。如需 Flow 入门,请查看 Kotlin Flow 和 LiveData 高级协程 Codelab 。
2. 设置您的环境
在此步骤中,您将下载整个 Codelab 的代码,然后运行一个简单的示例应用。
为了让您尽快开始,我们准备了一个入门项目供您在此基础上构建。
如果您安装了 git,只需运行以下命令即可。(您可以通过在终端/命令行中输入git --version并验证其是否正确执行来检查)。
git clone https://github.com/android/codelab-android-paging
代码位于/advanced文件夹中。打开start项目。
end项目包含您最终应完成的代码,如果您遇到困难,请随时查看。
如果您没有 git,可以点击以下按钮下载此 Codelab 的所有代码
- 解压代码,然后在 Android Studio 中打开项目。
- 在设备或模拟器上运行
app运行配置。

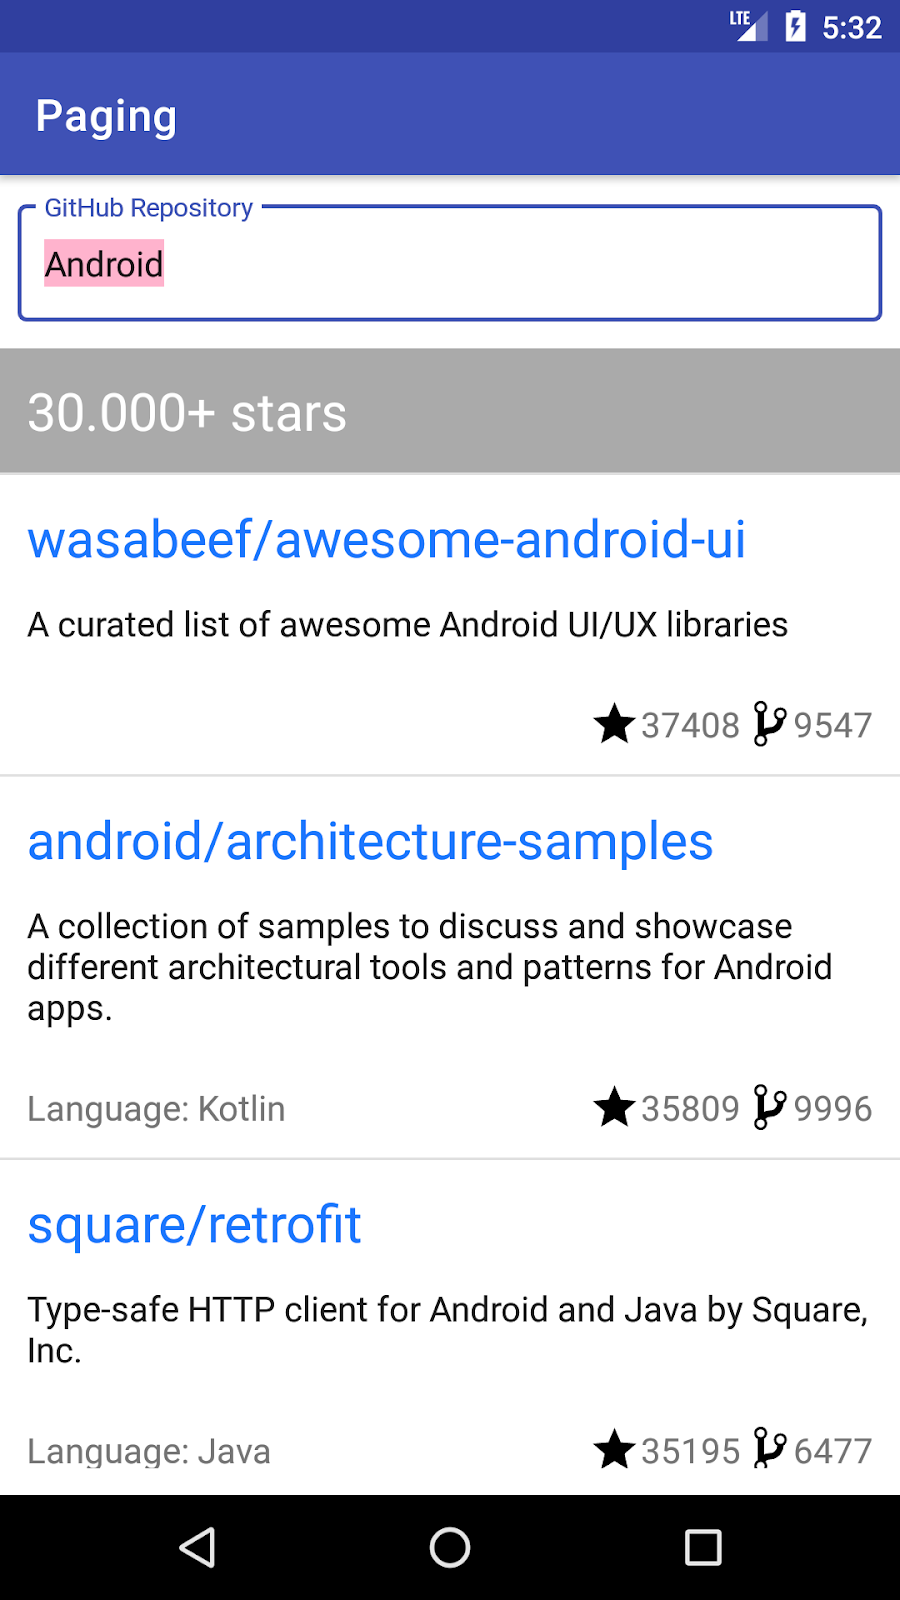
应用运行并显示类似于以下内容的 GitHub 代码库列表

3. 项目概览
该应用允许您搜索名称或描述包含特定单词的 GitHub 代码库。代码库列表按星级降序排列,然后按名称字母顺序排列。
该应用遵循“ 应用架构指南 ”中推荐的架构。以下是您将在每个包中找到的内容
- api - 使用 Retrofit 进行的 Github API 调用。
- data - 存储库类,负责触发 API 请求并将响应缓存在内存中。
- model -
Repo数据模型,它也是 Room 数据库中的一个表;以及RepoSearchResult,一个用于 UI 观察搜索结果数据和网络错误的类。 - ui - 与使用
RecyclerView显示Activity相关的类。
GithubRepository类会在用户每次滚动到列表末尾附近时,或者用户搜索新代码库时,从网络检索代码库名称列表。查询结果列表保存在GithubRepository的内存中的ConflatedBroadcastChannel中,并作为Flow公开。
SearchRepositoriesViewModel从GithubRepository请求数据并将其暴露给SearchRepositoriesActivity。由于我们希望确保在配置更改(例如旋转)时不会多次请求数据,因此我们在ViewModel中使用liveData()构建器方法将Flow转换为LiveData。这样,LiveData会将最新的结果列表缓存在内存中,当SearchRepositoriesActivity重新创建时,LiveData的内容将显示在屏幕上。ViewModel暴露
- 一个
LiveData<UiState> - 一个函数
(UiAction) -> Unit
UiState 代表了渲染应用 UI 所需的一切信息,不同的字段对应不同的 UI 组件。它是一个不可变对象,这意味着它不能被修改;但是,可以生成新的版本并由 UI 观察到。在我们的例子中,新的版本是由于用户操作而产生的:要么是搜索新查询,要么是滚动列表以获取更多数据。
用户操作恰当地由UiAction类型表示。将ViewModel交互的 API 封装在一个单一类型中具有以下优点
- API 表面小:可以添加、移除或更改操作,但
ViewModel的方法签名永不改变。这使得重构是本地的,并且不太可能泄露抽象或接口实现。 - 更容易的并发管理:正如您稍后将在 codelab 中看到的那样,能够保证某些请求的执行顺序非常重要。通过使用
UiAction对 API 进行强类型化,我们可以编写具有严格要求的代码,以控制什么可以发生以及何时可以发生。
从可用性角度来看,我们面临以下问题
- 用户对列表加载状态一无所知:当他们搜索新的代码库时,看到的是一个空白屏幕,或者在加载同一查询的更多结果时,列表只是突然结束。
- 用户无法重试失败的查询。
- 列表在方向更改或进程终止后总是滚动到顶部。
从实现角度来看,我们面临以下问题
- 列表在内存中无限增长,随着用户滚动浪费内存。
- 我们必须将结果从
Flow转换为LiveData以缓存它们,增加了代码的复杂性。 - 如果我们的应用需要显示多个列表,我们会发现为每个列表编写大量样板代码。
让我们看看 Paging 库如何帮助我们解决这些问题以及它包含哪些组件。
4. Paging 库组件
Paging 库使您更容易在应用 UI 中渐进式且平稳地加载数据。Paging API 为许多功能提供支持,否则您在需要分页加载数据时需要手动实现这些功能
- 跟踪用于检索下一页和上一页的键。
- 当用户滚动到列表末尾时,自动请求正确的页面。
- 确保不会同时触发多个请求。
- 允许您缓存数据:如果您使用 Kotlin,这将在
CoroutineScope中完成;如果您使用 Java,这可以使用LiveData完成。 - 跟踪加载状态并允许您在
RecyclerView列表项或 UI 的其他位置显示它,并轻松重试失败的加载。 - 允许您对将显示的列表执行常见操作,如
map或filter,而无论您是使用Flow、LiveData还是 RxJavaFlowable或Observable。 - 提供一种实现列表分隔符的简便方法。
应用架构指南 提出了一个包含以下主要组件的架构
- 一个本地数据库,用作呈现给用户和由用户操作的数据的单一事实来源。
- 一个 Web API 服务。
- 一个与数据库和 Web API 服务协作的存储库,提供统一的数据接口。
- 一个提供特定于 UI 的数据的
ViewModel。 - UI,显示
ViewModel中数据的可视化表示。
Paging 库与所有这些组件协同工作,并协调它们之间的交互,以便它可以从数据源加载内容的“页面”,并在 UI 中显示这些内容。
此 Codelab 向您介绍 Paging 库及其主要组件
PagingData- 分页数据的容器。每次数据刷新都将有一个单独的相应的PagingData。PagingSource-PagingSource是将数据快照加载到PagingData流中的基类。Pager.flow- 根据PagingConfig和一个定义如何构造实现的PagingSource的函数来构建一个Flow<PagingData>。PagingDataAdapter- 一个在RecyclerView中呈现PagingData的RecyclerView.Adapter。PagingDataAdapter可以连接到 KotlinFlow、LiveData、RxJavaFlowable或 RxJavaObservable。PagingDataAdapter监听内部PagingData加载事件,当页面加载时,并在后台线程上使用DiffUtil计算细粒度更新,因为更新的内容以新的PagingData对象的形式接收。RemoteMediator- 帮助实现网络和数据库的分页。
在此 Codelab 中,您将实现上述每个组件的示例。
5. 定义数据源
PagingSource实现定义了数据源以及如何从该源检索数据。PagingData对象响应用户在RecyclerView中滚动时生成的加载提示,从PagingSource查询数据。
目前,GithubRepository承担了 Paging 库完成添加后将处理的大部分数据源职责
- 从
GithubService加载数据,确保不会同时触发多个请求。 - 维护检索到的数据的内存中缓存。
- 跟踪要请求的页面。
要构建PagingSource,您需要定义以下内容
- 分页键的类型 - 在我们的例子中,Github API 使用基于 1 的索引号作为页面,因此类型为
Int。 - 加载的数据类型 - 在我们的例子中,我们加载
Repo项。 - 数据从何处检索 - 我们从
GithubService获取数据。我们的数据源将特定于某个查询,因此我们需要确保也将查询信息传递给GithubService。
因此,在data包中,让我们创建一个名为GithubPagingSource的PagingSource实现
class GithubPagingSource(
        private val service: GithubService,
        private val query: String
) : PagingSource<Int, Repo>() {
    override suspend fun load(params: LoadParams<Int>): LoadResult<Int, Repo> {
        TODO("Not yet implemented")
    }
   override fun getRefreshKey(state: PagingState<Int, Repo>): Int? {
        TODO("Not yet implemented")
    }

}
我们将看到PagingSource要求我们实现两个函数:load()和getRefreshKey()。
Paging 库将调用load()函数,以便在用户滚动时异步获取更多要显示的数据。LoadParams对象保留与加载操作相关的信息,包括以下内容
- 要加载页面的键。如果这是第一次调用 load,则
LoadParams.key将为null。在这种情况下,您必须定义初始页面键。对于我们的项目,您必须将GITHUB_STARTING_PAGE_INDEX常量从GithubRepository移到您的PagingSource实现中,因为这是初始页面键。 - 加载大小 - 请求要加载的项数。
load 函数返回一个LoadResult。这将取代我们的应用中使用RepoSearchResult,因为LoadResult可以采用以下类型之一
LoadResult.Page,如果结果成功。LoadResult.Error,如果发生错误。
在构建LoadResult.Page时,如果列表无法在相应的方向上加载,请将nextKey或prevKey设为null。例如,在我们的例子中,我们可以认为如果网络响应成功但列表为空,则没有更多数据可加载;因此nextKey可以为null。
基于所有这些信息,我们应该能够实现load()函数!
接下来我们需要实现getRefreshKey()。刷新键用于后续对PagingSource.load()的刷新调用(第一次调用是初始加载,它使用由Pager提供的initialKey)。当 Paging 库想要加载新数据以替换当前列表时,例如,在下拉刷新时,或由于数据库更新、配置更改、进程终止等导致的无效时,会发生刷新。通常,后续的刷新调用希望围绕PagingState.anchorPosition重新开始加载数据,它代表最近访问的索引。
GithubPagingSource实现如下
// GitHub page API is 1 based: https://developer.github.com/v3/#pagination
private const val GITHUB_STARTING_PAGE_INDEX = 1

class GithubPagingSource(
        private val service: GithubService,
        private val query: String
) : PagingSource<Int, Repo>() {

    override suspend fun load(params: LoadParams<Int>): LoadResult<Int, Repo> {
        val position = params.key ?: GITHUB_STARTING_PAGE_INDEX
        val apiQuery = query + IN_QUALIFIER
        return try {
            val response = service.searchRepos(apiQuery, position, params.loadSize)
            val repos = response.items
            val nextKey = if (repos.isEmpty()) {
                null
            } else {
                // initial load size = 3 * NETWORK_PAGE_SIZE
                // ensure we're not requesting duplicating items, at the 2nd request
                position + (params.loadSize / NETWORK_PAGE_SIZE)
            }
            LoadResult.Page(
                    data = repos,
                    prevKey = if (position == GITHUB_STARTING_PAGE_INDEX) null else position - 1,
                    nextKey = nextKey
            )
        } catch (exception: IOException) {
            return LoadResult.Error(exception)
        } catch (exception: HttpException) {
            return LoadResult.Error(exception)
        }
    }
    // The refresh key is used for subsequent refresh calls to PagingSource.load after the initial load
    override fun getRefreshKey(state: PagingState<Int, Repo>): Int? {
        // We need to get the previous key (or next key if previous is null) of the page
        // that was closest to the most recently accessed index.
        // Anchor position is the most recently accessed index
        return state.anchorPosition?.let { anchorPosition ->
            state.closestPageToPosition(anchorPosition)?.prevKey?.plus(1)
                ?: state.closestPageToPosition(anchorPosition)?.nextKey?.minus(1)
        }
    }

}
6. 构建并配置 PagingData
在我们当前的实现中,我们在GitHubRepository中使用Flow<RepoSearchResult>从网络获取数据并将其传递给ViewModel。然后ViewModel将其转换为LiveData并暴露给 UI。每当到达显示列表的末尾并且从网络加载更多数据时,Flow<RepoSearchResult>将包含该查询的所有先前检索到的数据的整个列表以及最新数据。
RepoSearchResult封装了成功和错误情况。成功情况包含存储库数据。错误情况包含Exception原因。使用 Paging 3,我们不再需要RepoSearchResult,因为该库使用LoadResult对成功和错误情况进行建模。请随意删除RepoSearchResult,因为在接下来的几个步骤中我们将替换它。
要构建PagingData,我们首先需要决定使用哪种 API 将PagingData传递给应用的其他层
- Kotlin
Flow- 使用Pager.flow。 LiveData- 使用Pager.liveData。- RxJava
Flowable- 使用Pager.flowable。 - RxJava
Observable- 使用Pager.observable。
由于我们已经在应用中使用了Flow,我们将继续采用这种方法;但我们将使用Flow<PagingData<Repo>>代替Flow<RepoSearchResult>。
无论您使用哪个PagingData构建器,您都必须传递以下参数
PagingConfig。此类设置了关于如何从PagingSource加载内容的选项,例如提前加载多远、初始加载的大小请求等。您必须定义的唯一强制参数是页面大小——每页应该加载多少项。默认情况下,Paging 将您加载的所有页面都保存在内存中。为确保在用户滚动时不浪费内存,请在PagingConfig中设置maxSize参数。默认情况下,如果 Paging 可以计数未加载的项,并且enablePlaceholders配置标志为 true,则 Paging 将返回 null 项作为未加载内容的占位符。这样,您就可以在适配器中显示占位符视图。为了简化此 codelab 中的工作,让我们通过传递enablePlaceholders = false来禁用占位符。- 一个函数,定义如何创建
PagingSource。在我们的例子中,我们将为每个新查询创建一个新的GithubPagingSource。
让我们修改我们的GithubRepository!
更新 GithubRepository.getSearchResultStream
- 移除
suspend修饰符。 - 返回
Flow<PagingData<Repo>>。 - 构建
Pager。
fun getSearchResultStream(query: String): Flow<PagingData<Repo>> {
    return Pager(
          config = PagingConfig(
            pageSize = NETWORK_PAGE_SIZE,
            enablePlaceholders = false
         ),
          pagingSourceFactory = { GithubPagingSource(service, query) }
    ).flow
}
清理GithubRepository
Paging 3 为我们做了很多事情
- 处理内存中的缓存。
- 当用户接近列表末尾时请求数据。
这意味着GithubRepository中的所有其他内容都可以移除,除了getSearchResultStream以及我们定义NETWORK_PAGE_SIZE的 companion object。您的GithubRepository现在应该看起来像这样
class GithubRepository(private val service: GithubService) {

    fun getSearchResultStream(query: String): Flow<PagingData<Repo>> {
        return Pager(
                config = PagingConfig(
                pageSize = NETWORK_PAGE_SIZE,
                enablePlaceholders = false
             ),
                pagingSourceFactory = { GithubPagingSource(service, query) }
        ).flow
    }

    companion object {
        const val NETWORK_PAGE_SIZE = 50
    }
}
现在您应该在SearchRepositoriesViewModel中看到编译错误。让我们看看需要进行哪些更改!
7. 在 ViewModel 中请求和缓存 PagingData
在解决编译错误之前,让我们回顾一下ViewModel中的类型
sealed class UiAction {
    data class Search(val query: String) : UiAction()
    data class Scroll(
        val visibleItemCount: Int,
        val lastVisibleItemPosition: Int,
        val totalItemCount: Int
    ) : UiAction()
}

data class UiState(
    val query: String,
    val searchResult: RepoSearchResult
)
在我们的UiState中,我们暴露了一个searchResult;searchResult的作用是作为搜索结果的内存中缓存,它能够在配置更改后保持。使用 Paging 3,我们不再需要将Flow转换为LiveData。相反,SearchRepositoriesViewModel现在将暴露一个StateFlow<UiState>。此外,我们完全去掉了searchResult值,转而暴露一个单独的Flow<PagingData<Repo>>,它具有与searchResult相同的作用。
PagingData是一个自包含的类型,它包含一个可变的更新流,这些更新适用于将在RecyclerView中显示的数据。每个PagingData的发射是完全独立的,单个查询可能会发射多个PagingData。因此,PagingData的Flows应独立于其他Flows暴露。
此外,作为用户体验优势,对于输入的每个新查询,我们都希望滚动到列表顶部以显示第一个搜索结果。然而,由于分页数据可能会多次发射,我们只希望在用户**未**开始滚动时滚动到列表顶部。
为此,让我们更新UiState并添加lastQueryScrolled和hasNotScrolledForCurrentSearch字段。这些标志将阻止我们在不应该滚动时滚动到列表顶部
data class UiState(
    val query: String = DEFAULT_QUERY,
    val lastQueryScrolled: String = DEFAULT_QUERY,
    val hasNotScrolledForCurrentSearch: Boolean = false
)
让我们重新审视我们的架构。因为所有对ViewModel的请求都通过一个入口点——定义为(UiAction) -> Unit的accept字段——我们需要做以下事情
- 将该入口点转换为包含我们感兴趣类型的流。
- 转换这些流。
- 将流重新组合成一个
StateFlow<UiState>。
从更函数式的角度来说,我们将把UiAction的发射reduce成UiState。这有点像一条流水线:UiAction类型是进入的原材料,它们引起效果(有时称为突变),而UiState是准备好绑定到 UI 的最终输出。这有时被称为将 UI 视为UiState的函数。
让我们重写ViewModel,以在两个不同的流中处理每种UiAction类型,然后使用一些 Kotlin Flow运算符将它们转换为StateFlow<UiState>。
首先,我们更新ViewModel中state的定义,使用StateFlow而不是LiveData,同时添加一个字段来暴露PagingData的Flow
   /**
     * Stream of immutable states representative of the UI.
     */
    val state: StateFlow<UiState>

    val pagingDataFlow: Flow<PagingData<Repo>>
接下来,我们更新UiAction.Scroll子类的定义
sealed class UiAction {
    ...
    data class Scroll(val currentQuery: String) : UiAction()
}
请注意,我们删除了UiAction.Scroll数据类中的所有字段,并用单个currentQuery字符串替换它们。这使我们可以将滚动操作与特定查询关联起来。我们还删除了不再使用的shouldFetchMore扩展。这也是在进程终止后需要恢复的内容,因此我们确保更新SearchRepositoriesViewModel中的onCleared()方法
class SearchRepositoriesViewModel{
  ...
   override fun onCleared() {
        savedStateHandle[LAST_SEARCH_QUERY] = state.value.query
        savedStateHandle[LAST_QUERY_SCROLLED] = state.value.lastQueryScrolled
        super.onCleared()
    }
}

// This is outside the ViewModel class, but in the same file
private const val LAST_QUERY_SCROLLED: String = "last_query_scrolled"
现在也是介绍实际从GithubRepository创建pagingData Flow的方法的好时机
class SearchRepositoriesViewModel(
    ...
) : ViewModel() {

    override fun onCleared() {
        ...
    }

    private fun searchRepo(queryString: String): Flow<PagingData<Repo>> =
        repository.getSearchResultStream(queryString)
}
Flow<PagingData>有一个便捷的cachedIn()方法,它允许我们将Flow<PagingData>的内容缓存在CoroutineScope中。由于我们在ViewModel中,我们将使用androidx.lifecycle.viewModelScope。
现在,我们可以开始将 ViewModel 中的accept字段转换为UiAction流。用以下内容替换SearchRepositoriesViewModel的init块
class SearchRepositoriesViewModel(
    ...
) : ViewModel() {
    ...
    init {
        val initialQuery: String = savedStateHandle.get(LAST_SEARCH_QUERY) ?: DEFAULT_QUERY
        val lastQueryScrolled: String = savedStateHandle.get(LAST_QUERY_SCROLLED) ?: DEFAULT_QUERY
        val actionStateFlow = MutableSharedFlow<UiAction>()
        val searches = actionStateFlow
            .filterIsInstance<UiAction.Search>()
            .distinctUntilChanged()
            .onStart { emit(UiAction.Search(query = initialQuery)) }
        val queriesScrolled = actionStateFlow
            .filterIsInstance<UiAction.Scroll>()
            .distinctUntilChanged()
            // This is shared to keep the flow "hot" while caching the last query scrolled,
            // otherwise each flatMapLatest invocation would lose the last query scrolled,
            .shareIn(
                scope = viewModelScope,
                started = SharingStarted.WhileSubscribed(stopTimeoutMillis = 5000),
                replay = 1
            )
            .onStart { emit(UiAction.Scroll(currentQuery = lastQueryScrolled)) }
   }
}
让我们回顾一下上面的代码片段。我们从两个项开始,initialQuery String(从保存的状态或默认值中提取),以及lastQueryScrolled,一个String,表示用户与列表交互的最后一个搜索词。接下来,我们开始将Flow拆分为特定的UiAction类型
UiAction.Search,用于用户每次输入特定查询时。UiAction.Scroll,用于用户每次在特定查询处于焦点时滚动列表时。
UiAction.Scroll Flow应用了一些额外的转换。让我们来回顾一下
shareIn:这是必需的,因为当最终消耗此Flow时,它是使用flatmapLatest运算符消耗的。每次上游发射时,flatmapLatest将取消其正在操作的最后一个Flow,并开始基于给定的新 Flow 工作。在我们的例子中,这将导致我们丢失用户已滚动过的最后一个查询的值。因此,我们使用带有replay值为 1 的Flow运算符来缓存最后一个值,以便在新查询进来时不会丢失它。onStart:也用于缓存。如果应用被终止,但用户已经滚动过某个查询,我们不希望将列表滚动回顶部,导致他们再次丢失位置。
应该仍然有编译错误,因为我们尚未定义state、pagingDataFlow和accept字段。让我们来修复它们。应用到每个UiAction的转换完成后,我们现在可以使用它们来创建PagingData和UiState的 Flow。
init {
        ...
        pagingDataFlow = searches
            .flatMapLatest { searchRepo(queryString = it.query) }
            .cachedIn(viewModelScope)

        state = combine(
            searches,
            queriesScrolled,
            ::Pair
        ).map { (search, scroll) ->
            UiState(
                query = search.query,
                lastQueryScrolled = scroll.currentQuery,
                // If the search query matches the scroll query, the user has scrolled
                hasNotScrolledForCurrentSearch = search.query != scroll.currentQuery
            )
        }
            .stateIn(
                scope = viewModelScope,
                started = SharingStarted.WhileSubscribed(stopTimeoutMillis = 5000),
                initialValue = UiState()
            )

        accept = { action ->
            viewModelScope.launch { actionStateFlow.emit(action) }
        }
    }
}
我们在searches flow 上使用flatmapLatest运算符,因为每个新的搜索查询都需要创建一个新的Pager。接下来,我们在PagingData flow 上应用cachedIn运算符,使其在viewModelScope内保持活动状态,并将结果分配给pagingDataFlow字段。在UiState方面,我们使用 combine 运算符填充所需的UiState字段,并将生成的Flow分配给暴露的state字段。我们还将accept定义为一个 lambda,它启动一个挂起函数,为我们的状态机提供数据。
就这样!从字面上和响应式编程的角度来看,我们现在拥有一个功能齐全的ViewModel!
8. 使 Adapter 与 PagingData 协同工作
要将PagingData绑定到RecyclerView,请使用PagingDataAdapter。PagingDataAdapter在PagingData内容加载时会收到通知,然后它会通知RecyclerView进行更新。
更新 ui.ReposAdapter以使用PagingData流
- 现在,
ReposAdapter实现了ListAdapter。改为实现PagingDataAdapter。其余类体保持不变
class ReposAdapter : PagingDataAdapter<Repo, RepoViewHolder>(REPO_COMPARATOR) {
// body is unchanged
}
到目前为止,我们已经进行了许多更改,但现在我们离能够运行应用只有一步之遥了——我们只需要连接 UI!
9. 触发网络更新
用 Flow 替换 LiveData
让我们更新SearchRepositoriesActivity以使用 Paging 3。为了能够使用Flow<PagingData>,我们需要启动一个新的协程。我们将在lifecycleScope中进行,它负责在活动重新创建时取消请求。
幸运的是,我们不需要做太多更改。我们将launch()一个coroutine并collect()一个Flow,而不是observe()一个LiveData。UiState将与PagingAdapter LoadState Flow结合,从而保证如果用户已经滚动,我们将不会在新的PagingData发射时将列表滚动回顶部。
首先,由于我们现在将状态作为StateFlow而不是LiveData返回,因此应将活动中所有对LiveData的引用替换为StateFlow,并确保同时添加pagingData Flow的参数。第一个地方是在bindState方法中
   private fun ActivitySearchRepositoriesBinding.bindState(
        uiState: StateFlow<UiState>,
        pagingData: Flow<PagingData<Repo>>,
        uiActions: (UiAction) -> Unit
    ) {
        ...
    }
此更改具有连锁效应,因为我们现在必须更新bindSearch()和bindList()。bindSearch()的更改最小,所以让我们从那里开始
   private fun ActivitySearchRepositoriesBinding.bindSearch(
        uiState: StateFlow<UiState>,
        onQueryChanged: (UiAction.Search) -> Unit
    ) {
        searchRepo.setOnEditorActionListener {...}
        searchRepo.setOnKeyListener {...}

        lifecycleScope.launch {
            uiState
                .map { it.query }
                .distinctUntilChanged()
                .collect(searchRepo::setText)
        }
    }
这里的主要变化是需要启动一个协程,并从UiState Flow中收集查询变化。
解决滚动问题并绑定数据
现在是滚动部分。首先,像前两次更改一样,我们用StateFlow替换LiveData,并为pagingData Flow添加一个参数。完成此操作后,我们可以继续处理滚动监听器。请注意,之前我们使用附加到RecyclerView的OnScrollListener来知道何时触发更多数据。Paging 库为我们处理列表滚动,但我们仍然需要OnScrollListener作为用户是否滚动了当前查询列表的信号。在bindList()方法中,让我们将setupScrollListener()替换为内联RecyclerView.OnScrollListener。我们还完全删除setupScrollListener()方法。
   private fun ActivitySearchRepositoriesBinding.bindList(
        repoAdapter: ReposAdapter,
        uiState: StateFlow<UiState>,
        pagingData: Flow<PagingData<Repo>>,
        onScrollChanged: (UiAction.Scroll) -> Unit
    ) {
        list.addOnScrollListener(object : RecyclerView.OnScrollListener() {
            override fun onScrolled(recyclerView: RecyclerView, dx: Int, dy: Int) {
                if (dy != 0) onScrollChanged(UiAction.Scroll(currentQuery = uiState.value.query))
            }
        })
        // the rest of the code is unchanged
    }
接下来,我们设置管道以创建一个shouldScrollToTop布尔标志。完成此操作后,我们有两个可以collect的流:PagingData Flow和shouldScrollToTop Flow。
    private fun ActivitySearchRepositoriesBinding.bindList(
        repoAdapter: ReposAdapter,
        uiState: StateFlow<UiState>,
        pagingData: Flow<PagingData<Repo>>,
        onScrollChanged: (UiAction.Scroll) -> Unit
    ) {
        list.addOnScrollListener(...)
        val notLoading = repoAdapter.loadStateFlow
            // Only emit when REFRESH LoadState for the paging source changes.
            .distinctUntilChangedBy { it.source.refresh }
            // Only react to cases where REFRESH completes i.e., NotLoading.
            .map { it.source.refresh is LoadState.NotLoading }

        val hasNotScrolledForCurrentSearch = uiState
            .map { it.hasNotScrolledForCurrentSearch }
            .distinctUntilChanged()

        val shouldScrollToTop = combine(
            notLoading,
            hasNotScrolledForCurrentSearch,
            Boolean::and
        )
            .distinctUntilChanged()

        lifecycleScope.launch {
            pagingData.collectLatest(repoAdapter::submitData)
        }

        lifecycleScope.launch {
            shouldScrollToTop.collect { shouldScroll ->
                if (shouldScroll) list.scrollToPosition(0)
            }
        }
    }
在上面,我们在pagingData Flow上使用collectLatest,这样我们就可以在新的pagingData发射时取消对先前pagingData发射的收集。对于shouldScrollToTop标志,PagingDataAdapter.loadStateFlow的发射与 UI 中显示的内容是同步的,因此一旦布尔标志发射为 true,就可以安全地立即调用list.scrollToPosition(0)。
LoadStateFlow 中的类型是CombinedLoadStates对象。
CombinedLoadStates允许我们获取三种不同类型的加载操作的加载状态
CombinedLoadStates.refresh- 表示第一次加载PagingData的加载状态。CombinedLoadStates.prepend- 表示在列表开头加载数据的加载状态。CombinedLoadStates.append- 表示在列表末尾加载数据的加载状态。
在我们的例子中,我们只需要在刷新完成时(即LoadState为refresh,NotLoading)重置滚动位置。
我们现在可以从updateRepoListFromInput()中移除binding.list.scrollToPosition(0)。
完成所有这些操作后,您的活动应该看起来像
class SearchRepositoriesActivity : AppCompatActivity() {

    override fun onCreate(savedInstanceState: Bundle?) {
        super.onCreate(savedInstanceState)
        val binding = ActivitySearchRepositoriesBinding.inflate(layoutInflater)
        val view = binding.root
        setContentView(view)

        // get the view model
        val viewModel = ViewModelProvider(this, Injection.provideViewModelFactory(owner = this))
            .get(SearchRepositoriesViewModel::class.java)

        // add dividers between RecyclerView's row items
        val decoration = DividerItemDecoration(this, DividerItemDecoration.VERTICAL)
        binding.list.addItemDecoration(decoration)

        // bind the state
        binding.bindState(
            uiState = viewModel.state,
            pagingData = viewModel.pagingDataFlow,
            uiActions = viewModel.accept
        )
    }

    /**
     * Binds the [UiState] provided  by the [SearchRepositoriesViewModel] to the UI,
     * and allows the UI to feed back user actions to it.
     */
    private fun ActivitySearchRepositoriesBinding.bindState(
        uiState: StateFlow<UiState>,
        pagingData: Flow<PagingData<Repo>>,
        uiActions: (UiAction) -> Unit
    ) {
        val repoAdapter = ReposAdapter()
        list.adapter = repoAdapter

        bindSearch(
            uiState = uiState,
            onQueryChanged = uiActions
        )
        bindList(
            repoAdapter = repoAdapter,
            uiState = uiState,
            pagingData = pagingData,
            onScrollChanged = uiActions
        )
    }

    private fun ActivitySearchRepositoriesBinding.bindSearch(
        uiState: StateFlow<UiState>,
        onQueryChanged: (UiAction.Search) -> Unit
    ) {
        searchRepo.setOnEditorActionListener { _, actionId, _ ->
            if (actionId == EditorInfo.IME_ACTION_GO) {
                updateRepoListFromInput(onQueryChanged)
                true
            } else {
                false
            }
        }
        searchRepo.setOnKeyListener { _, keyCode, event ->
            if (event.action == KeyEvent.ACTION_DOWN && keyCode == KeyEvent.KEYCODE_ENTER) {
                updateRepoListFromInput(onQueryChanged)
                true
            } else {
                false
            }
        }

        lifecycleScope.launch {
            uiState
                .map { it.query }
                .distinctUntilChanged()
                .collect(searchRepo::setText)
        }
    }

    private fun ActivitySearchRepositoriesBinding.updateRepoListFromInput(onQueryChanged: (UiAction.Search) -> Unit) {
        searchRepo.text.trim().let {
            if (it.isNotEmpty()) {
                list.scrollToPosition(0)
                onQueryChanged(UiAction.Search(query = it.toString()))
            }
        }
    }

    private fun ActivitySearchRepositoriesBinding.bindList(
        repoAdapter: ReposAdapter,
        uiState: StateFlow<UiState>,
        pagingData: Flow<PagingData<Repo>>,
        onScrollChanged: (UiAction.Scroll) -> Unit
    ) {
        list.addOnScrollListener(object : RecyclerView.OnScrollListener() {
            override fun onScrolled(recyclerView: RecyclerView, dx: Int, dy: Int) {
                if (dy != 0) onScrollChanged(UiAction.Scroll(currentQuery = uiState.value.query))
            }
        })
        val notLoading = repoAdapter.loadStateFlow
            // Only emit when REFRESH LoadState for the paging source changes.
            .distinctUntilChangedBy { it.source.refresh }
            // Only react to cases where REFRESH completes i.e., NotLoading.
            .map { it.source.refresh is LoadState.NotLoading }

        val hasNotScrolledForCurrentSearch = uiState
            .map { it.hasNotScrolledForCurrentSearch }
            .distinctUntilChanged()

        val shouldScrollToTop = combine(
            notLoading,
            hasNotScrolledForCurrentSearch,
            Boolean::and
        )
            .distinctUntilChanged()

        lifecycleScope.launch {
            pagingData.collectLatest(repoAdapter::submitData)
        }

        lifecycleScope.launch {
            shouldScrollToTop.collect { shouldScroll ->
                if (shouldScroll) list.scrollToPosition(0)
            }
        }
    }
}
我们的应用应该可以编译并运行,但没有加载状态页脚和错误时显示的Toast。在下一步中,我们将看到如何显示加载状态页脚。
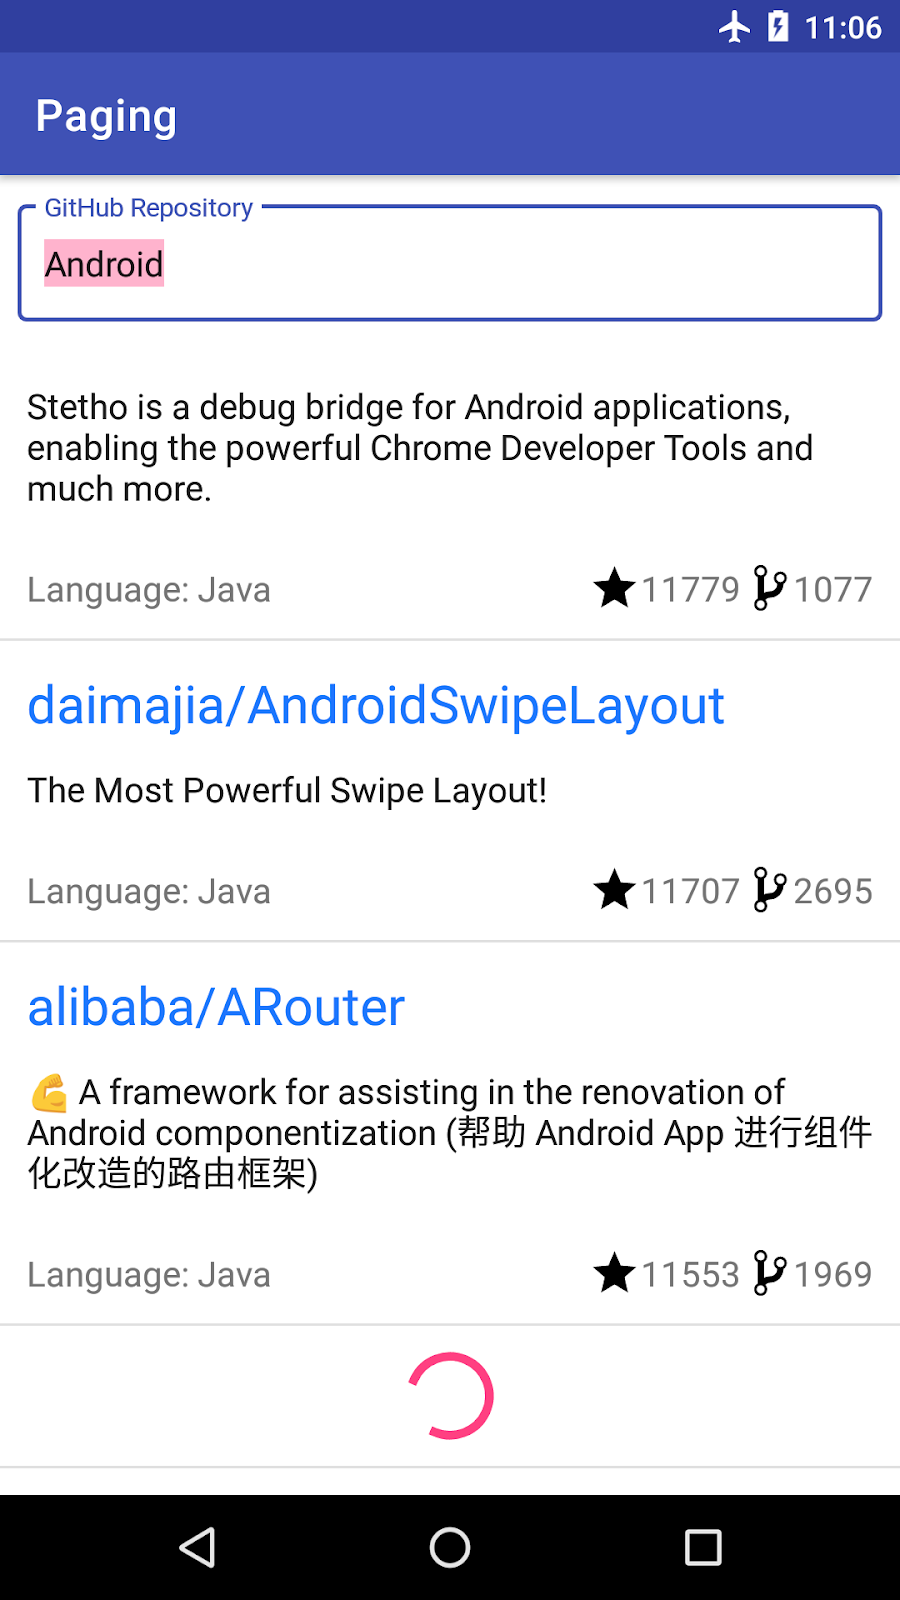
10. 在页脚中显示加载状态
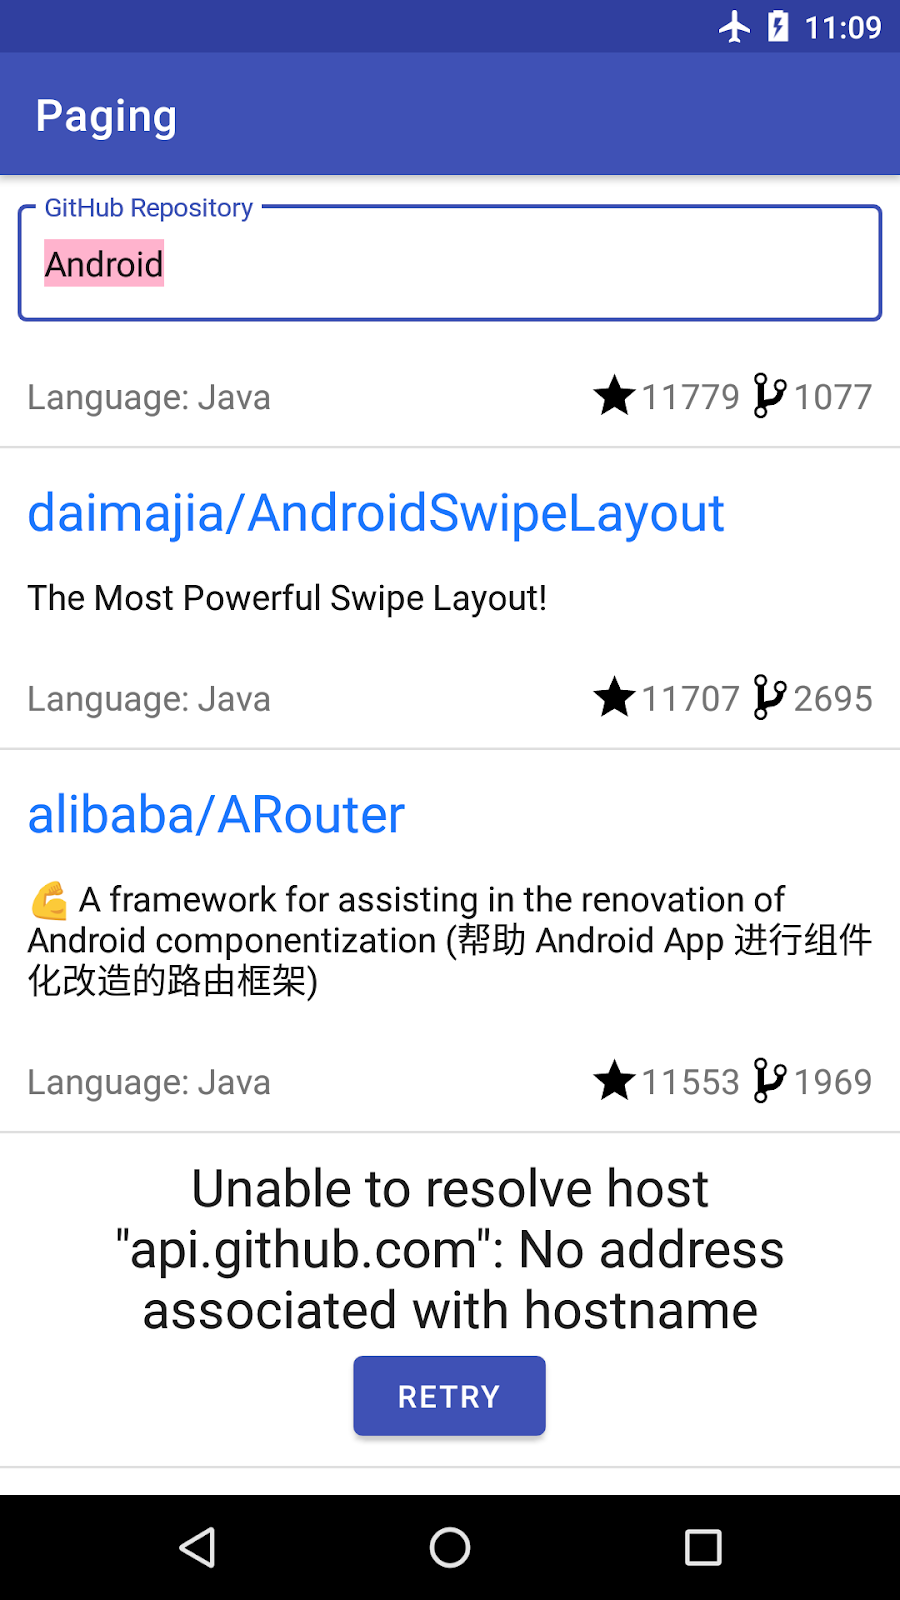
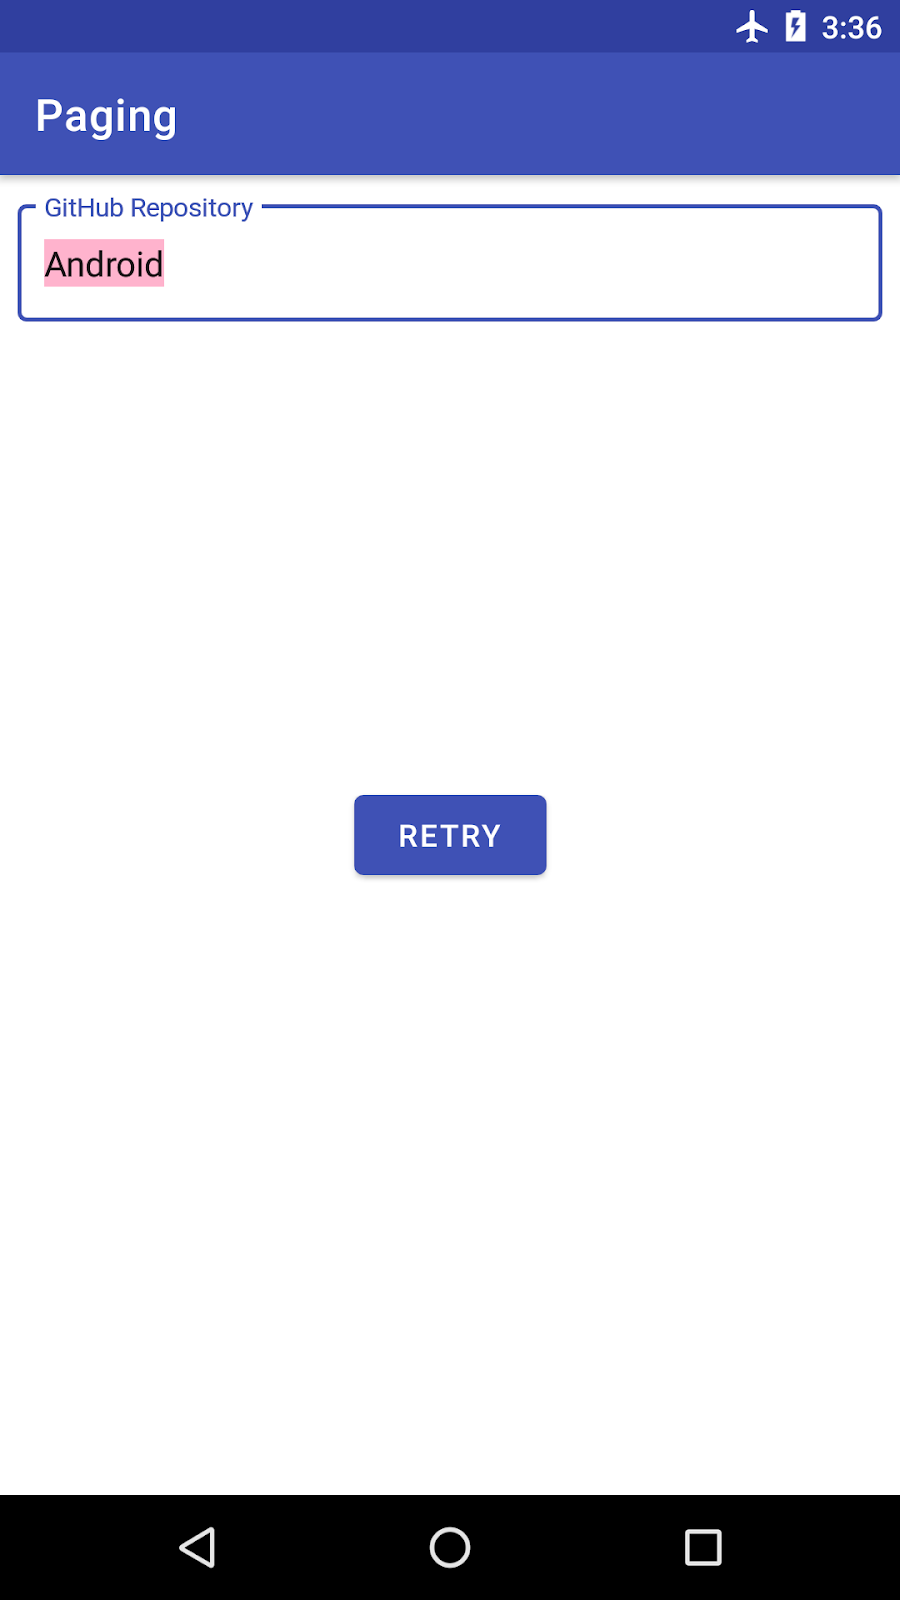
在我们的应用中,我们希望能够根据加载状态显示页脚:当列表加载时,我们希望显示一个进度微调器。如果出现错误,我们希望显示错误和一个重试按钮。
我们需要构建的页眉/页脚遵循了需要附加到我们实际显示的项目列表开头(作为页眉)或末尾(作为页脚)的列表的想法。页眉/页脚是只有一个元素的列表:根据 Paging LoadState显示进度条或带有重试按钮的错误的视图。
由于根据加载状态显示页眉/页脚和实现重试机制是常见的任务,Paging 3 API 在这两个方面都能帮助我们。
对于**页眉/页脚实现**,我们将使用LoadStateAdapter。此RecyclerView.Adapter的实现会自动收到加载状态变化的通知。它确保只有Loading和Error状态会导致项目显示,并根据LoadState通知RecyclerView何时删除、插入或更改了项目。
对于**重试机制**,我们使用adapter.retry()。在底层,此方法最终会调用您的PagingSource实现的正确页面。响应将通过Flow<PagingData>自动传播。
让我们看看我们的页眉/页脚实现是什么样的!
与任何列表一样,我们需要创建 3 个文件
- 包含用于显示进度、错误和重试按钮的 UI 元素的**布局文件**
- **
ViewHolder文件**根据 PagingLoadState使 UI 项目可见 - **适配器文件**定义如何创建和绑定
ViewHolder。我们将扩展 Paging 3 的**LoadStateAdapter**,而不是扩展RecyclerView.Adapter。
创建视图布局
为我们的代码库加载状态创建repos_load_state_footer_view_item布局。它应该有一个ProgressBar、一个TextView(用于显示错误)和一个重试Button。所需的字符串和尺寸已在项目中声明。
<?xml version="1.0" encoding="utf-8"?>
<LinearLayout xmlns:android="http://schemas.android.com/apk/res/android"
    android:layout_width="match_parent"
    android:layout_height="wrap_content"
    xmlns:tools="http://schemas.android.com/tools"
    android:orientation="vertical"
    android:padding="8dp">
    <TextView
        android:id="@+id/error_msg"
        android:textColor="?android:textColorPrimary"
        android:textSize="@dimen/error_text_size"
        android:layout_width="wrap_content"
        android:layout_height="wrap_content"
        android:layout_gravity="center"
        android:textAlignment="center"
        tools:text="Timeout"/>
    <ProgressBar
        android:id="@+id/progress_bar"
        style="?android:attr/progressBarStyle"
        android:layout_width="match_parent"
        android:layout_height="wrap_content"
        android:layout_gravity="center"/>
    <Button
        android:id="@+id/retry_button"
        android:layout_width="wrap_content"
        android:layout_height="wrap_content"
        android:layout_gravity="center"
        android:text="@string/retry"/>
</LinearLayout>
创建**ViewHolder**
在ui文件夹中创建一个名为ReposLoadStateViewHolder的新ViewHolder。它应该接收一个重试函数作为参数,该函数将在按下重试按钮时调用。创建一个接收LoadState作为参数并根据LoadState设置每个视图可见性的bind()函数。使用ViewBinding实现的ReposLoadStateViewHolder如下所示
class ReposLoadStateViewHolder(
        private val binding: ReposLoadStateFooterViewItemBinding,
        retry: () -> Unit
) : RecyclerView.ViewHolder(binding.root) {

    init {
        binding.retryButton.setOnClickListener { retry.invoke() }
    }

    fun bind(loadState: LoadState) {
        if (loadState is LoadState.Error) {
            binding.errorMsg.text = loadState.error.localizedMessage
        }
        binding.progressBar.isVisible = loadState is LoadState.Loading
        binding.retryButton.isVisible = loadState is LoadState.Error
        binding.errorMsg.isVisible = loadState is LoadState.Error
    }

    companion object {
        fun create(parent: ViewGroup, retry: () -> Unit): ReposLoadStateViewHolder {
            val view = LayoutInflater.from(parent.context)
                    .inflate(R.layout.repos_load_state_footer_view_item, parent, false)
            val binding = ReposLoadStateFooterViewItemBinding.bind(view)
            return ReposLoadStateViewHolder(binding, retry)
        }
    }
}
创建LoadStateAdapter
在ui文件夹中也创建一个扩展LoadStateAdapter的ReposLoadStateAdapter。适配器应接收重试函数作为参数,因为在构造时会将重试函数传递给ViewHolder。
与任何Adapter一样,我们需要实现onBind()和onCreate()方法。LoadStateAdapter通过在这两个函数中传递LoadState使其更容易。在onBindViewHolder()中,绑定您的ViewHolder。在onCreateViewHolder()中,根据父ViewGroup和重试函数定义如何创建ReposLoadStateViewHolder
class ReposLoadStateAdapter(private val retry: () -> Unit) : LoadStateAdapter<ReposLoadStateViewHolder>() {
    override fun onBindViewHolder(holder: ReposLoadStateViewHolder, loadState: LoadState) {
        holder.bind(loadState)
    }

    override fun onCreateViewHolder(parent: ViewGroup, loadState: LoadState): ReposLoadStateViewHolder {
        return ReposLoadStateViewHolder.create(parent, retry)
    }
}
将页脚适配器与列表绑定
现在我们有了页脚的所有元素,让我们将它们绑定到列表中。为此,PagingDataAdapter有 3 个有用的方法
withLoadStateHeader- 如果我们只想显示页眉——这应该在列表仅支持在列表开头添加项目时使用。withLoadStateFooter- 如果我们只想显示页脚——这应该在列表仅支持在列表末尾添加项目时使用。withLoadStateHeaderAndFooter- 如果我们想显示页眉和页脚——如果列表可以双向分页。
更新ActivitySearchRepositoriesBinding.bindState()方法并在适配器上调用withLoadStateHeaderAndFooter()。作为重试函数,我们可以调用adapter.retry()。
   private fun ActivitySearchRepositoriesBinding.bindState(
        uiState: StateFlow<UiState>,
        pagingData: Flow<PagingData<Repo>>,
        uiActions: (UiAction) -> Unit
    ) {
        val repoAdapter = ReposAdapter()
        list.adapter = repoAdapter.withLoadStateHeaderAndFooter(
            header = ReposLoadStateAdapter { repoAdapter.retry() },
            footer = ReposLoadStateAdapter { repoAdapter.retry() }
        )
        ...
    }
由于我们有一个无限滚动的列表,查看页脚的一个简单方法是将您的手机或模拟器设置为飞行模式,然后滚动到列表末尾。
让我们运行应用!
11. 在 Activity 中显示加载状态
您可能已经注意到,我们目前有两个问题
- 在迁移到 Paging 3 时,我们失去了在结果列表为空时显示消息的能力。
- 每当您搜索新的查询时,当前查询结果会一直显示在屏幕上,直到我们获得网络响应。这用户体验很差!我们应该显示一个进度条或一个重试按钮。
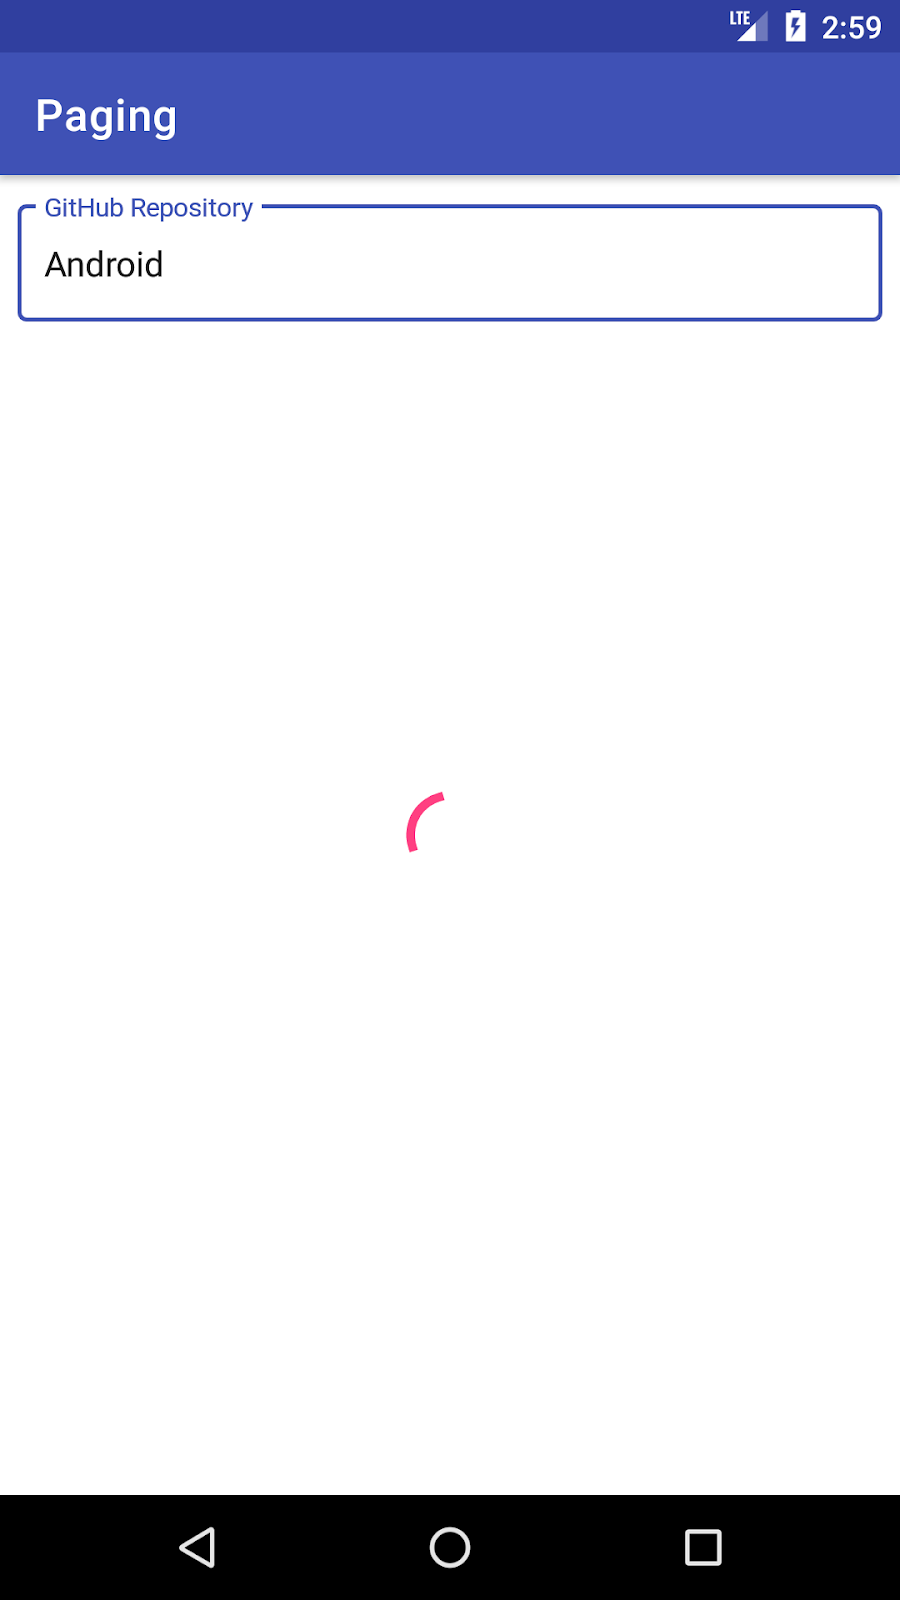
解决这两个问题的方案是在我们的SearchRepositoriesActivity中对加载状态变化做出反应。
显示空列表消息
首先,让我们恢复空列表消息。此消息只应在列表加载且列表中项目数为 0 时显示。为了知道列表何时加载,我们将使用PagingDataAdapter.loadStateFlow属性。此Flow每次加载状态通过CombinedLoadStates对象发生变化时都会发射。
CombinedLoadStates为我们提供了我们定义的PageSource或网络和数据库情况下所需的RemoteMediator的加载状态(稍后会详细介绍)。
在SearchRepositoriesActivity.bindList()中,我们直接从loadStateFlow收集。当CombinedLoadStates的refresh状态是NotLoading并且adapter.itemCount == 0时,列表为空。然后我们分别切换emptyList和list的可见性
private fun ActivitySearchRepositoriesBinding.bindList(
        repoAdapter: ReposAdapter,
        uiState: StateFlow<UiState>,
        pagingData: Flow<PagingData<Repo>>,
        onScrollChanged: (UiAction.Scroll) -> Unit
    ) {
        ...
        lifecycleScope.launch {
            repoAdapter.loadStateFlow.collect { loadState ->
                val isListEmpty = loadState.refresh is LoadState.NotLoading && repoAdapter.itemCount == 0
                // show empty list
                emptyList.isVisible = isListEmpty
                // Only show the list if refresh succeeds.
                list.isVisible = !isListEmpty
                }
            }
        }
    }
显示加载状态
让我们更新我们的activity_search_repositories.xml以包含重试按钮和进度条 UI 元素
<androidx.constraintlayout.widget.ConstraintLayout
    xmlns:android="http://schemas.android.com/apk/res/android"
    xmlns:app="http://schemas.android.com/apk/res-auto"
    xmlns:tools="http://schemas.android.com/tools"
    android:layout_width="match_parent"
    android:layout_height="match_parent"
    tools:context=".ui.SearchRepositoriesActivity">
    <com.google.android.material.textfield.TextInputLayout
        android:id="@+id/input_layout"
        android:layout_width="0dp"
        android:layout_height="wrap_content"
        android:layout_marginEnd="8dp"
        android:layout_marginStart="8dp"
        android:layout_marginTop="8dp"
        android:layout_marginLeft="8dp"
        android:layout_marginRight="8dp"
        style="@style/Widget.MaterialComponents.TextInputLayout.OutlinedBox"
        app:layout_constraintEnd_toEndOf="parent"
        app:layout_constraintStart_toStartOf="parent"
        app:layout_constraintTop_toTopOf="parent">
        <EditText
            android:id="@+id/search_repo"
            android:layout_width="match_parent"
            android:layout_height="wrap_content"
            android:hint="@string/search_hint"
            android:imeOptions="actionSearch"
            android:inputType="textNoSuggestions"
            android:selectAllOnFocus="true"
            tools:text="Android"/>
    </com.google.android.material.textfield.TextInputLayout>

    <androidx.recyclerview.widget.RecyclerView
        android:id="@+id/list"
        android:layout_width="0dp"
        android:layout_height="0dp"
        android:paddingVertical="@dimen/row_item_margin_vertical"
        android:scrollbars="vertical"
        app:layoutManager="LinearLayoutManager"
        app:layout_constraintBottom_toBottomOf="parent"
        app:layout_constraintEnd_toEndOf="parent"
        app:layout_constraintStart_toStartOf="parent"
        app:layout_constraintTop_toBottomOf="@+id/input_layout"
        tools:ignore="UnusedAttribute"/>

    <ProgressBar
        android:id="@+id/progress_bar"
        style="?android:attr/progressBarStyle"
        android:layout_width="match_parent"
        android:layout_height="wrap_content"
        android:layout_gravity="center"
        app:layout_constraintLeft_toLeftOf="parent"
        app:layout_constraintRight_toRightOf="parent"
        app:layout_constraintTop_toTopOf="parent"
        app:layout_constraintBottom_toBottomOf="parent"/>

    <Button
        android:id="@+id/retry_button"
        android:layout_width="wrap_content"
        android:layout_height="wrap_content"
        android:text="@string/retry"
        app:layout_constraintLeft_toLeftOf="parent"
        app:layout_constraintRight_toRightOf="parent"
        app:layout_constraintTop_toTopOf="parent"
        app:layout_constraintBottom_toBottomOf="parent"/>

    <TextView android:id="@+id/emptyList"
        android:layout_width="0dp"
        android:layout_height="match_parent"
        android:gravity="center"
        android:text="@string/no_results"
        android:textSize="@dimen/repo_name_size"
        android:visibility="gone"
        app:layout_constraintBottom_toBottomOf="parent"
        app:layout_constraintEnd_toEndOf="parent"
        app:layout_constraintStart_toStartOf="parent"
        app:layout_constraintTop_toTopOf="parent"/>

</androidx.constraintlayout.widget.ConstraintLayout>
我们的重试按钮应该触发PagingData的重新加载。为此,我们在onClickListener实现中调用adapter.retry(),就像我们对页眉/页脚所做的那样
// SearchRepositoriesActivity.kt

   private fun ActivitySearchRepositoriesBinding.bindList(
        repoAdapter: ReposAdapter,
        uiState: StateFlow<UiState>,
        pagingData: Flow<PagingData<Repo>>,
        onScrollChanged: (UiAction.Scroll) -> Unit
    ) {
        retryButton.setOnClickListener { repoAdapter.retry() }
        ...
}
接下来,让我们在SearchRepositoriesActivity.bindList中对加载状态变化做出反应。由于我们只想在有新的查询时显示进度条,我们需要依赖于我们分页源的加载类型,特别是CombinedLoadStates.source.refresh和LoadState:Loading或Error。此外,我们在上一步中注释掉的一个功能是在出现错误时显示Toast,所以让我们确保也把它带回来。要显示错误消息,我们必须检查CombinedLoadStates.prepend或CombinedLoadStates.append是否是LoadState.Error的实例,并从错误中检索错误消息。
让我们更新SearchRepositoriesActivity中的ActivitySearchRepositoriesBinding.bindList方法以具备此功能
private fun ActivitySearchRepositoriesBinding.bindList(
        repoAdapter: ReposAdapter,
        uiState: StateFlow<UiState>,
        pagingData: Flow<PagingData<Repo>>,
        onScrollChanged: (UiAction.Scroll) -> Unit
    ) {
        ...
        lifecycleScope.launch {
            repoAdapter.loadStateFlow.collect { loadState ->
                val isListEmpty = loadState.refresh is LoadState.NotLoading && repoAdapter.itemCount == 0
                // show empty list
                emptyList.isVisible = isListEmpty
                // Only show the list if refresh succeeds.
                list.isVisible = !isListEmpty
                // Show loading spinner during initial load or refresh.
                progressBar.isVisible = loadState.source.refresh is LoadState.Loading
                // Show the retry state if initial load or refresh fails.
                retryButton.isVisible = loadState.source.refresh is LoadState.Error

                // Toast on any error, regardless of whether it came from RemoteMediator or PagingSource
                val errorState = loadState.source.append as? LoadState.Error
                    ?: loadState.source.prepend as? LoadState.Error
                    ?: loadState.append as? LoadState.Error
                    ?: loadState.prepend as? LoadState.Error
                errorState?.let {
                    Toast.makeText(
                        this@SearchRepositoriesActivity,
                        "\uD83D\uDE28 Wooops ${it.error}",
                        Toast.LENGTH_LONG
                    ).show()
                }
            }
        }
    }
现在让我们运行应用并检查它是如何工作的!
就这样!在当前的设置下,Paging 库组件会及时触发 API 请求,处理内存中的缓存,并显示数据。运行应用并尝试搜索代码库。
12. 添加列表分隔符
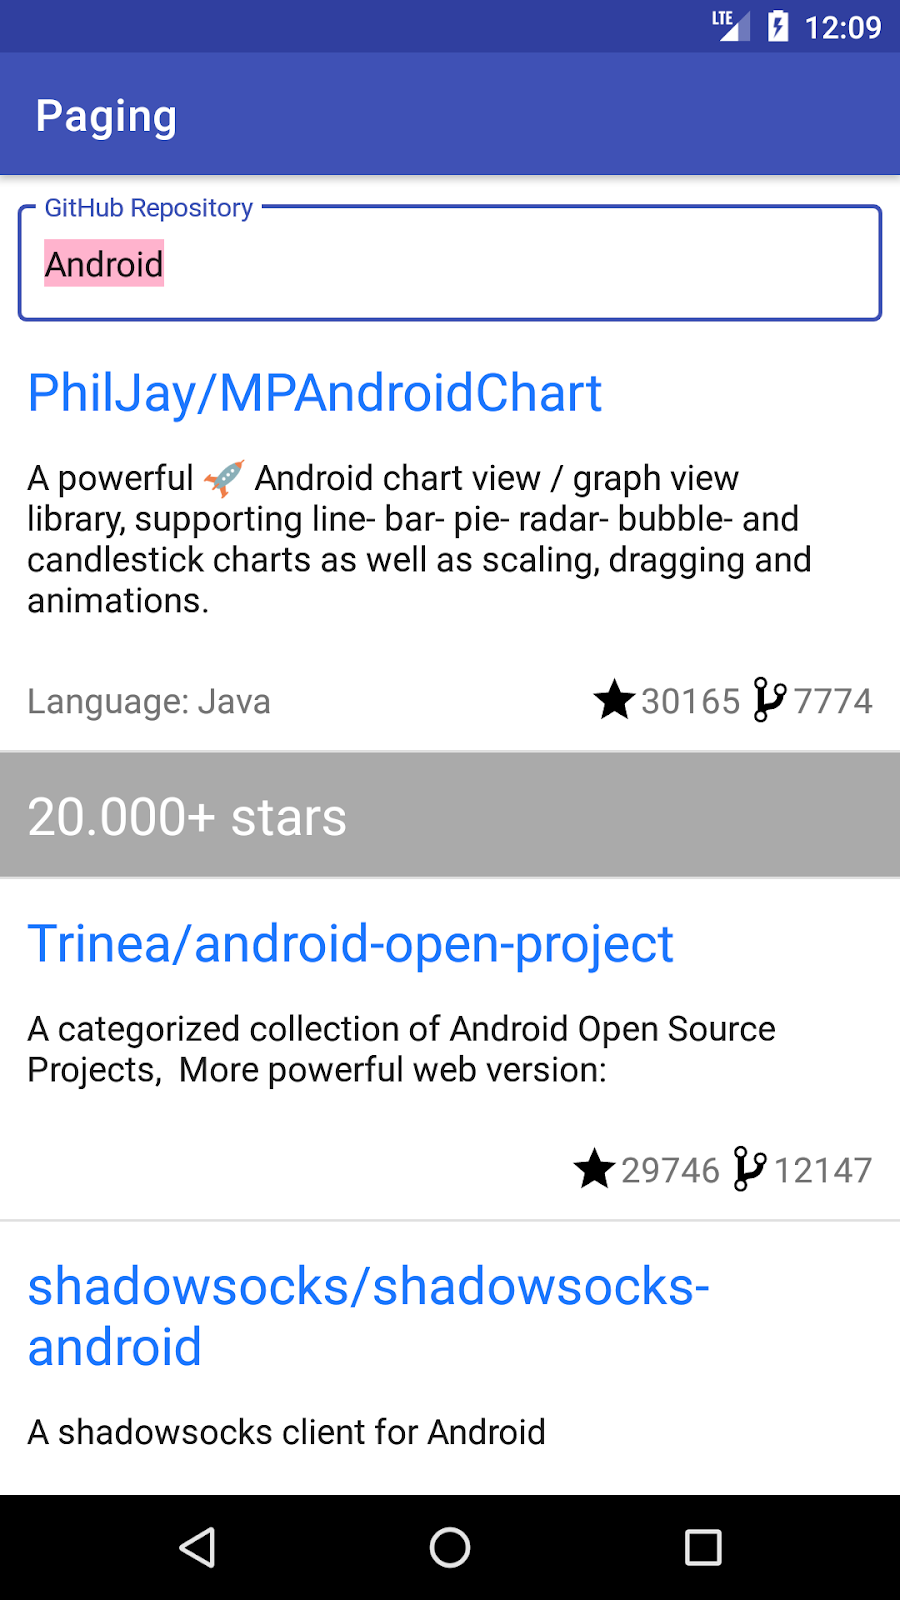
改善列表可读性的一种方法是添加分隔符。例如,在我们的应用中,由于代码库按星级降序排列,我们可以每隔 1 万颗星添加一个分隔符。为了帮助实现此功能,Paging 3 API 允许将分隔符插入到PagingData中。
在PagingData中添加分隔符将导致我们屏幕上显示的列表发生修改。我们不再仅显示Repo对象,还显示分隔符对象。因此,我们必须将从ViewModel暴露的 UI 模型从Repo更改为可以封装这两种类型的另一种类型:RepoItem和SeparatorItem。接下来,我们必须更新我们的 UI 以支持分隔符
- 为分隔符添加布局和
ViewHolder。 - 更新
RepoAdapter以支持创建和绑定分隔符和代码库。
让我们一步一步来看看实现是什么样的。
更改 UI 模型
目前SearchRepositoriesViewModel.searchRepo()返回Flow<PagingData<Repo>>。为了支持代码库和分隔符,我们将在与SearchRepositoriesViewModel相同的文件中创建一个UiModel密封类。我们可以有两种类型的UiModel对象:RepoItem和SeparatorItem。
sealed class UiModel {
    data class RepoItem(val repo: Repo) : UiModel()
    data class SeparatorItem(val description: String) : UiModel()
}
由于我们想根据 10k 星级分隔代码库,让我们在RepoItem上创建一个扩展属性,它会为我们四舍五入星级数
private val UiModel.RepoItem.roundedStarCount: Int
    get() = this.repo.stars / 10_000
插入分隔符
SearchRepositoriesViewModel.searchRepo()现在应返回Flow<PagingData<UiModel>>。
class SearchRepositoriesViewModel(
    private val repository: GithubRepository,
    private val savedStateHandle: SavedStateHandle
) : ViewModel() {

    ...

    fun searchRepo(queryString: String): Flow<PagingData<UiModel>> {
        ...
    }
}
让我们看看实现如何变化!目前,repository.getSearchResultStream(queryString)返回一个Flow<PagingData<Repo>>,所以我们需要添加的第一个操作是将每个Repo转换为UiModel.RepoItem。为此,我们可以使用Flow.map运算符,然后映射每个PagingData以从当前Repo项构建新的UiModel.Repo,从而得到一个Flow<PagingData<UiModel.RepoItem>>
...
val newResult: Flow<PagingData<UiModel>> = repository.getSearchResultStream(queryString)
                .map { pagingData -> pagingData.map { UiModel.RepoItem(it) } }
...
现在我们可以插入分隔符了!对于Flow的每次发射,我们将调用PagingData.insertSeparators()。此方法返回一个PagingData,其中包含每个原始元素,以及根据前后元素生成的可选分隔符。在边界条件(列表的开头或结尾)下,相应的之前或之后元素将为null。如果不需要创建分隔符,则返回null。
由于我们将PagingData元素的类型从UiModel.Repo更改为UiModel,请务必显式设置insertSeparators()方法的类型参数。
searchRepo()方法应如下所示
   private fun searchRepo(queryString: String): Flow<PagingData<UiModel>> =
        repository.getSearchResultStream(queryString)
            .map { pagingData -> pagingData.map { UiModel.RepoItem(it) } }
            .map {
                it.insertSeparators { before, after ->
                    if (after == null) {
                        // we're at the end of the list
                        return@insertSeparators null
                    }

                    if (before == null) {
                        // we're at the beginning of the list
                        return@insertSeparators UiModel.SeparatorItem("${after.roundedStarCount}0.000+ stars")
                    }
                    // check between 2 items
                    if (before.roundedStarCount > after.roundedStarCount) {
                        if (after.roundedStarCount >= 1) {
                            UiModel.SeparatorItem("${after.roundedStarCount}0.000+ stars")
                        } else {
                            UiModel.SeparatorItem("< 10.000+ stars")
                        }
                    } else {
                        // no separator
                        null
                    }
                }
            }
支持多种视图类型
SeparatorItem对象需要在我们的RecyclerView中显示。这里我们只显示一个字符串,所以让我们在res/layout文件夹中创建一个带有TextView的separator_view_item布局
<?xml version="1.0" encoding="utf-8"?>
<androidx.constraintlayout.widget.ConstraintLayout
    xmlns:android="http://schemas.android.com/apk/res/android"
    xmlns:app="http://schemas.android.com/apk/res-auto"
    xmlns:tools="http://schemas.android.com/tools"
    android:layout_width="match_parent"
    android:layout_height="wrap_content"
    android:background="@color/separatorBackground">

    <TextView
        android:id="@+id/separator_description"
        android:layout_width="0dp"
        android:layout_height="wrap_content"
        android:padding="@dimen/row_item_margin_horizontal"
        android:textColor="@color/separatorText"
        android:textSize="@dimen/repo_name_size"
        app:layout_constraintEnd_toEndOf="parent"
        app:layout_constraintStart_toStartOf="parent"
        app:layout_constraintTop_toTopOf="parent"
        tools:text="10000+ stars" />
</androidx.constraintlayout.widget.ConstraintLayout>
让我们在ui文件夹中创建一个SeparatorViewHolder,我们在其中只将字符串绑定到TextView
class SeparatorViewHolder(view: View) : RecyclerView.ViewHolder(view) {
    private val description: TextView = view.findViewById(R.id.separator_description)

    fun bind(separatorText: String) {
        description.text = separatorText
    }

    companion object {
        fun create(parent: ViewGroup): SeparatorViewHolder {
            val view = LayoutInflater.from(parent.context)
                    .inflate(R.layout.separator_view_item, parent, false)
            return SeparatorViewHolder(view)
        }
    }
}
更新ReposAdapter以支持UiModel而不是Repo
- 将
PagingDataAdapter参数从Repo更新为UiModel。 - 实现一个
UiModel比较器并用它替换REPO_COMPARATOR。 - 创建
SeparatorViewHolder并将其与UiModel.SeparatorItem的描述绑定。
由于我们现在需要显示 2 个不同的 ViewHolder,请将 RepoViewHolder 替换为 ViewHolder
- 更新
onCreateViewHolder返回类型 - 更新
onBindViewHolderholder参数 - 这是您最终的
ReposAdapter的样子
就这样!运行应用时,您应该能看到分隔符!
class ReposAdapter : PagingDataAdapter<UiModel, ViewHolder>(UIMODEL_COMPARATOR) {

    override fun onCreateViewHolder(parent: ViewGroup, viewType: Int): ViewHolder {
        return if (viewType == R.layout.repo_view_item) {
            RepoViewHolder.create(parent)
        } else {
            SeparatorViewHolder.create(parent)
        }
    }

    override fun getItemViewType(position: Int): Int {
        return when (getItem(position)) {
            is UiModel.RepoItem -> R.layout.repo_view_item
            is UiModel.SeparatorItem -> R.layout.separator_view_item
            null -> throw UnsupportedOperationException("Unknown view")
        }
    }

    override fun onBindViewHolder(holder: ViewHolder, position: Int) {
        val uiModel = getItem(position)
        uiModel.let {
            when (uiModel) {
                is UiModel.RepoItem -> (holder as RepoViewHolder).bind(uiModel.repo)
                is UiModel.SeparatorItem -> (holder as SeparatorViewHolder).bind(uiModel.description)
            }
        }
    }

    companion object {
        private val UIMODEL_COMPARATOR = object : DiffUtil.ItemCallback<UiModel>() {
            override fun areItemsTheSame(oldItem: UiModel, newItem: UiModel): Boolean {
                return (oldItem is UiModel.RepoItem && newItem is UiModel.RepoItem &&
                        oldItem.repo.fullName == newItem.repo.fullName) ||
                        (oldItem is UiModel.SeparatorItem && newItem is UiModel.SeparatorItem &&
                                oldItem.description == newItem.description)
            }

            override fun areContentsTheSame(oldItem: UiModel, newItem: UiModel): Boolean =
                    oldItem == newItem
        }
    }
}
13. 从网络和数据库进行分页
让我们通过将数据保存在本地数据库中来为应用添加离线支持。这样,数据库将成为我们应用的单一事实来源,我们将始终从那里加载数据。每当数据库中没有更多数据时,我们就会从网络请求更多数据,然后将其保存在数据库中。由于数据库是事实来源,当保存更多数据时,UI 将自动更新。
以下是添加离线支持需要做的事情
创建一个 Room 数据库,一个保存Repo对象的表,以及一个我们将用于处理Repo对象的 DAO。
- 通过实现
RemoteMediator,定义当数据库中的数据已加载完毕时如何从网络加载数据。 - 构建一个基于 Repos 表作为数据源以及用于加载和保存数据的
RemoteMediator的Pager。 - 注意:
RemoteMediatorAPI 目前是**实验性**的。所有实现RemoteMediator的类都应该使用@OptIn(ExperimentalPagingApi::class)进行注解。
14. 定义 Room 数据库、表和 DAO
我们的Repo对象需要保存在数据库中,所以让我们首先将Repo类设置为实体,tableName = "repos",其中Repo.id是主键。为此,使用@Entity(tableName = "repos")注解Repo类,并为id添加@PrimaryKey注解。您的Repo类现在应该看起来像这样
创建一个新的db包。我们将在其中实现访问数据库中数据的类和定义数据库的类。
@Entity(tableName = "repos")
data class Repo(
    @PrimaryKey @field:SerializedName("id") val id: Long,
    @field:SerializedName("name") val name: String,
    @field:SerializedName("full_name") val fullName: String,
    @field:SerializedName("description") val description: String?,
    @field:SerializedName("html_url") val url: String,
    @field:SerializedName("stargazers_count") val stars: Int,
    @field:SerializedName("forks_count") val forks: Int,
    @field:SerializedName("language") val language: String?
)
通过创建一个用@Dao注解的RepoDao接口,实现数据访问对象 (DAO) 来访问repos表。我们需要对Repo执行以下操作
插入Repo对象列表。如果Repo对象已在表中,则替换它们。
- 查询名称或描述中包含查询字符串的代码库,并按星级降序排序,然后按名称字母顺序排序。返回
PagingSource<Int, Repo>,而不是List<Repo>。这样,repos表就成为 Paging 的数据源。
 @Insert(onConflict = OnConflictStrategy.REPLACE)
 suspend fun insertAll(repos: List<Repo>)
- 清除
Repos表中的所有数据。
@Query("SELECT * FROM repos WHERE " +
  "name LIKE :queryString OR description LIKE :queryString " +
  "ORDER BY stars DESC, name ASC")
fun reposByName(queryString: String): PagingSource<Int, Repo>
- 您的
RepoDao应该看起来像这样
@Query("DELETE FROM repos")
suspend fun clearRepos()
实现 Repo 数据库
@Dao
interface RepoDao {

    @Insert(onConflict = OnConflictStrategy.REPLACE)
    suspend fun insertAll(repos: List<Repo>)

    @Query("SELECT * FROM repos WHERE " +
   "name LIKE :queryString OR description LIKE :queryString " +
   "ORDER BY stars DESC, name ASC")
    fun reposByName(queryString: String): PagingSource<Int, Repo>

    @Query("DELETE FROM repos")
    suspend fun clearRepos()
}
创建一个抽象类RepoDatabase,它扩展RoomDatabase。
- 使用
@Database注解类,将实体列表设置为包含Repo类,并将数据库版本设置为 1。为了本 Codelab 的目的,我们不需要导出 schema。 - 定义一个返回
ReposDao的抽象函数。 - 在
companion object中创建一个getInstance()函数,如果RepoDatabase对象尚不存在,则构建它。 - 您的
RepoDatabase如下所示
现在我们已经设置好数据库,让我们看看如何从网络请求数据并将其保存在数据库中。
@Database(
    entities = [Repo::class],
    version = 1,
    exportSchema = false
)
abstract class RepoDatabase : RoomDatabase() {

    abstract fun reposDao(): RepoDao

    companion object {

        @Volatile
        private var INSTANCE: RepoDatabase? = null

        fun getInstance(context: Context): RepoDatabase =
                INSTANCE ?: synchronized(this) {
                    INSTANCE
                            ?: buildDatabase(context).also { INSTANCE = it }
                }

        private fun buildDatabase(context: Context) =
                Room.databaseBuilder(context.applicationContext,
                        RepoDatabase::class.java, "Github.db")
                        .build()
    }
}
15. 请求和保存数据 - 概览
Paging 库将数据库用作需要在 UI 中显示的数据的单一事实来源。每当数据库中没有更多数据时,我们就需要从网络请求更多数据。为了帮助解决这个问题,Paging 3 定义了RemoteMediator抽象类,其中需要实现一个方法:load()。每当需要从网络加载更多数据时,就会调用此方法。此类返回一个MediatorResult对象,它可以是
Error - 如果从网络请求数据时发生错误。
Success- 如果成功从网络获取数据。在这里,我们还需要传递一个信号,告诉是否可以加载更多数据。例如,如果网络响应成功,但我们获得了空的代码库列表,这意味着没有更多数据可加载。- 在
data包中,让我们创建一个名为GithubRemoteMediator的新类,它扩展了RemoteMediator。这个类将为每个新的查询重新创建,因此它将接收以下参数
查询String。
GithubService- 以便我们可以进行网络请求。RepoDatabase- 以便我们可以保存从网络请求获取的数据。- 为了能够构建网络请求,load 方法有两个参数,它们应该提供我们需要的所有信息
@OptIn(ExperimentalPagingApi::class)
class GithubRemoteMediator(
    private val query: String,
    private val service: GithubService,
    private val repoDatabase: RepoDatabase
) : RemoteMediator<Int, Repo>() {

    override suspend fun load(loadType: LoadType, state: PagingState<Int, Repo>): MediatorResult {

   }
}
PagingState - 这提供了关于之前加载的页面、列表中最近访问的索引以及初始化分页流时定义的PagingConfig的信息。
LoadType- 这告诉我们是需要在我们之前加载的数据的末尾加载数据(LoadType.APPEND),还是在数据开头加载(LoadType.PREPEND),还是这是我们第一次加载数据(LoadType.REFRESH)。- 例如,如果加载类型是
LoadType.APPEND,那么我们从PagingState中检索加载的最后一项。基于此,我们应该能够通过计算要加载的下一页来找出如何加载下一批Repo对象。
在下一节中,您将了解如何计算要加载的下一页和上一页的键。
16. 计算并保存远程页面键
对于 Github API,我们用来请求代码库页面的页面键只是一个页面索引,在获取下一页时会递增。这意味着给定一个Repo对象,可以基于页面索引 + 1请求下一批Repo对象。上一批Repo对象可以基于页面索引 - 1请求。在特定页面响应中收到的所有Repo对象将具有相同的下一页和上一页键。
当我们从PagingState中获取最后加载的项目时,无法得知它所属页面的索引。为了解决这个问题,我们可以添加另一个表来存储每个Repo的下一页和上一页键;我们可以称它为remote_keys。虽然这可以在Repo表中完成,但为与Repo相关的下一页和上一页远程键创建一个新表可以更好地实现关注点分离。
在db包中,让我们创建一个名为RemoteKeys的新数据类,用@Entity注解它,并添加 3 个属性:代码库id(也是主键),以及前一个和下一个键(当无法追加或预添加数据时可以为null)。
让我们创建一个RemoteKeysDao接口。我们将需要以下功能
@Entity(tableName = "remote_keys")
data class RemoteKeys(
    @PrimaryKey
    val repoId: Long,
    val prevKey: Int?,
    val nextKey: Int?
)
我们来创建一个 RemoteKeysDao 接口。我们需要以下功能:
- 插入一个
RemoteKeys列表,因为每当我们从网络获取Repos时,我们将为它们生成远程键。 - 根据
Repo的id获取一个RemoteKey。 - 清空
RemoteKeys,这将在每次有新查询时使用。
@Dao
interface RemoteKeysDao {

    @Insert(onConflict = OnConflictStrategy.REPLACE)
    suspend fun insertAll(remoteKey: List<RemoteKeys>)

    @Query("SELECT * FROM remote_keys WHERE repoId = :repoId")
    suspend fun remoteKeysRepoId(repoId: Long): RemoteKeys?

    @Query("DELETE FROM remote_keys")
    suspend fun clearRemoteKeys()
}
我们来将 RemoteKeys 表添加到我们的数据库,并提供访问 RemoteKeysDao 的途径。为此,按如下方式更新 RepoDatabase:
- 将 RemoteKeys 添加到实体列表中。
- 将
RemoteKeysDao公开为一个抽象函数。
@Database(
        entities = [Repo::class, RemoteKeys::class],
        version = 1,
        exportSchema = false
)
abstract class RepoDatabase : RoomDatabase() {

    abstract fun reposDao(): RepoDao
    abstract fun remoteKeysDao(): RemoteKeysDao

    ...
    // rest of the class doesn't change
}
17. 请求并保存数据 - 实现
既然我们已经保存了远程键,我们来回到 GithubRemoteMediator,看看如何使用它们。这个类将替换我们的 GithubPagingSource。我们来从 GithubPagingSource 中复制 GITHUB_STARTING_PAGE_INDEX 声明到我们的 GithubRemoteMediator 中,并删除 GithubPagingSource 类。
我们来了解如何实现 GithubRemoteMediator.load() 方法:
- 根据
LoadType,找出我们需要从网络加载哪个页面。 - 触发网络请求。
- 网络请求完成后,如果收到的仓库列表不为空,则执行以下操作:
- 我们为每个
Repo计算RemoteKeys。 - 如果这是一个新查询(
loadType = REFRESH),则我们清空数据库。 - 将
RemoteKeys和Repos保存在数据库中。 - 返回
MediatorResult.Success(endOfPaginationReached = false)。 - 如果仓库列表为空,则返回
MediatorResult.Success(endOfPaginationReached = true)。如果在请求数据时发生错误,则返回MediatorResult.Error。
以下是总体代码的外观。我们稍后会替换掉 TODO。
override suspend fun load(loadType: LoadType, state: PagingState<Int, Repo>): MediatorResult {
    val page = when (loadType) {
        LoadType.REFRESH -> {
         // TODO
        }
        LoadType.PREPEND -> {
        // TODO
        }
        LoadType.APPEND -> {
        // TODO
        }
    }
    val apiQuery = query + IN_QUALIFIER

    try {
        val apiResponse = service.searchRepos(apiQuery, page, state.config.pageSize)

        val repos = apiResponse.items
        val endOfPaginationReached = repos.isEmpty()
        repoDatabase.withTransaction {
            // clear all tables in the database
            if (loadType == LoadType.REFRESH) {
                repoDatabase.remoteKeysDao().clearRemoteKeys()
                repoDatabase.reposDao().clearRepos()
            }
            val prevKey = if (page == GITHUB_STARTING_PAGE_INDEX) null else page - 1
            val nextKey = if (endOfPaginationReached) null else page + 1
            val keys = repos.map {
                RemoteKeys(repoId = it.id, prevKey = prevKey, nextKey = nextKey)
            }
            repoDatabase.remoteKeysDao().insertAll(keys)
            repoDatabase.reposDao().insertAll(repos)
        }
        return MediatorResult.Success(endOfPaginationReached = endOfPaginationReached)
    } catch (exception: IOException) {
        return MediatorResult.Error(exception)
    } catch (exception: HttpException) {
        return MediatorResult.Error(exception)
    }
}
我们来看看如何根据 LoadType 找到要加载的页面。
18. 根据 LoadType 获取页面
现在我们知道在拥有页面键后,GithubRemoteMediator.load() 方法中会发生什么,我们来了解如何计算它。这将取决于 LoadType。
LoadType.APPEND
当我们需要在当前已加载数据集的末尾加载数据时,加载参数是 LoadType.APPEND。所以现在,根据数据库中的最后一个项目,我们需要计算网络页面键。
- 我们需要获取从数据库加载的最后一个
Repo项目的远程键——我们把它封装在一个函数中:
    private suspend fun getRemoteKeyForLastItem(state: PagingState<Int, Repo>): RemoteKeys? {
        // Get the last page that was retrieved, that contained items.
        // From that last page, get the last item
        return state.pages.lastOrNull() { it.data.isNotEmpty() }?.data?.lastOrNull()
                ?.let { repo ->
                    // Get the remote keys of the last item retrieved
repoDatabase.remoteKeysDao().remoteKeysRepoId(repo.id)
                }
    }
- 如果
remoteKeys是 null,这意味着刷新结果尚未在数据库中。我们可以返回 Success 并设置endOfPaginationReached = false,因为如果 RemoteKeys 变为非 null,Paging 会再次调用此方法。如果 remoteKeys 不是null但其nextKey是null,这意味着我们已经到达 APPEND 的分页末尾。
val page = when (loadType) {
    LoadType.APPEND -> {
        val remoteKeys = getRemoteKeyForLastItem(state)
        // If remoteKeys is null, that means the refresh result is not in the database yet.
        // We can return Success with endOfPaginationReached = false because Paging
        // will call this method again if RemoteKeys becomes non-null.
        // If remoteKeys is NOT NULL but its nextKey is null, that means we've reached
        // the end of pagination for append.
        val nextKey = remoteKeys?.nextKey
        if (nextKey == null) {
            return MediatorResult.Success(endOfPaginationReached = remoteKeys != null)
        }
        nextKey
    }
      ...
  }
LoadType.PREPEND
当我们需要在当前已加载数据集的开头加载数据时,加载参数是 LoadType.PREPEND。根据数据库中的第一个项目,我们需要计算网络页面键。
- 我们需要获取从数据库加载的第一个
Repo项目的远程键——我们把它封装在一个函数中:
private suspend fun getRemoteKeyForFirstItem(state: PagingState<Int, Repo>): RemoteKeys? {
    // Get the first page that was retrieved, that contained items.
    // From that first page, get the first item
    return state.pages.firstOrNull { it.data.isNotEmpty() }?.data?.firstOrNull()
            ?.let { repo ->
                // Get the remote keys of the first items retrieved
                repoDatabase.remoteKeysDao().remoteKeysRepoId(repo.id)
            }
}
- 如果
remoteKeys是 null,这意味着刷新结果尚未在数据库中。我们可以返回 Success 并设置endOfPaginationReached = false,因为如果 RemoteKeys 变为非 null,Paging 会再次调用此方法。如果 remoteKeys 不是null但其prevKey是null,这意味着我们已经到达 PREPEND 的分页末尾。
val page = when (loadType) {
    LoadType.PREPEND -> {
        val remoteKeys = getRemoteKeyForFirstItem(state)
        // If remoteKeys is null, that means the refresh result is not in the database yet.
        val prevKey = remoteKeys?.prevKey
        if (prevKey == null) {
            return MediatorResult.Success(endOfPaginationReached = remoteKeys != null)
        }
        prevKey
    }

      ...
  }
LoadType.REFRESH
当首次加载数据,或者调用了 PagingDataAdapter.refresh() 时,会调用 LoadType.REFRESH;所以此时加载数据的参考点是 state.anchorPosition。如果是首次加载,则 anchorPosition 为 null。当调用 PagingDataAdapter.refresh() 时,anchorPosition 是显示列表中第一个可见的位置,因此我们需要加载包含该特定项目的页面。
- 根据
state中的anchorPosition,我们可以通过调用state.closestItemToPosition()来获取最接近该位置的Repo项目。 - 根据
Repo项目,我们可以从数据库中获取RemoteKeys。
private suspend fun getRemoteKeyClosestToCurrentPosition(
        state: PagingState<Int, Repo>
): RemoteKeys? {
    // The paging library is trying to load data after the anchor position
    // Get the item closest to the anchor position
    return state.anchorPosition?.let { position ->
        state.closestItemToPosition(position)?.id?.let { repoId ->
   repoDatabase.remoteKeysDao().remoteKeysRepoId(repoId)
        }
    }
}
- 如果
remoteKey不为 null,那么我们可以从中获取nextKey。在 Github API 中,页面键是顺序递增的。因此,要获取包含当前项目的页面,我们只需从remoteKey.nextKey中减去 1。 - 如果
RemoteKey是null(因为anchorPosition是null),则需要加载的页面是初始页面:GITHUB_STARTING_PAGE_INDEX
现在,完整的页面计算如下所示:
val page = when (loadType) {
    LoadType.REFRESH -> {
        val remoteKeys = getRemoteKeyClosestToCurrentPosition(state)
        remoteKeys?.nextKey?.minus(1) ?: GITHUB_STARTING_PAGE_INDEX
    }
    LoadType.PREPEND -> {
        val remoteKeys = getRemoteKeyForFirstItem(state)
        val prevKey = remoteKeys?.prevKey
        if (prevKey == null) {
            return MediatorResult.Success(endOfPaginationReached = remoteKeys != null)
        }
        prevKey
    }
    LoadType.APPEND -> {
        val remoteKeys = getRemoteKeyForLastItem(state)
        val nextKey = remoteKeys?.nextKey
        if (nextKey == null) {
            return MediatorResult.Success(endOfPaginationReached = remoteKeys != null)
        }
        nextKey
    }
}
19. 更新分页 Flow 创建
现在我们已经在 ReposDao 中实现了 GithubRemoteMediator 和 PagingSource,我们需要更新 GithubRepository.getSearchResultStream 来使用它们。
为了做到这一点,GithubRepository 需要访问数据库。我们将其作为参数传递到构造函数中。此外,由于这个类将使用 GithubRemoteMediator:
class GithubRepository(
        private val service: GithubService,
        private val database: RepoDatabase
) { ... }
更新 Injection 文件
provideGithubRepository方法应接受一个上下文作为参数,并在GithubRepository构造函数中调用RepoDatabase.getInstance。provideViewModelFactory方法应接受一个上下文作为参数,并将其传递给provideGithubRepository。
object Injection {
    private fun provideGithubRepository(context: Context): GithubRepository {
        return GithubRepository(GithubService.create(), RepoDatabase.getInstance(context))
    }

    fun provideViewModelFactory(context: Context, owner: SavedStateRegistryOwner): ViewModelProvider.Factory {
        return ViewModelFactory(owner, provideGithubRepository(context))
    }
}
更新 SearchRepositoriesActivity.onCreate() 方法,并将上下文传递给 Injection.provideViewModelFactory()。
       // get the view model
        val viewModel = ViewModelProvider(
            this, Injection.provideViewModelFactory(
                context = this,
                owner = this
            )
        )
            .get(SearchRepositoriesViewModel::class.java)
我们回到 GithubRepository。首先,为了能够按名称搜索仓库,我们需要在查询字符串的开头和结尾添加 %。然后,当调用 reposDao.reposByName 时,我们得到一个 PagingSource。由于每次我们在数据库中进行更改时 PagingSource 都会失效,我们需要告诉 Paging 如何获取 PagingSource 的新实例。为此,我们只需创建一个调用数据库查询的函数:
// appending '%' so we can allow other characters to be before and after the query string
val dbQuery = "%${query.replace(' ', '%')}%"
val pagingSourceFactory =  { database.reposDao().reposByName(dbQuery)}
现在我们可以更改 Pager 构建器,以使用 GithubRemoteMediator 和 pagingSourceFactory。Pager 是一个实验性 API,所以我们需要使用 @OptIn 注解它:
@OptIn(ExperimentalPagingApi::class)
return Pager(
        config = PagingConfig(
            pageSize = NETWORK_PAGE_SIZE,
            enablePlaceholders = false
         ),
        remoteMediator = GithubRemoteMediator(
                query,
                service,
                database
        ),
        pagingSourceFactory = pagingSourceFactory
).flow
就是这样!我们来运行应用吧!
使用 RemoteMediator 时对加载状态做出反应
到目前为止,在读取 CombinedLoadStates 时,我们始终读取 CombinedLoadStates.source。但是,当使用 RemoteMediator 时,准确的加载信息只能通过同时检查 CombinedLoadStates.source 和 CombinedLoadStates.mediator 来获取。特别是,我们目前在 source 的 LoadState 为 NotLoading 时,在新查询上触发滚动到列表顶部。我们还需要确保新添加的 RemoteMediator 的 LoadState 也为 NotLoading。
为此,我们定义一个枚举,总结由 Pager 获取的列表的呈现状态:
enum class RemotePresentationState {
    INITIAL, REMOTE_LOADING, SOURCE_LOADING, PRESENTED
}
根据上述定义,我们可以比较 CombinedLoadStates 的连续发射,并用它们来确定列表中项目的确切状态。
@OptIn(ExperimentalCoroutinesApi::class)
fun Flow<CombinedLoadStates>.asRemotePresentationState(): Flow<RemotePresentationState> =
    scan(RemotePresentationState.INITIAL) { state, loadState ->
        when (state) {
            RemotePresentationState.PRESENTED -> when (loadState.mediator?.refresh) {
                is LoadState.Loading -> RemotePresentationState.REMOTE_LOADING
                else -> state
            }
            RemotePresentationState.INITIAL -> when (loadState.mediator?.refresh) {
                is LoadState.Loading -> RemotePresentationState.REMOTE_LOADING
                else -> state
            }
            RemotePresentationState.REMOTE_LOADING -> when (loadState.source.refresh) {
                is LoadState.Loading -> RemotePresentationState.SOURCE_LOADING
                else -> state
            }
            RemotePresentationState.SOURCE_LOADING -> when (loadState.source.refresh) {
                is LoadState.NotLoading -> RemotePresentationState.PRESENTED
                else -> state
            }
        }
    }
        .distinctUntilChanged()
上述内容使我们可以更新用于检查是否可以滚动到列表顶部的 notLoading Flow 的定义:
       val notLoading = repoAdapter.loadStateFlow
            .asRemotePresentationState()
            .map { it == RemotePresentationState.PRESENTED }
类似地,在初始页面加载期间(在 SearchRepositoriesActivity 中的 bindList 扩展中)显示加载微调器时,应用仍然依赖于 LoadState.source。我们现在想要的是仅显示来自 RemoteMediator 加载的微调器。其可见性取决于 LoadStates 的其他 UI 元素也存在此问题。因此,我们将 LoadStates 与 UI 元素的绑定更新如下:
private fun ActivitySearchRepositoriesBinding.bindList(
        header: ReposLoadStateAdapter,
        repoAdapter: ReposAdapter,
        uiState: StateFlow<UiState>,
        onScrollChanged: (UiAction.Scroll) -> Unit
    ) {
        ...

        lifecycleScope.launch {
            repoAdapter.loadStateFlow.collect { loadState ->
                ...
                val isListEmpty = loadState.refresh is LoadState.NotLoading && repoAdapter.itemCount == 0
                // show empty list
                emptyList.isVisible = isListEmpty
                // Only show the list if refresh succeeds, either from the local db or the remote.
                list.isVisible =  loadState.source.refresh is LoadState.NotLoading || loadState.mediator?.refresh is LoadState.NotLoading
                // Show loading spinner during initial load or refresh.
                progressBar.isVisible = loadState.mediator?.refresh is LoadState.Loading
                // Show the retry state if initial load or refresh fails.
                retryButton.isVisible = loadState.mediator?.refresh is LoadState.Error && repoAdapter.itemCount == 0
                }
            }
        }
    }
此外,由于数据库是唯一的真实数据源,因此可能出现应用启动时数据库中已有数据,但通过 RemoteMediator 进行的刷新失败的情况。这是一个有趣的边缘情况,但我们可以轻松处理。为此,我们可以保留对头部 LoadStateAdapter 的引用,并且仅当其刷新状态出现错误时,将其 LoadState 覆盖为 RemoteMediator 的状态。否则,我们使用默认值。
private fun ActivitySearchRepositoriesBinding.bindList(
        header: ReposLoadStateAdapter,
        repoAdapter: ReposAdapter,
        uiState: StateFlow<UiState>,
        onScrollChanged: (UiAction.Scroll) -> Unit
    ) {
        ...

        lifecycleScope.launch {
            repoAdapter.loadStateFlow.collect { loadState ->
                // Show a retry header if there was an error refreshing, and items were previously
                // cached OR default to the default prepend state
                header.loadState = loadState.mediator
                    ?.refresh
                    ?.takeIf { it is LoadState.Error && repoAdapter.itemCount > 0 }
                    ?: loadState.prepend
                ...
            }
        }
    }
您可以在 end 文件夹中找到此 Codelab 中所有步骤的完整代码。
20. 总结
现在我们已经添加了所有组件,让我们回顾一下所学到的知识!
PagingSource异步地从您定义的数据源加载数据。Pager.flow根据配置和定义如何实例化PagingSource的函数创建一个Flow<PagingData>。- 每当
PagingSource加载新数据时,Flow会发出新的PagingData。 - UI 观察更改后的
PagingData,并使用PagingDataAdapter更新呈现数据的RecyclerView。 - 要从 UI 重试失败的加载,请使用
PagingDataAdapter.retry方法。在底层,Paging 库将触发PagingSource.load()方法。 - 要为列表添加分隔符,请创建一个高级类型,并将分隔符作为支持的类型之一。然后使用
PagingData.insertSeparators()方法来实现分隔符生成逻辑。 - 要将加载状态显示为头部或尾部,请使用
PagingDataAdapter.withLoadStateHeaderAndFooter()方法并实现一个LoadStateAdapter。如果您想根据加载状态执行其他操作,请使用PagingDataAdapter.addLoadStateListener()回调。 - 要使用网络和数据库,请实现一个
RemoteMediator。 - 添加
RemoteMediator会导致LoadStatesFlow中mediator字段的更新。