
1. 简介
在本 Codelab 中,您将学习依赖注入 (DI) 的重要性,以创建可扩展到大型项目的扎实应用。我们将使用 Hilt 作为 DI 工具来管理依赖项。
依赖注入是一种广泛应用于编程中的技术,也非常适用于 Android 开发。遵循 DI 原则,您可以为良好的应用架构奠定基础。
实现依赖注入为您提供了以下优势
- 代码可重用性
- 易于重构
- 易于测试
Hilt 是一个有主见的 Android 依赖注入库,它减少了在项目中手动进行 DI 的样板代码。进行手动依赖注入需要手动构建每个类及其依赖项,并使用容器来重用和管理依赖项。
Hilt 提供了一种在应用中进行 DI 注入的标准方式,通过为项目中的每个 Android 组件提供容器并自动为您管理容器的生命周期。这是通过利用流行的 DI 库 Dagger 来实现的。
如果您在完成此 Codelab 时遇到任何问题(代码错误、语法错误、措辞不清等),请通过 Codelab 左下角的“报告错误”链接报告问题。
先决条件
- 您熟悉 Kotlin 语法。
- 您了解依赖注入在应用中的重要性。
您将学到什么
- 如何在 Android 应用中使用 Hilt。
- 创建可持续应用的相关 Hilt 概念。
- 如何使用限定符 (qualifiers) 为同一类型添加多个绑定 (bindings)。
- 如何使用
@EntryPoint从 Hilt 不支持的类访问容器。 - 如何使用单元测试和插桩测试来测试使用 Hilt 的应用。
您需要什么
- Android Studio Arctic Fox 或更高版本。
2. 设置
获取代码
从 GitHub 获取 Codelab 代码
$ git clone https://github.com/android/codelab-android-hilt
或者您可以将仓库下载为 Zip 文件
打开 Android Studio
此 Codelab 需要 Android Studio Arctic Fox 或更高版本。如果需要下载 Android Studio,可以在此处下载。
运行示例应用
在本 Codelab 中,您将为应用添加 Hilt,该应用会记录用户交互并使用 Room 将数据存储到本地数据库中。
按照以下说明在 Android Studio 中打开示例应用
- 如果您下载了 Zip 存档文件,请将其解压缩到本地。
- 在 Android Studio 中打开项目。
- 点击
 运行按钮,然后选择模拟器或连接您的 Android 设备。
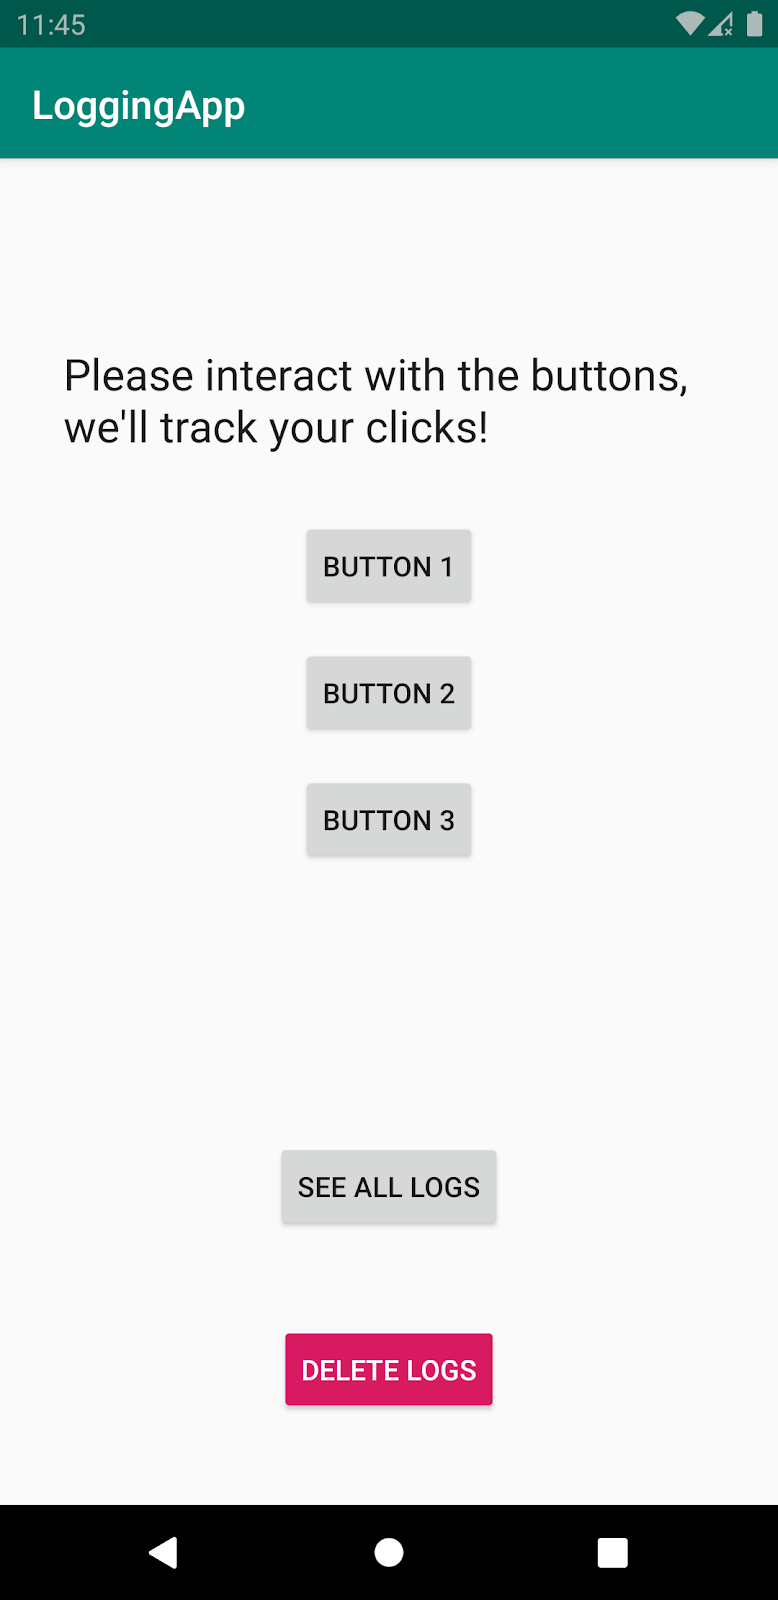
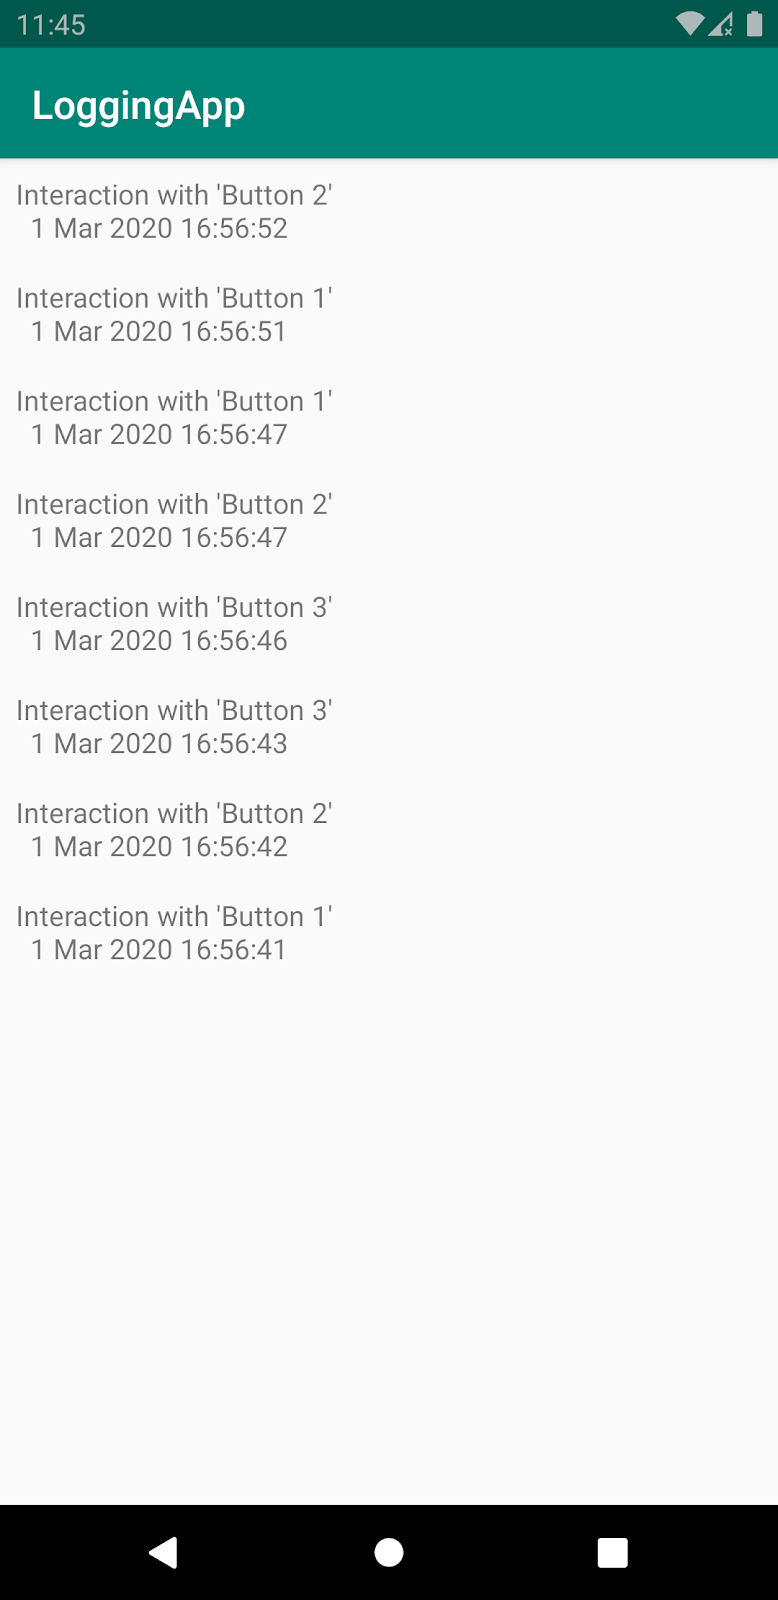
如您所见,每次您与其中一个编号按钮交互时,都会创建并存储一条日志。在查看所有日志屏幕中,您将看到所有先前交互的列表。要删除日志,请点击删除日志按钮。
项目设置
该项目有多个 GitHub 分支
main是您检出或下载的分支。这是此 Codelab 的起始点。solution包含此 Codelab 的解决方案。
我们建议您从 main 分支中的代码开始,并按照自己的节奏逐步完成此 Codelab。
在 Codelab 期间,您将看到需要添加到项目中的代码片段。在某些地方,您还需要移除代码片段注释中明确提及的代码。
要使用 git 获取 solution 分支,请使用此命令
$ git clone -b solution https://github.com/android/codelab-android-hilt
或者从这里下载解决方案代码
常见问题
3. 将 Hilt 添加到项目
为什么选择 Hilt?
如果您查看初始代码,可以看到 LogApplication 类中存储了一个 ServiceLocator 类实例。ServiceLocator 创建并存储那些需要它们的类按需获取的依赖项。您可以将其视为一个附加到应用生命周期的依赖项容器,这意味着当应用进程被销毁时它也会被销毁。
正如 Android DI 指南中所解释的,服务定位器 (service locators) 起初样板代码相对较少,但扩展性差。要开发可扩展的 Android 应用,您应该使用 Hilt。
Hilt 通过生成您原本会手动创建的代码(例如 ServiceLocator 类中的代码),消除了 Android 应用中手动依赖注入或服务定位器模式中不必要的样板代码。
在接下来的步骤中,您将使用 Hilt 替换 ServiceLocator 类。之后,您将为项目添加新功能以探索更多 Hilt 功能。
项目中的 Hilt
Hilt 已经在 main 分支(您下载的代码)中配置好了。您无需在项目中包含以下代码,因为已经为您完成。尽管如此,我们还是来看看在 Android 应用中使用 Hilt 需要什么。
除了库依赖项外,Hilt 还使用在项目中配置的 Gradle 插件。打开根目录下的 build.gradle 文件,并查看 classpath 中的以下 Hilt 依赖项
buildscript {
    ...
    ext.hilt_version = '2.40'
    dependencies {
        ...
        classpath "com.google.dagger:hilt-android-gradle-plugin:$hilt_version"
    }
}
然后,要在 app 模块中使用 Gradle 插件,我们在 app/build.gradle 文件中指定它,方法是将插件添加到文件顶部 kotlin-kapt 插件下方
plugins {
    ...
    id 'kotlin-kapt'
    id 'dagger.hilt.android.plugin'
}

android {
    ...
}
最后,Hilt 依赖项包含在同一 app/build.gradle 文件中的项目中
...
dependencies {
    ...
    implementation "com.google.dagger:hilt-android:$hilt_version"
    kapt "com.google.dagger:hilt-android-compiler:$hilt_version"
}
所有库,包括 Hilt,在构建和同步项目时都会被下载。让我们开始使用 Hilt 吧!
4. Application 类中的 Hilt
与 LogApplication 类中 ServiceLocator 实例的使用和初始化方式类似,要添加一个附加到应用生命周期的容器,我们需要使用 @HiltAndroidApp 注解 Application 类。打开 LogApplication.kt 并将 @HiltAndroidApp 注解添加到 Application 类
@HiltAndroidApp
class LogApplication : Application() {
    ...
}
@HiltAndroidApp 触发 Hilt 的代码生成,包括一个可使用依赖注入的应用基类。应用容器是应用的父容器,这意味着其他容器可以访问它提供的依赖项。
现在,我们的应用可以使用 Hilt 了!
5. 使用 Hilt 进行字段注入
我们不再需要在类中按需从 ServiceLocator 获取依赖项,而是使用 Hilt 为我们提供这些依赖项。让我们开始替换类中对 ServiceLocator 的调用。
打开 ui/LogsFragment.kt 文件。LogsFragment 在 onAttach() 中填充其字段。我们可以使用 Hilt 创建和管理 LoggerLocalDataSource 和 DateFormatter 实例,而不是手动使用 ServiceLocator 填充这些实例。
要使 LogsFragment 使用 Hilt,我们必须用 @AndroidEntryPoint 注解它
@AndroidEntryPoint
class LogsFragment : Fragment() {
    ...
}
使用 @AndroidEntryPoint 注解 Android 类会创建一个遵循 Android 类生命周期的依赖项容器。
使用 @AndroidEntryPoint,Hilt 将创建一个附加到 LogsFragment 生命周期并能够将实例注入到 LogsFragment 中的依赖项容器。我们如何引用由 Hilt 注入的字段?
我们可以通过在我们希望注入的字段(即 logger 和 dateFormatter)上使用 @Inject 注解,让 Hilt 注入不同类型的实例
@AndroidEntryPoint
class LogsFragment : Fragment() {

    @Inject lateinit var logger: LoggerLocalDataSource
    @Inject lateinit var dateFormatter: DateFormatter

    ...
}
这被称为字段注入。
由于 Hilt 将负责为我们填充这些字段,我们不再需要 populateFields() 方法了。让我们从类中移除此方法
@AndroidEntryPoint
class LogsFragment : Fragment() {

    // Remove following code from LogsFragment

    override fun onAttach(context: Context) {
        super.onAttach(context)

        populateFields(context)
    }

    private fun populateFields(context: Context) {
        logger = (context.applicationContext as LogApplication).serviceLocator.loggerLocalDataSource
        dateFormatter =
            (context.applicationContext as LogApplication).serviceLocator.provideDateFormatter()
    }

    ...
}
在底层,Hilt 将在 onAttach() 生命周期方法中,使用 Hilt 为 LogsFragment 自动生成的依赖项容器中构建的实例填充这些字段。
要执行字段注入,Hilt 需要知道如何提供这些依赖项的实例!在本例中,我们希望 Hilt 提供 LoggerLocalDataSource 和 DateFormatter 的实例。然而,Hilt 尚不知道如何提供这些类的实例。
使用 @Inject 告诉 Hilt 如何提供依赖项
打开 ServiceLocator.kt 文件以查看 ServiceLocator 的实现方式。您可以看到调用 provideDateFormatter() 如何总是返回一个不同的 DateFormatter 实例。
这正是我们希望使用 Hilt 实现的行为。幸运的是,DateFormatter 不依赖于其他类,所以我们暂时不必担心传递性依赖 (transitive dependencies)。
要告诉 Hilt 如何提供某种类型的实例,请将 @Inject 注解添加到您希望 Hilt 注入的类的构造函数上。
打开 util/DateFormatter.kt 文件,并用 @Inject 注解 DateFormatter 类的构造函数。记住,在 Kotlin 中注解构造函数时,还需要 constructor 关键字
class DateFormatter @Inject constructor() { ... }
这样,Hilt 就知道如何提供 DateFormatter 的实例了。对 LoggerLocalDataSource 也必须做同样的操作。打开 data/LoggerLocalDataSource.kt 文件,并用 @Inject 注解其构造函数
class LoggerLocalDataSource @Inject constructor(private val logDao: LogDao) {
    ...
}
如果再次打开 ServiceLocator 类,您可以看到我们有一个公共的 LoggerLocalDataSource 字段。这意味着 ServiceLocator 在每次被调用时总是会返回同一个 LoggerLocalDataSource 实例。这被称为将实例作用域限定到容器 (scoping an instance to a container)。我们如何在 Hilt 中实现这一点?
6. 将实例作用域限定到容器
我们可以使用注解将实例作用域限定到容器。由于 Hilt 可以生成具有不同生命周期的不同容器,因此存在不同的注解用于将作用域限定到这些容器。
将实例作用域限定到应用容器的注解是 @Singleton。此注解将使应用容器始终提供同一个实例,无论该类型是作为其他类型的依赖项使用,还是需要进行字段注入。
同样的逻辑可以应用于附加到 Android 类的所有容器。您可以在文档的组件作用域部分找到所有作用域注解的列表。例如,如果您希望 Activity 容器始终提供某个类型的同一个实例,您可以使用 @ActivityScoped 注解该类型。
如上所述,由于我们希望应用容器始终提供同一个 LoggerLocalDataSource 实例,我们使用 @Singleton 注解其类
@Singleton
class LoggerLocalDataSource @Inject constructor(private val logDao: LogDao) {
    ...
}
现在 Hilt 知道如何提供 LoggerLocalDataSource 的实例了。然而,这次该类型具有传递性依赖!要提供 LoggerLocalDataSource 的实例,Hilt 还需要知道如何提供 LogDao 的实例。
不幸的是,由于 LogDao 是一个接口,我们无法用 @Inject 注解其构造函数,因为接口没有构造函数。我们如何告诉 Hilt 如何提供这种类型的实例?
7. Hilt 模块
模块用于向 Hilt 添加绑定,换句话说,就是告诉 Hilt 如何提供不同类型的实例。在 Hilt 模块中,您可以包含针对无法进行构造函数注入的类型的绑定,例如接口或不包含在您项目中的类。一个例子是 OkHttpClient - 您需要使用它的 builder 来创建一个实例。
Hilt 模块是一个用 @Module 和 @InstallIn 注解的类。@Module 告诉 Hilt 这是一个模块,而 @InstallIn 通过指定一个 Hilt 组件来告诉 Hilt 在哪些容器中可以使用这些绑定。您可以将 Hilt 组件视为一个容器。完整的组件列表可以在此处找到。
对于每个可以由 Hilt 注入的 Android 类,都有一个相关的 Hilt 组件。例如,Application 容器与 SingletonComponent 相关联,而 Fragment 容器与 FragmentComponent 相关联。
创建模块
让我们创建一个 Hilt 模块,以便添加绑定。在 hilt 包下创建一个名为 di 的新包,并在该包内创建一个名为 DatabaseModule.kt 的新文件。
由于 LoggerLocalDataSource 的作用域限定在应用容器中,因此 LogDao 绑定需要在应用容器中可用。我们使用 @InstallIn 注解并通过传入与其关联的 Hilt 组件类(即 SingletonComponent::class)来指定该要求。
package com.example.android.hilt.di

import dagger.Module
import dagger.hilt.InstallIn
import dagger.hilt.components.SingletonComponent

@InstallIn(SingletonComponent::class)
@Module
object DatabaseModule {

}
在 ServiceLocator 类实现中,LogDao 的实例是通过调用 logsDatabase.logDao() 获取的。因此,要提供 LogDao 的实例,我们对 AppDatabase 类有一个传递性依赖。
使用 @Provides 提供实例
我们可以在 Hilt 模块中使用 @Provides 注解一个函数,以告诉 Hilt 如何提供无法进行构造函数注入的类型。
用 @Provides 注解的函数的函数体将在 Hilt 需要提供该类型的实例时每次执行。用 @Provides 注解的函数的返回类型告诉 Hilt 绑定类型,即该函数提供实例的类型。函数参数是该类型的依赖项。
在我们的示例中,我们将把此函数包含在 DatabaseModule 类中
package com.example.android.hilt.di

import com.example.android.hilt.data.AppDatabase
import com.example.android.hilt.data.LogDao
import dagger.Module
import dagger.Provides
import dagger.hilt.InstallIn
import dagger.hilt.components.SingletonComponent

@InstallIn(SingletonComponent::class)
@Module
object DatabaseModule {

    @Provides
    fun provideLogDao(database: AppDatabase): LogDao {
        return database.logDao()
    }
}
上面的代码告诉 Hilt,在提供 LogDao 的实例时需要执行 database.logDao()。由于我们有 AppDatabase 作为传递性依赖,我们还需要告诉 Hilt 如何提供该类型的实例。
我们的项目也不拥有 AppDatabase 类,因为它是由 Room 生成的。我们无法对 AppDatabase 进行构造函数注入,但我们可以使用 @Provides 函数来提供它。这类似于我们在 ServiceLocator 类中构建数据库实例的方式
import android.content.Context
import androidx.room.Room
import com.example.android.hilt.data.AppDatabase
import com.example.android.hilt.data.LogDao
import dagger.Module
import dagger.Provides
import dagger.hilt.InstallIn
import dagger.hilt.android.qualifiers.ApplicationContext
import dagger.hilt.components.SingletonComponent
import javax.inject.Singleton

@InstallIn(SingletonComponent::class)
@Module
object DatabaseModule {

    @Provides
    fun provideLogDao(database: AppDatabase): LogDao {
        return database.logDao()
    }

    @Provides
    @Singleton
    fun provideDatabase(@ApplicationContext appContext: Context): AppDatabase {
        return Room.databaseBuilder(
            appContext,
            AppDatabase::class.java,
            "logging.db"
        ).build()
    }
}
由于我们总是希望 Hilt 提供同一个数据库实例,我们用 @Singleton 注解 @Provides provideDatabase() 方法。
每个 Hilt 容器都带有一组默认绑定,可以作为依赖项注入到您的自定义绑定中。这就是 applicationContext 的情况。要访问它,您需要用 @ApplicationContext 注解该字段。
运行应用
现在,Hilt 拥有了注入 LogsFragment 中实例所需的所有信息。然而,在运行应用之前,Hilt 需要知道托管 Fragment 的 Activity 才能正常工作。我们需要使用 @AndroidEntryPoint。
打开 ui/MainActivity.kt 文件,并用 @AndroidEntryPoint 注解 MainActivity
@AndroidEntryPoint
class MainActivity : AppCompatActivity() { ... }
现在,您可以运行应用并检查一切是否仍然正常工作。
让我们继续重构应用,从 MainActivity 中移除 ServiceLocator 调用。
8. 使用 @Binds 提供接口
目前,MainActivity 通过调用 provideNavigator(activity: FragmentActivity) 函数从 ServiceLocator 获取 AppNavigator 的实例。
由于 AppNavigator 是一个接口,我们无法使用构造函数注入。要告诉 Hilt 对一个接口使用哪种实现,您可以在 Hilt 模块内的函数上使用 @Binds 注解。
@Binds 必须注解一个抽象函数(因为它是抽象的,不包含任何代码,并且类也需要是抽象的)。抽象函数的返回类型是我们希望为其提供实现的接口(即 AppNavigator)。通过添加一个具有接口实现类型(即 AppNavigatorImpl)的唯一参数来指定实现。
我们可以将此函数添加到之前创建的 DatabaseModule 类中,还是需要一个新的模块?有多种原因说明我们应该创建一个新的模块
- 为了更好的组织,模块的名称应传达其提供的信息类型。例如,在名为
DatabaseModule的模块中包含导航绑定是没有意义的。 - The
DatabaseModulemodule is installed in theSingletonComponent, so the bindings are available in the application container. Our new navigation information (i.e.AppNavigator) needs information specific to the activity becauseAppNavigatorImplhas anActivityas a dependency. Therefore, it must be installed in theActivitycontainer instead of theApplicationcontainer, since that's where information about theActivityis available. - Hilt 模块不能同时包含非静态绑定方法和抽象绑定方法,因此您不能将
@Binds和@Provides注解放在同一个类中。
在 di 文件夹中创建一个名为 NavigationModule.kt 的新文件。在那里,我们创建一个新的抽象类 NavigationModule,并按照上面的解释,用 @Module 和 @InstallIn(ActivityComponent::class) 注解它
@InstallIn(ActivityComponent::class)
@Module
abstract class NavigationModule {

    @Binds
    abstract fun bindNavigator(impl: AppNavigatorImpl): AppNavigator
}
在新模块中,我们可以添加 AppNavigator 的绑定。它是一个抽象函数,返回我们告知 Hilt 的接口(即 AppNavigator),参数是该接口的实现(即 AppNavigatorImpl)。
现在我们必须告诉 Hilt 如何提供 AppNavigatorImpl 的实例。由于这个类可以进行构造函数注入,我们只需用 @Inject 注解它的构造函数即可。
打开 navigator/AppNavigatorImpl.kt 文件并执行此操作
class AppNavigatorImpl @Inject constructor(
    private val activity: FragmentActivity
) : AppNavigator {
    ...
}
AppNavigatorImpl 依赖于 FragmentActivity。由于 AppNavigator 实例在 Activity 容器中提供,因此 FragmentActivity 作为预定义绑定已经可用。
在 Activity 中使用 Hilt
现在,Hilt 拥有所有必需的信息,可以注入 AppNavigator 实例。打开 MainActivity.kt 文件并执行以下操作
- 用
@Inject注解navigator字段,使其由 Hilt 注入, - 移除
private可见性修饰符,以及 - 移除
onCreate函数中的navigator初始化代码。
新代码应如下所示
@AndroidEntryPoint
class MainActivity : AppCompatActivity() {

    @Inject lateinit var navigator: AppNavigator

    override fun onCreate(savedInstanceState: Bundle?) {
        super.onCreate(savedInstanceState)
        setContentView(R.layout.activity_main)

        if (savedInstanceState == null) {
            navigator.navigateTo(Screens.BUTTONS)
        }
    }

    ...
}
运行应用
您可以运行应用,看看它是否按预期工作。
完成重构
唯一仍然使用 ServiceLocator 获取依赖项的类是 ButtonsFragment。由于 Hilt 已经知道如何提供 ButtonsFragment 需要的所有类型,我们只需在该类中执行字段注入即可。
正如我们之前学到的,为了让类由 Hilt 进行字段注入,我们必须
- 用
@AndroidEntryPoint注解ButtonsFragment, - 移除
logger和navigator字段的 private 修饰符,并用@Inject注解它们, - 移除字段初始化代码(即
onAttach和populateFields方法)。
ButtonsFragment 的代码
@AndroidEntryPoint
class ButtonsFragment : Fragment() {

    @Inject lateinit var logger: LoggerLocalDataSource
    @Inject lateinit var navigator: AppNavigator

    override fun onCreateView(
        inflater: LayoutInflater,
        container: ViewGroup?,
        savedInstanceState: Bundle?
    ): View? {
        return inflater.inflate(R.layout.fragment_buttons, container, false)
    }

    override fun onViewCreated(view: View, savedInstanceState: Bundle?) {
        ...
    }
}
请注意,LoggerLocalDataSource 的实例将与我们在 LogsFragment 中使用的实例相同,因为该类型的作用域限定在应用容器中。然而,AppNavigator 的实例将与 MainActivity 中的实例不同,因为我们尚未将其作用域限定到其各自的 Activity 容器。
此时,ServiceLocator 类不再提供依赖项,因此我们可以将其完全从项目中移除。唯一剩余的用法是在 LogApplication 类中,我们在其中保留了一个它的实例。我们来清理那个类,因为它不再需要了。
打开 LogApplication 类并移除 ServiceLocator 的用法。Application 类的新代码如下
@HiltAndroidApp
class LogApplication : Application()
现在,您可以随意将 ServiceLocator 类完全从项目中移除。由于 ServiceLocator 在测试中仍在使用,请也从 AppTest 类中移除其用法。
基本内容已涵盖
您刚刚学到的知识足以在您的 Android 应用中使用 Hilt 作为依赖注入工具。
从现在开始,我们将向应用添加新功能,以学习如何在不同情况下使用更高级的 Hilt 功能。
9. 限定符 (Qualifiers)
现在我们已经从项目中移除了 ServiceLocator 类,并且您学习了 Hilt 的基础知识,让我们为应用添加新功能以探索 Hilt 的其他特性。
在本节中,您将学习
- 如何将作用域限定在 Activity 容器中。
- 什么是限定符 (qualifiers),它们解决什么问题,以及如何使用它们。
为了展示这一点,我们需要在应用中实现不同的行为。我们将日志存储从数据库切换到内存列表,目的是只在应用会话期间记录日志。
LoggerDataSource 接口
我们首先将数据源抽象为一个接口。在 data 文件夹下创建一个名为 LoggerDataSource.kt 的新文件,其内容如下
package com.example.android.hilt.data

// Common interface for Logger data sources.
interface LoggerDataSource {
    fun addLog(msg: String)
    fun getAllLogs(callback: (List<Log>) -> Unit)
    fun removeLogs()
}
LoggerLocalDataSource 在两个 Fragment 中使用:ButtonsFragment 和 LogsFragment。我们需要重构它们,使其改用 LoggerDataSource 的实例。
打开 LogsFragment 并将 logger 变量的类型改为 LoggerDataSource
@AndroidEntryPoint
class LogsFragment : Fragment() {

    @Inject lateinit var logger: LoggerDataSource
    ...
}
在 ButtonsFragment 中也做同样的操作
@AndroidEntryPoint
class ButtonsFragment : Fragment() {

    @Inject lateinit var logger: LoggerDataSource
    ...
}
接下来,我们让 LoggerLocalDataSource 实现此接口。打开 data/LoggerLocalDataSource.kt 文件并
- 使其实现
LoggerDataSource接口,并且 - 用
override标记其方法
@Singleton
class LoggerLocalDataSource @Inject constructor(
    private val logDao: LogDao
) : LoggerDataSource {
    ...
    override fun addLog(msg: String) { ... }
    override fun getAllLogs(callback: (List<Log>) -> Unit) { ... }
    override fun removeLogs() { ... }
}
现在,我们创建 LoggerDataSource 的另一个实现,名为 LoggerInMemoryDataSource,它将日志保存在内存中。在 data 文件夹下创建一个名为 LoggerInMemoryDataSource.kt 的新文件,其内容如下
package com.example.android.hilt.data

import java.util.LinkedList

class LoggerInMemoryDataSource : LoggerDataSource {

    private val logs = LinkedList<Log>()

    override fun addLog(msg: String) {
        logs.addFirst(Log(msg, System.currentTimeMillis()))
    }

    override fun getAllLogs(callback: (List<Log>) -> Unit) {
        callback(logs)
    }

    override fun removeLogs() {
        logs.clear()
    }
}
将作用域限定在 Activity 容器中
为了能够将 LoggerInMemoryDataSource 作为实现细节使用,我们需要告诉 Hilt 如何提供此类型的实例。和之前一样,我们用 @Inject 注解类构造函数
class LoggerInMemoryDataSource @Inject constructor(
) : LoggerDataSource { ... }
由于我们的应用只包含一个 Activity(也称为单 Activity 应用),我们应该在 Activity 容器中有一个 LoggerInMemoryDataSource 的实例,并在 Fragment 之间重用该实例。
我们可以通过将 LoggerInMemoryDataSource 的作用域限定到 Activity 容器来实现内存日志记录行为:创建的每个 Activity 都将有自己的容器,一个不同的实例。在每个容器中,当日志记录器需要作为依赖项或进行字段注入时,将提供 LoggerInMemoryDataSource 的同一个实例。此外,在组件层次结构中该容器下方的容器也将提供同一个实例。
按照作用域限定到组件文档的说明,要将类型的作用域限定到 Activity 容器,我们需要用 @ActivityScoped 注解该类型
@ActivityScoped
class LoggerInMemoryDataSource @Inject constructor(
) : LoggerDataSource { ... }
目前,Hilt 知道如何提供 LoggerInMemoryDataSource 和 LoggerLocalDataSource 的实例,但 LoggerDataSource 呢?当请求 LoggerDataSource 时,Hilt 不知道要使用哪种实现。
正如我们从前面章节所知,我们可以在模块中使用 @Binds 注解来告诉 Hilt 使用哪种实现。然而,如果我们需要在同一个项目中同时提供两种实现怎么办?例如,在应用运行时使用 LoggerInMemoryDataSource,而在 Service 中使用 LoggerLocalDataSource。
同一个接口的两种实现
让我们在 di 文件夹中创建一个名为 LoggingModule.kt 的新文件。由于 LoggerDataSource 的不同实现的作用域限定在不同的容器中,我们不能使用同一个模块:LoggerInMemoryDataSource 的作用域限定在 Activity 容器中,而 LoggerLocalDataSource 的作用域限定在 Application 容器中。
幸运的是,我们可以在刚刚创建的同一个文件中为这两个模块定义绑定
package com.example.android.hilt.di

import com.example.android.hilt.data.LoggerDataSource
import com.example.android.hilt.data.LoggerInMemoryDataSource
import com.example.android.hilt.data.LoggerLocalDataSource
import dagger.Binds
import dagger.Module
import dagger.hilt.InstallIn
import dagger.hilt.android.components.ActivityComponent
import dagger.hilt.android.scopes.ActivityScoped
import dagger.hilt.components.SingletonComponent
import javax.inject.Singleton

@InstallIn(SingletonComponent::class)
@Module
abstract class LoggingDatabaseModule {

    @Singleton
    @Binds
    abstract fun bindDatabaseLogger(impl: LoggerLocalDataSource): LoggerDataSource
}

@InstallIn(ActivityComponent::class)
@Module
abstract class LoggingInMemoryModule {

    @ActivityScoped
    @Binds
    abstract fun bindInMemoryLogger(impl: LoggerInMemoryDataSource): LoggerDataSource
}
如果类型的作用域被限定,则 @Binds 方法必须具有作用域注解,这就是为什么上面的函数用 @Singleton 和 @ActivityScoped 注解。如果 @Binds 或 @Provides 用作类型的绑定,则类型中的作用域注解将不再使用,因此您可以从不同的实现类中移除它们。
如果您现在尝试构建项目,将会看到一个 DuplicateBindings 错误!
error: [Dagger/DuplicateBindings] com.example.android.hilt.data.LoggerDataSource is bound multiple times
这是因为 LoggerDataSource 类型正在我们的 Fragment 中被注入,但是Hilt 不知道要使用哪种实现,因为同一类型有两个绑定!Hilt 如何知道使用哪个?
使用限定符 (Qualifiers)
要告诉 Hilt 如何提供同一类型的不同实现(多个绑定),您可以使用限定符 (qualifiers)。
我们需要为每个实现定义一个限定符,因为每个限定符将用于标识一个绑定。在 Android 类中注入该类型或将该类型作为其他类的依赖项时,需要使用限定符注解以避免歧义。
由于限定符只是一个注解,我们可以在添加模块的 LoggingModule.kt 文件中定义它们
package com.example.android.hilt.di

@Qualifier
annotation class InMemoryLogger

@Qualifier
annotation class DatabaseLogger
现在,这些限定符必须注解提供每种实现的 @Binds(如果需要,也可以是 @Provides)函数。查看完整代码并注意在 @Binds 方法中限定符的使用
package com.example.android.hilt.di

@Qualifier
annotation class InMemoryLogger

@Qualifier
annotation class DatabaseLogger

@InstallIn(SingletonComponent::class)
@Module
abstract class LoggingDatabaseModule {

    @DatabaseLogger
    @Singleton
    @Binds
    abstract fun bindDatabaseLogger(impl: LoggerLocalDataSource): LoggerDataSource
}

@InstallIn(ActivityComponent::class)
@Module
abstract class LoggingInMemoryModule {

    @InMemoryLogger
    @ActivityScoped
    @Binds
    abstract fun bindInMemoryLogger(impl: LoggerInMemoryDataSource): LoggerDataSource
}
此外,这些限定符必须与我们希望注入的实现一起在注入点使用。在本例中,我们将在 Fragment 中使用 LoggerInMemoryDataSource 实现。
打开 LogsFragment 并在 logger 字段上使用 @InMemoryLogger 限定符,以告诉 Hilt 注入 LoggerInMemoryDataSource 的实例
@AndroidEntryPoint
class LogsFragment : Fragment() {

    @InMemoryLogger
    @Inject lateinit var logger: LoggerDataSource
    ...
}
对 ButtonsFragment 也做同样的操作
@AndroidEntryPoint
class ButtonsFragment : Fragment() {

    @InMemoryLogger
    @Inject lateinit var logger: LoggerDataSource
    ...
}
如果您想更改要使用的数据库实现,只需用 @DatabaseLogger 注解注入的字段,而不是 @InMemoryLogger。
运行应用
我们可以运行应用,通过与按钮交互并观察“查看所有日志”屏幕上显示相应的日志来确认我们所做的工作。
请注意,日志不再保存到数据库。它们在会话之间不持久化,无论何时您关闭并再次打开应用,日志屏幕都是空的。
10. UI 测试
现在应用已完全迁移到 Hilt,我们也可以迁移项目中已有的插桩测试。检查应用功能的测试位于 app/androidTest 文件夹下的 AppTest.kt 文件中。打开它!
您将看到它无法编译,因为我们从项目中移除了 ServiceLocator 类。通过从类中移除 @After tearDown 方法,移除我们不再使用的对 ServiceLocator 的引用。
androidTest 测试在模拟器上运行。happyPath 测试确认点击“Button 1”已记录到数据库。由于应用使用的是内存数据库,测试完成后,所有日志都会消失。
使用 Hilt 进行 UI 测试
Hilt 将在您的 UI 测试中注入依赖项,就像在生产代码中发生的那样。
使用 Hilt 进行测试无需维护,因为 Hilt 会为每个测试自动生成一组新的组件.
添加测试依赖项
Hilt 使用一个额外的库,其中包含测试专用的注解,使您的代码测试更容易,该库名为 hilt-android-testing,必须添加到项目中。此外,由于 Hilt 需要为 androidTest 文件夹中的类生成代码,其注解处理器也必须能够在此处运行。为了启用此功能,您需要在 app/build.gradle 文件中包含两个依赖项。
要添加这些依赖项,打开 app/build.gradle 并在 dependencies 部分底部添加此配置
...
dependencies {

    // Hilt testing dependency
    androidTestImplementation "com.google.dagger:hilt-android-testing:$hilt_version"
    // Make Hilt generate code in the androidTest folder
    kaptAndroidTest "com.google.dagger:hilt-android-compiler:$hilt_version"
}
自定义 TestRunner
使用 Hilt 的插桩测试需要在支持 Hilt 的 Application 中执行。该库已经提供了 HiltTestApplication,我们可以用它来运行 UI 测试。通过在项目中创建一个新的测试运行器 (test runner) 来指定在测试中使用的 Application。
在 androidTest 文件夹下与 AppTest.kt 文件同级,创建一个名为 CustomTestRunner 的新文件。我们的 CustomTestRunner 继承自 AndroidJUnitRunner,实现如下
package com.example.android.hilt

import android.app.Application
import android.content.Context
import androidx.test.runner.AndroidJUnitRunner
import dagger.hilt.android.testing.HiltTestApplication

class CustomTestRunner : AndroidJUnitRunner() {

    override fun newApplication(cl: ClassLoader?, name: String?, context: Context?): Application {
        return super.newApplication(cl, HiltTestApplication::class.java.name, context)
    }
}
接下来,我们需要告诉项目使用此测试运行器进行插桩测试。这在 app/build.gradle 文件的 testInstrumentationRunner 属性中指定。打开文件,并将默认的 testInstrumentationRunner 内容替换为
...
android {
    ...
    defaultConfig {
        ...
        testInstrumentationRunner "com.example.android.hilt.CustomTestRunner"
    }
    ...
}
...
现在我们就可以在 UI 测试中使用 Hilt 了!
运行使用 Hilt 的测试
接下来,模拟器测试类要使用 Hilt,需要
- 用
@HiltAndroidTest注解,它负责为每个测试生成 Hilt 组件 - 使用
HiltAndroidRule,它管理组件的状态并用于在测试中执行注入。
我们将它们包含在 AppTest 中
@RunWith(AndroidJUnit4::class)
@HiltAndroidTest
class AppTest {

    @get:Rule
    var hiltRule = HiltAndroidRule(this)

    ...
}
现在,如果您使用类定义或测试方法定义旁边的播放按钮运行测试,如果配置了模拟器,它将启动并且测试将通过。
要了解有关测试以及诸如字段注入或在测试中替换绑定等功能的更多信息,请查阅文档。
11. @EntryPoint 注解
在本 Codelab 的这一部分,我们将学习如何使用 @EntryPoint 注解,该注解用于在 Hilt 不支持的类中注入依赖项。
正如我们之前所见,Hilt 支持最常见的 Android 组件。然而,您可能需要在 Hilt 不直接支持或无法使用 Hilt 的类中执行字段注入。
在这种情况下,您可以使用 @EntryPoint。入口点 (entry point) 是一个边界位置,您可以从不能使用 Hilt 注入其依赖项的代码中获取 Hilt 提供的对象。它是代码首次进入由 Hilt 管理的容器的点。
用例
我们希望能够将日志导出到应用进程之外。为此,我们需要使用 ContentProvider。我们只允许消费者通过 ContentProvider 查询特定的一个日志(给定一个 id)或应用的所有日志。我们将使用 Room 数据库检索数据。因此,LogDao 类应该暴露使用数据库 Cursor 返回所需信息的方法。打开 LogDao.kt 文件并将以下方法添加到接口中。
@Dao
interface LogDao {
    ...

    @Query("SELECT * FROM logs ORDER BY id DESC")
    fun selectAllLogsCursor(): Cursor

    @Query("SELECT * FROM logs WHERE id = :id")
    fun selectLogById(id: Long): Cursor?
}
接下来,我们必须创建一个新的 ContentProvider 类,并重写 query 方法以返回包含日志的 Cursor。在新的 contentprovider 目录下创建一个名为 LogsContentProvider.kt 的新文件,其内容如下
package com.example.android.hilt.contentprovider

import android.content.ContentProvider
import android.content.ContentUris
import android.content.ContentValues
import android.content.Context
import android.content.UriMatcher
import android.database.Cursor
import android.net.Uri
import com.example.android.hilt.data.LogDao
import dagger.hilt.EntryPoint
import dagger.hilt.InstallIn
import dagger.hilt.android.EntryPointAccessors
import dagger.hilt.components.SingletonComponent
import java.lang.UnsupportedOperationException

/** The authority of this content provider.  */
private const val LOGS_TABLE = "logs"

/** The authority of this content provider.  */
private const val AUTHORITY = "com.example.android.hilt.provider"

/** The match code for some items in the Logs table.  */
private const val CODE_LOGS_DIR = 1

/** The match code for an item in the Logs table.  */
private const val CODE_LOGS_ITEM = 2

/**
 * A ContentProvider that exposes the logs outside the application process.
 */
class LogsContentProvider: ContentProvider() {

    private val matcher: UriMatcher = UriMatcher(UriMatcher.NO_MATCH).apply {
        addURI(AUTHORITY, LOGS_TABLE, CODE_LOGS_DIR)
        addURI(AUTHORITY, "$LOGS_TABLE/*", CODE_LOGS_ITEM)
    }

    override fun onCreate(): Boolean {
        return true
    }

    /**
     * Queries all the logs or an individual log from the logs database.
     *
     * For the sake of this codelab, the logic has been simplified.
     */
    override fun query(
        uri: Uri,
        projection: Array<out String>?,
        selection: String?,
        selectionArgs: Array<out String>?,
        sortOrder: String?
    ): Cursor? {
        val code: Int = matcher.match(uri)
        return if (code == CODE_LOGS_DIR || code == CODE_LOGS_ITEM) {
            val appContext = context?.applicationContext ?: throw IllegalStateException()
            val logDao: LogDao = getLogDao(appContext)

            val cursor: Cursor? = if (code == CODE_LOGS_DIR) {
                logDao.selectAllLogsCursor()
            } else {
                logDao.selectLogById(ContentUris.parseId(uri))
            }
            cursor?.setNotificationUri(appContext.contentResolver, uri)
            cursor
        } else {
            throw IllegalArgumentException("Unknown URI: $uri")
        }
    }

    override fun insert(uri: Uri, values: ContentValues?): Uri? {
        throw UnsupportedOperationException("Only reading operations are allowed")
    }

    override fun update(
        uri: Uri,
        values: ContentValues?,
        selection: String?,
        selectionArgs: Array<out String>?
    ): Int {
        throw UnsupportedOperationException("Only reading operations are allowed")
    }

    override fun delete(uri: Uri, selection: String?, selectionArgs: Array<out String>?): Int {
        throw UnsupportedOperationException("Only reading operations are allowed")
    }

    override fun getType(uri: Uri): String? {
        throw UnsupportedOperationException("Only reading operations are allowed")
    }
}
您会看到 getLogDao(appContext) 调用无法编译!我们需要通过从 Hilt 应用容器中获取 LogDao 依赖项来实现它。然而,Hilt 默认不支持向 ContentProvider 注入,不像它对 Activity 那样,例如使用 @AndroidEntryPoint。
我们需要创建一个用 @EntryPoint 注解的新接口来访问它。
@EntryPoint 的应用
入口点是一个接口,其中包含我们想要的每个绑定类型(包括其限定符)的访问器方法。此外,接口必须用 @InstallIn 注解,以指定安装入口点的组件。
最佳实践是将新的入口点接口添加到使用它的类内部。因此,将接口包含在 LogsContentProvider.kt 文件中
class LogsContentProvider: ContentProvider() {

    @InstallIn(SingletonComponent::class)
    @EntryPoint
    interface LogsContentProviderEntryPoint {
        fun logDao(): LogDao
    }

    ...
}
请注意,该接口用 @EntryPoint 注解,并安装在 SingletonComponent 中,因为我们希望从 Application 容器的实例获取依赖项。在接口内部,我们暴露了用于访问我们想要的绑定的方法,在本例中是 LogDao。
要访问入口点,请使用 EntryPointAccessors 中相应的静态方法。参数应为组件实例或充当组件持有者的 @AndroidEntryPoint 对象。请确保您传递的组件参数和 EntryPointAccessors 静态方法都与 @EntryPoint 接口上的 @InstallIn 注解中的 Android 类匹配。
现在,我们可以实现上面代码中缺少的 getLogDao 方法。让我们使用上面我们在 LogsContentProviderEntryPoint 类中定义的入口点接口
class LogsContentProvider: ContentProvider() {
    ...

    private fun getLogDao(appContext: Context): LogDao {
        val hiltEntryPoint = EntryPointAccessors.fromApplication(
            appContext,
            LogsContentProviderEntryPoint::class.java
        )
        return hiltEntryPoint.logDao()
    }
}
注意我们如何将 applicationContext 传递给静态方法 EntryPointAccessors.fromApplication 以及用 @EntryPoint 注解的接口类。
12. 恭喜!
您现在熟悉 Hilt 了,并且应该能够将其添加到您的 Android 应用中。在此 Codelab 中,您了解了
- 如何使用
@HiltAndroidApp在 Application 类中设置 Hilt。 - 如何使用
@AndroidEntryPoint将依赖项容器添加到不同的 Android 生命周期组件中。 - 如何使用模块告诉 Hilt 如何提供某些类型。
- 如何使用限定符为某些类型提供多个绑定。
- 如何使用 Hilt 测试您的应用。
@EntryPoint何时有用以及如何使用。