1. 开始之前
折叠设备的特别之处是什么?
折叠设备是跨时代的创新。它们提供了独特的体验,并带来了独特的机遇,您可以通过区分功能(例如用于解放双手的桌面 UI)来愉悦用户。
前提条件
- 开发 Android 应用的基础知识
- Hilt 依赖注入框架的基础知识
您将构建什么
在本 Codelab 中,您将构建一个针对折叠设备优化布局的相机应用。

您将从一个不响应任何设备姿势或利用更好的后置摄像头增强自拍功能的基本相机应用开始。您将更新源代码,以便在设备展开时将预览移动到较小的显示屏,并响应手机设置为桌面模式。
虽然相机应用是此 API 最方便的用例,但您在本 Codelab 中学到的两项功能都可以应用于任何应用。
您将学到什么
- 如何使用 Jetpack Window Manager 来响应姿势变化
- 如何将您的应用移动到折叠设备的较小显示屏
您需要什么
- 最新版本的 Android Studio
- 折叠设备或折叠模拟器
2. 设置
获取起始代码
- 如果您安装了 Git,只需运行以下命令即可。要检查是否安装了 Git,请在终端或命令行中输入
git --version并验证其是否正确执行。
git clone https://github.com/android/large-screen-codelabs.git
打开第一个模块
- 在 Android Studio 中,打开
/step1下的第一个模块。

如果要求您使用最新版本的 Gradle,请继续更新。
3. 运行并观察
- 运行模块
step1中的代码。
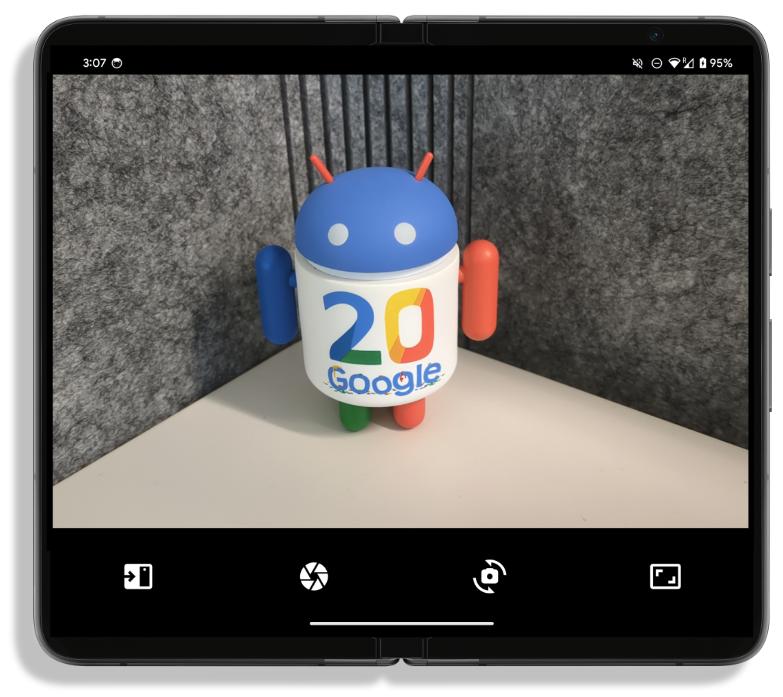
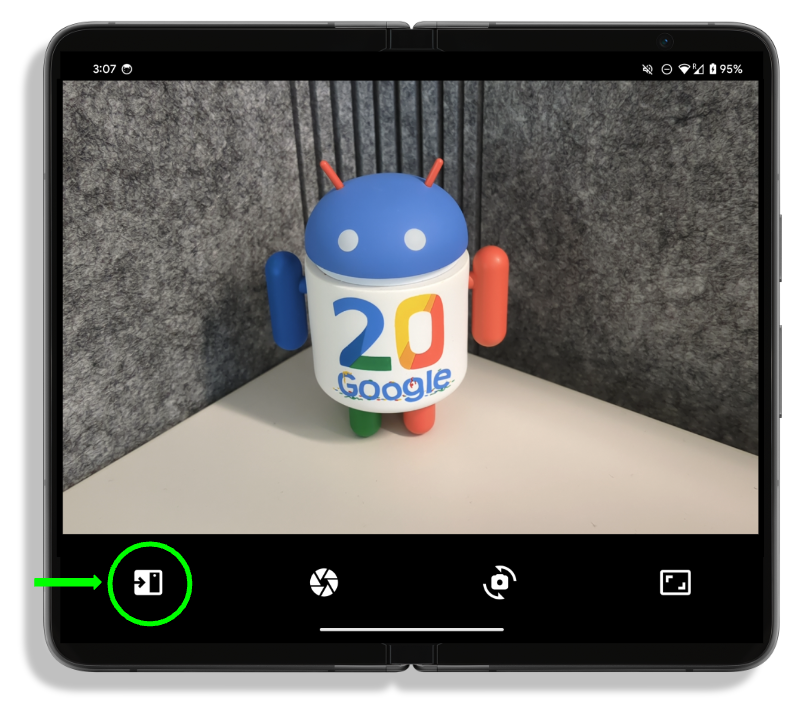
如您所见,这是一个简单的相机应用。您可以在前置和后置摄像头之间切换,还可以调整纵横比。然而,最左边的第一个按钮目前没有任何作用——但它将是后置自拍模式的入口点。

- 现在,尝试将设备置于半开位置,即铰链未完全平坦或关闭,而是形成 90 度角。
如您所见,该应用不响应不同的设备姿势,因此布局不会改变,铰链会留在取景器的中间。
4. 了解 Jetpack WindowManager
Jetpack WindowManager 库可帮助应用开发者为折叠设备构建优化体验。它包含 FoldingFeature 类,该类描述了柔性显示屏中的折叠或两个物理显示面板之间的铰链。其 API 可提供与设备相关的关键信息
- 如果铰链打开 180 度,
state()将返回FLAT;否则,将返回HALF_OPENED。 - 如果
FoldingFeature的宽度大于高度,orientation()将返回FoldingFeature.Orientation.HORIZONTAL;否则,将返回FoldingFeature.Orientation.VERTICAL。 bounds()以Rect格式提供FoldingFeature的边界。
FoldingFeature 类包含其他信息,例如 occlusionType() 或 isSeparating(),但本 Codelab 不会深入探讨这些内容。
从版本 1.2.0-beta01 开始,该库使用 WindowAreaController,这是一个启用后置显示模式的 API,可以将当前窗口移动到与后置摄像头对齐的显示屏,这对于使用后置摄像头拍摄自拍和许多其他用例非常有用!
添加依赖项
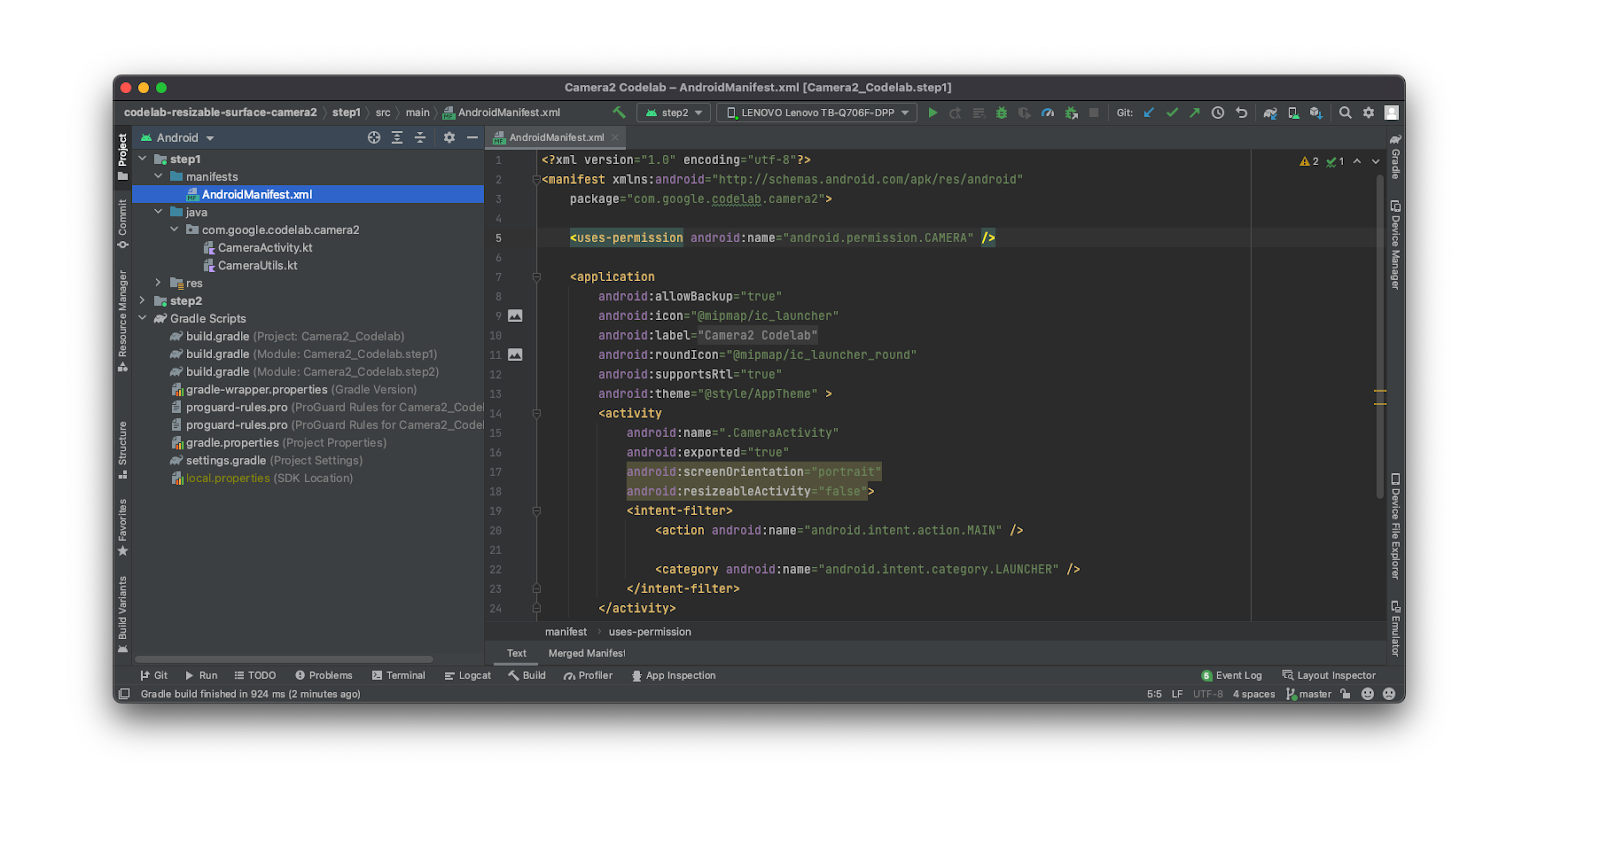
- 为了在您的应用中使用 Jetpack WindowManager,您需要在模块级
build.gradle文件中添加以下依赖项
step1/build.gradle
def work_version = '1.2.0'
implementation "androidx.window:window:$work_version"
implementation "androidx.window:window-java:$work_version"
implementation "androidx.window:window-core:$work_version"
现在您可以在应用中访问 FoldingFeature 和 WindowAreaController 类。您将使用它们来构建终极折叠相机体验!
5. 实现后置自拍模式
从后置显示模式开始。
启用此模式的 API 是 WindowAreaController,它提供了在设备上的显示屏或显示区域之间移动窗口的信息和行为。
它允许您查询当前可交互的 WindowAreaInfo 列表。
使用 WindowAreaInfo,您可以访问 WindowAreaSession,这是一个用于表示活动窗口区域功能和特定 WindowAreaCapability 可用性状态的接口。
- 在您的
MainActivity中声明这些变量
step1/MainActivity.kt
private lateinit var windowAreaController: WindowAreaController
private lateinit var displayExecutor: Executor
private var rearDisplaySession: WindowAreaSession? = null
private var rearDisplayWindowAreaInfo: WindowAreaInfo? = null
private var rearDisplayStatus: WindowAreaCapability.Status =
    WindowAreaCapability.Status.WINDOW_AREA_STATUS_UNSUPPORTED
private val rearDisplayOperation = WindowAreaCapability.Operation.OPERATION_TRANSFER_ACTIVITY_TO_AREA
- 并在
onCreate()方法中初始化它们
step1/MainActivity.kt
displayExecutor = ContextCompat.getMainExecutor(this)
windowAreaController = WindowAreaController.getOrCreate()

lifecycleScope.launch(Dispatchers.Main) {
  lifecycle.repeatOnLifecycle(Lifecycle.State.STARTED) {
    windowAreaController.windowAreaInfos
      .map{info->info.firstOrNull{it.type==WindowAreaInfo.Type.TYPE_REAR_FACING}}
      .onEach { info -> rearDisplayWindowAreaInfo = info }
      .map{it?.getCapability(rearDisplayOperation)?.status?:  WindowAreaCapability.Status.WINDOW_AREA_STATUS_UNSUPPORTED }
      .distinctUntilChanged()
      .collect {
           rearDisplayStatus = it
           updateUI()
      }
  }
}
- 现在实现
updateUI()函数,根据当前状态启用或禁用后置自拍按钮
step1/MainActivity.kt
private fun updateUI() {
    if(rearDisplaySession != null) {
        binding.rearDisplay.isEnabled = true
        // A session is already active, clicking on the button will disable it
    } else {
        when(rearDisplayStatus) {
            WindowAreaCapability.Status.WINDOW_AREA_STATUS_UNSUPPORTED -> {
                binding.rearDisplay.isEnabled = false
                // RearDisplay Mode is not supported on this device"
            }
            WindowAreaCapability.Status.WINDOW_AREA_STATUS_UNAVAILABLE -> {
                binding.rearDisplay.isEnabled = false
                // RearDisplay Mode is not currently available
            }
            WindowAreaCapability.Status.WINDOW_AREA_STATUS_AVAILABLE -> {
                binding.rearDisplay.isEnabled = true
                // You can enable RearDisplay Mode
            }
            WindowAreaCapability.Status.WINDOW_AREA_STATUS_ACTIVE -> {
                binding.rearDisplay.isEnabled = true
                // You can disable RearDisplay Mode
            }
            else -> {
                binding.rearDisplay.isEnabled = false
                // RearDisplay status is unknown
            }
        }
    }
}
最后一步是可选的,但这对于了解 WindowAreaCapability 的所有可能状态非常有用。
- 现在实现
toggleRearDisplayMode函数,如果功能已激活,它将关闭会话,否则将调用transferActivityToWindowArea函数
step1/CameraViewModel.kt
private fun toggleRearDisplayMode() {
    if(rearDisplayStatus == WindowAreaCapability.Status.WINDOW_AREA_STATUS_ACTIVE) {
        if(rearDisplaySession == null) {
            rearDisplaySession = rearDisplayWindowAreaInfo?.getActiveSession(rearDisplayOperation)
        }
        rearDisplaySession?.close()
    } else {
        rearDisplayWindowAreaInfo?.token?.let { token ->
            windowAreaController.transferActivityToWindowArea(
                token = token,
                activity = this,
                executor = displayExecutor,
                windowAreaSessionCallback = this
            )
        }
    }
}
注意将 MainActivity 用作 WindowAreaSessionCallback。
后置显示 API 采用监听器方法:当您请求将内容移动到其他显示屏时,会启动一个会话,该会话通过监听器的 onSessionStarted() 方法返回。当您想要返回内部(更大)显示屏时,您会关闭会话,并在 onSessionEnded() 方法中收到确认。要创建此类监听器,您需要实现 WindowAreaSessionCallback 接口。
- 修改
MainActivity声明,使其实现WindowAreaSessionCallback接口
step1/MainActivity.kt
class MainActivity : AppCompatActivity(), WindowAreaSessionCallback
现在,在 MainActivity 中实现 onSessionStarted 和 onSessionEnded 方法。这些回调方法对于获取会话状态通知并相应地更新应用非常有用。
但这次为了简单起见,只需在函数体中检查是否有任何错误并记录状态即可。
step1/MainActivity.kt
override fun onSessionEnded(t: Throwable?) {
    if(t != null) {
        Log.d("Something was broken: ${t.message}")
    }else{
        Log.d("rear session ended")
    }
}

override fun onSessionStarted(session: WindowAreaSession) {
    Log.d("rear session started [session=$session]")
}
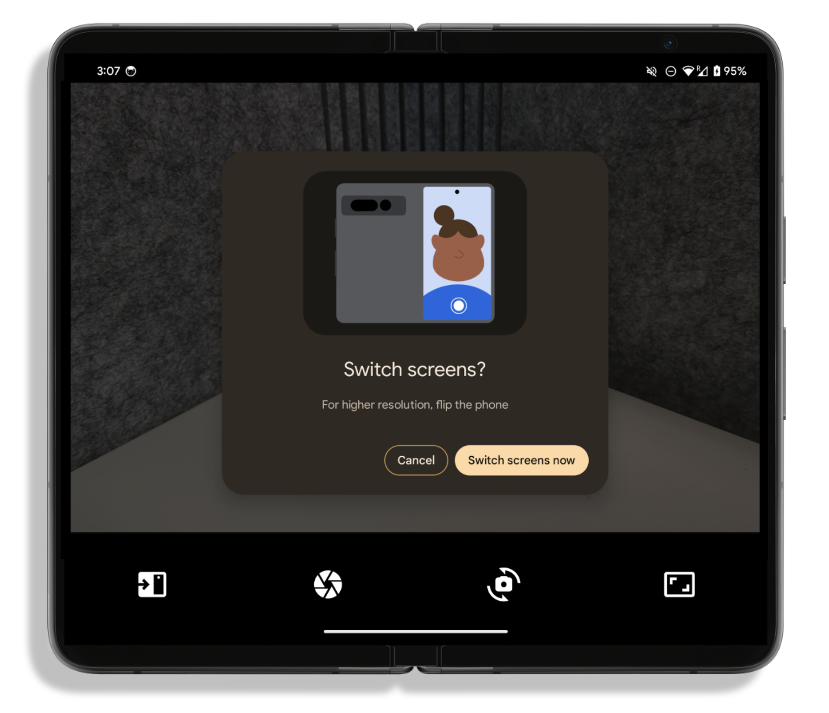
- 构建并运行应用。然后,如果您展开设备并点击后置显示屏按钮,您会收到如下消息

- 选择“立即切换屏幕”,即可看到您的内容移动到外侧显示屏上!
6. 实现桌面模式
现在是时候让您的应用感知折叠状态了:您可以根据折叠的方向将内容移动到设备的铰链旁边或上方。为此,您将在 FoldingStateActor 中进行操作,以便您的代码与 Activity 解耦,从而提高可读性。
此 API 的核心部分是 WindowInfoTracker 接口,它通过需要 Activity 的静态方法创建
step1/CameraCodelabDependencies.kt
@Provides
fun provideWindowInfoTracker(activity: Activity) =
        WindowInfoTracker.getOrCreate(activity)
您无需编写此代码,因为它已存在,但了解 WindowInfoTracker 的构建方式很有用。
- 要监听任何窗口变化,请在您的
Activity的onResume()方法中监听这些变化
step1/MainActivity.kt
lifecycleScope.launch {
    foldingStateActor.checkFoldingState(
         this@MainActivity,
         binding.viewFinder
    )
}
- 现在,打开
FoldingStateActor文件,因为是时候填充checkFoldingState()方法了。
正如您已经看到的,它在您的 Activity 的 RESUMED 阶段运行,并利用 WindowInfoTracker 来监听任何布局变化。
step1/FoldingStateActor.kt
windowInfoTracker.windowLayoutInfo(activity)
      .collect { newLayoutInfo ->
         activeWindowLayoutInfo = newLayoutInfo
         updateLayoutByFoldingState(cameraViewfinder)
      }
通过使用 WindowInfoTracker 接口,您可以调用 windowLayoutInfo() 来收集 WindowLayoutInfo 的 Flow,其中包含 DisplayFeature 中的所有可用信息。
最后一步是响应这些变化并相应地移动内容。您将在 updateLayoutByFoldingState() 方法中一步一步地完成此操作。
- 确保
activityLayoutInfo包含一些DisplayFeature属性,并且其中至少有一个是FoldingFeature,否则您不想做任何事情
step1/FoldingStateActor.kt
val foldingFeature = activeWindowLayoutInfo?.displayFeatures
            ?.firstOrNull { it is FoldingFeature } as FoldingFeature?
            ?: return
- 计算折叠位置,以确保设备位置正在影响您的布局,并且不在您的层级结构的边界之外
step1/FoldingStateActor.kt
val foldPosition = FoldableUtils.getFeaturePositionInViewRect(
            foldingFeature,
            cameraViewfinder.parent as View
        ) ?: return
现在,您确定您有一个影响您布局的 FoldingFeature,因此您需要移动您的内容。
- 检查
FoldingFeature是否为HALF_OPEN,否则只需恢复内容位置。如果它是HALF_OPEN,您需要进行另一次检查,并根据折叠方向采取不同的操作
step1/FoldingStateActor.kt
if (foldingFeature.state == FoldingFeature.State.HALF_OPENED) {
    when (foldingFeature.orientation) {
        FoldingFeature.Orientation.VERTICAL -> {
            cameraViewfinder.moveToRightOf(foldPosition)
        }
        FoldingFeature.Orientation.HORIZONTAL -> {
            cameraViewfinder.moveToTopOf(foldPosition)
        }
    }
} else {
    cameraViewfinder.restore()
}
如果折叠是 VERTICAL,您将内容向右移动,否则将其移动到折叠位置上方。
- 构建并运行您的应用,然后展开您的设备并将其置于桌面模式,查看内容如何相应地移动!
7. 恭喜!
在本 Codelab 中,您了解了折叠设备独有的一些功能,例如后置显示模式或桌面模式,以及如何使用 Jetpack WindowManager 解锁这些功能。
您已准备好为您的相机应用实现出色的用户体验。
