
1. 准备工作
在使用手机上的应用时,你会注意到应用的某些部分保持不变,而其他部分会变化(或具有可变性)。
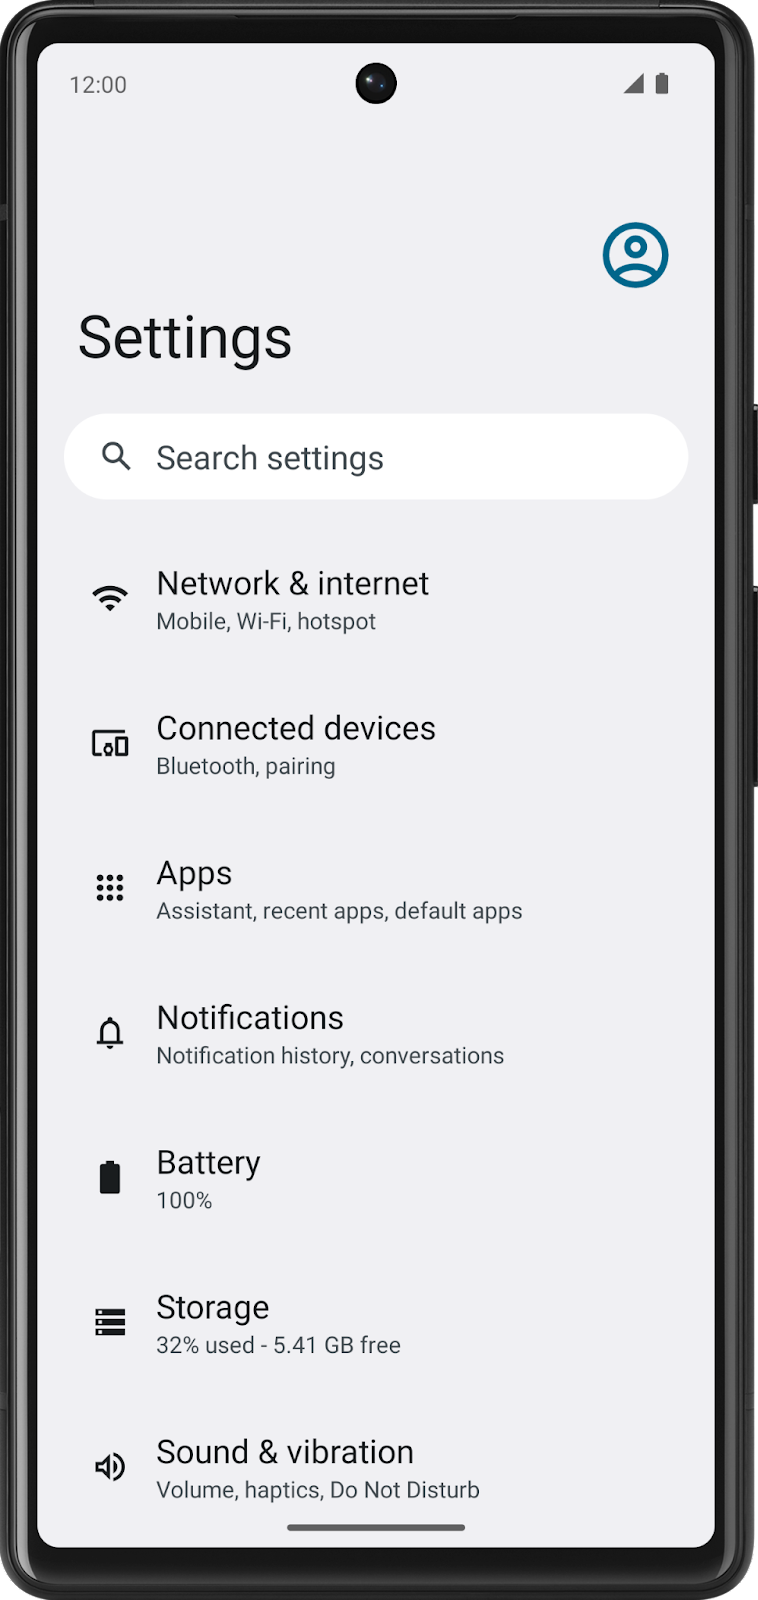
例如,“设置”应用中的类别名称保持不变 – 网络和互联网、已连接设备、应用等。
另一方面,如果你查看新闻应用,文章会经常变化。文章名称、来源、发布时间和图片都会变化。
你如何编写代码,以便内容随时间变化?你不能每次有新文章要发布时都重写应用中的代码,而新文章每时、每刻、每分都在发布!
在本 Codelab 中,你将学习如何编写使用变量的代码,以便程序中的某些部分可以在不编写全新指令集的情况下进行更改。你将像在之前的 Codelab 中一样使用 Kotlin Playground。
你将构建什么
- 使用变量的 Kotlin 短程序。
你将学到什么
- 如何定义变量并更新其值。
- 如何从 Kotlin 的基本数据类型中为变量选择合适的数据类型。
- 如何向代码添加注释。
你需要什么
- 一台能够访问互联网的计算机和一个网页浏览器。
2. 变量和数据类型
在计算机编程中,有一个变量的概念,它是用于存储单个数据片段的容器。你可以将其想象成一个包含值的盒子。盒子上有一个标签,这就是变量的名称。通过名称引用盒子,你就可以访问它存储的值。

既然可以直接使用值,为什么还要将值存储在盒子中并通过名称引用盒子呢?问题在于,如果你的代码在所有指令中都直接使用值,你的程序将只适用于该特定情况。
下面是一个可以让你更容易理解变量为何有用的类比。这是一封写给你最近认识的人的信。
亲爱的 Lauren,
今天在办公室见到你很高兴。期待周五再见。
祝你度过美好的一天!
这封信很棒,但它只适用于你和 Lauren 之间的特定情况。如果你发现自己多次写同一封信,但针对不同的人略有变化怎么办?更有效的方法是创建一个信件模板,将可变的部分留空。
亲爱的 ____,
今天在 _____ 见到你很高兴。期待 _____ 再见。
祝你度过美好的一天!
你还可以指定每个空白处填写的信息类型。这确保信件模板按照你的预期使用。
亲爱的 { name },
今天在 { location } 见到你很高兴。期待 { date } 再见。
祝你度过美好的一天!
从概念上讲,构建应用也是类似的。你有一些数据的占位符,而应用的其余部分保持不变。

在上面新闻应用的插图中,“欢迎”文本、“你的最新新闻”标题和“查看更多文章”按钮文本始终保持不变。相反,用户的姓名和每篇文章的内容会变化,因此这是使用变量来存储每条信息的绝佳机会。

你不会希望新闻应用中的代码(或指令)只适用于名为 Alex 的用户,或者始终具有相同标题和发布日期的新闻文章。相反,你需要一个更灵活的应用,因此你应该通过引用 name、article1Name、article1Date 等变量名来编写代码。这样,你的代码就足够通用,可以适用于用户姓名不同、文章详情不同的许多不同用例。
带有变量的应用示例
让我们来看一个应用示例,了解它可能在哪里使用变量。

在地图应用中,你可能会找到每个地点的详细信息屏幕,例如餐厅或商家。上面来自 Google 地图应用的屏幕截图显示了 Google 公司总部(称为 Googleplex)的详细信息。你认为应用中哪些数据片段是作为变量存储的?
- 地点的名称
- 地点的星级评分
- 地点的评论数量
- 用户是否保存(或收藏)了该地点
- 地点的地址
更改存储在这些变量中的数据,你就会得到一个足够灵活的地图应用,可以显示其他地点的详细信息。
数据类型
当你决定应用中的哪些方面可以是可变的时,指定这些变量可以存储什么类型的数据非常重要。在 Kotlin 中,有一些常见的基本数据类型。下表每行显示一种不同的数据类型。对于每种数据类型,都有它能存储什么类型的数据以及示例值的描述。
Kotlin 数据类型 | 它可以包含什么类型的数据 | 示例字面值 |
| 文本 |
|
| 整数 |
|
| 小数 |
|
| 小数(精确度低于 |
|
|
|
|
现在你已经了解了一些常见的 Kotlin 数据类型,那么对于你之前看到的地点详情页面中识别出的每个变量,哪种数据类型是合适的?
- 地点的名称是文本,因此可以存储在数据类型为
String的变量中。 - 地点的星级评分是小数(例如 4.2 星),因此可以存储为
Double。 - 地点的评论数量是整数,因此应该存储为
Int。 - 用户是否保存了该地点只有两个可能的值(已保存或未保存),因此它存储为
Boolean类型,其中true和false可以分别表示这些状态。 - 地点的地址是文本,因此应该存储为
String类型。
请练习以下另外两个场景。识别以下应用中变量的使用及其数据类型。
- 在视频观看应用(例如 YouTube 应用)中,有一个视频详情屏幕。变量可能在哪里使用?这些变量的数据类型是什么?

没有唯一正确的答案,但在视频观看应用中,变量可用于以下数据片段
- 视频的名称(
String) - 频道的名称(
String) - 视频的观看次数(
Int) - 视频的点赞数(
Int) - 视频的评论数量(
Int)
- 在像“信息”这样的应用中,屏幕上列出了最近收到的文本消息。变量可能在哪里使用?这些变量的数据类型是什么?
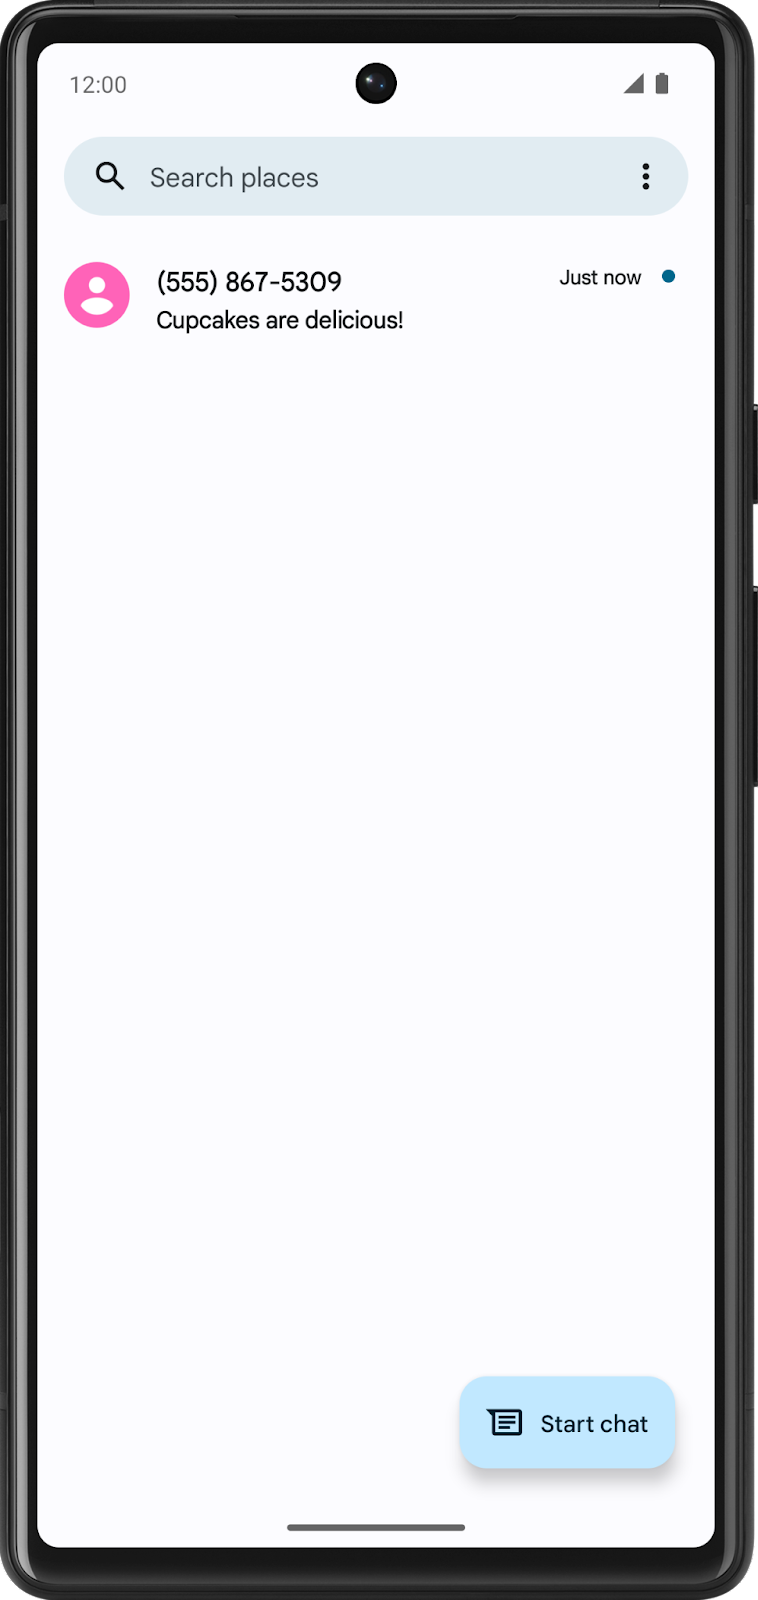
同样,没有唯一正确的答案。在文本消息应用中,变量可用于以下数据片段
- 发送者的电话号码(
String) - 消息的时间戳(
String) - 消息内容的预览(
String) - 文本消息是否未读(
Boolean)
尝试一下
- 打开你手机上最喜欢的应用。
- 识别在该屏幕上你认为应用中使用了变量的地方。
- 猜测这些变量的数据类型。
- 在社交媒体上分享你的答案,并附带应用的屏幕截图、对你认为使用了变量的地方的解释,以及话题标签 #AndroidBasics。
到目前为止,你在本 Codelab 中做得非常棒!请继续阅读下一部分,了解更多关于如何在代码中使用变量和数据类型的信息。
3. 定义和使用变量
定义与使用变量
在使用变量之前,你必须先在代码中定义变量。这类似于你在上一个 Codelab 中学到的关于先定义函数再调用它们的内容。
当你定义一个变量时,你给它分配一个唯一的名称来标识它。你还通过指定数据类型来决定它可以存储什么类型的数据。最后,你可以提供一个初始值存储在变量中,但这并非必需。
一旦你定义了变量,就可以在程序中使用该变量。要使用变量,请在代码中输入变量名,这会告诉 Kotlin 编译器你希望在该代码点使用该变量的值。
例如,定义一个变量来表示用户收件箱中的未读消息数量。该变量的名称可以是 count。在变量中存储一个值,例如数字 2,表示用户收件箱中有 2 条未读消息。(你可以在变量中存储其他数字,但为了本例的目的,使用数字 2。)

每次代码需要访问未读消息数量时,请在代码中输入 count。执行指令时,Kotlin 编译器会在代码中看到变量名,并用变量值代替它。
技术上讲,有一些更具体的词汇来描述这个过程
表达式是评估后得出一个值的代码片段。表达式可以由变量、函数调用等组成。在以下情况下,这个表达式由一个变量组成:count 变量。这个表达式评估后为 2。

评估意味着确定表达式的值。在这种情况下,表达式评估后为 2。编译器评估代码中的表达式,并在执行程序中的指令时使用这些值。

要在 Kotlin Playground 中观察此行为,请运行下一部分的程序。
示例
- 在网页浏览器中打开Kotlin Playground。
- 用以下程序替换 Kotlin Playground 中的现有代码。
此程序创建一个名为 count 的变量,初始值为 2,并通过将 count 变量的值打印到输出中使用它。如果你还不完全理解代码语法的所有方面,请不要担心。后续部分将对其进行更详细的解释。
fun main() {
    val count: Int = 2
    println(count)
}
- 运行程序,输出应为
2
变量声明
在你运行的程序中,第二行代码表示
val count: Int = 2
此语句创建一个名为 count 的整型变量,它存储数字 2。
熟悉 Kotlin 中声明变量的语法(或格式)可能需要一些时间。下图显示了变量的每个细节应位于何处,以及空格和符号的位置。

在 count 变量示例中,你可以看到变量声明以单词 val 开头。变量的名称是 count。数据类型是 Int,初始值是 2。

变量声明的每个部分都将在下面更详细地解释。
定义新变量的关键字
要定义一个新变量,请以 Kotlin 关键字 val(代表值)开头。然后 Kotlin 编译器就知道该语句是一个变量声明。
变量名
就像命名函数一样,你也命名变量。在变量声明中,变量名紧随 val 关键字。

你可以选择任何你想要的变量名,但最佳实践是避免使用 Kotlin 关键字作为变量名。
最好选择一个描述变量所存储数据的名称,以便代码更易读。
变量名应遵循驼峰命名法,就像你学习的函数名一样。变量名的第一个单词全部小写。如果名称中有多个单词,单词之间没有空格,并且所有其他单词应以大写字母开头。
示例变量名
numberOfEmailscityNamebookPublicationDate
对于前面显示的代码示例,count 是变量的名称。
val count: Int = 2
变量数据类型
在变量名之后,添加冒号、一个空格,然后是变量的数据类型。如前所述,String、Int、Double、Float 和 Boolean 是一些基本的 Kotlin 数据类型。你将在本课程的后续部分学习更多数据类型。请记住数据类型的拼写必须与所示完全一致,并且每个单词的首字母大写。

对于 count 变量示例,Int 是变量的数据类型。
val count: Int = 2
赋值运算符
在变量声明中,等号符号(=)位于数据类型之后。等号符号称为赋值运算符。赋值运算符将值赋给变量。换句话说,等号右侧的值存储在等号左侧的变量中。

变量初始值
变量值是存储在变量中的实际数据。

对于 count 变量示例,数字 2 是变量的初始值。
val count: Int = 2
你可能还会听到这句话:“count 变量被初始化为 2。”这意味着变量声明时,2 是存储在变量中的第一个值。
初始值将根据为变量声明的数据类型而有所不同。
请参考下表,你可能在本 Codelab 早期部分见过它。第三列显示了可以存储在每种对应类型变量中的示例值。这些值称为字面值,因为它们是固定或常量值(值始终相同)。例如,整数 32 总是等于 32。相比之下,变量不是字面值,因为它的值可以改变。你可能会听到这些字面值根据其类型被称为:字符串字面值、整数字面值、布尔字面值等。
Kotlin 数据类型 | 它可以包含什么类型的数据 | 示例字面值 |
| 文本 |
|
| 整数 |
|
| 小数 |
|
| 小数(精确度低于 |
|
|
|
|
根据变量的数据类型提供适当且有效的值非常重要。例如,你不能将 "Hello" 这样的字符串字面值存储在 Int 类型的变量中,因为 Kotlin 编译器会报错。
使用变量
以下是你之前在 Kotlin Playground 中运行的原始程序。到目前为止,你已经了解到第二行代码创建了一个新的整型变量 count,其值为 2。
fun main() {
    val count: Int = 2
    println(count)
}
现在看第三行代码。你正在将 count 变量打印到输出
println(count)
注意,单词 count 周围没有引号。它是一个变量名,而不是字符串字面值。(如果是字符串字面值,单词周围会有引号。)运行程序时,Kotlin 编译器会评估 println() 指令中括号内的表达式,即 count。由于表达式评估后为 2,因此 println() 方法被调用时输入为 2:println(2)。
因此,程序的输出是
2
输出中的数字本身不太有用。在输出中打印更详细的消息来解释 2 代表什么会更有帮助。
字符串模板
在输出中显示更有帮助的消息是
You have 2 unread messages.
按照以下步骤操作,以便程序输出更有帮助的消息。
- 使用以下代码更新 Kotlin Playground 中的程序。对于
println()调用,传入一个包含count变量名的字符串字面值。记住用引号将文本括起来。请注意,这不会给你预期的结果。你将在后面的步骤中解决此问题。
fun main() {
    val count: Int = 2
    println("You have count unread messages.")
}
- 运行程序,输出应显示
You have count unread messages.
这句话没有意义!你希望在消息中显示 count 变量的值,而不是变量名。
- 要修正输出,你需要一个字符串模板。这是一个字符串模板,因为它包含一个模板表达式,模板表达式由美元符号(
$)后跟变量名组成。模板表达式会被评估,其值将替换到字符串中。

在 count 变量前添加一个美元符号 $。在这种情况下,模板表达式 $count 的评估结果为 2,并且 2 被替换到表达式所在的位置。
fun main() {
    val count: Int = 2
    println("You have $count unread messages.")
}
- 运行程序后,输出与预期目标一致
You have 2 unread messages.
这句话对用户来说更有意义!
- 现在将
count变量的初始值更改为另一个整数字面值。例如,你可以选择数字10。程序的其余代码保持不变。
fun main() {
    val count: Int = 10
    println("You have $count unread messages.")
}
- 运行程序。请注意输出随之改变,你甚至不需要更改程序中的
println()语句。
You have 10 unread messages.
你可以看到字符串模板有多么有用。你只需在代码中编写一次字符串模板("You have $count unread messages.")。如果你更改 count 变量的初始值,println() 语句仍然有效。你的代码现在更灵活了!
为了进一步强调这一点,比较以下两个程序。第一个程序使用字符串字面值,将精确的未读消息数量直接包含在字符串中。该程序仅在用户有 10 条未读消息时有效。
fun main() {
    println("You have 10 unread messages.")
}
通过在第二个程序中使用变量和字符串模板,你的代码可以适应更多场景。这个第二个程序更灵活!
fun main() {
    val count: Int = 10
    println("You have $count unread messages.")
}
类型推断
这里有一个小技巧,可以在声明变量时少写一些代码。
类型推断是指 Kotlin 编译器可以在代码中不显式写出类型的情况下推断(或确定)变量的数据类型。这意味着如果你为变量提供了初始值,就可以在变量声明中省略数据类型。Kotlin 编译器会查看初始值的数据类型,并假定你希望变量存储该类型的数据。
以下是使用类型推断的变量声明语法

回到 count 示例,程序最初包含以下代码行
val count: Int = 2
但是,这行代码也可以写成如下形式。注意,冒号符号(:)和 Int 数据类型被省略了。更新后的语法键入的字符更少,并且实现了相同的目的:创建一个名为 count 的 Int 变量,值为 2。
val count = 2
Kotlin 编译器知道你想要将 2(一个整数)存储到变量 count 中,因此它可以推断出 count 变量的类型是 Int。很方便,对吧?这是编写 Kotlin 代码更简洁的一个例子!
尽管此示例仅讨论 Int 类型的变量,但类型推断的概念适用于 Kotlin 中的所有数据类型。
整数的基本数学运算
值为 2 的 Int 变量和值为 "2" 的 String 变量有什么区别?当它们都打印到输出时,它们看起来是一样的。
将整数存储为 Int(而不是 String)的优点在于,你可以对 Int 变量执行数学运算,例如加法、减法、除法和乘法(参见其他运算符)。例如,两个整型变量可以相加得到它们的总和。当然,在某些情况下将整数存储为 String 是合理的,但本节的目的是向你展示如何使用 Int 变量。
- 返回 Kotlin Playground 并删除代码编辑器中的所有代码。
- 创建一个新程序,定义一个整型变量来表示收件箱中的未读电子邮件数量,并将其初始化为
5等值。如果你愿意,可以选取不同的数字。定义第二个整型变量来表示收件箱中的已读电子邮件数量。将其初始化为100等值。如果你愿意,可以选取不同的数字。然后通过将这两个整数相加来打印收件箱中的邮件总数。
fun main() {
    val unreadCount = 5
    val readCount = 100
    println("You have ${unreadCount + readCount} total messages in your inbox.")
}
- 运行程序,它应该显示收件箱中的邮件总数
You have 105 total messages in your inbox.
对于字符串模板,你学过可以在单个变量名前面加上 $ 符号。但是,如果你有一个更复杂的表达式,则必须将表达式用大括号括起来,并在大括号前加上 $ 符号:${unreadCount + readCount}。大括号内的表达式 unreadCount + readCount 评估后为 105。然后将值 105 替换到字符串字面值中。

- 要进一步探索此主题,请创建具有不同名称和不同初始值的变量,并使用模板表达式将消息打印到输出。
例如,修改你的程序以打印出以下内容
100 photos
10 photos deleted
90 photos left
这是编写程序的一种方式,当然也有其他正确的方式!
fun main() {
    val numberOfPhotos = 100
    val photosDeleted = 10
    println("$numberOfPhotos photos")
    println("$photosDeleted photos deleted")
    println("${numberOfPhotos - photosDeleted} photos left")
}
4. 更新变量
应用运行时,变量的值可能需要更新。例如,在购物应用中,随着用户向购物车添加商品,购物车总额会增加。
让我们将购物车用例简化为一个简单的程序。下面的逻辑用人类语言写出,而不是 Kotlin 代码。这称为伪代码,因为它描述了代码编写的关键点,但不包含代码的所有细节。
在程序的主函数中
- 创建一个整型
cartTotal变量,其初始值为0。 - 用户将一件价值 20 美元的毛衣添加到购物车。
- 将
cartTotal变量更新为20,这是购物车中商品的当前总价。 - 将购物车中商品的总价(即
cartTotal变量)打印到输出。
为了进一步简化代码,你无需编写用户添加商品到购物车的代码。(你尚未学习程序如何响应用户输入。这将在后面的单元中介绍。)因此,请重点关注创建、更新和打印 cartTotal 变量的部分。
- 用以下程序替换 Kotlin Playground 中的现有代码。在程序的第 2 行,你将
cartTotal变量初始化为值0。由于你提供了初始值,根据类型推断,无需指定Int数据类型。在程序的第 3 行,你尝试使用赋值运算符(=)将cartTotal变量更新为20。在程序的第 4 行,你使用字符串模板打印cartTotal变量的值。
fun main() {
    val cartTotal = 0
    cartTotal = 20
    println("Total: $cartTotal")
}
- 运行程序,你会得到一个编译错误。
- 注意错误提示
val不能被重新赋值。错误发生在程序的第三行,它试图将cartTotal变量的值更改为20。一旦valcartTotal被赋值了初始值(0),就不能再将其重新赋值给另一个值(20)。
Val cannot be reassigned
如果你需要更新变量的值,请使用 Kotlin 关键字 var 声明变量,而不是 val。
val关键字 - 在你期望变量值不会改变时使用。var关键字 - 在你期望变量值会改变时使用。
使用 val 时,变量是只读的,这意味着你只能读取或访问变量的值。一旦值被设置,你就不能编辑或修改它的值。使用 var 时,变量是可变的,这意味着值可以被更改或修改。值可以发生变异。
为了记住区别,可以将 val 想象成一个固定的值,将 var 想象成变量。在 Kotlin 中,建议尽可能使用 val 关键字而不是 var 关键字。
- 将程序第 2 行的
cartTotal变量声明更新为使用var而不是val。代码应如下所示
fun main() {
    var cartTotal = 0
    cartTotal = 20
    println("Total: $cartTotal")
}
- 注意程序第 3 行更新变量的代码语法。
cartTotal = 20
使用赋值运算符(=)将新值(20)赋给现有变量(cartTotal)。你无需再次使用 var 关键字,因为变量已经定义过了。

使用盒子的类比,想象一下将值 20 存储在标有 cartTotal 的盒子中。

这是更新变量的一般语法图,该变量已在前面代码行中声明。以要更新的变量名开始语句。添加一个空格、等号,再添加一个空格。然后写出变量的更新值。

- 运行你的程序,代码应该成功编译。它应该打印以下输出
Total: 20
- 要查看程序运行时变量值如何变化,请在变量初次声明后将
cartTotal变量打印到输出。参见下面的代码更改。第 3 行新增了一个println()语句。代码第 4 行还添加了一个空行。空行对编译器理解代码没有影响。在代码中添加空行可以分隔相关代码块,从而提高代码的可读性。
fun main() {
    var cartTotal = 0
    println("Total: $cartTotal")

    cartTotal = 20
    println("Total: $cartTotal")
}
- 再次运行程序,输出应为
Total: 0
Total: 20
你可以看到,最初购物车总额是 0。然后它更新为 20。你成功更新了一个变量!这是因为你将 cartTotal 从只读变量(使用 val)更改为可变变量(使用 var)。
记住,只有当你期望变量值会改变时,才应该使用 var 来声明变量。否则,你应该默认使用 val 来声明变量。这种做法能让你的代码更安全。使用 val 可以确保如果变量不应更新,它们就不会在你的程序中被更新。一旦 val 被赋值,它将始终保持该值。
递增和递减运算符
现在你知道,要更新变量的值,必须将其声明为 var 类型。将此知识应用于下面的电子邮件示例,该示例应该看起来很熟悉。
- 用此程序替换 Kotlin Playground 中的代码
fun main() {
    val count: Int = 10
    println("You have $count unread messages.")
}
- 运行程序。它应该打印出
You have 10 unread messages.
- 用
var关键字替换val关键字,使count变量成为一个可变变量。运行程序时,输出应该没有变化。
fun main() {
    var count: Int = 10
    println("You have $count unread messages.")
}
- 然而,现在你可以将
count更新为不同的值。例如,当用户收件箱中收到一封新邮件时,你可以将count增加 1。(你无需编写处理邮件到达的代码。从互联网获取数据是一个更高级的主题,将在后面的单元中介绍。)目前,请重点关注使用此代码行将count变量增加1。
count = count + 1
等号右侧的表达式是 count + 1,评估后为 11。这是因为 count 的当前值为 10(程序第 2 行),而 10 + 1 等于 11。然后通过赋值运算符,值 11 被赋值或存储到 count 变量中。

将此代码行添加到程序中 main() 函数的底部。你的代码应该如下所示
fun main() {
    var count = 10
    println("You have $count unread messages.")
    count = count + 1
}
如果你现在运行程序,输出与之前相同,因为你还没有添加任何代码来使用更新后的 count 变量。
- 添加另一个 print 语句,在变量更新后打印未读消息的数量。
fun main() {
    var count = 10
    println("You have $count unread messages.")
    count = count + 1
    println("You have $count unread messages.")
}
- 运行程序。第二条消息应该显示更新后的
count,即11条消息。
You have 10 unread messages.
You have 11 unread messages.
- 为了简写,如果你想将变量增加
1,可以使用递增运算符(++),它由两个加号组成。通过在变量名后直接使用这些符号,你告诉编译器你想在变量的当前值上加 1,然后将新值存储到变量中。以下两行代码是等效的,但使用++递增运算符可以少输入一些字符。
count = count + 1
count++
修改代码,然后运行程序。变量名和递增运算符之间不应有空格。
fun main() {
    var count = 10
    println("You have $count unread messages.")
    count++
    println("You have $count unread messages.")
}
- 运行程序。输出相同,但现在你学会了一个新运算符!
You have 10 unread messages.
You have 11 unread messages.
- 现在修改程序的第 4 行,在
count变量名后使用递减运算符(--)。递减运算符由两个减号组成。通过将递减运算符放在变量名后面,你告诉编译器要将变量的值减少1并将新值存储到变量中。
fun main() {
    var count = 10
    println("You have $count unread messages.")
    count--
    println("You have $count unread messages.")
}
- 运行程序。它应该打印出以下输出
You have 10 unread messages.
You have 9 unread messages.
在本节中,你学习了如何使用递增运算符(++)和递减运算符(--)来更新可变变量。更具体地说,count++ 等同于 count = count + 1,而 count-- 等同于 count = count - 1。
5. 探索其他数据类型
在本 Codelab 的早期部分,你了解了一些常见的基本数据类型:String、Int、Double 和 Boolean。你刚刚使用了 Int 数据类型,现在你将探索其他数据类型。
Kotlin 数据类型 | 它可以包含什么类型的数据 |
| 文本 |
| 整数 |
| 小数 |
|
|
在 Kotlin Playground 中尝试这些程序,看看输出是什么。
Double
当你需要一个带小数值的变量时,使用 Double 变量。要了解其有效范围,请参阅此表,并查看它可以存储的小数位数等。
想象一下,你正在前往某个目的地,你的旅程被分成三个不同的部分,因为你需要在途中停留。这个程序显示了到达目的地的剩余总距离。
- 在 Kotlin Playground 中输入此代码。你能理解每行代码正在做什么吗?
fun main() {
    val trip1: Double = 3.20
    val trip2: Double = 4.10
    val trip3: Double = 1.72
    val totalTripLength: Double = 0.0
    println("$totalTripLength miles left to destination")
}
声明了三个变量 trip1、trip2 和 trip3 来表示旅程每个部分的距离。它们都是 Double 变量,因为它们存储小数。使用 val 声明每个变量,因为它们的值在程序运行期间不会改变。程序还创建了第四个变量 totalTripLength,当前初始化为 0.0。程序的最后一行使用 totalTripLength 变量的值打印一条消息。
- 修改代码,使
totalTripLength变量为所有三个旅程长度的总和。
val totalTripLength: Double = trip1 + trip2 + trip3
等号右侧的表达式评估后为 9.02,因为 3.20 + 4.10 + 1.72 等于 9.02。值 9.02 被存储到 totalTripLength 变量中。

你的整个程序应该如下面的代码所示
fun main() {
    val trip1: Double = 3.20
    val trip2: Double = 4.10
    val trip3: Double = 1.72
    val totalTripLength: Double = trip1 + trip2 + trip3
    println("$totalTripLength miles left to destination")
}
- 运行程序。它应该打印出
9.02 miles left to destination
- 更新你的代码,由于类型推断,从变量声明中删除不必要的
Double数据类型。Kotlin 编译器可以根据提供的作为初始值的小数来推断出这些变量是Double数据类型。
fun main() {
    val trip1 = 3.20
    val trip2 = 4.10
    val trip3 = 1.72
    val totalTripLength = trip1 + trip2 + trip3
    println("$totalTripLength miles left to destination")
}
- 再次运行你的代码,确保代码仍然可以编译。输出应该相同,但现在你的代码更简洁了!
String
当你需要一个可以存储文本的变量时,请使用 String 变量。记住在 String 字面值周围使用引号,例如 "Hello Kotlin",而 Int 和 Double 字面值周围没有引号。
- 将此程序复制并粘贴到 Kotlin Playground 中。
fun main() {
    val nextMeeting = "Next meeting:"
    val date = "January 1"
    val reminder = nextMeeting + date
    println(reminder)
}
注意,声明了两个 String 变量,一个 nextMeeting 变量和一个 date 变量。然后声明了第三个 String 变量 reminder,它等于 nextMeeting 变量加上 date 变量。
使用 + 符号可以将两个字符串连接在一起,这称为字符串拼接。这两个字符串会按顺序组合在一起。表达式 nextMeeting + date 的结果是 "Next meeting:January 1",如下图所示。

然后,使用程序第 4 行的赋值运算符,将值 "Next meeting:January 1" 存储到 reminder 变量中。
- 运行你的程序。它应该打印出
Next meeting:January 1
当你将两个字符串连接在一起时,字符串之间不会添加额外的空格。如果你希望在结果字符串中冒号后面有空格,你需要将空格添加到其中一个字符串的末尾或另一个字符串的开头。
- 更新你的
nextMeeting变量,使其在字符串末尾的右引号前有一个额外的空格。(或者,你也可以在date变量的开头添加一个额外的空格)。你的程序应如下所示
fun main() {
    val nextMeeting = "Next meeting: "
    val date = "January 1"
    val reminder = nextMeeting + date
    println(reminder)
}
- 再次运行你的程序,现在输出消息中冒号后面应该有一个空格。
Next meeting: January 1
- 修改代码,将另一段文本连接(或添加)到存储在
reminder变量中的表达式。
使用 + 符号将字符串字面值 " at work" 添加到 reminder 字符串的末尾。
- 运行程序。
它应该打印出以下输出
Next meeting: January 1 at work
下面的代码展示了实现此行为的一种方式。
fun main() {
    val nextMeeting = "Next meeting: "
    val date = "January 1"
    val reminder = nextMeeting + date + " at work"
    println(reminder)
}
注意,nextMeeting 和 date 周围没有引号,因为它们是现有字符串变量的名称(其各自的值是带有引号的文本)。相反,字面值 " at work" 之前没有在任何变量中定义,因此需要在这个文本周围使用引号,以便编译器知道这是一个应该连接到其他字符串上的字符串。
技术上讲,你可以通过声明一个包含完整文本的单个 String 变量来获得相同的输出,而不是使用单独的变量。然而,本练习的目的是演示如何声明和操作 String 变量,特别是如何连接单独的字符串。
- 在阅读包含字符串的代码时,你可能会遇到转义序列。转义序列是前面带有反斜杠符号(
\)的字符,反斜杠也称为转义反斜杠。
例如,在字符串字面值中看到 \",如下面的示例所示。将此代码复制并粘贴到 Kotlin Playground 中。
fun main() {
    println("Say \"hello\"")
}
你之前学过在字符串字面值周围使用双引号。但是如果你想在字符串中使用 " 符号怎么办?那么你需要在字符串中使用反斜杠符号放在双引号前面,写成 \"。记住整个字符串仍然应该用双引号括起来。
- 运行程序查看输出。它应该显示
Say "hello"
在输出中,hello 周围显示了引号,因为我们在 println() 语句中 hello 的前后添加了 \"。
对于 Kotlin 中支持的其他转义序列,请参阅关于转义序列的文档页面。例如,如果你想在字符串中换行,请在字符 n 前使用 \ 符号,写成 \n。
现在你已经学会了字符串拼接以及字符串中的转义序列。继续学习本 Codelab 涵盖的最后一种数据类型。
Boolean
The Boolean 数据类型在变量只有两个可能值(由 true 或 false 表示)时非常有用。
一个例子是表示设备飞行模式开启或关闭,或者应用通知启用或禁用的变量。
- 在 Kotlin Playground 中输入此代码。在此程序的第 2 行,你声明了一个名为
notificationsEnabled的Boolean变量,并将其初始化为true。技术上讲,你可以在声明中省略: Boolean,因此如果你愿意,可以将其删除。在程序的第 3 行,你打印出notificationsEnabled变量的值。
fun main() {
    val notificationsEnabled: Boolean = true
    println(notificationsEnabled)
}
运行程序,它应该打印出
true
- 将程序第 2 行的
Boolean初始值更改为 false。
fun main() {
    val notificationsEnabled: Boolean = false
    println(notificationsEnabled)
}
运行程序,它应该打印出
false
- 其他数据类型可以连接到
Strings。例如,你可以将Booleans连接到Strings。使用+符号将notificationsEnabled布尔变量的值连接(或追加)到"Are notifications enabled? "字符串的末尾。
fun main() {
    val notificationsEnabled: Boolean = false
    println("Are notifications enabled? " + notificationsEnabled)
}
运行程序查看连接结果。程序应该打印以下输出
Are notifications enabled? false
你可以看到可以将 Boolean 变量设置为 true 或 false 值。Boolean 变量使你能够编写更有趣的场景,其中当 Boolean 变量的值为 true 时,你执行一组指令。如果 Boolean 的值为 false,则跳过这些指令。你将在未来的 Codelab 中学习更多关于 Booleans 的内容。
6. 编码规范
在之前的 Codelab 中,你了解了 Kotlin 风格指南,它是 Google 推荐并被其他专业开发者遵循的以一致方式编写 Android 代码的规范。
以下是基于你新学到的知识的一些其他格式和编码规范
- 变量名应采用驼峰命名法,并以小写字母开头。
- 在变量声明中,指定数据类型时,冒号后应有一个空格。

- 在赋值(
=)、加法(+)、减法(-)、乘法(*)、除法(/)等运算符前后应有一个空格。


- 随着你编写更复杂的程序,建议每行代码不超过 100 个字符。这可以确保你在计算机屏幕上轻松阅读程序中的所有代码,而无需在阅读代码时水平滚动。
7. 在代码中添加注释
编写代码时,另一个良好的实践是添加注释来描述代码 intended 的功能。注释可以帮助阅读你代码的人更容易理解。两个正斜杠符号,即 //,表示该符号之后直到行尾的文本都被视为注释,因此它不会被解释为代码。通常的做法是在两个正斜杠符号后添加一个空格。
// This is a comment.
注释也可以从代码行中间开始。在这个例子中,height = 1 是正常的代码语句。// Assume the height is 1 to start with 被解释为注释,不被视为代码的一部分。
height = 1 // Assume the height is 1 to start with
如果你想用一段长注释更详细地描述代码,且注释超过一行 100 个字符,请使用多行注释。多行注释以正斜杠(/)和星号(*)组成 /* 开头。在注释的每一新行开头添加一个星号。最后以星号和正斜杠符号 */ 结束注释。
/*
 * This is a very long comment that can
 * take up multiple lines.
 */
此程序包含单行注释和多行注释,描述了正在发生的事情
/*
 * This program displays the number of messages
 * in the user's inbox.
 */
fun main() {
    // Create a variable for the number of unread messages.
    var count = 10
    println("You have $count unread messages.")

    // Decrease the number of messages by 1.
    count--
    println("You have $count unread messages.")
}
如前所述,你可以在代码中添加空行,以将相关的语句组合在一起,使代码更易于阅读。
- 在你之前使用过的代码片段中添加一些注释。
- 运行程序,确保行为没有改变,因为注释不应该影响输出。
8. 总结
干得漂亮!你学习了 Kotlin 中的变量,为什么变量在编程中有用,以及如何创建、更新和使用它们。你尝试了 Kotlin 中的不同基本数据类型,包括 Int、Double、String 和 Boolean 数据类型。你还学习了 val 和 var 关键字之间的区别。
所有这些概念都是你成为开发者旅程中的关键构建块。
下个 Codelab 再见!
总结
- 变量是用于存储单个数据片段的容器。
- 使用变量之前,必须先声明变量。
- 使用
val关键字定义只读变量,一旦赋值后其值不能更改。 - 使用
var关键字定义可变或可更改的变量。 - 在 Kotlin 中,如果可能,优先使用
val而非var。 - 要声明变量,请以
val或var关键字开头。然后指定变量名、数据类型和初始值。例如:val count: Int = 2。 - 使用类型推断时,如果提供了初始值,可以在变量声明中省略数据类型。
- 一些常见的 Kotlin 基本数据类型包括:
Int、String、Boolean、Float和Double。 - 使用赋值运算符(
=)为变量赋值,无论是在声明变量时还是更新变量时。 - 只能更新被声明为可变变量(使用
var)的变量。 - 使用递增运算符(
++)或递减运算符(--)分别将整型变量的值增加或减少 1。 - 使用
+符号将字符串连接在一起。你也可以将其他数据类型的变量(如Int和Boolean)连接到Strings。